
Related Manuals for Extron electronics SGS 408


Summary of Contents for Extron electronics SGS 408
- Page 1 Vertrieb von CAMBOARD Electronics SGS 408 Eight Input, High Resolution, Seamless Graphic Switcher 68-520-01 Rev. C 03 05 www.camboard.de Tel. 07131 911201 ce-info@camboard.de Fax 07131 911203...
- Page 2 im Vertrieb von CAMBOARD Electronics Precautions Safety Instructions • English Warning This symbol is intended to alert the user of important operating and maintenance Power sources • This equipment should be operated only from the power source indicated on the product.
- Page 3 Quick Start — SGS 408 Installation Step 1 Install the four rubber feet on the bottom of the SGS 408 switcher, or mount the switcher in a rack (1). Step 2 Turn off power to the input and output SI TI devices, and remove the power cords from them.
-
Page 4: Adjusting An Image
Vertrieb von CAMBOARD Electronics Quick Start — SGS 408, cont’d Adjusting an Image From the default screen, press the indicated button. To adjust the preview image, press the button again. Button Right adjustment knob Left adjustment knob Center Move image horizontally... -
Page 5: Table Of Contents
Using the Black button ....................3-16 Applying a cut ......................... 3-16 Applying other effects ....................3-16 Available effects ......................3-16 Setting up a new effect ....................3-19 www.camboard.de Tel. 07131 911201 ce-info@camboard.de SGS 408 Switcher • Table of Contents Fax 07131 911203... - Page 6 Replacing the AC fuse ...................... B-3 Installing a firmware update ..................B-4 Part Numbers ........................B-6 Related part numbers ....................... B-6 68-520-01 Rev. C 03 05 www.camboard.de Tel. 07131 911201 ce-info@camboard.de SGS 408 Switcher • Table of Contents Fax 07131 911203...
-
Page 7: Chapter 1 • Introduction
Vertrieb von CAMBOARD Electronics SGS 408 Switcher Chapter One Introduction About the SGS 408 Features www.camboard.de Tel. 07131 911201 ce-info@camboard.de Fax 07131 911203... -
Page 8: About The Sgs 408
Seamless switching allows switching between sources without a loss of sync. You can connect the SGS 408 to an Extron RCP 1000 remote control panel. You can also connect up to three SGS 408 switchers to one Extron ECP 1000 event control panel. - Page 9 Extron’s SIS™ (Simple Instruction Set™) or Extron’s control software for Windows. The RS-232 port also provides communication between the SGS 408 and an Extron ECP 1000 event control panel. • RCP port — Supports an Extron RCP 1000, which allows the switch operator to control the switcher from a remote location.
- Page 10 Vertrieb von CAMBOARD Electronics Introduction, cont’d www.camboard.de Tel. 07131 911201 ce-info@camboard.de SGS 408 Switcher • Introduction Fax 07131 911203...
-
Page 11: Chapter 2 • Installation
Vertrieb von CAMBOARD Electronics SGS 408 Switcher Chapter Two Installation Rear Panel Connectors Installation Cable Pinouts www.camboard.de Tel. 07131 911201 ce-info@camboard.de Fax 07131 911203... -
Page 12: Rear Panel Connectors
RCP port — One 4-pin female XLR connector that allows you to attach the RCP 1000 remote control panel to the SGS 408. Refer to the RCP 1000 User’s Manual for more information. -
Page 13: Mounting The Switcher
Turn on the input and output devices. Use the LCD menu screens to configure the switcher. See “Configuring the SGS 408” on page 3-4. The image from each input device should appear on the output devices, and you should be able to switch from one input device to another. If this does not happen, double check steps 3 and 4 and make adjustments as needed. -
Page 14: Tabletop/Desktop Mounting
Figure 2-4 — Output connections Figure 2-5 shows a typical system installation and its cable connections. See the next chapter, “Operation”, for information on configuring and using the switcher. www.camboard.de Tel. 07131 911201 ce-info@camboard.de SGS 408 Switcher • Installation Fax 07131 911203... -
Page 15: Genlocking Video Inputs For Accu-Rate Frame Lock
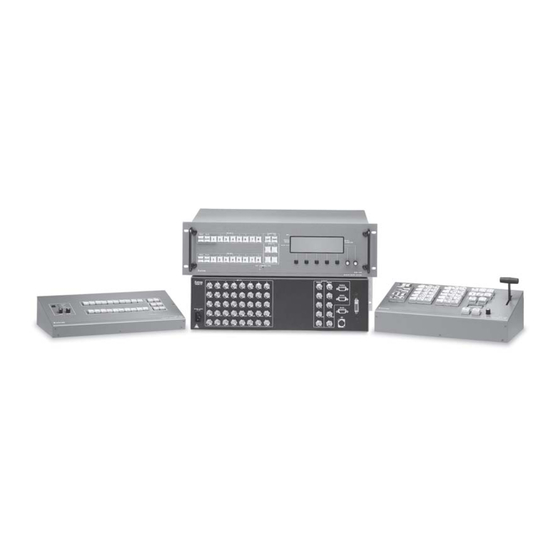
Figure 2-5 — Typical SGS 408 application Genlocking Video Inputs for Accu-RATE Frame Lock™ All video inputs to the SGS 408 should be genlocked for Accu-RATE Frame Lock to work properly. In the example below (figure 2-6), a DVD player must be attached to input #1 through a time base corrector for the proper sync signal during Accu-RATE Frame Locking. -
Page 16: Attaching An Rcp 1000
Figure 2-7 — SGS 408 and RCP 1000 Attaching an ECP 1000 To attach an ECP 1000 event control panel to an SGS 408 switcher, plug an ECP comm cable (provided with the ECP 1000) between a 9-pin D sub SGS connector on the ECP 1000 and the RS-232 connector on the SGS 408. -
Page 17: Cable Pinouts
Monitor ECP 1000 Preview Up to 50' Monitor Control Room RCP 1000 Figure 2-8 — SGS 408 and ECP 1000 Cable Pinouts XLR cable pinouts The XLR connector (figure 2-9) uses the following pinouts: Signal Pin Signal +12 V Communications line... -
Page 18: Making An Rcp Comm Cable
(attach one pair to pin 3 and the other pair to pin 4). • The cable can be up to 1000 feet (304.8 meters) long. • Power is supplied by the SGS 408. DVI cable pinouts The optional DVI connector (figure 2-10) uses the following pinouts:... -
Page 19: Chapter 3 • Operation
Vertrieb von CAMBOARD Electronics SGS 408 Switcher Chapter Three Operation Front Panel Controls Default Screen Configuring the SGS 408 Using the Image Controls Selecting an Input Optimizing the Image www.camboard.de Tel. 07131 911201 ce-info@camboard.de Fax 07131 911203... -
Page 20: Front Panel Controls
RCP COMMUNICATION SGS 408 SEAMLESS GRAPHIC SWITCHER Figure 3-1 — SGS 408 front panel Program input selection buttons — Allow the system operator to view the image switch as it happens. Freeze — Locks the output display to the image that is currently displayed on the program output. -
Page 21: Default Screen
RCP 1000 remote control panel. When the SGS 408 is transmitting data to the RCP 1000, the Tx LED is lit. When the SGS 408 is receiving data from the RCP 1000, the Rx LED is lit. -
Page 22: Configuring The Sgs 408
CAMBOARD Electronics Operation, cont’d Controls — Display the available controls. The configuration options are available by pressing the Menu button. See “Configuring the SGS 408” below. Current duration — Displays the currently selected effect’s duration. Current effect — Displays the effect and transition that are specified for the active input. -
Page 23: Selecting The Input Configuration
When an input is configured for RGB, separate phasing adjustments for the program and preview outputs can be made. To properly adjust the input phase, the input should be the same resolution as the output of the SGS 408 and an alternating pixel pattern should be used. -
Page 24: Selecting The Output Rate
Selecting the output sync format and polarity To select the output sync format, do the following: Press the Menu button. Press the Out Sync button (figure 3-10). www.camboard.de Tel. 07131 911201 ce-info@camboard.de SGS 408 Switcher • Operation Fax 07131 911203... -
Page 25: Selecting A Test Pattern
To select the screen on which to show the test pattern, turn the right adjustment knob. The following options are available: None Preview Program Program and preview www.camboard.de Tel. 07131 911201 ce-info@camboard.de SGS 408 Switcher • Operation Fax 07131 911203... -
Page 26: Changing The Title Settings
C e n t e r K e y S i z e R e s e t T a k e Figure 3-14 — Title box submenu www.camboard.de Tel. 07131 911201 ce-info@camboard.de SGS 408 Switcher • Operation Fax 07131 911203... - Page 27 C e n t e r S i z e R e s e t T a k e W i n d o w Figure 3-17 — Sizing the title box www.camboard.de Tel. 07131 911201 ce-info@camboard.de SGS 408 Switcher • Operation Fax 07131 911203...
-
Page 28: Setting The Program Keylock
To set the program keylock, do the following: From the default menu, press the Menu button, then the Next button, then the Prog Lock button (figure 3-21). www.camboard.de Tel. 07131 911201 ce-info@camboard.de 3-10 SGS 408 Switcher • Operation Fax 07131 911203... -
Page 29: Setting The Lcd Appearance
To perform a reset, do the following: From the default menu, press the Menu button, then the Next button, then the Reset button (figure 3-23). www.camboard.de Tel. 07131 911201 ce-info@camboard.de SGS 408 Switcher • Operation 3-11 Fax 07131 911203... - Page 30 P r e s s " S y s t e m " t o C o n f i r m S y s t e m E S C Figure 3-25 — Selecting the system reset www.camboard.de Tel. 07131 911201 ce-info@camboard.de 3-12 SGS 408 Switcher • Operation Fax 07131 911203...
-
Page 31: Using The Image Controls
To change the vertical size (height) of the image, turn the left adjustment knob. To change the horizontal size (width) of the image, turn the right adjustment knob. The adjustment settings range from Min (lowest) to Max (highest). www.camboard.de Tel. 07131 911201 ce-info@camboard.de SGS 408 Switcher • Operation 3-13 Fax 07131 911203... -
Page 32: Filtering An Image
C e n t e r S i z e F i l t e r L e v e l Figure 3-29 — Adjusting contrast and brightness www.camboard.de Tel. 07131 911201 ce-info@camboard.de 3-14 SGS 408 Switcher • Operation Fax 07131 911203... -
Page 33: Selecting An Input
Max (maximum). Selecting an Input When the SGS 408 is powered on, the program inputs default to the black output. The program input selection buttons could be used to select inputs to the program output, but the switch will not be seamless. You can lock out the program input buttons, through a configuration menu option, to prevent accidental switches to the program input (see “Setting the program keylock”... -
Page 34: Using The Black Button
The SGS 408 provides a wide variety of effects: • A dissolve causes the program image to fade out while the preview image fades in (figure 3-31). - Page 35 Starting in all four corner of the screen and moving in to the center of the screen. • Starting at the center of the screen and moving out to the corners of the screen. Figure 3-34 — Plus wipe effects www.camboard.de Tel. 07131 911201 ce-info@camboard.de SGS 408 Switcher • Operation 3-17 Fax 07131 911203...
- Page 36 3-8 for information on defining the title box). Preview Program Program During Window Effect Figure 3-36 — ECP window title effect www.camboard.de Tel. 07131 911201 ce-info@camboard.de 3-18 SGS 408 Switcher • Operation Fax 07131 911203...
-
Page 37: Setting Up A New Effect
• S curtains (soft curtains wipe, figure 3-41) • H curtains (hard curtains wipe, figure 3-42) • Plus wipe (figure 3-43) • Square wipe (figure 3-44) • Title (figure 3-45) www.camboard.de Tel. 07131 911201 ce-info@camboard.de SGS 408 Switcher • Operation 3-19 Fax 07131 911203... - Page 38 B o t t o m T o p E s c Select duration Select a transition Select effect Figure 3-40 — Setting up the H wipe effect www.camboard.de Tel. 07131 911201 ce-info@camboard.de 3-20 SGS 408 Switcher • Operation Fax 07131 911203...
- Page 39 S e c o n d s O u t E s c Select duration Select a transition Select effect Figure 3-43 — Setting up the Plus wipe effect www.camboard.de Tel. 07131 911201 ce-info@camboard.de SGS 408 Switcher • Operation 3-21 Fax 07131 911203...
-
Page 40: Implementing An Established Effect
When you want the effect to occur, press the Take button. The Take button lights, the effect occurs during the time specified by the duration, and the Take button light turns off. www.camboard.de Tel. 07131 911201 ce-info@camboard.de 3-22 SGS 408 Switcher • Operation Fax 07131 911203... -
Page 41: Implementing A Title
E x e c u t i v e M o d e E n a b l e d Figure 3-46 — Enabling executive mode When executive mode is enabled, all front panel buttons and controls are locked, but the SGS 408 will still respond to RS-232 commands. www.camboard.de Tel. 07131 911201 ce-info@camboard.de... -
Page 42: Optimizing The Image
Follow the procedures in this section, in sequence, after you have installed the SGS 408. This will help you to configure the switcher for the best settings for your display environment. For information on test patterns, see “Selecting a test pattern”... -
Page 43: Chapter 4 • Serial Communication
Vertrieb von CAMBOARD Electronics SGS 408 Switcher Chapter Four Serial Communication RS-232 Programmer’s Guide Control Software for Windows www.camboard.de Tel. 07131 911201 ce-info@camboard.de Fax 07131 911203... -
Page 44: Rs-232 Programmer's Guide
The SGS-initiated messages are listed below (underlined). (C) Copyright 2000, Extron Electronics, SGS 408, Vx.xx The copyright message is initiated by the switcher when it is first powered on. Vx.xx is the firmware version number. -
Page 45: Sgs Error Responses
Symbol definitions are shown at the beginning of the response table, as is an ASCII-to-hexadecimal conversion table. Command and response examples are shown throughout the table. www.camboard.de Tel. 07131 911201 ce-info@camboard.de SGS 408 Switcher • Serial Communication Fax 07131 911203... -
Page 46: Command/Response Table
1 = Lock* 2 = 75 Hz 2 = Lock* 2 = Lock* 3 = Lock* * Locked to the current vertical refresh rate of input 1. www.camboard.de Tel. 07131 911201 ce-info@camboard.de SGS 408 Switcher • Serial Communication Fax 07131 911203... - Page 47 Shift output image left one step Vertical shift Increment Vph + Shift output image down one step Decrement –/ Vph – Shift output image up one step www.camboard.de Tel. 07131 911201 ce-info@camboard.de SGS 408 Switcher • Serial Communication Fax 07131 911203...
- Page 48 View input video type Input Phase Specific value Set phase to for input on output View View the phase value for the current input on output www.camboard.de Tel. 07131 911201 ce-info@camboard.de SGS 408 Switcher • Serial Communication Fax 07131 911203...
-
Page 49: Advanced Instructions
Windows 95/98/2000, and NT. It provides remote control of various functions including input selection, picture controls, effects, transitions, and output rates. If an ECP 1000 event control panel is attached to the SGS 408, refer to the ECP 1000 User’s Manual for information on running the SGS 408 Control Program. -
Page 50: Using The Software
To run the SGS 408 Control Program, double-click on the SGS 408 Control Pgm icon (left) in the Extron Electronics group or folder. Click on the comm port that is connected to the RS-232 port of the SGS 408. The SGS 408 Control Program window appears (figure 4-2). It displays the current settings of the SGS 408. -
Page 51: Chapter 5 • Troubleshooting
Vertrieb von CAMBOARD Electronics SGS 408 Switcher Chapter Five Troubleshooting www.camboard.de Tel. 07131 911201 ce-info@camboard.de Fax 07131 911203... -
Page 52: If The Image Does Not Appear
Ensure that the baud rate (9600 baud) and There is no response to communication protocol are set correctly. See commands from the RS-232 page 4-2. controller. www.camboard.de Tel. 07131 911201 ce-info@camboard.de SGS 408 Switcher • Troubleshooting Fax 07131 911203... -
Page 53: Appendix A • Specifications
Vertrieb von CAMBOARD Electronics SGS 408 Switcher A ppendix A Specifications www.camboard.de Tel. 07131 911201 ce-info@camboard.de Fax 07131 911203... - Page 54 Output impedance ....... 75 ohms Max input voltage ......5.0 Vp-p Polarity .......... Composite sync: negative H/V: user-selectable Control/remote — switcher Serial control port ......RS-232, 9-pin female D connector www.camboard.de Tel. 07131 911201 ce-info@camboard.de SGS 408 Switcher • Specifications Fax 07131 911203...
- Page 55 Compliances ......... CE, FCC Class A MTBF ..........30,000 hours Warranty ........3 years parts and labor All nominal levels are at ±10%. Specifications are subject to change without notice. www.camboard.de Tel. 07131 911201 ce-info@camboard.de SGS 408 Switcher • Specifications Fax 07131 911203...
- Page 56 Vertrieb von CAMBOARD Electronics Specifications, cont’d www.camboard.de Tel. 07131 911201 ce-info@camboard.de SGS 408 Switcher • Specifications Fax 07131 911203...
-
Page 57: Appendix B • Reference Information
Vertrieb von CAMBOARD Electronics SGS 408 Switcher A ppendix B Reference Information Upgrades and Repairs Part Numbers www.camboard.de Tel. 07131 911201 ce-info@camboard.de Fax 07131 911203... -
Page 58: Upgrades And Repairs
Reference Information Reference Information, cont’d Upgrades and Repairs You can perform the following upgrades and repairs to the SGS 408: • Installing the DVI connector option (see below) • Replacing the AC fuse (page B-3) • Installing a firmware update (page B-4) Before completing any of these procedures, follow the instructions in “Internal... -
Page 59: Replacing The Ac Fuse
Check the alignment of the DVI circuit card and socket J3. Reinstall the cover of the SGS 408. Attach the power cord to the SGS 408 and to the AC power source. Make sure the SGS 408 is working correctly. -
Page 60: Installing A Firmware Update
Electrostatic discharge (ESD) can damage IC chips, even if you cannot sense the discharge. Locate the ICs to be replaced (figure B-4). The update kit will list the specific ICs. www.camboard.de Tel. 07131 911201 ce-info@camboard.de SGS 408 Switcher • Reference Information Fax 07131 911203... - Page 61 If the switcher is rack mounted, remove the power cable from the switcher. Reattach the switcher to the rack, and reconnect the power cord and input and output cables. www.camboard.de Tel. 07131 911201 ce-info@camboard.de SGS 408 Switcher • Reference Information Fax 07131 911203...
-
Page 62: Part Numbers
DVI connector option 70-122-01 DVI transmitter and DVI receiver 60-316-02 SGS 408 Control Program SGS 408 User’s Manual RCP 1000 User’s Manual ECP 1000 User’s Manual www.camboard.de Tel. 07131 911201 ce-info@camboard.de SGS 408 Switcher • Reference Information Fax 07131 911203... - Page 63 Extron’s Warranty Extron Electronics warrants this product against defects in materials and workmanship for a period of three years from the date of purchase. In the event of malfunction during the warranty period...
- Page 64 PM Industrial Building 16 Ichibancho The Netherlands Singapore 368363 Chiyoda-ku, Tokyo 102-0082 Japan 714.491.1500 +31.33.453.4040 +65.6383.4400 +81.3.3511.7655 www.extron.com Fax 714.491.1517 Fax +31.33.453.4050 Fax +65.6383.4664 Fax +81.3.3511.7656 www.camboard.de Tel. 07131 911201 ce-info@camboard.de © 2005 Extron Electronics. All rights reserved. Fax 07131 911203...
Need help?
Do you have a question about the SGS 408 and is the answer not in the manual?
Questions and answers