Table of Contents
Advertisement
Quick Links
Advertisement
Table of Contents

Related Manuals for Exalto 232BD


Summary of Contents for Exalto 232BD
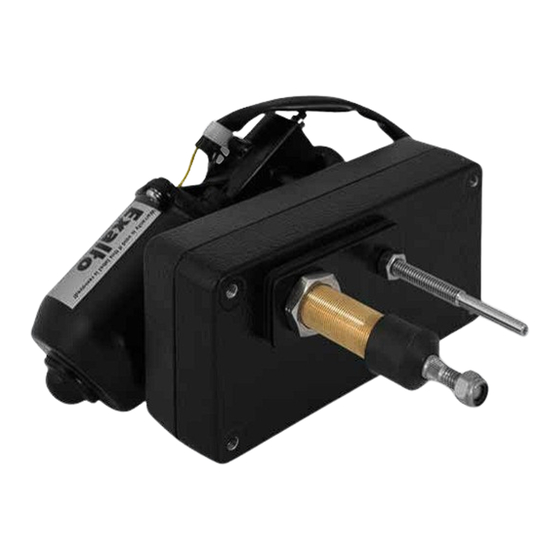
- Page 1 Exalto windshield wiper Type: 232BD Q u a l i t y M a r i n e E q u i p m e n t...
- Page 2 An exclamation mark in front of the text warns you, that injury or damage can occur if a procedure is badly performed. Dangers The installation and use of Exalto wipers will not inflict any personal dangers or damage, provided that installation is done according to the procedures specified in the manual.
- Page 3 • Never install or maintain the wiper with the electrical voltage applied, unless this is specifically mentioned in the manual. • Clear your tools after installation. Use of the manual Read the entire manual before installation. In this manual you can find the following expressions and symbols: Hint! Gives you advice on how to perform a task more easily. Attention! Alerts you to possible problems and safety warnings.
-
Page 4: Table Of Contents
Contents 1 Introduction ............5 1.1 Introduction . -
Page 5: Introduction
The wiper arc is adjustable from 40° to 90° with steps of 5°. Standard the 232BD is supplied for a bulkhead thickness of either 20, 35, 55, 75, 100 or 125. The matching Exalto PU pantograph arms are adjustable in length, to set the wipe area accurately. -
Page 6: Technical Data
• Product ........ -
Page 7: Installation
3 Installation Read the chapter on safety. Check before installation if the parts are all present and undamaged. In case of errors, contact your vendor. 3.1 Preparation The complete wiper, with packaging, can be handled and transported by hand. Leave the wiper in the packing, until you are ready to install it; this to reduce the risk of damage. Make sure all parts, tools and other means are ready. 3.2 Installation of mechanical parts 1. If your wiper is supplied with the wipe arc disc uninstalled, please follow steps described in paragraphs 5.3 and 5.4 to set the wiping arc prior to... -
Page 8: Electrical Installation
2. Place the windshield wiper in the pre-drilled holes of the bulkhead (see figure). A nitrile plate must be placed at both sides of the bulkhead. Attention! Do not fit the wiper arm before finishing the electrical connections. 3.3 Electrical installation 3. Install a wiper switch in the dashboard. Wiring diagram 232BD... -
Page 9: Final Installation
Attention! The 232BD is suitable for wiper arms model PU up to 750 mm and wiper blades up to 800 mm. tape 8. Place the wiper arm with the blade on the shafts. - Page 10 Attention To ensure the arm has the right spring pressure, install the wiper arm in such a way that the shafts make a 90° angle with the window (figure left) and that the shafts make a 90° angle with the wiper arm (figure right). If this is not the case, please install a spacer or multiple spacers to make the 90°...
-
Page 11: Operation And Use
• if the park position is correct. If the wipe arc or the park position is wrong, adjust them. Follow the procedure in paragraph 5.3 to do so. 4.2 Use All Exalto windshield wipers are provided with the following functions: • low speed; • high speed; • self parking. Do not use the wiper on a dry window; excessive wear of the blades and the motor can occur in this case. -
Page 12: Maintenance
5 Maintenance 5.1 General maintenance To keep the Exalto wiper in good condition, you are advised to: • clean wiper, arms and blades with fresh water after every journey in salt water (to prevent salt from clogging moving parts); • never use the wiper on a dry window. 5.2 Servicing As long as the wiper system functions normally and is kept in good shape (see paragraph 5.1), servicing the motor is not necessary. -
Page 13: Rough Determination Of Wipe Arc And Wiper Blade
Disc Nut for pin Bearing Center nut for disc Retaining ring Connection lever 3. Screw M8 center nut for disc onto the motor shaft and tighten properly. 4. Mount the wiper assembly. 5. Run the motor for a few minutes to check if everything is working correctly. 6. Set the length of the wiper arm, if necessary. 5.4 Rough determination of = distance top side wipe arc and wiper blade... -
Page 14: Disassembly And Assembly
• find in the table below the vertical displacement of the blade (H); Determining the vertical displacement of the wiper blade Armlength (L) 450 500 550 600 800 850 900 950 1000 40° 45° 50° 55° 96 102 107 113 60° 107 114 121 127 134 65° 125 133 141 149 157 70°... -
Page 15: Troubleshooting
6 Troubleshooting In this chapter, several malfunctions are mentioned combined with possible causes. Please leave servicing to qualified mechanics. 6.1 Wiper does not work after switching on • Possible causes: 1. Wiper switch is not working properly. 2. Burned or incorrectly sized fuse. 3. Electrical connections are wired incorrectly or might be damaged. 4. -
Page 16: Declaration Of Conformity
Tel: +31 (0)184-61.58.00 Fax: +31 (0)184-61.82.00 hereby declares that Exalto windshield wiper type 232BD ... is intended to be built into another machine or as a component, or is to be integrated with other machines to a machine where Directive 89/392/EEG applies to;... -
Page 17: Parts List
8 Parts list Qua Part Dimensions Cat. no. 2100.3024 / Motor 2100.3012 Socket screw s.s. M6 x 35 2100.055 Housing motor side 180 x 96 x 22 2100.902 Socket screw s.s. M6 x 16 2100.050 M8 x 26 2100.920 Arc disk Ø70 x 5 2100.930 Arc sticker 2100.931... -
Page 18: Drawings And Schemes
9 Drawings and schemes 9.1 Assembly overview... -
Page 19: Internal Wiring Diagram
9.2 Internal wiring diagram The following diagram explains the way the wiper motor works. white yellow black blue Wiring diagram Function Polarity Motor code Switch code Cable high speed white low speed yellow earth black common leg blue self parking... - Page 20 Exalto B.V. • P.O. Box 40 3370 AA Hardinxveld-Giessendam The Netherlands • T +31 (0)184 615 800 • F +31 (0)184 618 200 • E wipers@exalto.com • I www.exaltowipers.com...
Need help?
Do you have a question about the 232BD and is the answer not in the manual?
Questions and answers