Avocent Cyclades ACS 6000 Installation/Administration/User Manual
Hide thumbs
Also See for Cyclades ACS 6000:
- Command reference manual (70 pages) ,
- Installation & administrators manual (108 pages) ,
- Installation & administrators manual (100 pages)
Table of Contents
Advertisement
Advertisement
Table of Contents

Related Manuals for Avocent Cyclades ACS 6000


Summary of Contents for Avocent Cyclades ACS 6000
- Page 1 Cyclades ACS 6000 ® Installation/Administration/User Guide...
-
Page 2: Fcc Warning Statement
FCC Warning Statement The Cyclades ACS advanced console server has been tested and found to comply with the limits for Class A digital devices, pursuant to Part 15 of the FCC rules. These limits are designed to provide reasonable protection against harmful interference when the equipment is operated in a commercial environment. -
Page 3: Cyclades Acs 6000 Advanced Console Server Installation/Administration/User Guide
Advanced Console Server Installation/Administration/User Guide Avocent, the Avocent logo, The Power of Being There, DSView and Cyclades are registered trademarks of Avocent Corporation or its affiliates in the US and other countries. All other marks are the property of their respective owners. - Page 4 Instructions This symbol is intended to alert the user to the presence of important operating and maintenance (servicing) instructions in the literature accompanying the appliance. Dangerous Voltage This symbol is intended to alert the user to the presence of uninsulated dangerous voltage within the product’s enclosure that may be of sufficient magnitude to constitute a risk of electric shock to persons.
-
Page 5: Table Of Contents
T A B L E O F C ON T E N T S Table of Contents List of Figures ........................ vii List of Tables ........................ix Chapter 1: Introduction ....................1 Features and Benefits ........................1 Web Manager..........................1 Access options.......................... - Page 6 Cyclades ACS 6000 Advanced Console Server Installation/Administration/User Guide Pluggable Devices Installation and Configuration ................. 17 Chapter 3: Web Manager Overview ................19 First Time Configuration ......................... 19 Web Manager Overview for Administrators..................22 Web Manager Overview for Regular Users ..................25 Chapter 4: Using the Web Manager................
- Page 7 Table of Contents Firewall Configuration ........................52 IPSec(VPN) ............................55 SNMP Configuration ........................56 Date and Time..........................57 Boot Configuration .......................... 58 Online Help............................59 Power Management ......................... 59 Settings ............................. 60 Management ..........................61 Outlet Groups ........................... 61 Power configuration ......................... 62 Configuring a port for a connected PDU .................
- Page 8 Cyclades ACS 6000 Advanced Console Server Installation/Administration/User Guide...
-
Page 9: List Of Figures
LIST OF FIGU RES List of Figures Figure 1.1: Typical ACS 6000 Advanced Console Server Configuration ......... 5 Figure 2.1: Bracket Connections for Front Mount Configuration ............ 7 Figure 2.2: Front of the Console Server with PC Card Slots and LEDs (ACS 6032 Console Server Shown) .......................... - Page 10 Cyclades ACS 6000 Advanced Console Server Installation/Administration/User Guide...
-
Page 11: List Of Tables
LIST OF TABLES List of Tables Table 1.1: Typical ACS 6000 Advanced Console Server Configuration Descriptions ..... 5 Table 2.1: Connectors on the Console Server Front ................. 8 Table 2.2: LEDs on the Console Server Front .................. 8 Table 2.3: Connectors on the Console Server Rear ................9 Table 2.4: Cyclades Serial Port Pinout ................... - Page 12 Cyclades ACS 6000 Advanced Console Server Installation/Administration/User Guide...
-
Page 13: Chapter 1: Introduction
CHAPTER Introduction The Cyclades ACS 6000 advanced console server is a 1U appliance that serves as a single point for access and administration of connected devices, such as target device consoles, modems and power devices. ACS 6000 console servers support secure remote data center management and out-of-band management of IT assets from any location worldwide. -
Page 14: Access Options
Cyclades ACS 6000 Advanced Console Server Installation/Administration/User Guide Manager to troubleshoot, maintain, cycle power, reboot connected devices and change the user password. For more information on the Web Manager, see Chapters 3 and 4. Access options Secure access is available through the following local (analog console port) and remote (digital IP and dial-up) options: •... -
Page 15: Flexible Users And Groups
Chapter 1: Introduction • SSH and Telnet access • Syslog server NOTE: Remote authentication NIS and IPSec are not supported with IPv6. Flexible users and groups An account can be defined for each user on the console server or on an authentication server. The admin and root users have accounts by default, and either can add and configure other user accounts. -
Page 16: Packet Filtering
Cyclades ACS 6000 Advanced Console Server Installation/Administration/User Guide Packet filtering An administrator can configure the device to filter packets like a firewall. Packet filtering is controlled by chains. A chain is a named profile configured with one or more rules that define both a set of characteristics to look for in a packet and what to do with any packet that has the defined characteristics. -
Page 17: Auto Discovery
Chapter 1: Introduction Auto discovery An administrator can enable auto discovery for a serial port. If the hostname of the connected target device is successfully discovered, the hostname is shown instead of the serial port alias. This feature can save time for administrators because they do not need to enter port aliases manually. NOTE: If the console server is being managed through DSView 3 software, hostname discovery can be configured through the DSView 3 software. - Page 18 Cyclades ACS 6000 Advanced Console Server Installation/Administration/User Guide Table 1.1: Typical ACS 6000 Advanced Console Server Configuration Descriptions (Continued) Number Description Number Description Serial port connection LAN firewall PC card (modem, Ethernet or storage) Remote authentication server Either AUX/Modem or any serial port...
-
Page 19: Chapter 2: Installation
CHAPTER Installation Rack Mounting You can mount the ACS 6000 console server in a rack or cabinet or place it on a desktop or other flat surface. For rack or cabinet mounting, two mounting brackets are supplied with six hex screws to connect the brackets to the console server. -
Page 20: Connecting The Hardware
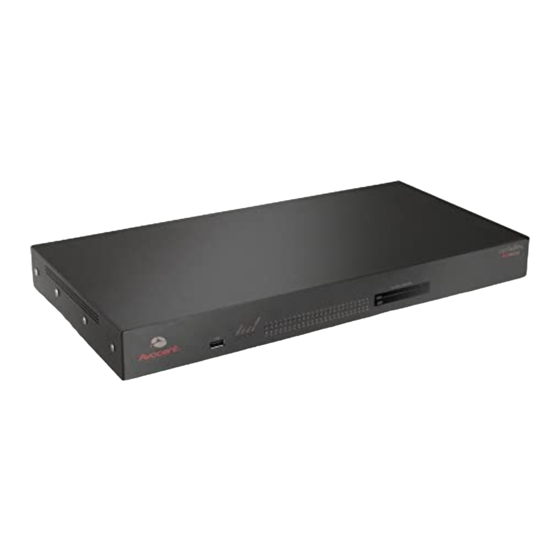
Cyclades ACS 6000 Advanced Console Server Installation/Administration/User Guide Connecting the Hardware ACS console server connectors The following figure shows the connectors on the front of the ACS 6000 console server. Figure 2.2: Front of the Console Server with PC Card Slots and LEDs (ACS 6032 Console Server Shown) Table 2.1: Connectors on the Console Server Front... -
Page 21: Device Consoles Or Modems To Serial Ports
Chapter 2: Installation The following figure shows the rear connectors on the console server. Figure 2.3: Rear of the Console Server (ACS 6032 Console Server Shown) Table 2.3: Connectors on the Console Server Rear Number Description Power supplies (dual AC shown). Models come with either single or dual AC or DC power. Serial ports (32 ports shown). -
Page 22: Table 2.4: Cyclades Serial Port Pinout
Cyclades ACS 6000 Advanced Console Server Installation/Administration/User Guide The following tables show serial port pinout information, which you can use to create cables. Table 2.4: Cyclades Serial Port Pinout Pin No. Signal Name Input/Output DCD/DSR Not Used Table 2.5: Cisco Serial Port Pinout Pin No. -
Page 23: Power Devices
Chapter 2: Installation To connect modems, use straight-through CAT 5 or greater cables, with RJ-45 connectors on one end and the appropriate connectors or adaptors (USB, DB-9 or DB-25) for the modem on the other end. See Power devices on page 11 for more information on connecting power devices. See To install a pluggable device: on page 17 for more information on installing PC cards. -
Page 24: Power Configuration
Repeat steps 1 and 2 until you have connected the desired number of Cyclades PDUs. NOTE: For performance reasons, Avocent recommends connecting no more than 128 outlets per serial port. NOTE: If the outlet has been assigned a name, such as “myoutlet,” entering myoutlet is sufficient and no other path name is needed. -
Page 25: Acs 6000 Remote Console Server Configuration
Chapter 2: Installation Figure 2.5: DC Power Connection Terminal Block Table 2.6: DC Power Connection Details Number Description Number Description Power switch GND (Ground) RTN (Return) -48 VDC Make sure that the power switch on the console server is turned off. Make sure that DC power cables are not connected to a power source. -
Page 26: Making An Ethernet Connection
Cyclades ACS 6000 Advanced Console Server Installation/Administration/User Guide Making an Ethernet connection To make an Ethernet connection, connect an Ethernet cable to the port labeled 10/100/1000Base-T and to an Ethernet hub or switch. Making a direct connection To connect a computer or terminal to the console port: Connect a CAT 5 straight-through cable with RJ-45 connectors to one of the supplied RJ-45 adaptors. -
Page 27: Accessing An Acs Console Server
Chapter 2: Installation Accessing an ACS Console Server Using the Web Manager An IP address is needed to launch the Web Manager in a browser. The IP address is usually configured as a static IP address assigned to the console server during initial configuration. If DHCP is used, then the user must be able to discover the IP address assigned by the DHCP server. - Page 28 Cyclades ACS 6000 Advanced Console Server Installation/Administration/User Guide Select the down arrow next to the console server name. A list of either default port names or administrator-defined aliases for all installed and configured devices for which the user is authorized appears.
-
Page 29: Pluggable Devices Installation And Configuration
NOTE: When a pluggable device is not in the current list of supported pluggable devices (PC cards and USB devices), if the device is detected by the console server, the console server attempts to configure the device with standard settings. The device might operate normally but it might not be supported by Avocent. To enable Pluggable Device Detection: Select Appliance Settings - Security - Security Profile in the Web Manager. - Page 30 Cyclades ACS 6000 Advanced Console Server Installation/Administration/User Guide To configure a pluggable device: Select Application Settings - Pluggable Devices in the Web Manager. The Pluggable Devices content area is displayed and all mounted pluggable devices are shown. Click on the pluggable device name. The page for the pluggable device type is displayed.
-
Page 31: Chapter 3: Web Manager Overview
Log in as with the password . The First Time Configuration screen appears. admin avocent To configure security parameters and select a security profile (First Time Configuration): Select Security from the left menu on the First Time Configuration screen. The Security Profile screen appears. - Page 32 Cyclades ACS 6000 Advanced Console Server Installation/Administration/User Guide To configure users and change the default user passwords (First Time Configuration): WARNING: For security reasons, it is recommended that you change the default password for both root and admin users immediately.
- Page 33 Chapter 3: Web Manager Overview Configure the remaining port parameters as needed. Click Save. Select Physical Ports from the left menu. The Physical Ports screen appears. To enable and perform additional configuration on all ports at once, click the checkbox on the top line of the ports list.
-
Page 34: Web Manager Overview For Administrators
Cyclades ACS 6000 Advanced Console Server Installation/Administration/User Guide Web Manager Overview for Administrators The following figure shows a typical screen when an administrator is logged into the Web Manager. Figure 3.1: Administrator Web Manager Screen Table 3.1: Web Manager Screen Areas Number Description Top option bar. -
Page 35: Table 3.2: Web Manager Options For Administrators
Chapter 3: Web Manager Overview The following table provides an overview of the tools under Appliance Settings that are used by administrators to configure the system. Table 3.2: Web Manager Options for Administrators Heading Description Global Settings • Click Sessions to configure global session parameters for idle time-out, data •... - Page 36 Cyclades ACS 6000 Advanced Console Server Installation/Administration/User Guide Table 3.2: Web Manager Options for Administrators (Continued) Heading Description Users • Click Local Accounts to configure users, assign them to pre-defined user • Local Accounts groups, configure expiration of the password and the account and configure •...
-
Page 37: Web Manager Overview For Regular Users
Chapter 3: Web Manager Overview Web Manager Overview for Regular Users The following figure shows features of the Web Manager for a regular user. Figure 3.2: Web Manager Regular User Screen Table 3.3: Web Manager Regular Users Screen Functional Areas Number Description Top option bar. - Page 38 Cyclades ACS 6000 Advanced Console Server Installation/Administration/User Guide Table 3.4: Web Manager Options for Regular Users (Continued) Menu Option Description Power Management • Select Settings and select the name of a PDU. Rename, restore the factory • Settings defaults or configure the selected PDU. For more information, see Chapter 4.
-
Page 39: Chapter 4: Using The Web Manager
CHAPTER Using the Web Manager Global Settings Global settings for the ACS 6000 console server are for configuring operating parameters so that you can vary how long a session can be idle before it times out, enabling session logging and alerts, setting the minimum and maximum values for the console server’s temperature sensors and configuring data buffering. -
Page 40: Data Buffering
Cyclades ACS 6000 Advanced Console Server Installation/Administration/User Guide To configure the temperature sensors: Click Appliance Settings - Global Settings - Sensors. The Sensors window will be displayed. In the Maximum Temperature field, enter the temperature in degrees Celsius that, if exceeded, will generate an event notification. -
Page 41: Devices Options
Chapter 4: Using the Web Manager Click Get DNS from DHCPv6 to obtain the Domain Name Server IP address from the DHCP server. Click Get Domain from DHCPv6 to obtain the domain name from the DHCP server. Click Save. An alert window displays the notice, Enabling or disabling IPv6 requires reboot to be effective. -
Page 42: Bonding Options
Cyclades ACS 6000 Advanced Console Server Installation/Administration/User Guide Bonding options An administrator can enable and configure Ethernet bonding (also called failover). When bonding is enabled, the eth0 interface is used for access, and eth1 is used if the eth0 interface fails. -
Page 43: Dns Options
Select Appliance Settings - Network - DNS. The DNS configuration page is displayed. Enter the Primary DNS IP address. Enter the Secondary DNS address. Enter the Domain name, for example, (default). corp.avocent.com Enter the hostname of the console server, for example, (default). ACS60<#ports> - <serial#> Click Save. -
Page 44: Ports Configuration
Cyclades ACS 6000 Advanced Console Server Installation/Administration/User Guide Ports Configuration Physical Ports An administrator can enable and configure serial ports and auxiliary ports. On the serial ports screen, you can enable serial ports, specify the connection profile (CAS, Dial-In or Power) based on the type of connected device, optionally configure the port with a Cisco pinout if required and configure communication settings. -
Page 45: Cas Profile
Chapter 4: Using the Web Manager CAS Profile An administrator can configure settings for ports that are assigned to the CAS Profile. The CAS Profile option has four options shown in the following table. Table 4.1: CAS Profile Options Option Description Default Settings Configure the connection protocol, authentication, auto discovery and other general... - Page 46 Cyclades ACS 6000 Advanced Console Server Installation/Administration/User Guide To enable auto discovery, select the Enable auto discovery checkbox. Perform other configurations on the screen as required. Click Save. To enable and configure alerts for ports configured with CAS Profile: Select Appliance Settings - Ports - CAS Profile - Default Settings - Alerts. The Alerts screen appears.
- Page 47 Chapter 4: Using the Web Manager To enable the port, specify the connection protocol, configure authentication, enable auto discovery, configure the name and other general settings, then select the General option. To enable and configure up to ten strings to generate event notifications if detected during a session, select the Alerts option.
-
Page 48: Dial-In Profile
Cyclades ACS 6000 Advanced Console Server Installation/Administration/User Guide To add an auto answer input and output string, click Add. Enter a new string in the Input String or Output String field and click Save. -or- To delete a pair of auto answer strings, select the checkbox. Click Delete, then click Save. -
Page 49: Power Profile
Select Appliance Settings - Ports - Power Profile - Login. The Login Screen appears. To change the password for an Avocent or Cyclades PDU, an Avocent SPC PDU or a ServerTechnology PDU, enter the password in the appropriately labeled section. -
Page 50: Pluggable Devices
Select Appliance Settings - Ports - Power Profile - Devices. The Devices screen appears. Select a device by clicking on a device name. Under Power Settings, select Auto, Avocent-Cyclades, SPC, or ServerTech from the PDU Type drop-down menu. Enable or disable the Enable speed auto detection checkbox. -
Page 51: Security Configuration
Chapter 4: Using the Web Manager To manage pluggable devices: Select Application Settings - Pluggable Devices. The Pluggable Devices screen appears. Select the checkbox next to the pluggable device you wish to configure, or select the checkbox above the list of pluggable devices to select them all. Click Insert All, Eject or Rename. -
Page 52: Table 4.2: Security Profile Services, Ssh, And Http/Https Definitions
Cyclades ACS 6000 Advanced Console Server Installation/Administration/User Guide The following table shows the configuration of each predefined security profile. Table 4.2: Security Profile Services, SSH, and HTTP/HTTPS Definitions Service or Other Security Parameter Secure Moderate Open Telnet SSH v1 SSH v2... -
Page 53: Authentication
Chapter 4: Using the Web Manager Configure the WEB settings. Select the HTTP checkbox to enable HTTP, and enter the HTTP port number. Select the HTTPS checkbox to enable HTTPS. Select an HTTPS SSL version from the drop-down menu, enter the HTTPS port number and select to enable the Redirect HTTP/ HTTPS checkbox. -
Page 54: Appliance Authentication
Cyclades ACS 6000 Advanced Console Server Installation/Administration/User Guide Appliance authentication The ACS 6000 console server authenticates for the console server and for the ports, either in groups or individually. Refer to Physical Ports on page 32 for more information on configuring authentication for individual ports. - Page 55 Enter your desired Login Attributes. Click Save. To configure a Kerberos authentication server: Select Appliance Settings - Authentication - Authentication Servers - Kerberos to display the Kerberos Server screen. Enter the IP address (Realm) of the server. Enter the Realm Domain Name (example: avocent.com...
-
Page 56: Users Accounts And User Groups
Performs the initial network configuration. The factory default password for admin is avocent. The admin user is a member of the admin group. The admin user can configure the console server and ports. Administrators also configure user and group authorizations. -
Page 57: User Groups
Chapter 4: Using the Web Manager To add new users: Click Appliance Settings - Users - Local Accounts - User Names. The User Names screen is displayed with a list of all users. Click Add. The Local User Information screen is displayed. Enter the new username. - Page 58 Cyclades ACS 6000 Advanced Console Server Installation/Administration/User Guide If an administrator configures the console server to restrict user access to ports, the administrator can assign users to groups that are authorized for port access. The administrator can also authorize groups for power management and data buffer management.
- Page 59 Chapter 4: Using the Web Manager • Configure User Accounts • Backup/Restore Configuration • Shell Access • Transfer Files NOTE: The Appliance Access Rights screen for the admin and appliance-admin user groups is read-only and cannot be changed. Unchecking any box and clicking Save will result in an error message. The console server will maintain all rights selected.
- Page 60 Cyclades ACS 6000 Advanced Console Server Installation/Administration/User Guide Click Appliance Settings - Users - Authorization - Groups in the navigation bar. The Groups screen is displayed. Click the new user group name. The Members screen is displayed (Members column is empty).
- Page 61 Chapter 4: Using the Web Manager Click on the new user group name. The Members screen is displayed. In the navigation bar, click Access Rights. The Serial screen is displayed. In the navigation bar, click Power. The PDU screen is displayed. In the content area, click Assign.
-
Page 62: Syslog
Cyclades ACS 6000 Advanced Console Server Installation/Administration/User Guide Click Appliance Settings - Users - Authorization - Groups in the navigation bar. The Groups screen is displayed. Click on the new user group name. The Members screen is displayed. In the navigation bar, click Access Rights. The Serial screen is displayed. -
Page 63: Event Notifications - Settings
Chapter 4: Using the Web Manager Event Notifications - Settings The following table describes the screens and the actions you need to take to configure Event Notifications. Table 4.3: Event Notifications - Settings Screen Description Name Description Syslog: Facility There are six choices available from the pull-down menu: LogLocal 0, LogLocal 1, LogLocal 2, LogLocal 3, LogLocal 4 or LogLocal 5. -
Page 64: Event Notifications - Events
Cyclades ACS 6000 Advanced Console Server Installation/Administration/User Guide Table 4.3: Event Notifications - Settings Screen Description (Continued) Name Description DSView: Buffer Full Third Enter the number of bytes allowed by the DSView 3 buffer before the third buffer Warning (bytes) full event notification is sent (when DSView 3 server does not respond). -
Page 65: Table 4.4: Firewall Configuration - Tcp And Udp Options Fields
Chapter 4: Using the Web Manager When a chain is added, only a named entry for the chain is created. One or more rules must be configured for a chain after it is added. Configuring the firewall For each rule, an action (either ACCEPT, DROP, RETURN, LOG or REJECT ) must be selected from the Target pull-down menu. - Page 66 Cyclades ACS 6000 Advanced Console Server Installation/Administration/User Guide To add a chain: Select Appliance Settings - Firewall. Select either IPv4 Filter Table or IPv6 Filter Table as needed. The Filter Table screen is displayed. Click Add. The Add Chain screen is displayed.
-
Page 67: Ipsec(Vpn)
Chapter 4: Using the Web Manager From the chain list, click the name of the chain to which you wish to edit a rule. The Rules screen is displayed. Select the rule you want to edit and click Edit. Modify the rule as needed. Click Save. -
Page 68: Snmp Configuration
An administrator can configure SNMP, which is needed if notifications are to be sent to an SNMP management application. NOTE: The Avocent ACS 6000 Enterprise MIB text file is available in the appliance. Follow the filename: /usr/ local/mibs/ACS6000-MIB.asn. The Avocent ACS 6000 Enterprise TRAP MIB text file is available in the appliance. -
Page 69: Date And Time
Chapter 4: Using the Web Manager Click Add. Enter the community name for SNMP v1/v2 or the username for SNMP v3 in the Name field. Enter the OID. Select the desired permission from the pull-down menu. Choices are Read and Write or Read Only. -
Page 70: Boot Configuration
• A TFTP or BootP server must be available on the network • An upgraded console server boot image file must be downloaded from Avocent and made available on the TFTP or BootP server • The ACS 6000 console server must be configured with a fixed IP address •... -
Page 71: Online Help
NOTE: Using the online help feature from the Avocent/Cyclades server is not always possible due to firewall configurations, nor is it recommended. It is generally advisable for you to use the online help system provided with the product or download the online help .zip file and run it from a local server. -
Page 72: Settings
NOTE: The term PDU refers to any of these types of power devices. The ACS 6000 console server automatically recognizes and supports a Cyclades PM PDU or Avocent SPC device when the serial port to which the power device is connected has been configured for power management. -
Page 73: Management
Chapter 4: Using the Web Manager Click on Phases. The Phases window appears displaying each phase and its settings. Click on the name of a phase to change its settings. The Phase Settings window appears. You can change the Current Critical Threshold, Current Warning Threshold and Current Low Warning Threshold from this window. -
Page 74: Power Configuration
Cyclades ACS 6000 Advanced Console Server Installation/Administration/User Guide Select Power Management - Outlet Groups. The Outlet Groups window appears. Check the box next to the name of the Outlet Group you want to manage. Click the On, Off or Cycle radio button, if desired, then click Save. - Page 75 Cyclades - for a Cyclades PM PDU • ServerTech - for a Server Technology PDU • SPC - for an Avocent SPC PDU (Optional) Enable speed auto detection. (Optional) Configure the polling rate. 10. Click Save. To enable and configure a port connected to a server to allow power management...
- Page 76 Cyclades ACS 6000 Advanced Console Server Installation/Administration/User Guide Enter the number(s) of the outlet(s) to which the server is connected in the Outlets field. Click Save. 12. To configure outlets on a PDU that is not currently connected, perform the following steps: Enter the name of a PDU that is not currently connected in the Custom - PDU ID field.
- Page 77 Chapter 4: Using the Web Manager Select PDU. The PDU window appears. Click Assign. The Power window appears with a list of all configured PDUs. Select a PDU name from the list of Available PDUs and click Add. (Optional) To configure access to a PDU that has not yet been connected and configured, specify a PDU name in the Custom - PDU ID field and assign it to the group.
-
Page 78: Monitoring
When the upgrade is done and the screen with the result of the operation appears, click Finish. To upgrade software on a non-Cyclades PDU: Avocent SPC power devices are not user upgradable. For Server Technology PDUs, upgrades must be done through a network port. Contact Server Technology support to check if new software is available and to obtain information on how to upgrade the device. -
Page 79: Active Sessions
Chapter 4: Using the Web Manager Table 4.6: Monitoring Screens (Continued) Screen Name Definition Serial Statistics Shows Device Name, Speed, TX Bytes, RX Bytes, Frame Error, Parity Error, Break and Overrun. Active Sessions The ACS 6000 console server allows multiple users to log in and run sessions simultaneously. The Active Sessions feature allows you to view all active sessions and to terminate (kill) any unwanted sessions. - Page 80 Cyclades ACS 6000 Advanced Console Server Installation/Administration/User Guide...
-
Page 81: Appendices
APP ENDICE S Appendices Appendix A: Techical Specifications Table A.1: Technical Specifications for the ACS 6000 Console Server Hardware General Information PPC440EPx @ 533 MHz (PowerPC with Security Acceleration Engine) Memory 256 MB DDR-2 / 128 MB NAND Flash (embedded ICs on motherboard) 2 Ethernet 10/100/1000BT on RJ-45 1 RS232 Console on RJ-45 1 AUX RS232 on RJ-45 or internal MODEM V.92 on RJ-45 (RJ11 compatible) - Page 82 Cyclades ACS 6000 Advanced Console Server Installation/Administration/User Guide Table A.1: Technical Specifications for the ACS 6000 Console Server Hardware (Continued) Emissions and Immunity: FCC Class A (USA), CE Class A (EU), ICES-003 (Canada), VCCI (Japan), C-Tick (Australia, no internal modem), A-Tick (Australia, with internal modem)
-
Page 83: Appendix B: Safety, Regulatory And Compliance Information
Appendices Appendix B: Safety, Regulatory and Compliance Information Safety, regulatory and compliance information for the ACS 6000 console server is described in this appendix. Safety and environmental guidelines for rack mounting the console server The following considerations should be taken into account when rack mounting the Cyclades ACS 6000 advanced console server. - Page 84 CAUTION: To help prevent electric shock, plug the Cyclades ACS 6000 advanced console server into a properly grounded power source. The cable is equipped with a three-prong plug to help ensure proper grounding. Do not use adaptor plugs or remove the grounding prong from the cable.
-
Page 85: Replacing The Battery
Asegurarse de que nada descanse sobre los cables del ACS 6000 console server, y que los cables no obstruyan el paso. Asegurarse de no dejar caer alimentos o bebidas en el Cyclades ACS 6000 Advanced Console Server Installation/Administration/User Guide. Si esto ocurre, avise a Avocent Corporation. - Page 86 ANSI/NFPA 701, Edición 1999. Para conectar la corriente directa (CD) al sistema, utilice cable de 0.75 mm (18 AWG). Instalar el interruptor corriente directa (CD) aprobado por UL entre la fuente de alimentación y el Cyclades ACS 6000 advanced console server. El limite mínimo del interruptor deberá ser 2 amperes, con conductor de 0.75 mm (18 AWG).
-
Page 87: Appendix C: Technical Support
Appendix C: Technical Support Our Technical Support staff is ready to assist you with any installation or operating issues you encounter with your Avocent product. If an issue should develop, follow the steps below for the fastest possible service. To resolve an issue: Check the pertinent section of this manual to see if the issue can be resolved by following the procedures outlined. - Page 88 Cyclades ACS 6000 Advanced Console Server Installation/Administration/User Guide...
- Page 90 For Technical Support: www.avocent.com/support 590-767-501B...
Need help?
Do you have a question about the Cyclades ACS 6000 and is the answer not in the manual?
Questions and answers