Advertisement
Quick Links
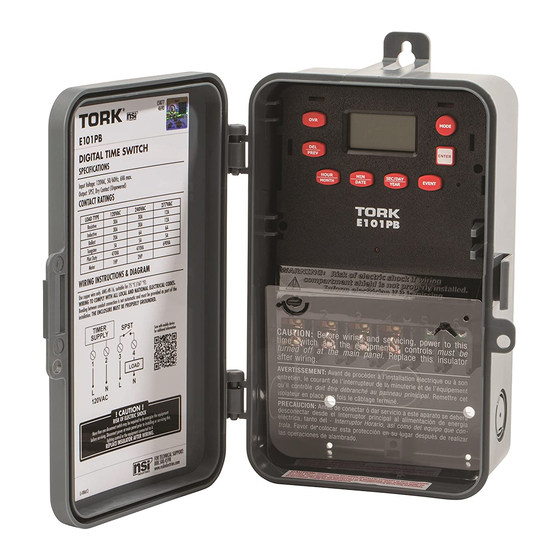
Using the iAP to instAll A toRK e-seRies timeR
to An inteRmAtic enclosURe
STEP 1
The original insulator that came with the timer will be
replaced by the insulator provided with the IAP kit.
For smaller metal enclosure, cut along the horizontal
line (1 3/8") and for Pool and Spa panels (2 1/4")
from bottom of the insulator provided with the IAP
kit. For all other enclosures, install the unmodified
insulator.
STEP 2
Attach the IAP to the E-Series Digital Timer.
Using the long screws, attach the IAP to the rear
of the E-Series timer. Using a Phillips screwdriver,
carefully tighten the screws to secure the timer to the
plate.
When correctly attached, the raised edge of the IAP
should be on the RIGHT side of the E-series timer
when viewed from the rear.
®
A DIVISION OF
FOR TECHNICAL ASSISTANCE: 877.230.7874 • WWW.NSIINDUSTRIES.COM
®
NSi INDUSTRIES, LLC
STEP 3
Slide the timer on an angle inside of the enclosure,
gently resting it against the clip.
STEP 4
With the top of the IAP resting on the clip, push the
top of the timer until it snaps downward and locks.
L1-201 (D)
Advertisement

Related Manuals for NSI NORK E Series


Summary of Contents for NSI NORK E Series
- Page 1 When correctly attached, the raised edge of the IAP should be on the RIGHT side of the E-series timer when viewed from the rear. ® NSi INDUSTRIES, LLC A DIVISION OF FOR TECHNICAL ASSISTANCE: 877.230.7874 • WWW.NSIINDUSTRIES.COM L1-201 (D)
- Page 2 Using the short screws, attach the IAP. Using a flat-blade screwdriver, carefully tighten the screws to secure the timer to the IAP. ® NSi INDUSTRIES, LLC A DIVISION OF FOR TECHNICAL ASSISTANCE: 877.230.7874 • WWW.NSIINDUSTRIES.COM L1-201 (D)
Need help?
Do you have a question about the NORK E Series and is the answer not in the manual?
Questions and answers