Table of Contents
Advertisement
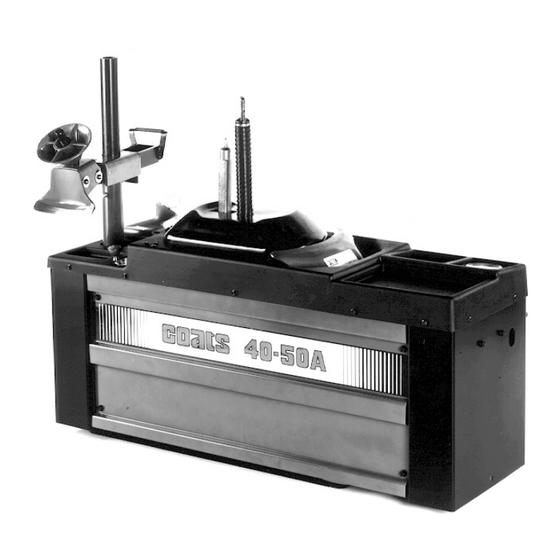
4050A
Tire Changer
For servicing single piece automotive and
most light truck tire/wheel assemblies
1601 J. P. Hennessy Drive, LaVergne, TN USA 37086-3565 615/641-7533 800/688-6359
HENNESSY INDUSTRIES INC. Manufacturer of AMMCO
Safety Instructions
Operating Instructions
Installation Instructions
Maintenance Instructions
READ these instructions before placing unit in
service KEEP these and other materials delivered
with the unit in a binder near the machine for
ease of reference by supervisors and operators.
®
, COATS
®
and BADA
®
Automotive Service Equipment and Tools.
®
Manual Part No.: 8111144 00
Revision:
02/97
Advertisement
Table of Contents

Related Manuals for HENNESSY INDUSTRIES Coats 4050A


Summary of Contents for HENNESSY INDUSTRIES Coats 4050A
- Page 1 1601 J. P. Hennessy Drive, LaVergne, TN USA 37086-3565 615/641-7533 800/688-6359 Manual Part No.: 8111144 00 HENNESSY INDUSTRIES INC. Manufacturer of AMMCO ® , COATS ®...
-
Page 2: Table Of Contents
Installation Instructions ........13 contact: Critical Safety Instructions ....Back Cover Hennessy Industries, Inc. 1601 J.P. Hennessy Drive LaVergne, TN 37086-3565 (615) 641-7533 or (800) 688-6359 www.ammcoats.com For additonal tire, wheel, and/or inflation information contact the following: RUBBER MANUFACTURERS ASSOCIATION 1400 K Street N.W. -
Page 3: Definitions Of Hazard Levels
DANGER DANGER Explosion Hazard Explosion Hazard Never inflate Never exceed 40 tire above PSI while seating manufacturer's beads. recommended pressure after bead is seated. COATS 4050A Tire Changer • 1... -
Page 4: Principal Operating Parts
Hold Down Tube — Used with styled steel wheels to Foot Pedal — Operates the air valve for power bead prevent the centering cone from touching the wheel. loosening, mounting, and demounting. 2 • COATS 4050A Tire Changer... -
Page 5: Operating Instructions
Refer to the instructions on bead loosener shoe and pages 8 and 12. COATS 4050A Tire Changer • 3... - Page 6 Safety glasses with side shields, goggles, or face shields are acceptable. Back Figure 7 - Tool Properly Positioned belts provide support during lifting activities and are also helpful in providing operator protection. 4 • COATS 4050A Tire Changer...
-
Page 7: Mounting
✓ When you have completed the mounting process, proceed to Inflation, page 6. Figure 9 - Inspect Wheel Before Beginning COATS 4050A Tire Changer • 5... -
Page 8: Inflation
Follow all safety instructions in this manual and force to injure the operator or bystanders. Do not on machine. use the position to inflate a tire. 6 • COATS 4050A Tire Changer... -
Page 9: Inflation
Figure 16 - Release Pressure with the Manual Release Valve DANGER DANGER Explosion Hazard Explosion Hazard Never inflate Never exceed 40 PSI tire above while seating beads. manufacturer's recommended pressure after bead is seated. COATS 4050A Tire Changer • 7... -
Page 10: Performance Tires/Custom Wheels
3. For mounting and demounting tires on wheels from 10” to 14” wide, use the optional short center post extension (part #8108311). Slip the extension over the center post key (figure 19). Figure 22 - Combination Tool Boots 8 • COATS 4050A Tire Changer... -
Page 11: Custom And Special Wheels
Do it Now ✓ Always check to be sure you 4050 has a clearly Valve Hole Transmitter visible operator instruction decal. Mounting Strap Figure 25 - Wheels with Low Pressure Sensor COATS 4050A Tire Changer • 9... -
Page 12: Stages Of Inflation
For safety, do not attempt to mount and inflate mis-matched tires and wheels. Even Size Tires Note 15° 14.0, 15.0, 16.0, Bead Seat 17.0, etc. Half Size Wheels Bead will not 14.5, 15.5, 16.5, seat properly 17/5, etc. 10 • COATS 4050A Tire Changer... -
Page 13: Maintenance Instructions
Be careful no dirt falls in calibration. through the hole (figure 26). 4. Reinstall breather plug and reattach front panel. Figure 26 - Filling the 7” Cylinder igure 28 - Calibrating Pressure Gauge COATS 4050A Tire Changer • 11... - Page 14 G. Inspect the unit on a daily basis. Check that all systems and functions are operating normally. Detailed inspection and testing procedures are specified for various components at regular intervals. Set up a chart and assign responsibility for these items. 12 • COATS 4050A Tire Changer...
-
Page 15: Installation Instructions
Sufficient air pressure assures good performance. Floor Mounting The machine may be mounted to the floor if desired. Use suitable anchors in the mounting holes at each corner of the machine. COATS 4050A Tire Changer • 13... - Page 16 ADDITIONAL COPIES, CONTACT THE COATS ® SERIOUS INJURY OR DEATH TO OPERATOR COMPANY, 1601 J.P. HENNESSY DRIVE, AND/OR BYSTANDERS. LAVERGNE, TENNESSEE, 37086 - (800) 688-6359. 8111144 02/97 © Copyright 1993, 2001 Hennessy Industries and COATS ® All Rights Reserved Printed in USA...
Need help?
Do you have a question about the Coats 4050A and is the answer not in the manual?
Questions and answers