DuraMax Metal Garden Shed Owner's Manual
Hide thumbs
Also See for Metal Garden Shed:
- Owners manual and assembly (33 pages) ,
- Owner's manual (33 pages) ,
- Owner's manual/ instructions for assembly (44 pages)
Advertisement
Quick Links
(
A L L
P U R P O S E
M E T A L
S T O R A G E
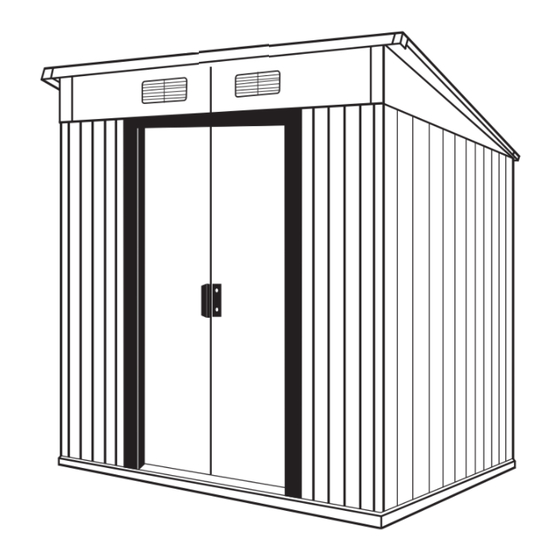
EN) Pent Roof Type
Metal Garden Shed
(FR) Pent Roof Type
Abri de Jardin en Métal
(PT) Pent Roof Type
Abrigo de Jardim em Metal
(ES) Pent Roof Type
La Barraca del Jardín del metal
(EN OWNER'S MANUAL /
Instructions for Assembly
Size 6Ft x 4Ft / 2.0 m x 1.2 m
Ver: 3.0
(FR) MANUEL D'INSTRUCTION /
Instructions pour l'Assemblage
Dimension 6Pieds x 4Pieds / 2.0 Mètre x 1.2 Mètre
Ver: 3.0
(PT) MANUAL DO PROPRIETARIO/
Intruções de montagem.
Tamanho 6pés x 4pés / 2.0Metro x 1.2Metro
Ver: 3.0
• Tall Walk in Shed
(EN)
• Quick & Easy Assembly
• Ridge Reinforced Walls
• Wide Double Doors
• Available in Various Sizes
• Promenade debout dans l'abri
(FR)
• Assemblage rapide & facile
• Murs à arête renforcé
• Portes double large
• Disponible en différentes
dimensions
• Altura primisível a andamento
(PT)
de pé.
• Rápida e fàcil montagem.
• Paredes reforçadas "Ridge".
• Amplas Portas Duplas.
• Disponível em diversas dimenções.
• La Caminata alta en la Barraca
(ES)
• Rápido & la Asamblea Fácil
• La arista Reforzó Paredes
• Las Puertas anchas del Doble
• Disponible en Varios Tamaño
TM
A Product of
S H E D S
(DE) • Begehbarer Schuppen
• Leichter Aufbau
• Wände mit Verstärkungsrippen
• Breite Doppeltüren
• Verfügbar in verschiedenen Größen
(PL)
• Wysokie wejście do magazynka
• Szybki i łatwy montaż
• Wzmocnione ściany profilowane
• Szerokie dwuskrzydłowe drzwi
• Dostępne w różnych rozmiarach
(NL)
• Walk-in schuurtje
• Makkelijke en snelle montage
• Versterkte geribbelde platen
• Brede dubbele deur
• Beschikbaar in verschillende
afmetingen
(DE) Pultdach Bauart
(DE) Pultdach Bauart
Metall-Gartenschuppen
Metall-Gartenschuppen
(PL) Magazynek z dachem jednospadowym
(PL) Magazynek z dachem jednospadowym
Metalowe magazynki ogrodowe
Metalowe magazynki ogrodowe
(NL) Terras dak type
(NL) Terras dak type
Metalen tuinschuurtje
Metalen tuinschuurtje
(ES) MANUAL DEL PROPIETARIO /
Instrucciones de montaje
Tamaño 6Pies x 4Pies / 2.0 Metros x 1.2 Metros
Ver: 3.0
(DE) Benutzerhandbuch /
Montageanleitung
Größe: 6Ft x 4Ft / 2.0 m x 1.2 m
Version: 3.0
(PL) PODRĘCZNIK UŻYTKOWNIKA /
Instrukcja montażu
Wymiary 6Stopy x 4Stopy / 2.0Metr x 1.2Metr
Wersja: 3.0
(NL) Gebruiksaanwijzing voor eigenaar/
Instructies voor bouw
Maat 6 voet x 4 voet / 2.0Meter x 1.2Meter
Versie: 3.0
(EN) Customer Service Hotline.
(FR) Service Hotline Client.
(PT) Linha de apoio ao cliente.
(ES) La Línea Directa del Servicio del cliente.
(DE) Kundendienst Hotline.
(PL) Linia telefoniczna dla klientów
(NL) Directe servicelijn.
01805 89 31 50 (0,14 €/min aus dem deutschen Festnetz
Mobilfunk max. 0,42 €/min.) tepro Garten GmbH, D-63322 Rödermark
(EN) Requires two people and takes 2-3 hours for Installation.
(FR) Il faut deux personnes et ça prend 2-3 heures pour l'installation.
(PT) Requere duas pessoas e leva 2-3 horas para instalação.
(ES) Requiere a dos personas y lleva 2-3 horas para la Instalación.
(DE) Die Montage dauert 2-3 Stunden und ist von 2 Personen durchzuführen.
(PL) Montaż wymaga dwóch osób i zajmuje 2-3 godzin.
(NL) Twee mensen nodig en 2-3 uren voor installatie.
(EN) Call us for any missing or damaged parts.
Do not return to the store.
(FR) Appelez-nous pour toute les pièces manquantes ou
endommagées.
Ne pas retourner au magasin.
(PT) Contacta-nos para qualquer falta ou partes danificadas.
Não devolver à loja.
(ES) Llámenos para cualquier perder o partes dañadas.
No vuelva a la tienda.
(DE) Rufen Sie uns an, wenn Teile fehlen oder beschädigt sind.
Senden Sie nichts an das Geschäft zurück.
(PL) Zadzwoń do nas w przypadku braku części lub ich zniszczenia.
Nie zwracaj towaru do sklepu.
(NL) Bel ons als er onderdelen missen of beschadigd zijn.
Niet terug naar de winkel.
Advertisement

Subscribe to Our Youtube Channel
Related Manuals for DuraMax Metal Garden Shed


Summary of Contents for DuraMax Metal Garden Shed
- Page 1 S H E D S (DE) Pultdach Bauart (DE) Pultdach Bauart EN) Pent Roof Type Metall-Gartenschuppen Metall-Gartenschuppen Metal Garden Shed (PL) Magazynek z dachem jednospadowym (PL) Magazynek z dachem jednospadowym (FR) Pent Roof Type Metalowe magazynki ogrodowe Metalowe magazynki ogrodowe Abri de Jardin en Métal...
- Page 2 (EN) Building Dimensions : Storage Exterior Dimension Interior Dimension Approximate Door Opening Size Area Volume Base Dimension Roof Edge to Edge Wall to Wall inch inch inch inch 6 Ft x 4 Ft 20 1/4 Sq. Ft 107 1/4 Cu.Ft 34 7/8 Width 79 1/8...
- Page 3 Côté intérieur du panneau de pignon pour le hangar de base. Sur le panneau de mur pour des prolongements. (PT) Abrigo De Jardim Duramax Garantia Limitada a Quinze Anos E.U. Polymer Inc. enviará peças de substituição sem custos adicionais, em caso de defeitos de materiais e /ou mão-de-obra, durante um período de quinze anos (15) desde a data da compra.
- Page 4 Innenseite der dachgiebel Panel für grundlegende Vergossen Auf der Wall Panel für Erweiterungen. (PL) Magazynek do przechowywania Duramax Gwarancja na piętnaście lat U.S. Polymer Inc. wyśle za darmo części zamienne w przypadku wad materiałowych i produkcyjnych stwierdzonych w ciągu piętnastu lat od daty zakupu.
- Page 5 (EN) SAFETY & PRECAUTIONS (DE) SICHERHEITS U.- VORSICHTSMASSNAHMEN (FR) SÉCURITÉ ET PRÉCAUTIONS (PL) ŚRODKÓW OSTROŻNOŚCI (PT) SEGURANÇA E CUIDADOS (NL) VEILIGHEIDSVOORSCHRIFTEN (ES) SEGURIDAD Y PRECAUCIONES (DE) Bevor Sie anfangen..(EN) Before You Begin... (PL) Przed rozpoczęciem montażu... (FR) Avant de commencer... (PT) Antes de iniciar a montagem...
- Page 6 (ES) 1. Consulte los códigos de construcción locales relativos a cimentación , localización etc. 2. Seleccione un sitio que permite suficiente espacio para trabajar alrededor de la nave. 3. Determinar la la fundación de la construcción y sistema de anclaje. 4.
- Page 7 (EN) SAFETY & PRECAUTIONS (DE) SICHERHEITS U.- VORSICHTSMASSNAHMEN (FR) SÉCURITÉ ET PRÉCAUTIONS (PL) ŚRODKÓW OSTROŻNOŚCI (PT) SEGURANÇA E CUIDADOS (NL) VEILIGHEIDSVOORSCHRIFTEN (ES) SEGURIDAD Y PRECAUCIONES (EN) For your own safety, please read and follow these instructions during the shed assembly. (FR) Pour votre propre sûreté, svp lisez et suivez ces instructions pendant le montage.
- Page 8 (EN) Do not attempt to assemble the shed on a windy day. Shed panels can be whipped across by the wind making the worksite difficult and dangerous. (FR) N'essayez pas d'assembler le hangar un jour venteux. Des panneaux de hangar peuvent être fouettés par le vent rendant le chantier difficile et dangereux.
- Page 9 (PL) Magazynek należy zbudować na trwałej podstawie. Ława fundamentowa lub duża betonowa płyta tarasowa w kształcie kwadratu to odpowiednie materiały na jego fundamenty. Upewnij się, że są one stabilne i wyrównane oraz że umożliwią odpływ wody z miejsca budowy. Wymiary podstawy powinny być co najmniej o 100 mm większe niż wymiary magazynka. W celu zapoznania się...
- Page 10 Embora essa unidade não requeira nenhum tipo de manutenção, cuidados devem ser tomados para prolongar a vida útil do (PT) galpão. TELHADO : Mantenha o telhado limpo de folhas e neve com uma vassoura de cerdas macias e cabo longo. Grande quantidade de neve pode danificar o galpão, tornando-o um lugar perigoso.
- Page 11 (EN) Parts List (DE) Teileliste (EN) PROFILES (DE) PROFILE (FR) PROFILES (PL) PROFILE (FR) Liste des pièces (PL) Lista części (PT) PERFILS (NL) PROFILES (PT) Lista de Peças (NL) Onderdelenlijst (ES) PERFILES (ES) La Lista de partes (EN) Note: Check all parts prior to installation. (FR) Note: Vérifier toutes les pièces avant l’installation.
- Page 12 (EN) Tools You Will Need Hand Gloves 8’ Step Ladder Cordless Drill - Philips Head Adjustable pliers Screw driver - Philips Head Level - 3ft. Carpenter’s Square Tape Measure Eye Protector (FR) Outils dont vous aurez besoin Gants Escabeau 8' Perceuse sans fil –...
- Page 13 (EN) Exploded View (DE) El Panorama estallado (FR) Vue Explosée (PL) Rysunek złożeniowy (PT) Vista esplodida (NL) Barsten bekijken (ES) El Panorama estallado RFSLR RPSLR RFRC RPCLR RFLC RFLC RPCLR RPSLR RFRC SBSLR GPSL RFSLR FBSLR RSLRC SBSLR FB1C FBSLR FB2C GPSR ASLR...
- Page 14 (EN) DuraMax must be installed on a level wooden platform or a level concrete foundation. (FR) DuraMax doit être installé sur une plate-forme en bois ou une fondation de béton. (EN) Lay 2 x 4 Flat (PT) Duramax deve ser instalado em uma plataforma de madeira o numa fundação (Actual size 2”x 3 1/2”, 50mm x 88.9mm)
- Page 15 (DE) Es sind druckbehandelte Holzlatten von 2 x 4 (Aktuelle Größe 2”x 3 1/2”,50mm x 88.9mm) zu benutzen, um einenPlattformrahmen mit den äußeren Abmessungen von 47”x 78” (1193.80mm x 1981.20mm) zu erstellen. Wetterbeständige Sperrholzplatten, CDX 3/4” (19 mm), zurechtschneiden und wie gezeigt zu einem festen Fundament zusammensetzen. Das Fundament muss rechtwinklig und eben sein.
- Page 16 (EN) Concrete Platform The shed must be constructed on a solid base foundation. A concrete pad or a large size concrete patio stone squares is recommended for suitable floor base. Make sure it is firm and level and will allow drainage away from the site. The base foundation should be at least 4 inches (100mm) larger than the shed dimensions.
- Page 17 B. (EN) Base Frame (DE) Bodenrahmen (FR) Canaux de base (PL) Rama fundamentowa (PT) Base de armação (NL) Basis frame (ES) Armazón de la base (EN) Parts needed (DE) Benötigte Teile (FR) Pièces nécessaires (PL) Lista części (PT) Peças Necessárias (NL) Onderdelen nodig (ES) Las partes necesitaron (EN) Note: It is important that these instructions are followed step by step.
- Page 18 (EN) Back (DE) Hinten (FR) Arrière (PL) Tył (PT) Traseira (NL) Achteraan (ES) Detrás (EN) Front (DE) Vorne (FR) Avant (PL) Przód (PT) Frente (NL) Vooraan (ES) Frente (EN) Front (DE) Vorne (FR) Avant (PL) Przód (PT) Frente (NL) Vooraan (ES) Frente BBFC BBFC...
- Page 19 BBFC BBFC BBFC (EN) Front (DE) Vorne (FR) Avant (PL) Przód (PT) Frente (NL) Vooraan (ES) Frente (EN) Back (DE) Hinten (FR) Arrière (PL) Tył (PT) Traseira (NL) Achteraan (ES) Detrás BBFC 1 & 2 BBFC BBFC (EN) Front (DE) Vorne (FR) Avant (PL) Przód (PT) Frente (NL) Vooraan (ES) Frente...
- Page 20 (EN) Assembly on concrete Foundation Using a carpenter square, line up corners. Align Base bars, mark the concrete at the holes in the base and drill concrete with 1/4” (dia. 6mm) concrete bit to accept anchor bolts to a 1 3/4” (44mm) depth. Replace base and secure with 1/4” x 1 3/8” (M6 x 35mm) anchor bolts (not provided).
- Page 21 WFRC WFRC BBFC (EN) Front (DE) Vorne (FR) Avant (PL) Przód (PT) Frente (NL) Vooraan (ES) Frente WCFC WFRC WFRC WCFC BBFC (EN) Front (DE) Vorne (FR) Avant (PL) Przód (PT) Frente (NL) Vooraan (ES) Frente (EN) Note: Make sure the overlapping position is as shown in fig.1. (FR) Note: Assurez-vous que la position chevauchement est indiquée dans la Fig 1.
- Page 22 1 & 2 WCFC WCFC WCFC WFRC (EN) Front (DE) Vorne (FR) Avant (PL) Przód (PT) Frente (NL) Vooraan (ES) Frente (EN) Front (DE) Vorne (FR) Avant (PL) Przód WFRC (PT) Frente (NL) Vooraan (ES) Frente (EN) Front (DE) Vorne (FR) Avant (PL) Przód (PT) Frente (NL) Vooraan (ES) Frente...
- Page 23 WCFC WFLC WFLC BBFC WCFC (EN) Front (DE) Vorne (FR) Avant (PL) Przód (PT) Frente (NL) Vooraan (ES) Frente (EN) Note: Make sure the overlapping position is as shown in fig.1. (FR) Note: Assurez-vous que la position chevauchement est indiquée dans la Fig 1. (PT) Nota: Certifique-se que a posição se sobrepõem como mostrado na fig.1.
- Page 24 (EN) Front (DE) Vorne (FR) Avant (PL) Przód (PT) Frente (NL) Vooraan (ES) Frente (EN) Front (DE) Vorne (FR) Avant (PL) Przód (PT) Frente (NL) Vooraan (ES) Frente (EN) Note: Make sure the position of the projection on (TS) towards inside. (FR) Note: Assurez-vous de la position de la projection sur (TS) vers l’intérieur.
- Page 25 WCBC WCBC (EN) Back (DE) Hinten (FR) Arrière (PL) Tył (PT) Traseira (NL) Achteraan (ES) Detrás (EN) Note: Make sure the overlapping position is as shown in fig.2. (FR) Note: Assurez-vous que la position chevauchement est indiquée dans la Fig 2. (PT) Nota: Certifique-se que a posição se sobrepõem como mostrado na fig.2.
- Page 26 WCBC WCBC (EN) Back (DE) Hinten (FR) Arrière (PL) Tył (PT) Traseira (NL) Achteraan (ES) Detrás WCBC WCBC WCBC (EN) Back (DE) Hinten (FR) Arrière (PL) Tył (PT) Traseira (NL) Achteraan (ES) Detrás (EN) Note: Make sure the overlapping position is as shown in fig.1. (FR) Note: Assurez-vous que la position chevauchement est indiquée dans la Fig 1.
- Page 27 ABCLR ABCLR ASLR ASLR ABCLR ABCLR ASLR WCBC WCBC 1 & 2 WCBC (EN) Back (DE) Hinten (FR) Arrière (PL) Tył (PT) Traseira (NL) Achteraan (ES) Detrás (EN) Note: Top angle (ABCLR) must sit on top angle (ASLR). (FR) Note: L’angle supérieur (ABCLR) doit s'asseoir sur l'angle (ASLR). (PT) Nota: Ângulo superior (ABCLR) têm que se apoiar em cima do ângulo (ASLR).
- Page 28 DCLC DCLC DCLC BBFC (EN) Front (DE) Vorne (FR) Avant (PL) Przód (PT) Frente (NL) Vooraan (ES) Frente DCLC (EN) Front (DE) Vorne (FR) Avant (PL) Przód (PT) Frente (NL) Vooraan (ES) Frente (EN) Front (DE) Vorne (FR) Avant (PL) Przód (PT) Frente (NL) Vooraan (ES) Frente (EN) IMPORTANT: USE HAND GLOVES TO PREVENT INJURY.
- Page 29 (EN) Roof (DE) Dach (FR) Toit (PL) DACH (PT) Telhado (NL) Dak (ES) El techo (EN) Note: All panels are clearly marked and care should be taken to use the correct one. Remove the polyethylene film before start assembling. (FR) Note: Toutes les parois sont clairement identifiées et il faut veiller à utiliser la bonne. Retirer le film de polyéthylène avant de commencer l’assemblage.
- Page 30 FB1C FB2C FBSLR FBSLR FBSLR (EN) Front (DE) Vorne (FR) Avant (PL) Przód FB2C (PT) Frente (NL) Vooraan (ES) Frente 1 & 2 FB2C FB2C FB2C (EN) Front (DE) Vorne (FR) Avant (PL) Przód (PT) Frente (NL) Vooraan (ES) Frente FB1C 1 &...
- Page 31 (EN) Front (DE) Vorne (FR) Avant (PL) Przód FB1C (PT) Frente (NL) Vooraan (ES) Frente 1 & 2 FB1C FB1C FB2C FB2C FB2C FBSLR (EN) Front (DE) Vorne (FR) Avant (PL) Przód (PT) Frente (NL) Vooraan GPSL GPSL (ES) Frente ASLR GPSL ASLR...
- Page 32 (EN) Front (DE) Vorne (FR) Avant (PL) Przód (PT) Frente (NL) Vooraan GPSR (ES) Frente FB2C ASLR GPSR ASLR ABCLR GPSR GPSR 1, 2&3 ABCLR ASLR ABCLR ABCLR (EN) Front (DE) Vorne 1 & 2 (FR) Avant (PL) Przód (PT) Frente (NL) Vooraan (ES) Frente GPSR FBSLR...
- Page 33 (EN) Back (DE) Hinten (FR) Arrière (PL) Tył 1 & 2 (PT) Traseira (NL) Achteraan (ES) Detrás RSLRC GPSR RSLRC GPSR GPSR RSLRC RSLRC GPSL 1 & 2 (EN) Front (DE) Vorne (FR) Avant (PL) Przód (PT) Frente (NL) Vooraan FB1C (ES) Frente FB1C...
- Page 34 (EN) Note: Make sure the overlapping position for roof panel is as shown in blowup. (FR) Note: Assurez-vous que la position chevauchement des parois de toit est telle qu’indiquée dans l’exposé. (PT) Nota: Certifique-se que a sobreposição de posição para o painel do telhado é como mostrado na fig. Explodida. (ES) Nota: Cerciórese la posición que se superpone para el entrepaño de techo es como mostrada en el blowup.
- Page 35 (EN) Back (DE) Hinten (FR) Arrière (PL) Tył RFSLR (PT) Traseira (NL) Achteraan (ES) Detrás RFSLR (EN) Front (DE) Vorne (FR) Avant (PL) Przód (PT) Frente (NL) Vooraan (ES) Frente (EN) Back (DE) Hinten (FR) Arrière (PL) Tył RFRC (PT) Traseira (NL) Achteraan (ES) Detrás RFLC RFLC...
- Page 36 (EN) Front (DE) Vorne (FR) Avant (PL) Przód (PT) Frente (NL) Vooraan (ES) Frente (EN) IMPORTANT: USE HAND GLOVES TO PREVENT INJURY. (DE) WICHTIG: BENUTZEN SIE HANDSCHUHE, UM VERLETZUNGEN ZU VERMEIDEN. (FR) IMPORTANT: UTILISER LES GANTS POUR PREVENIR LES ACCIDENTS. (PL) WAŻNE: UŻYWAJ RĘKAWIC, ABY ZAPOBIEC URAZOM.
- Page 37 D. (EN) Door (DE) Die Tür (FR) Porte (PL) Dach (PT) Porta (NL) De deur (ES) La puerta (EN) Note : Use screws with plastic washers on top of prepainted surface only. (FR) Note : Utilisez des vis avec des rondelles en plastique sur le dessus de la surface pré peinte seulement (PT) Nota : Utilize parafusos com anilhas plásticas em cima da superfície prepainted apenas.
- Page 38 (EN) Right Door Assembly (DE) Montage der rechten Tür (FR) Assemblage Porte Droite (PL) Montaż prawych drzwi (PT) Montagem da Porta Direita (NL) Montage van de rechterdeur (ES) La Asamblea correcta de la Puerta DPRC DPRC DSSC DSSC (EN) Note: Remove the Polyethylene Film before assembling. (FR) Note: Retirer le film de polyéthylène avant de commencer l’assemblage.
- Page 39 DSCC DSCC DSSC DSSC DSCC TSRC 1 & 2 TSRC DPRC DSSC DPRC DSSC TSRC DPRC TSRC DSSC (EN) IMPORTANT: USE HAND GLOVES TO PREVENT INJURY. (DE) WICHTIG: BENUTZEN SIE HANDSCHUHE, UM VERLETZUNGEN ZU VERMEIDEN. (FR) IMPORTANT: UTILISER LES GANTS POUR PREVENIR LES ACCIDENTS. (PL) WAŻNE: UŻYWAJ RĘKAWIC, ABY ZAPOBIEC URAZOM.
- Page 40 DSSC DPRC DSCC DPRC BDSC DSSC BDSC BDSC DSSC DPRC (EN) IMPORTANT: USE HAND GLOVES TO PREVENT INJURY. (DE) WICHTIG: BENUTZEN SIE HANDSCHUHE, UM VERLETZUNGEN ZU VERMEIDEN. (FR) IMPORTANT: UTILISER LES GANTS POUR PREVENIR LES ACCIDENTS. (PL) WAŻNE: UŻYWAJ RĘKAWIC, ABY ZAPOBIEC URAZOM. (PT) IMPORTANTE: USAR LUVAS PARA EVITAR LESÕES.
- Page 41 DPRC DPRC (EN) Left Door Assembly (DE) Montage der linken Tür (FR) Assemblage Porte Gauche (PL) Montaż lewych drzwi (PT) Montagem da porta esquerda (NL) Montage van de linkerdeur (ES) La Asamblea izquierda de la Puerta DSSC DSSC DPLC (EN) Note: Remove the Polyethylene Film before assembling. (FR) Note: Retirer le film de polyéthylène avant de commencer l’assemblage.
- Page 42 DSCC DPLC DSSC DSCC DSCC DSSC DSCC DSSC DSCC (EN) IMPORTANT: USE HAND GLOVES TO PREVENT INJURY. (DE) WICHTIG: BENUTZEN SIE HANDSCHUHE, UM VERLETZUNGEN ZU VERMEIDEN. (FR) IMPORTANT: UTILISER LES GANTS POUR PREVENIR LES ACCIDENTS. (PL) WAŻNE: UŻYWAJ RĘKAWIC, ABY ZAPOBIEC URAZOM. (PT) IMPORTANTE: USAR LUVAS PARA EVITAR LESÕES.
- Page 43 TSLC TSLC 1 & 2 DPLC DSSC DPLC DSSC TSLC TSLC DSSC DSCC DSSC DSSC DPLC DSCC BDSC DPLC BDSC BDSC (EN) IMPORTANT: USE HAND GLOVES TO PREVENT INJURY. (DE) WICHTIG: BENUTZEN SIE HANDSCHUHE, UM VERLETZUNGEN ZU VERMEIDEN. (FR) IMPORTANT: UTILISER LES GANTS POUR PREVENIR LES ACCIDENTS. (PL) WAŻNE: UŻYWAJ RĘKAWIC, ABY ZAPOBIEC URAZOM.
- Page 44 DSSC DPLC DPLC DPLC (EN) IMPORTANT: USE HAND GLOVES TO PREVENT INJURY. (DE) WICHTIG: BENUTZEN SIE HANDSCHUHE, UM VERLETZUNGEN ZU VERMEIDEN. (FR) IMPORTANT: UTILISER LES GANTS POUR PREVENIR LES ACCIDENTS. (PL) WAŻNE: UŻYWAJ RĘKAWIC, ABY ZAPOBIEC URAZOM. (PT) IMPORTANTE: USAR LUVAS PARA EVITAR LESÕES. (NL) POMEMBNO: UPORABITE ROKAVICE, DA SE NE POŠKODUJETE.
- Page 45 (EN) Front (DE) Vorne (FR) Avant (PL) Przód (PT) Frente (NL) Vooraan (ES) Frente BBFC GPLC GPRC DPLC DPRC DPLC DPRC (EN) To get proper alignment of the door realign the holes with door panel. See fig. (FR) Pour obtenir un bon alignement de laporte, réaligner les trous avec la paroi de porte. Voir fig. (PT) Para obter um alinhamento adequado da porta realinhe os buracos com o painel da porta.
- Page 46 (EN) WE RECOMMEND TO CLEAR YOUR METAL SHED OF SNOW AFTER EACH SNOWFALL. (FR) NOUS VOUS RECOMMANDONS DE DÉBLAYER LA NEIGE APRÈS CHAQUE CHUTE DE. (PT) NÓS RECOMENDAMOS PARA LIMPAR O GALPÃO DEPOI DE CADA QUEDA DE NEVE. (ES) DESPUES DE CADA NEVADA RECOMENDAMOS LIMPIAR LA NIEVE DE SU COBERTIZO DE METAL. (DE) WIR EMPFEHLEN NACH JEDEM SCHNEEFALL IHR METALL SHED AUFZURÄUMEN.
- Page 47 (EN) ADDITIONAL ACCESSORIES AVAILABLE (DE) WEITERES ZUBEHöR (FR) ACCESSOIRES ADDITIONNELS DISPONIBLES (PL) DOSTĘPNE DODATKOWE AKCESORIA (PT) ACESSÓRIOS ADICIONAIS DISPONÍVEIS (NL) EXTRA ACCESOIRES AANWEZIG. (ES) ACCESORIOS ADICIONALES DISPONIBLES (EN) These accessories are required in case of heavy snow or high wind areas. Please choose relevant accessories according to your needs.
- Page 48 (EN) ANCHOR KIT (Foundation) (FR) KIT D'ANCRE (Base) (PT) KIT DE APOIO (Base) (ES) KIT DE ANCLAJE (Fundación) (DE) ANKER-KIT (Fundament) (PL) ZESTAW DO MOCOWANIA (Podstawa) (NL) ANKER GEREEDSCHAP (Fundering) (EN) Strap clamping for shed assembly with foundation(Wood / Metal) on concrete. To prevent shed from displacement.
- Page 49 U.S. Polymers, Inc. 1057 S. Vail Ave Montebello, CA 90640, United States of America...
Need help?
Do you have a question about the Metal Garden Shed and is the answer not in the manual?
Questions and answers