Table of Contents
Advertisement
Advertisement
Table of Contents

Related Manuals for CUOGHI NEB 6500


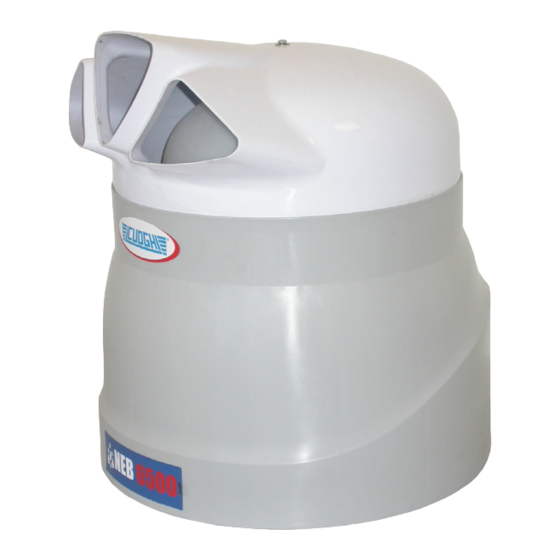
Summary of Contents for CUOGHI NEB 6500
- Page 2 0010060 0060287 0060287 0060310 0060310 0060311 0080003 0070008 0080004 0070009 0080051 0070046 0080053 0080385 0080410 0080431 0080413 0080433 0080430 0080437 0080432 0080438 0080434 0080447 0080435 0090154 0080436 0080439 0080441 0080412 0090006 0080414 0080445 0090052 0090152 0090158 0090159 i220-0...
- Page 3 M360-1 English www.cuoghi-luigi.it...
-
Page 4: Table Of Contents
Table of Contents Technical Characteristics ......................3 Dimensions and weights ......................3 Description of the components ....................3 Introduction..........................4 General safety rules......................4 Installation............................5 Materials supplied ........................5 Preliminary operations ......................5 Positioning ...........................5 Wall installation ........................6 Hanging installation ......................7 Electric connections ......................8 3.6.1 Electric wiring diagram....................8 3.6.2 Cabling .........................9 Hydraulic connections......................10... -
Page 5: Technical Characteristics
E C H N I C A L H A R A C T E R I S T I C S ECHNICAL HARACTERISTICS NEB6500 Atomising capacity 1,1 - 6,5 L/hour Electric power supply 230V, 50Hz Rated Power 0.23 kW (0,3 kW with resistance) Air Delivery 77,8 L/sec (280 m³/hour) Water Supply Pressure... -
Page 6: Introduction
The NEB 6500 operation is controlled by an electronic card which, besides running the normal machine operations, also sees to regular automatic washing cycles of the supply tank to prevent stagnant water from depositing inside the machine and, consequently, the proliferation of bacteria dangerous to health. -
Page 7: Installation
N S T A L L A T I O N NSTALLATION 3.1 Materials supplied The following materials are standard supplied with the machine. Check that all the materials listed below are in the pack before starting work. • N.1 humidifier mod. NEB6500 (code F2060) •... -
Page 8: Wall Installation
N S T A L L A T I O N To allow maintenance to be carried out when necessary and also for the correct operation of the machine, the minimum advised distances must be respected when positioning the humidifier. depending on the type of installation that will be adopted, choose the most opportune position for humidifying the room. -
Page 9: Hanging Installation
N S T A L L A T I O N 3.5 Hanging installation Hanging installation is done with the standard supplied brackets. Three supporting chains, from which to hang the machine, must be prepared.. The chains must hang down as straight as possible and be attached to hooks that bear the weight of the machine (see Tab. -
Page 10: Electric Connections
N S T A L L A T I O N 3.6 Electric connections Installation provides for the utilization of an ON/OFF humidistat that controls starting and switching off the humidifier: it is, however, possible to use instead, a simple ON/OFF contact with the only difference that the machine must be started and stopped manually. This choice however does not in any way influence the installation procedure described below. -
Page 11: Cabling
N S T A L L A T I O N 3.6.2 Cabling The flexible lead that is used for the electric connections, must be at least protected by an ordinary PVC sheath and respect 227 IEC 53 standards (CENELEC H05VV-F or H05VVH2-F or better) With reference to Fig. -
Page 12: Hydraulic Connections
N S T A L L A T I O N 3.7 Hydraulic connections The installation of the humidifier also needs the water supply and drainage pipes to be connected. The pipes, standard supplied, must be connected to the machine as explained in par. 3.2 Preliminary operations , on page 3 of this manual. Fig. -
Page 13: Starting, Control And Stopping
T A R T I N G C O N T R O L A N D S T O P P I N G TARTING CONTROL AND STOPPING 4.1 Preliminary checking Before starting up the humidifier check that: all the connections, both electrical and hydraulic, have been done according to the instructions found in this manual; there are no leaks;... -
Page 14: Electronic Control
E L E C T R O N I C C O N T R O L ELECTRONIC CONTROL 5.1 The electronic card The operation of the NEB6500 is controlled by the electronic card, that has the following functions: • Adjustment of the humidification capacity •... -
Page 15: The Washing/Reset Cycle
E L E C T R O N I C C O N T R O L 5.4 The washing/reset cycle The electronic card of the NEB 6500 is programmed to carry out a washing/reset cycle each time: the machine is started with the main switch;... -
Page 16: Anti-Freeze Device (Optional)
N T I F R E E Z E D E V I C E O P T I O N A L FREEZE DEVICE OPTIONAL The anti-freeze device is necessary when the NEB6500 is installed in an environment where the temperature could drop below 0°C. ATTENTION: keep to the operation limits shown in Tab. -
Page 17: Maintenance
A I N T E N A N C E AINTENANCE The NEB6500 is designed to guarantee efficient and faultless operation for a long time. It is however, necessary to carry out some simple maintenance operations, how often they are carried out depends on the environmental conditions in which the NEB6500 operates and on the quality of the water supply. -
Page 18: Feeding Solenoid Valve
A I N T E N A N C E 7.3 Feeding solenoid valve. The drain solenoid valve is fitted with an input filter that must be checked and cleaned periodically. To reach the filter, the pipe connection A of the supply pipe must be unscrewed: the filter is found inside the threaded bushing B of the solenoid valve. -
Page 19: Storing
T O R I N G TORING • Keep the machine in an environment with a temperature range between -10°C and +60°C. • When the machine is still packed, keep it upright. • Do not put any other heavy things on the box. 8.1 Points to check before and after a long period of inactivity 8.1.1 Before •...
Need help?
Do you have a question about the NEB 6500 and is the answer not in the manual?
Questions and answers