Table of Contents
Advertisement
Advertisement
Table of Contents

Related Manuals for SSR Motorsports SR300S


Summary of Contents for SSR Motorsports SR300S
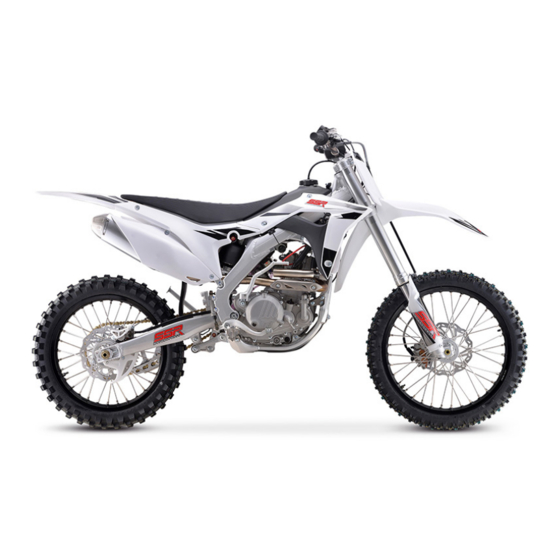
- Page 1 SR300S OWNER’S MANUAL | SSR MOTORSPORTS...
-
Page 2: Table Of Contents
TABLE OF CONTENTS 1. Starting the engine ..................................12 2. When the engine is “cold” ................................12 3. When the engine is “warm” ................................. 12 1. Shifter operation ................................... 13 2. Climbing or turning ..................................13 3. Stopping ......................................13 1. - Page 3 7.3.2. Replacing the chain ..............................23 8. Brake system ....................................24 8.1. Checking the brake fluid ..............................24 9. Front and rear suspension ................................26 9.1.1.1. Adjustment of the front fork damping ........................26 9.1.1.2. Adjustment of the front fork rebound damping ......................26 9.1.1.3.
- Page 4 The information, images, and specifications in the manual are based on the most recent product data information available at the time of publication. Since changes may have occurred or improvements, there may be differences between vehicles and this manual. SSR Motorsports reserves the right to make changes any time, without having to make notification.
- Page 5 Do not modify or change the electrical system in any way, changes to this system could result in overloading of electrical circuits which may lead to blown fuses or electrical shorts which could lead to fire or explosion. SSR Motorsports are not responsible for any consequences arising from the addition or modification of the electrical equipment.
- Page 6 VIN AND ENGINE NUMBER LOCATION Please record the numbers indicated in the following places, and keep the certificate issued with the motorcycle for after-sales service. Engine number (1) is on the middle of the cylinder of the engine. Frame number (2) is on the right side of the frame head tube. NOTE: if the original frame number or engine number is scratched or changed, the dealer will not be able to confirm the configuration list and batch of vehicle identity, which will affect the after-sales processing, resulting in a state of inconsistency with the purchase status.
- Page 7 PRECAUTION AND INSPECTION BEFORE RIDING 1. Preparation before riding Before riding you must be prepared as follows: 1.1. Read this instruction manual; 1.2. Ensure that you know the safety factors involved; 1.3. Ensure you know how to operate all parts of the motorcycle; 1.4.
- Page 8 when the throttle is released Fuel Quantity Enough to ride the distance/time desired (1) Brake pad material is above the minimum thickness Front and rear brake (2) The brake lever free play distance (front & rear) is correct systems (3) Neither brake is spongey or dragging while operating (1) Proper air pressure Tires (2) Proper tire thread depth...
- Page 9 Main components and functions of your motorcycle 1. Stop Switch: red button, hold the red button in until the engine stops. 2. Choke knob: used to reduce the amount of air entering the carburetor inlet at low temperatures, and to increase the concentration of the fuel mixture to start when the engine is cold. Pull UP for ON, push DOWN for OFF.
- Page 10 1. Fuel Cap: Remove the fuel tank cap and look into fuel tank to check the fuel volume. To loosen the fuel tank cap turn it counterclockwise. 2. Fuel switch 2.1. The fuel switch is located on the bottom of the fuel tank on the left-hand side, the fuel is filtered and sent into the carburetor.
- Page 11 When the foot brake lever is pressed, the rear disc brake will slow down the motorcycle. 8. Kick Starting Turn the ignition switch to the ON position, only kick start with the engine with the transmission in the neutral position, pull in the clutch lever in with your left hand, turn the throttle a little with your right hand, press downward on the kick starter strongly and quickly, until it bottoms out.
- Page 12 Break-in 1. Break-in Period The break-in period refers to a treatment method in which your new motorcycle is used for the first time in order to ensure that the engine surfaces between parts wear in optimally. Notice: 1.1. During the break-in period, the throttle should not be fully opened, and the maximum engine RPM should not exceed 5000r/min;...
-
Page 13: Starting The Engine
Starting the motorcycle 1. To start the engine 1.1. Turn the fuel tank switch to the ‘ON’ position; 1.2. Turn the ignition switch to the ‘ON’ position; 1.3. Make sure the transmission is in neutral. 2. When the engine is “cold” Pull up the choke knob on the left side of the carburetor, pull in the clutch lever with your left hand, press the yellow start button with your right hand, and open the throttle slightly. -
Page 14: Shifter Operation
SAFE RIDING TIPS 1. Shifter operation You motorcycle has a six-speed transmission with a constantly meshing two-stage transmission. The first and second gears are low speed, the third and fourth gears are mid-speed, and the fifth and sixth gears are high speed. To shift, please refer to the following operations: 1.1. -
Page 15: Periodic Maintenance Table
Motorcycle Maintenance 1. Periodic Maintenance Table You need to maintenance your motorcycle according to the following table. 1 Ride 3 Rides 6 Rides 9 Rides 12 Rides Inspection Items Remarks 2.5 h 7.5 h 15 h 22.5h Oil screen Throttle cable Air filter element Engine oil Coolant... -
Page 16: Engine Lubrication
2. Engine Oil 2.1. Engine oil choice The engine oil acts on the engine to reduce friction, increase sealing, cool parts, clean parts, and to prevent rust. Poor quality oils, excessive use time, insufficient oil volume, etc., will accelerate the wearing of engine parts, power loss, abnormal noise, clutch wear or slippage, increased engine temperatures, and even reduce the overall service lifetime of your motorcycle. -
Page 17: Oil Change
2.3. Changing the engine oil 2.3.1. Start the engine and allow it to idle for 3 minutes then turn the engine off; 2.3.2. Put the motorcycle on a dirt bike stand or other means to keep it in a vertical position; 2.3.3. -
Page 18: Cooling System
3. Cooling system 3.1. Coolant reservoir The coolant reservoir is located behind the right radiator. According to the environment and conditions the motorcycle is used in, the coolant reservoir should be cleaned regularly to remove dust and dirt. 3.2. Coolant The coolant should be maintained according to the "Maintenance Schedule". - Page 19 3.2.7. Special Notes: 3.2.7.1. If the radiator cap is installed improperly, excessive coolant loss may occur, and the engine may overheat causing damage; 3.2.7.2. Always allow the engine and coolant to cool before removing the radiator cap. Hot coolant is under pressure and will spray out if the cap is removed while hot potentially causing burns;...
-
Page 20: Spark Plug
4. Spark plug 4.1. Choosing the spark plug Spark plug used: Champion RG6YC. The spark plug used on this series of motorcycle has been carefully selected and matched to suit the largest working range. If the color of the spark plug when checked is different than the normal spark plug, please return to using the original recommended spark plug. -
Page 21: Air Filter
5. Air filter The air filter used is comprised of two stages of special foam. It is extremely important to keep the air filter clean for two reasons: If the air filter is caked with dirt/dust it will affect the intake system by increasing air resistance thru the filter which will cause the fuel mixture to become too rich, decreasing engine power. - Page 22 5.2.2. If you are riding in a dusty environment, shorten the period time between air filter inspection and replacement. If the filter element is found to be clogged and worn, if the engine's apparent power is reduced, and the fuel consumption is increased. The filter element needs to be replaced immediately. This condition cannot be corrected until maintenance is performed;...
-
Page 23: Carburetor
6. Carburetor Under an average load, climate and pressure conditions, the carburetor can be operated under normal conditions. However, in order to fine-tune the power output of the engine, the carburetor may need to be adjusted to your specific needs. As the following picture shows: (1) The choke knob (used when the engine is “cold”, detailed in the second section of this manual ("Starting the Motorcycle");... -
Page 24: Chain
7. Chain The drive chain life will depend on how often it is lubricated and adjusted. A lack of maintenance can result in premature wear or damage to the chain and/or sprockets. When operating your motorcycle in unusually dusty or muddy environments increase the frequency with which you clean & adjust the drive chain. If the chain or sprockets have reached their wear limit, they must be replaced together immediately. -
Page 25: Brake System
7.3.2.4. When installing the master link clip, make sure the open end faces the opposite direction of the chain rotation. 8. Brake system 8.1. Checking the brake fluid 8.1.1. Place the motorcycle on a flat surface and stand it up vertically; 8.1.2. - Page 26 8.1.6.2 Other inspections Check that the front brake assembly and the rear brake assembly are properly installed and that the bolts are secure. Make sure there is no fluid leakage, check the brake hoses and pressure fittings for signs of aging or cracks.
-
Page 27: Front And Rear Suspension
9. Front forks and rear shock 9.1 Front forks The front forks on your motorcycle are two-way adjustable. You can adjust the compression damping and rebound damping according to your personal preference, riding environment, or to suit different needs. Refer to the "Periodic Maintenance Table"... -
Page 28: Rear Shock Compression Damping Adjustment
In order to ensure optimal performance and normal operation the suspension requires after a certain period and after intense riding that the air bleeder screws be opened to release any trapped high-pressure air generated by the reciprocating action inside of the front forks. 9.1.1.3.1. - Page 29 state. The specific adjustment methods are as follows: Adjust the rebound damping adjustment bolt (2) to the middle position, while sitting on the motorcycle compress the rear shock absorber up and down, adjust the rebound damping counterclockwise or clockwise according to your personal preference and riding environment. Make sure that the two adjustments are not adjusted to the limit and 3-5 clicks of damping are reserved.
- Page 30 9.3.2. Poor handling adjustments Steering is heavy • Steering stem adjusting nut is too tight • Damaged steering head bearings Either wheel is wobbling • Excessing wheel bearing play • Bent rim • Improperly installed wheel hub • Excessively worn swingarm pivot bearings •...
- Page 31 • Change to a lighter fork oil • Decrease the fork oil capacity • Decrease the fork compression damping • Use a softer fork spring set Rear end hops over bumps while accelerating • Decrease shock preload • Decrease shock compression damping Rear end gets poor traction while accelerating away from a corner •...
-
Page 32: Wheels
10. Wheels 10.1. Spokes Keeping the rims true and maintaining proper spoke tension is a key to the safe operation of your motorcycle. During the break-in period, it is easy for the spokes to become loose. Excessive spoke looseness can cause high speed instability and loss of control. -
Page 33: Changing The Inner Tubes
10.2.3. Changing the inner tubes If the inner tube is punctured or damaged, you should replace it as soon as possible. A patched inner tube will not have the same reliability as a new inner tube and may affect your riding. We recommended you only buy new inner tubes for replacement. -
Page 34: Battery
11. Battery The battery used in your motorcycle is a lithium battery. Please charge it with a lithium type battery charger. 11.1. Installation of the battery 11.1.1 Check the battery voltage with a multimeter before installation. If the voltage is less than 12.4V, please charge it. - Page 35 11.4.5. Please DO NOT attempt to open the battery; 11.4.6. If the battery is found to have a strange odor, is hot, is deformed, the casing is fading, or any other abnormal conditions discontinue use. If any of these conditions occur while using or charging the battery, remove it from the motorcycle or discontinue charging it immediately.
-
Page 36: Bearings
12. Bearings 12.1. Steering stem bearings If you ride in wet, muddy or dusty environments, regularly clean, inspect and lubricate the steering stem bearings, it is very necessary to maintain their smooth operation. Place a stand under the engine to lift the front wheel 12.1.1 off the ground;... -
Page 37: Swingarm Bearings
bearing is not damaged. After all the parts are dry, apply a high-quality water proof grease to the needle bearings and inner bushings evenly; 12.2.6. Reinstall the removed parts in reverse order, tighten everything. Note: When reinstalling the spacers, oil seals and bolts, take note not to install the wrong sizes. 12.3. -
Page 38: Rear Wheel Bearings And Spacers
Note: Do not squeeze the front brake lever after the front wheel is removed; ensure that the front brake rotor is free from damage while it is apart; be sure to remove any grease that might get on the brake rotor during assembly. -
Page 39: Cleaning Your Motorcycle
Cleaning your Motorcycle Cleaning your motorcycle can effectively prevent dirt from getting caught in moving parts. This is the simplest preventive maintenance that you can perform that checks for damage, wear and oil leaks. When cleaning your motorcycle with a high-pressure cleaner, do not spray water directly into the electrical parts, plugs, cables, bearings, etc. - Page 40 Transporting If you use a truck or motorcycle trailer to transport your motorcycle, we recommend that you follow these guidelines: (1) Use a loading ramp (2) Remove the gasoline in the fuel tank and the carburetor (3) Use a motorcycle tie-down to secure the motorcycle in an upright position.
- Page 41 Storage If you do not use your motorcycle for a long time in winter or during other seasons, thoroughly check your motorcycle to solve any problems before storing it. To reduce or prevent problems that may occur during the storage period, please follow these guidelines: (1) Thoroughly clean all parts of your motorcycle.
-
Page 42: Troubleshooting
Troubleshooting Problem Reason Methods Wrong starting operation use the correct method 1. Charge the battery The engine doesn’t turn Battery discharging 2. Check the charging voltage over 3. Check why the battery was discharged Fuse blown Change the fuse Starter failure Check the starter Wrong starting operation use the correct method... - Page 43 1. Check the ignition coil Something wrong with ignition 2. Check the electrode stator winding 3. Check the spark plug The engine stopped while Lack of fuel Add fuel running Fuse blown Change the fuse The coolant is decreasing in the 1.
-
Page 44: Technical Parameters
Technical Parameters SR300S Engine Engine 300cc, water cooled, single cylinder, 4 stroke, kick/electrical start Bore diameter* stroke 82mm*53.6mm Compression ratio 10.6:1 Valve structure Single overhead cam 4 valves Fuel supply PWK34 carburetor Ignition type DC-CDI Maximum power 30.84hp/9000rpm Maximum torque 16.96 ft-lb/7000rpm... - Page 45 Rear shock 480mm, External reservoir, adjustable two-way damping Front brake 240mm disc brake, double piston caliper Rear brake 240mm disc brake, single piston caliper Dimensions Wheel base 57.08 inches Seat height 37 inches Ground clearance 11.4 inches Length*width*height 85.43*32.28*50 inches Net weight 256±2.2 lbs.
- Page 46 Wiring Diagram...
Need help?
Do you have a question about the SR300S and is the answer not in the manual?
Questions and answers