Table of Contents
Advertisement
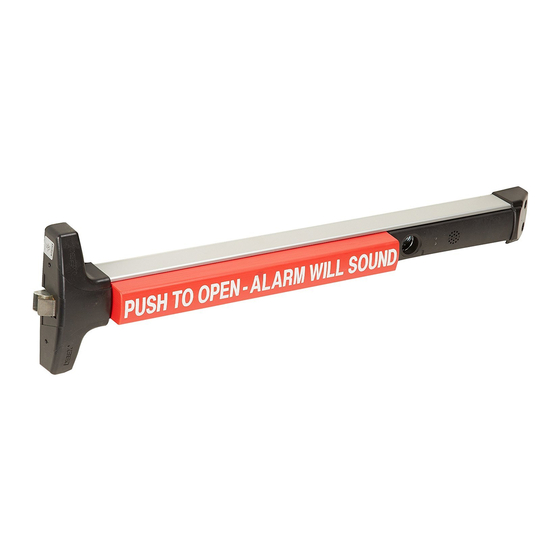
INSTALLATION INSTRUCTIONS FOR DETEX VALUE SERIES® V40 RIM PANIC HARDWARE,
FV40 RIM FIRE EXIT HARDWARE AND "H" MODELS (HURRICANE)
FV40 / V40 x EB, EH, EHxR, EX
Parts Check List
Centercase/Pushpad SubAssembly
P/N: 104350-X
Plastic Template
Use for ease of installation
Mounting plate
Subassembly
Latchbolt Monitoring
P/N: 100696-1
Centercase Assembly
P/N: 104354
99 Strike *, P/N: 100855-2
Non-Roller Strike
Strike Shim
P/N: 100234-1
P/N: 100088
98 Strike *, P/N: 100855-1
Mortise
Mortise Strike
Strike Shim
P/N: 100480
P/N: 100482
Strike Shield
P/N: 100481
Note: Parts listed above will vary
according to product configuration.
*Narrow Stile "NS" option
Mortise cylinder not included with device.
Standard Yale type cam required.
Detex Corporation, 302 Detex Drive, New Braunfels, Texas 78130-3045
(830)629-2900 / 1-800-729-3839 / Fax (830)620-6711
E-MAIL: detex@detex.com
RIM
Fillerplate SubAssembly
Pushpad Wrap
P/N: 101810-X (3-0)
P/N: 101815-X (4-0)
Centercase Cover
P/N: 101805-1
Standard
Plastic Template
P/N: 100212
2" Narrow Stile
Plastic Template
P/N: 101899
INTERNATIONAL PATENT NUMBER:
101275 Page 1
101275
INTERNET: www.detex.com
L9 = Less 9v Battery
SI = Status Indicator "ON"
Endcap
P/N: 101822
Fillerplate SubAssembly
(Electrified Models)
P/N: 104358-X
Fillerplate Subassembly (EX x LD)
P/N: 104357-1 (3-0)
P/N: 104357-3 (4-0)
Fillerplate SubAssembly (EX x HD)
P/N: 104355-1 (3-0)
P/N: 104355-3 (4-0)
Fillerplate SubAssembly (EX x CD)
P/N: 104356-1 (3-0)
P/N: 104356-3 (4-0)
U.S. PATENT NUMBERS:
6009732
6205825B1
6532777B2
PCT6009732
Owner's Copy
November 09, 2007
Endcap Bracket
P/N: 101844
P/N: 101821
Hex Nut
P/N: 100783
9V Battery
P/N: PP-5567
Hex Key
P/N: 100450
Hex Nut
P/N: 100783
See
For:
- Tamper Kit
- Double Door Strike Kit
- Key Stop Kit
- Narrow Stile Kit
Advertisement
Table of Contents

Related Manuals for Detex VALUE SERIES V40 x EB


Summary of Contents for Detex VALUE SERIES V40 x EB
- Page 1 (830)629-2900 / 1-800-729-3839 / Fax (830)620-6711 E-MAIL: detex@detex.com INTERNET: www.detex.com INSTALLATION INSTRUCTIONS FOR DETEX VALUE SERIES® V40 RIM PANIC HARDWARE, FV40 RIM FIRE EXIT HARDWARE AND "H" MODELS (HURRICANE) L9 = Less 9v Battery FV40 / V40 x EB, EH, EHxR, EX SI = Status Indicator "ON"...
- Page 2 Unreinforced Doors: Use Sex Nuts and Bolts structural and dimensional specifications for Unreinforced Frames: Use Blind Rivet Nuts (see sketch) door and frame preparation. Fasteners for unreinforced openings are not supplied by Detex. Narrow Stile Reinforcement Reinforced door or frame engages at Minimum door stile 2"...
-
Page 3: Tools Required
Fastener Table Tap Wrench Comments Drill Bit Use Either Machine Screws, Sheetmetal Screws, or Sex Nuts Machine Screws #6-32 x 5/8" #36 or 7/64 #6-32 Tap Used on 98 Strike Shield Mounting Holes ----- #6-32 x 3/8" ----- Used to Mount Centercase Cover and Endcap #25 or 9/64"... - Page 4 Mounting plate hole If necessary, remove label temporarily to mark trim hole Strike holes Mounting plate Hole Mark mounting plate Slide 99 strike locator and strike holes into mounting plate. (if using a 98 strike, see 98 STRIKE INSTALLATION page) Punch marked holes Mounting plate holes (2)
- Page 5 Insert centercase into slots of centercase mounting plate, depress pushpad, rotate toward door. Position cam as shown DOOR Fasten rim device to mounting plate with 1/4-20 x 1/4" PPH MUST BE INSTALLED! Peel off backing to expose tape. Install Pushpad Wrap. Verify wrap is secured by snapping in place.
- Page 6 CHECKING FOR DEVICE CLEARANCE (Cut-Off procedure if required) Slide endcap assembly onto extrusion Align fillerplate FLUSH to extrusion prior to cutting Secure Install battery with (where required) tape Length Type 36" Unit 48" Unit Electrified 2 in 8 in model 6 in 12 in CAUTION:...
- Page 7 MORTISE CYLINDER INSTALLATION Refer to switch options pages Longer cylinder See View A (see note 3) Cylinder collar optional (Detex p/n: ECL-1595) Slide/remove the fillerplate subassembly Adjust for LONGER cylinder length with spacers (provided) Install mortise and cylinder collar (not included)
- Page 8 Slide fillerplate & endcap bracket into extrusion & level pushpad assembly. Note: Endcap Bracket must bottom-out on extrusion. DO NOT REMOVE NYLON SPACER ON BACK OF BRACKET! With pushpad assembly level, secure the endcap bracket to door by tightening the factory installed self-drilling screw.
- Page 9 Install cover with 6-32 Care and Maintenance: machine screws. Tighten The Detex Value Series® devices are designed to provide many years of maintenance with hand tools only. free service under normal usage. Periodically inspect and lubricate the unit to extend its life.
- Page 10 SWITCH OPTIONS Switch selections must be made before applying power or installing battery (See Figure 1) Table 1 Status Indicator Status Description See Table 3 Off (factory set) The Device gives no indication of armed or disarmed status. (jumper w/L9) The Device flashes red or green LED every 3 seconds.
- Page 11 L9SI SWITCH OPTIONS L9 = Less 9v battery SI = Status indicator Switch selections must be made before applying power. L9SI factory presets Status Indicator The Device flashes red or green LED every 3 seconds. Alarm sounds until turned off with key. Disable Auto rearm Disable Low Battery Jumper...
- Page 12 HARDWIRE TRANSFER OPTIONS (EH and EHxR models) (Requirements: Minimum 6 Conductor Wires, Maximum 12 Conductor Wires) Power Transfer Endcap Prep Electric Hinge Endcap Prep Electric Hinge Order by finish Power Transfer Wire chase through door p/n: EWH8-X Wire chase through door p/n: PT-5 1/2"...
- Page 13 1. When the unit is in full alarm and the door closes, the alarm will shut off after 2 minutes. Care and Maintenance: The Detex Value Series® devices are designed to provide many years of maintenance free service under normal usage. Periodically inspect and lubricate the unit to extend its life.
-
Page 14: Technical Support
V40 EB/EH and LBM Troubleshooting Tips for Default Setting EB/EH (Bar Monitoring) PROBABLE CAUSE ACTION PROBLEMS Dead or weak battery. Install new battery, LED's should flash and the No LED activity when key is siren beep once. turned CCW to armed position Battery not secured to connector Secure battery correctly. - Page 15 Align the strike with 98 STRIKE INSTALLATION the latchbolt. 98 Strike locator Firmly tighten screws (when required) Shield (if necessary) Door frame Shim (if necessary) 98 Strike Cutout per 98 Strike Mark and drill holes as necessary. #7 for 1/4-20 machine screws, For #14 self-drilling screws, no pilot hole necessary 7/64"...
-
Page 16: Optional Accessories
Optional Accessories Glass Bead Kit Catalog No: GB2 - Glass Bead Kit, 40 series p/n: 101644 #1/4-20 X 1-1/2" Screw (4) Included Sex Nut The #10-32 kit is available in (4) finishes: The #1/4-20 kit is available in (4) finishes: Catalog No: SN2 Brushed Brass BHMA 606 Finish Catalog No: SN1...
Need help?
Do you have a question about the VALUE SERIES V40 x EB and is the answer not in the manual?
Questions and answers