Advertisement
Quick Links
Advertisement

Related Manuals for CHIEF EZ LINER EXPRESS


Summary of Contents for CHIEF EZ LINER EXPRESS
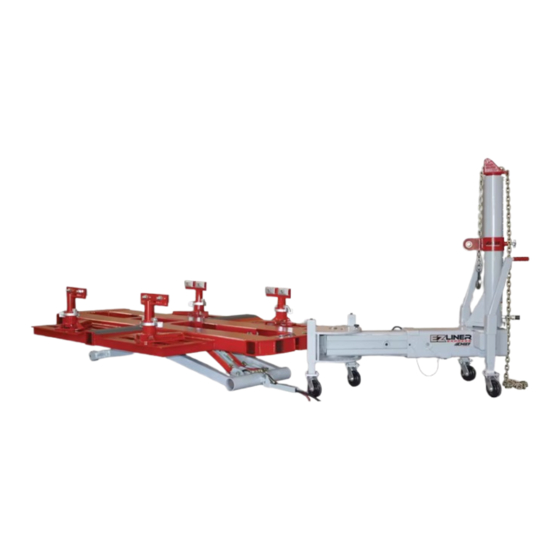
- Page 1 EZ LINER EXPRESS USERS MANUAL 2013 © Vehicle Service Group...
-
Page 2: Warranty And Liability
WARRANTY & LIABILITY Chief Automotive Technologies warrants for one year from date of installation and/or purchase any components of its EZ Liner Express Repair System which do not perform satisfactorily due to defect caused by faulty material or workmanship. Chief’s... -
Page 3: Important Safety Instructions
EZ LINER EXPRESS USERS MANUAL IMPORTANT SAFETY INSTRUCTIONS When using your garage equipment, basic safety precautions should always be followed, including the following: 1. Read all instructions. 2. Care must be taken as burns can occur from touching hot parts. - Page 4 EZ LINER EXPRESS USERS MANUAL I. Lift Pump Assembly 1. Assemble Pump Holder by placing the handle shaft over 4. Connect the Safety Latch airline from the lift to the quick the stem on the base. Insert locking pin at bottom of the disconnect on the Air Valve Assembly on the side opposite handle shaft (see Figure 1).
-
Page 5: Tower Assembly
EZ LINER EXPRESS USERS MANUAL II. Tower Assembly 3. Install the Collar Assembly on the Tower Pipe (see 1. Set the brake on the Rear Casters (see Figure 4). Figure 6). Align the handle end of the Collar Assembly with the fourteen Collar Pin holes on the back of the Tower Pipe. - Page 6 EZ LINER EXPRESS USERS MANUAL 5. Reinstall the ½-13NC HHCS and ½” washer into the top of the Tower Pipe (see Figure 8). 1/2-13NC HHCS Figure 8 6. Remove the (4) M6 tower leg retaining bolts (see Figure 9). 7. Screw in the (4) M20 tower leg height adjustment bolts so that approximately 2”...
- Page 7 EZ LINER EXPRESS USERS MANUAL 8. Insert the Tower Pump Storage Ring into one of the 10. Connect the hose from the Tower Pump to the female brackets on the rear of the Side Supports of the Tower disconnect protruding from the cylinder in the Tower (see Figure 10).
- Page 8 EZ LINER EXPRESS USERS MANUAL III. Set Stabilization Leg Height Pump Figure 13 1. Raise the lift by pressing the pump portion of the pedal on the Lift Pump until the mainframe reaches the height where Tower Insert Plug can be inserted into the Mounting Port on the mainframe (approximately the height where the Safety Latch falls into the first Latch position) (see Figures 13 and 14).
- Page 9 EZ LINER EXPRESS USERS MANUAL 6. Disengage the Safety Latch by pressing the Release Button on the Air Valve on the Pump Stand. And lower the lift Release Button completely by pressing the release portion on the pedal of the Lift Pump (see Figure 16).
-
Page 10: Verify Installation
EZ LINER EXPRESS USERS MANUAL V. Verify Installation VI. Safety Instructions: 1. Verify that with a vehicle that the vehicle lift has been 1.) Remain clear of lift whenever raising or lowering a installed correctly and the safety latch and stabilization vehicle. - Page 11 To prevent personal injury or death from explosion or fire: WARNING 1. Vehicles with fuel leaks should not be placed on the EZ Liner Express. 2. Fuel tanks must not be removed or replaced on the EZ Liner Express. 3. Cleanup and ventilation of fuel spills is mandatory before operating the electric pump, grinding, welding, drilling or smoking.
- Page 12 EZ LINER EXPRESS USERS MANUAL IX. Raise Vehicle 1. Press the pump portion on the pedal of the Lift Pump (see Figure 21) to raise the mainframe until the Lift Pads contact the structural components of the vehicle (see Figure 22).
- Page 13 EZ LINER EXPRESS USERS MANUAL X. Lower Vehicle to Wheel Stands 1. Lower the vehicle by pressing the release portion on the pedal of the Lift Pump until the vehicle starts to make contact with the Wheel Stands (Figures 24 and 25).
- Page 14 EZ LINER EXPRESS USERS MANUAL XI. Install Anchor Stands 1. Install the UMS Adapter in Anchoring Stand Base and position stand at front of the center section on side of vehicle that must not move with pull (see Figure 27 & 28).
- Page 15 EZ LINER EXPRESS USERS MANUAL (End View) Pinchweld Flange (End Rocker View) Locating Plate UMS adapter Tube Clamp Jaw Assembly Fastener Plate Figure 30 8. Secure anchoring stands to mainframe. a. Install the fastener plates on the bottom of the Figure 29 mainframe in the same slots as the locating plates.
- Page 16 EZ LINER EXPRESS USERS MANUAL XII. Raise Lift and Vehicle to Pulling Height and Lower Stabilizating Legs 1. Raise the lift and vehicle by pressing the pump portion of the pedal on the Lift Pump until the all of the Stabilization Legs can fall and become completely vertical (see Figure 31).
- Page 17 EZ LINER EXPRESS USERS MANUAL 2. Push the Tower (using handles) so that the Tower Insert Plug is inserted into and fully engages the Mounting Port. To ensure full engagement, place the tower/mainframe pin into the pinhole on the mainframe. The...
- Page 18 EZ LINER EXPRESS USERS MANUAL Pump Release 45° Figure 37 8. Remove the Tower Pump from the Tower Pump Storage Ring (see Figure 37) and position pump away from the tower and out of the direct line of the pull.
- Page 19 CAUTION 1) Only one pulling device may be used at a time. 2) Only an EZ Liner Express tower or lifting device provided with this product may be used. No exceptions! 3) DO NOT use tower to make a pull until vehicle is secured to mainframe.
- Page 20 EZ LINER EXPRESS USERS MANUAL XIV. Vehicle Unloading 1. Replace the wheels on the vehicle if they were removed. Clamp Jaws Ums Adapter Locking Collar Height Adjusting Pin Fastener Bar Figure 40 2. Loosen the Clamp Jaws and Locking Collars (see Figure 40).
- Page 21 EZ LINER EXPRESS USERS MANUAL Figure 42 4. Raise the mainframe and vehicle high enough to be able to place the wheel stands under the tires of the vehicle by pressing the pump portion of the pedal on the Lift Pump (see Figure 42).
- Page 22 EZ LINER EXPRESS USERS MANUAL Release Button 6. Disengage the Safety Latch by pressing the Release Button on the Air Valve on the Pump Stand (see Figure 44). 7. Lower the vehicle by pressing the release portion on the pedal of the Lift Pump until the vehicle starts to make Pump contact with the Wheel Stands (see Figure 44).
- Page 23 EZ LINER EXPRESS USERS MANUAL 12. Place the Lift Pads into the Support Holders. Figure 46 13. Raise the mainframe and Support Stands up to the vehicle and lift the vehicle off of the Wheel Stands by pressing the pump portion of the Lift Pump (see Figure 46).
- Page 24 EZ LINER EXPRESS USERS MANUAL Release Button 16. Disengage the Safety Latch by pressing the Release Button on the Air Valve on the Pump Stand and lower the lift completely by pressing the release portion on the pedal of the Lift Pump (see Figure 48).
-
Page 25: Inspection And Maintenance
XV Inspection and Maintenance Daily -Inspect hydraulic and pneumatic hoses for damage -Inspect hydraulic hoses for leaks -Inspect chain for damage Monthly -Inspect safety latch functionality -Inspect deck for damage -Grease rollers, wheels, and pins -Grease tower insert plug Yearly -Replace hydraulic fluid with Mobil DTE 13M or equivalent... -
Page 26: Troubleshooting
EZ LINER EXPRESS USERS MANUAL Troubleshooting: Symptom Possible Causes Corrective Action Cylinder does not extend, • Lift is overloaded • Remedy overload move or respond to condition pressurized fluid • Loose couplers • Tighten couplers • Faulty couplers • Replace couplers •... - Page 27 EZ LINER EXPRESS USERS MANUAL Troubleshooting: Lift is making unusual • Rollers, wheels, and pins • Grease rollers, wheels, sounds do not have adequate and pins lubrication Safety Latch is not • Corrosion • Lubricate latching engaging or disengaging mechanism •...
- Page 28 EZ LINER EXPRESS USERS MANUAL Tower Extension Instructions Tower Nose (3) M30 HHCS 90 ft/lbs Torque 1. Caution: 18" Extension is Heavy. Team lift is recommended. 2. Insert Tower Nose into receptacle of 18" Extension. 3. Visual inspect and confirm Tower nose has been fully inserted and is seated tight against 18"...
- Page 29 EZ LINER EXPRESS USERS MANUAL Tower Extension Instructions Receptacle 18" Extension Remove and Discard (2) M6 HHCS Spacer M10 Hex Nut & Washer Shoulder Bolt M10 HHCS Rear Leg Bracket 1. Remove and Discard (2) M6 HHCS located in back of Caster Leg.
- Page 30 NOTES:...
- Page 31 NOTES:...
- Page 32 996 Industrial Drive Madison, IN 47250 Phone: 800-445-9262 Fax: 866-275-0173 www.chiefautomotive.com Chief reserves the right to alter product specifications and/or package components without notice. Part No. 556024, CO8497 Rev. C, 2.11.13...
Need help?
Do you have a question about the EZ LINER EXPRESS and is the answer not in the manual?
Questions and answers