Advertisement
Quick Links
Advertisement

Related Manuals for Singer 700 Series


Summary of Contents for Singer 700 Series
- Page 1 700 Series Touch & Sew Tension repair guide...
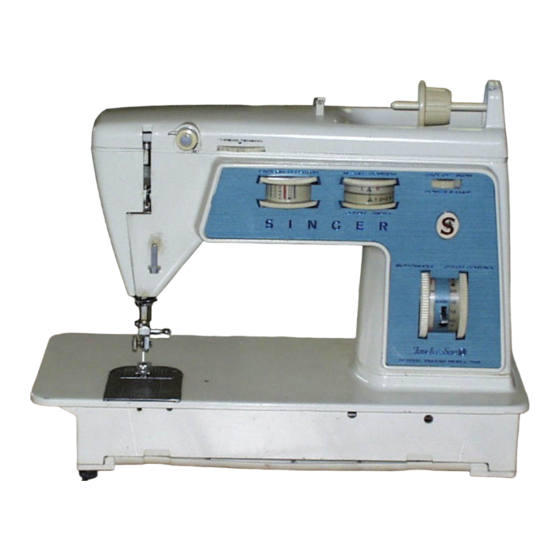
- Page 2 This guide will walk you through the entire process of cleaning, repairing and adjusting the top tension unit on any 700 Series Touch & Sew machine. Common models include: 750 – 758 – 756 – 770 – 771 – 776 – 778 – 775 – 774 As with all my guides, it is assumed the user is handy with their tools, and at some point in time, has had the machine open for oiling and cleaning.
- Page 3 Basic Tension Parts: Shown to the right, fig 1, is the basic T&S top tension unit Lets break it down and become familiar with the parts, fig 2 63 – tension cap / regulator nut 64 – tension cap – plastic 65 –...
- Page 4 Tension Disassembly: Using the rounded end needle noise pliers, or other tool available, remove the tension cap regulator nut. Turn counter clockwise, fig 1 Fig 1 Remove the plastic tension cap, and inspect for any damage. This part should be free of nicks, or other areas that could snag the thread during sewing.
- Page 5 Tension Reassembly: Before putting the unit back together, lets inspect some of the parts, and ensure they are in good working order. Any broken or damaged part will need to be replaced, or repaired as best possible until you can obtain a replacement part Figure 1 shows us the tension stud disassembled.
- Page 6 Adjusting The Tension: If the tension was properly working at one time or another before having to repair it, it’s a pretty safe bet that adjusting will not be necessary. These come preset from the factory, and should not require adjusting. Fig 1 Common problems are the plastic part on the tension stud breaking, allowing the check spring to loose proper return pressure, the discs are full of crude, or rusted up, and finally the...
- Page 7 Reassemble Covers – Threading: Install the side cover and arm top cover, thread the machine up and see how you’ve done Tips on threading: Turn the tension dial to 5, ensure the presser foot is up Thread the machine as far as the take-up lever and stop Pull on the thread some, and then set the presser foot down, continuing to pull on the thread.