Advertisement
Advertisement
Table of Contents

Subscribe to Our Youtube Channel
Summary of Contents for REI ST-4050
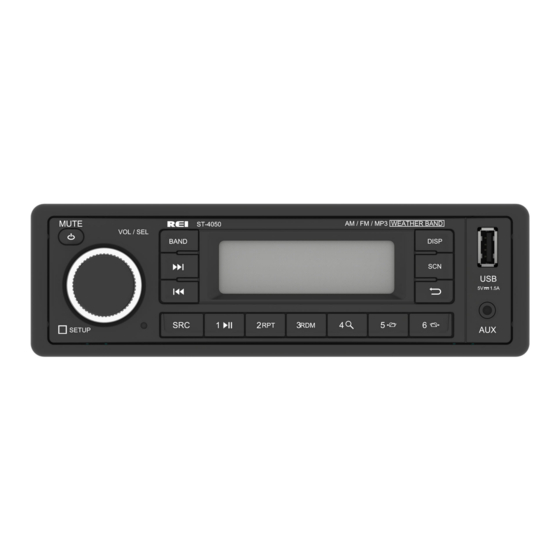
- Page 1 Heavy Duty Digital Media Receiver with Short Chassis Design, AM/FM Stereo Weather Band Radio, USB iPod® Control and Charging, Front/Rear Auxiliary Inputs and built in PA Radio Engineering Industries, Inc. www.radioeng.com Rev A.0 Date: 4-10-19 Installation/ Operation Manual 50W x 4 ST-4050...
- Page 2 Thank you for purchasing ST-4050 AM/FM/CD Receiver from REI. This product is NOTES: designed and tested to with stand temperature and vibration extremes. Please read the owner’s manual carefully before attempting to install this unit. If you have an installation question or need installation assistance, please call the: SERVICE HOT LINE 1-877-726-4617 Toll Free USA &...
-
Page 3: Controls And Indicators
CONTROLS AND INDICATORS 1. Power/Mute Button 2. Volume/Select Knob 3. Scan /Search Button 4. Band Button 5. Tune /Seek/Track Down Button 6. Tune /Seek/Track Up Button 7. Preset Memory/Recall, Media Control Buttons 8. Front USB Input 9. Back Button 10. Display Button 11. -
Page 4: Operation
OPERATION POWER/MUTE Button Press the Power Button to turn the unit ON or hold to turn the unit OFF. The button will illuminate RED when OFF and BLUE when ON. When ON, press to MUTE the audio on/off. Note: Radio can also be powered on by pressing any front button. VOLUME/SELECT Knob Rotate the knob left or right to change the volume level. -
Page 5: Specifications Audio Section
USB Input SPECIFICATIONS Insert a USB drive and the radio will automatically switch to USB input and begin AUDIO SECTION playback. Power supply voltage (negative ground) ……………….……….12V DC (10V-18V) Standby Current…...……………………..…………..……………….……..…<5mA 9) BACK Button Max Current Consumption……….……………………….……….….………..10A Press this button to navigate Backwards when in Apple playback modes: Speaker impedance …………………….……………….….…4-8 Ohms per channel Maximum Pre-output Voltage……….…........2.0Vrms/10k ohms 10) DISP Button... -
Page 6: Troubleshooting
WEATHER BAND MODE NOAA National Weather Radio Broadcasts from over 380 Locations throughout the U.S. on seven VHF/FM frequencies. Tune to receive continuous weather TROUBLE SHOOTING information 24 hours a day on one of the following frequencies. Problem Cause Solution For local station listing see: http://www.nws.noaa.gov/nwr/nwrbro.htm Radio will not power up No power to BATTERY wire or blown 10A... -
Page 7: Radio Operation
VER XXXX If additional support is needed, bend the included support bracket, and secure it This is the firmware version present on the radio. Not all features described to the vehicle using a screw. Secure the opposite end to the radio’s rear stud using the in this manual may be available on the radio at this time. -
Page 8: Usb Operation
USB OPERATION INSTALLING THE RADIO Connect a USB storage device to the unit. The radio will automatically switch Place the DIN collar into the dash opening. Bend the tabs outward as shown on MODE’S and begin playback after the media is successfully loaded. Use the the drawing below to lock into place. -
Page 9: Electrical Connections
iPod®/iPhone® OPERATION ELECTRICAL CONNECTIONS To listen to audio through your apple device, verify that a Certified USB extension Follow this easy wiring diagram when installing Radio and Speakers. is connected to the USB pigtail on the rear of the radio. Next, connect the USB Warning: cable to the Apple device. -
Page 10: Optional Remote Control
Apple Inc., registered in the U.S. and other countries. Functionality may vary by model number, operation is not guaranteed. The Bluetooth® word mark and logos are registered trademarks owned by Bluetooth SIG, Inc. and any use of such marks by REI under license.


Need help?
Do you have a question about the ST-4050 and is the answer not in the manual?
Questions and answers