
Related Manuals for Kingfisher NE15EPC


Summary of Contents for Kingfisher NE15EPC
- Page 1 RADIANT PANEL HEATER NE10EPC 840-1000W 3663602912880 NE15EPC 1250-1500W 3663602912897 NE20EPC 1680-2000W 3663602912903 NE5EPC 420-500W 3663602688525 NE10PCS 840-1000W 3663602688556...
-
Page 2: Table Of Contents
Let’s get started… These instructions are for your safety. Please read through them thoroughly before use and retain them for future reference. Getting started… Safety Before you start Quick start In more detail… Technical and legal information Care and cleaning Environment protection... -
Page 3: Safety
Safety PLEASE READ SAFETY INSTRUCTIONS CAREFULLY BEFORE USING THE UNIT. This appliance can be used by children aged from 8 years and above and persons with reduced physical, sensory or mental capabilities or lack of experience and knowledge if they have been given supervision or instruction concerning use of the appliance in a safe way and understand the hazards involved. - Page 4 Safety If the power cord is damaged, it must be replaced by the manufacturer, its service agent or similarly qualified persons in order to avoid a hazard. The appliance should not be placed immediately below a socket. WARNINGS :In order to avoid overheating, do not cover the heater.
- Page 5 Safety If being fitted in a bathroom, a 30mA RCD must be used. With respect to the details of how to install the appliance onto the wall, refer to "INSTALLATION" on pages 9-11.
-
Page 6: Before You Start
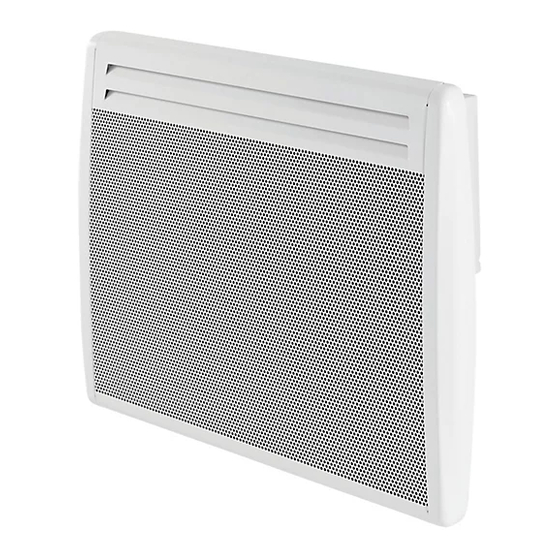
Never allow children or persons unable to operate the appliance safely to use this appliance without supervision. Please dispose of plastic bags carefully and keep them away from children. Your product 1. Body 2. Control panel 3. Wall-mounted kits NE10EPC/NE15EPC NE10PCS /NE20EPC NE10EPC Description Drawing /NE15EPC NE5EPC... - Page 7 Before you start This heater is for wall mounting only. Do not attempt to use it free standing. You need to follow the below requirements when you install your heater: THIS PRODUCT IS SUITABLE FOR BATHROOMS ZONE 2 AND OUTSIDE ZONE; - Means for disconnection having a contact separation in all poles must be incorporated in the fixed wiring in accordance with the wiring rules.
- Page 8 Before you start This product is suitable for use in living areas, and Bathroom dry (Outside) Zones only (see diagram below and current IET Wiring Regulations for details). It is not suitable for Bathroom Zones 0,1, or other areas where contact with moisture is likely.
- Page 9 3. Verify that the bracket is perfectly horizontal with a spirit level and mark the location of holes (4 holes for NE10EPC/NE15EPC/NE20EPC, 3 holes for NE5EPC, 2 holes for NE10PCS) on the wall. Insert the pegs into the holes, then screw securely wall mount bracket onto the wall.
- Page 10 Before you start FIXINGS FOR NE10EPC/NE15EPC/NE20EPC FIXINGS FOR NE5EPC...
- Page 11 Before you start FIXINGS FOR NE10PCS...
-
Page 12: Quick Start
Quick start LCD display: Functions of the icons on the LCD: Symbol Function Mode Standby (the appliance doesn’t work but with power on) Mode Anti-freeze (the appliance maintains the temperature around 7°C) Mode Comfort (set the desired temperature) Mode ECO (ECO maintains the temperature that is 3.5 ° C lower to comfort temperature. This mode reduces the temperature without disturbing the desired temperature in comfort mode) Mode P (Under mode P , the appliance will work at comfort mode as default (except for... -
Page 13: Control Panel
Quick start CONTROL PANEL Symbol Function Set the time, day of the week, the temperature; or under weekly Touch personalized programs, to choose between comfort mode, eco mode or standby mode. Standby Touch Touch To choose the weekly personalized program Touch To select Window detector function Touch... - Page 14 Quick start II. Temperature setting 1. Under the mode of comfort mode or Eco mode (excluding anti-freezing mode), press to choose the desired temperature. The temperature difference between mode ECO and mode comfort is 3.5°C, so the temperature of mode ECO is between 1.5°C and 25.5°C.
- Page 15 Quick start 4. Press other buttons except to finish the setting, or after 10 Seconds it will automatically save. IV. Program setting 1. Pre-installed programs P1/P2/P3 Mon-Sun day workables weekends day workables weekends P1 / P2 / P3 programs are pre-installed programs. After confirming the program, the program icon and the set temperature will be shown on the screen.
- Page 16 Quick start Day of the week Hour 2. Press the PRG button again, press to choose the hour, to choose comfort mode and then repeat for the entire 24 hours. 3. After 30 seconds without action, the setting is saved. Notes: In case of power failure, the unit keep in memory only the parameters, temperature and operating mode.
- Page 17 Quick start VI: Window detector function Press button to enter window detector function. The appliance will enter comfort mode as default. If temperature decrease detected, the appliance will automatically enter anti-freeze mode. If temperature rise up, the appliance will go back to comfort mode. You can press M or PRG button to choose other modes, or press standby button to enter standby mode.
-
Page 18: In More Detail
In more detail… Technical information Care and cleaning Environmental protection... -
Page 19: Technical Information
Model no. Dimension & Frequency (Watt) H x W x D (mm) NE10EPC 840-1000W 450x570x110 Double isolation IPX4 220-240V~ 50/60Hz CLASS II NE15EPC Double isolation IPX4 220-240V~ 1250-1500W 450x720x110 50/60Hz CLASS II NE20EPC 220-240V~ Double isolation IPX4 1680-2000W 450x870x110 50/60Hz... - Page 20 [yes] detection with distance control option [no] with adaptive start control [no] with working time limitation [no] with black bulb sensor [no] Kingfisher International Products Limited Contact details 3 Sheldon Square, London W2 6PX, United Kingdom...
- Page 21 Technical information Information requirements for electric local space heaters Model identifier(s): NE15EPC Item Symbol Value Unit Item Unit Type of heat input, for electric storage local space Heat output heaters only (select one) manual heat charge control, with integrated Nominal heat output...
- Page 22 [yes] detection with distance control option [no] with adaptive start control [no] with working time limitation [no] with black bulb sensor [no] Kingfisher International Products Limited Contact details 3 Sheldon Square, London W2 6PX, United Kingdom...
- Page 23 [yes] detection with distance control option [no] with adaptive start control [no] with working time limitation [no] with black bulb sensor [no] Kingfisher International Products Limited Contact details 3 Sheldon Square, London W2 6PX, United Kingdom...
- Page 24 [yes] detection with distance control option [no] with adaptive start control [no] with working time limitation [no] with black bulb sensor [no] Kingfisher International Products Limited Contact details 3 Sheldon Square, London W2 6PX, United Kingdom...
-
Page 25: Care And Cleaning
Care and cleaning CARE AND CLEANING 1. Before cleaning the appliance, switch off the appliance supply and wait until it is completely cooled. 2. Use a damp cloth to clean the housing of the device. 3. Clean grilles and air outlet regularly. 4. - Page 26 Environmental protection ENVIRONMENTAL PROTECTION This symbol is known as the 'Crossed-out Wheelie Bin Symbol'. When this symbol is marked on a product or battery, it means that it should not be disposed of with your general household waste. Some chemicals contained within electrical/electronic products or batteries can be harmful to health and the environment.
- Page 27 Manufacturer: Kingfisher International Products Limited 3 Sheldon Square London W2 6PX United Kingdom Distributor: B&Q plc Distributor: SFD Limited Chandlers Ford, Hants, Trade House, Mead Avenue SO53 3LE United Kingdom Yeovil www.diy.com A22 8RT, United Kingdom www.screwfix.com...
- Page 28 PANNEAU RAYONNANT HE10EPC 1000W 3663602912910 HE15EPC 1500W 3663602912927 HE20EPC 2000W 3663602912934 HE5EPC 500W 3663602688532 HE10PCS 1000W 3663602688563...
-
Page 29: Table Of Contents
C’est parti… Ces instructions visent à assurer votre sécurité. Veuillez les lire très attentivement avant utilisation, puis les conserver pour pouvoir vous y référer ultérieurement. Pour bien commencer… Sécurité Avant de commencer Utilisation rapide Et dans le détail… Informations techniques et légales Entretien et nettoyage... -
Page 30: Sécurité
Sécurité MERCI DE BIEN VOULOIR LIRE LES CONSIGNES DE SÉCURITÉ ATTENTIVEMENT AVANT D’UTILISER L'APPAREIL. • Cet appareil peut être utilisé par des enfants âgés d'au moins 8 ans et par des personnes ayant des capacités physiques, sensorielles ou mentales réduites ou dénuées d’expérience ou de connaissance, s'ils (si elles) sont correctement surveillé(e)s ou si des instructions relatives à... - Page 31 Sécurité prêter une attention particulière en présence d'enfants et de personnes vulnérables. • Si le câble d’alimentation est endommagé, il doit être remplacé par le fabricant, son service après vente ou des personnes de qualification similaire afin d’éviter un danger. •...
- Page 32 Sécurité personne dans la baignoire ou la douche. Un moyen de déconnexion du réseau d’alimentation ayant une distance d’ouverture des contacts de tous les pôles doit être prévu dans la canalisation fixe conformément aux règles d’installation. Avertissement: si cet appareil est installé dans une salle de bain, il doit être installé...
-
Page 33: Avant De Commencer
Avant de commencer Liste des informations à vérifier avant de commencer Pour une utilisation domestique uniquement. Les enfants ou les personnes incapables d’utiliser l’appareil de façon sûre ne doivent jamais utiliser cet appareil. Merci de bien vouloir jeter les emballages plastiques et les garder hors de portée des enfants. - Page 34 Avant de commencer rapport au niveau du sol. • N’installez pas l’appareil dans un flux d’air susceptible de perturber sa régulation (ex. sous une climatisation, VMC, …) Mise en garde : à faire installer par un professionnel selon la norme d’installation applicable dans chaque pays (NF C 15 100 pour la France ou équivalent pour les autres pays)
- Page 35 Avant de commencer suspension inférieurs avec les crochets inférieurs du support de fixation murale. B: Poussez le chauffage vers le bas jusqu'à ce que les crochets s'encastrent dans les trous. C: Positionnez le chauffage en sorte d’aligner ses trous de suspension supérieurs avec les crochets supérieurs du support de fixation murale.
- Page 36 Avant de commencer FIXATION POUR HE5EPC FIXATION POUR HE10PCS...
- Page 37 Avant de commencer CONNEXION ELECTRIQUE L’appareil est alimenté en 230V 50Hz Raccorder le câblage 3 fils comme suit : Marron=phase, Bleu=Neutre, noir=filpilote Appareil de la classe II (double isolation). Le raccordement à la terre est interdit. Ne pas brancher le fil pilote (noir) à la terre. En l’absence de fil pilote, isolez le bout dénudé...
-
Page 38: Utilisation Rapide
Utilisation rapide Ecran LCD: Icônes fonctionnelles de l’écran LCD: Symbole Fonction Mode veille (l’appareil ne fonctionne pas mais est mis sous tension) Mode hors gel (l’appareil maintient la température ambiante à environ 7°C) Mode confort (réglage de la température souhaitée) Mode eco (maintient la température ECO qui est égale à... - Page 39 Utilisation rapide Les commandes Symbole Fonction permet de moduler le temps, le jour de la semaine, la température OU via Touche les réglages personnalisés de choisir entre le mode confort, le mode éco ou le mode veille. veille/marche Touche Touche PRG permet de choisir le programme personnalisé...
- Page 40 Utilisation rapide 2.Appuyez sur la touche M pour choisir l’un des 6 modes: Mode confort , mode économique , mode hors-gel , P1/ P2/ P3/ Pilote Sous le mode Pilote , réglez le chauffage à l'aide du programmateur externe. Réglage du mode Sous le mode Pilote , réglez le chauffage à...
- Page 41 Utilisation rapide 1. Appuyer sur les touches en même temps pour régler le temps. 2. Appuyer sur la touche pour appuyée pour basculer parmi heure/minute/ semaine. 3. Appuyez sur la touche pour régler heure/minute/semaine. Jour de la semaine temps 4. Appuyer sur les autres boutons excepté les touches pour confirmer le réglage, ou le réglage sera confirmé...
- Page 42 Utilisation rapide Les programmes P1/P2/P3 sont des programmes préinstallés. Une fois le programme confirmé, l’icône du programme et la température de la pièce seront réglés à l’écran. 2.Réglage du programme personnalisé Appuyer sur la touche PRG pour régler le "jour (1 à 7)” et le "mode de chauffage des différentes plages horaires (00:00 à...
- Page 43 Utilisation rapide ATTENTION: 1. Le bouton de Veille est encore disponible quand le verrouillage du clavier est activé. 2. Le clavier est déverrouillé si: 1) L'appareil est mis en veille en appuyant sur le bouton 2) L'appareil est déconnecté du réseau d'alimentation. Il faut appuyer à...
-
Page 44: Et Dans Le Détail
Et dans le détail… Informations techniques et légales Entretien nettoyage Garantie... -
Page 45: Informations Techniques Et Légales
Informations techniques et légales Caractéristiques Techniques Modèle / REF Voltage Puissance Dimension Classe & Fréquence (Watt) produit H x L x P (mm) HE10EPC 1000W 230V~50Hz Double isolation IPX4 450x570x110 CLASSE II HE15EPC 230V~50Hz 1500W Double isolation IPX4 450x720x110 CLASSE II HE20EPC 230V~50Hz 2000W... - Page 46 à distance [non] [non] contrôle adaptatif de l'activation limitation de la durée d'activation [non] [non] capteur à globe noir Coordonnées de Fabricant Kingfisher International Products Limited 3 Sheldon Square, London W2 6PX, United Kingdom contact:...
- Page 47 à distance [non] [non] contrôle adaptatif de l'activation limitation de la durée d'activation [non] [non] capteur à globe noir Coordonnées de Fabricant Kingfisher International Products Limited 3 Sheldon Square, London W2 6PX, United Kingdom contact:...
- Page 48 à distance [non] [non] contrôle adaptatif de l'activation limitation de la durée d'activation [non] [non] capteur à globe noir Coordonnées de Fabricant Kingfisher International Products Limited 3 Sheldon Square, London W2 6PX, United Kingdom contact:...
- Page 49 à distance [non] [non] contrôle adaptatif de l'activation limitation de la durée d'activation [non] [non] capteur à globe noir Coordonnées de Fabricant Kingfisher International Products Limited 3 Sheldon Square, London W2 6PX, United Kingdom contact:...
- Page 50 à distance [non] [non] contrôle adaptatif de l'activation limitation de la durée d'activation [non] [non] capteur à globe noir Coordonnées de Fabricant Kingfisher International Products Limited 3 Sheldon Square, London W2 6PX, United Kingdom contact:...
-
Page 51: Entretien Et Nettoyage
Entretien et nettoyage ENTRETIEN ET NETTOYAGE 1.Avant de nettoyer I’appareil, coupez son alimentation et attendez qu’il soit complètement refroidi. 2.Utilisez un chiffon humide pour nettoyer la coque de l’appareil. 3.Nettoyez les grilles d’entrée et sortie d’air régulièrement. 4.N’utilisez pas d’eau, de détergents abrasifs liquides ou des agents chimiques (alcool, essence, etc.) pour nettoyer l’appareil. -
Page 52: Garantie
Protection de l’environnement Garantie PROTECTION DE L’ENVIRONNEMENT Ce produit est marqué du symbole du tri sélectif relatif aux déchets d’équipements électriques et électroniques. Cela signifie que ce produit ne doit pas être mis au rebut avec les déchets ménagers mais doit être pris en charge par un système de collecte sélective conformément à... - Page 53 Fabricant Kingfisher International Products Limited 3 Sheldon Square London W2 6PX United Kingdom Distributeur:Castorama France Distributeur:BRICO DÉPÔT C.S. 50101 Templemars 30-32 rue de la Tourelle 59637 Wattignies CEDEX 91310 Longpont-sur- Orge www.castorama.fr France www.bricodepot.com...
- Page 54 PANELOWY GRZEJNIK PROMIENNIKOWY NE10EPC 840-1000W 3663602912941 NE15EPC 1250-1500W 3663602912958 NE20EPC 1680-2000W 3663602912965 NE5EPC 420-500W 3663602688549 NE10PCS 840-1000W 3663602688570...
- Page 55 Pierwsze kroki… Instrukcje zawarte w podręczniku mają na celu zapewnić bezpieczeństwo użytkownika. Należy je dokładnie przeczytać przed uruchomieniem urządzenia oraz zachować, aby móc z nich skorzystać w przyszłości. Pierwsze kroki ... Bezpieczeństwo Czynności przed użytkowaniem Skrócona instrukcja obsługi Informacje szczegółowe… Informacje techniczne Konserwacja i czyszczenie Ochrona środowiska...
- Page 56 Bezpieczeństwo DOKŁADNIE PRZECZYTAĆ NINIEJSZĄ INSTRUKCJĘ PRZED UŻYCIEM URZĄDZENIA. • Urządzenia może być użytkowane przez dzieci powyżej 8 roku życia i osoby o ograniczonej sprawności fizycznej, sensorycznej lub umysłowej, bądź o niedostatecznym doświadczeniu i wiedzy jedynie pod nadzorem lub po przeszkoleniu w zakresie bezpiecznej obsługi i zagrożeń.
- Page 57 Bezpieczeństwo zwrócić, w obecności dzieci i osób wrażliwych. • W przypadku uszkodzonego kabla zasilającego, w celu uniknięcia zagrożenia, musi on zostać wymieniony przez producenta, punkt serwisowy lub osobę o podobnych kwalifikacjach. • Urządzenia nie należy ustawiać bezpośrednio pod gniazdkiem. • OSTRZEŻENIE: Aby uniknąć...
- Page 58 Bezpieczeństwo zwykłych odpadów komunalnych (zmieszanych); należy go oddać do najbliższego punktu utylizacji i recyklingu urządzeń elektrycznych. • Grzejnik należy instalować tak, aby przełączniki urządzenia znajdowały się poza zasięgiem osób znajdujących się w wannie lub pod prysznicem. • W przypadku montażu w łazience, instalacja musi być...
- Page 59 Należy pozbyć się wszystkich toreb polietylenowych i opakowania oraz trzymać je z dala od dzieci. Twój produkt 1.Obudowa 2. Panel sterujący 3. Zestaw do montażu na ścianie NE10EPC/NE15EPC NE10PCS /NE20EPC ILOŚĆ NE10EPC Opis Rysunek /NE15EPC NE5EPC...
- Page 60 Czynności przed użytkowaniem kuchnia, w których podłoga może być mokra, urządzenie należy instalować co najmniej 250 mm powyżej poziomu podłogi. • Urządzenia nie należy instalować w miejscach, w których strumień powietrza mógłby zakłócać regulację (np. pod klimatyzatorem). Ostrożnie: Instalację MINIMALNE ODLEGŁOŚCI urządzenia należy zlecić...
- Page 61 Czynności przed użytkowaniem NE15EPC/NE20EPC, 3 otwory w przypadku modelu NE5EPC, 2 otwory w przypadku modelu NE10PCS). Włożyć w otwory kołki rozporowe i mocno dokręcić do ściany wspornik ścienny (rysunek 3). 4. Przyłożyć grzejnik do wspornika (rysunek 4): A: Dopasować grzejnik do zaczepów dolnych skierowanych w dół.
- Page 62 Czynności przed użytkowaniem ELEMENTY MOCUJĄCE DO MODELU NE10EPC/NE15EPC/NE20EPC ELEMENTY MOCUJĄCE DO MODELU NE5EPC...
- Page 63 Czynności przed użytkowaniem ELEMENTY MOCUJĄCE DO MODELU NE10PCS...
- Page 64 Skrócona instrukcja obsługi Wyświetlacz LCD: Funkcje ikon na wyświetlaczu LCD: Symbol Funkcja Tryb Gotowość (urządzenie nie pracuje, ale zasilanie jest włączone) Tryb Zabezpieczenie przed mrozem (urządzenie utrzymuje temperaturę ok. 7°C) Tryb Komfort (ustawianie żądanej temperatury) Tryb ECO (ECO utrzymuje temperaturę o 3,5°C niższą niż temperatura komfortu. Tryb ten obniża temperaturę...
- Page 65 Skrócona instrukcja obsługi PANEL STERUJĄCY Symbol Funkcja Nastawianie czasu, dnia tygodnia, temperatury lub w tygodniowych Przycisk dotykowy trybach spersonalizowanych wybór między trybami Komfort, Eco i Gotowość. Gotowość Przycisk dotykowy Przycisk dotykowy PRG Wybór tygodniowego trybu spersonalizowanego Funkcja wykrywania okien Przycisk dotykowy Wybór trybu pracy komfort / Eco / zabezpieczenie przed Przycisk dotykowy M mrozem / P1 / P2 / P3 / P...
- Page 66 Skrócona instrukcja obsługi II. Ustawianie temperatury 1. W trybie Komfort lub Eco (ale nie w trybie Zabezpieczenie przed mrozem), należy przyciskami wybrać żądaną temperaturę. Rożnica temperatur między trybami ECO i Komfort wynosi 3,5°C, stąd temperatura w trybie ECO mieści się w przedziale od 1,5°C do 25,5°C.
- Page 67 Skrócona instrukcja obsługi 4. Dokończyć konfigurowanie pozostałymi przyciskami (innymi niż ) lub odczekać, aż po 10 sekundach urządzenie automatycznie zapisze ustawienia. IV. Ustawianie programu 1. Programy preinstalowane P1/P2/P3 Mon-Sun day workables weekends day workables weekends Programy P1 / P2 / P3 zostały zainstalowane fabrycznie. Po potwierdzeniu programu, ikona programu i nastawiona temperatura zostają...
- Page 68 Skrócona instrukcja obsługi Dzień tygodnia Godzina 2.Nacisnąć przycisk PRG ponownie, nacisnąć przycisk , aby wybrać godzinę, przycisk , aby wybrać tryb Komfort oraz powtórzyć wszystko dla całych 24 godzin. 3.Po 30 sekundach braku jakichkolwiek działań ustawienie zostaje zapisane. Uwagi: W przypadku awarii zasilania, urządzenie przechowuje w pamięci tylko parametry, temperaturę...
- Page 69 Skrócona instrukcja obsługi VI: Funkcja wykrywania okien przejść do funkcji wykrywania okien, należy nacisnąć przycisk. Domyślnie urządzenie przejdzie w tryb komfortu. Jeśli zostanie wykryty spadek temperatury, urządzenie automatycznie przejdzie w tryb zapobiegania zamarzaniu. Jeśli temperatura podniesie się, urządzenie wróci do trybu komfortu. Naciśnięcie przycisku M lub PRG pozwala wybrać...
- Page 70 Informacje szczegółowe… Informacje techniczne Konserwacja i czyszczenie Ochrona środowiska...
- Page 71 Napięcie i Model nr (waty) produktu: częstotliwość wys. x szer. x gł. (mm) NE10EPC 840-1000W 450x570x110 Podwójna izolacja IPX4 220-240V~ KLASA II 50/60Hz NE15EPC 220-240V~ Podwójna izolacja IPX4 1250-1500W 450x720x110 KLASA II 50/60Hz NE20EPC 220-240V~ Podwójna izolacja IPX4 1680-2000W 450x870x110 50/60Hz...
- Page 72 [tak] wykrywaniem otwartego okna z regulacją na odległość [nie] z adaptacyjną regulacją startu [nie] z ograniczeniem czasu pracy [nie] z czujnikiem ciepła promieniowania [nie] Kingfisher International Products Limited Dane teleadresowe 3 Sheldon Square, London W2 6PX, United Kingdom...
- Page 73 Informacje techniczne Wymogi w zakresie informacji dotyczące elektrycznych miejscowych ogrzewaczy pomieszczeń Identyfikator(-y) modelu: NE15EPC Parametr Oznaczenie Wartość Jednostka Parametr Jednostka Sposób doprowadzania ciepła wyłącznie w przypadku elektrycznych akumulacyjnych miejscowych ogrzewaczy Moc cieplna pomieszczeń (należy wybrać jedną opcję) ręczny regulator doprowadzania ciepła z...
- Page 74 [tak] wykrywaniem otwartego okna z regulacją na odległość [nie] z adaptacyjną regulacją startu [nie] z ograniczeniem czasu pracy [nie] z czujnikiem ciepła promieniowania [nie] Kingfisher International Products Limited Dane teleadresowe 3 Sheldon Square, London W2 6PX, United Kingdom...
- Page 75 [tak] wykrywaniem otwartego okna z regulacją na odległość [nie] z adaptacyjną regulacją startu [nie] z ograniczeniem czasu pracy [nie] z czujnikiem ciepła promieniowania [nie] Kingfisher International Products Limited Dane teleadresowe 3 Sheldon Square, London W2 6PX, United Kingdom...
- Page 76 [tak] wykrywaniem otwartego okna z regulacją na odległość [nie] z adaptacyjną regulacją startu [nie] z ograniczeniem czasu pracy [nie] z czujnikiem ciepła promieniowania [nie] Kingfisher International Products Limited Dane teleadresowe 3 Sheldon Square, London W2 6PX, United Kingdom...
- Page 77 Konserwacja i czyszczenie Konserwacja i czyszczenie 1. Przed czyszczeniem należy wyłączyć urządzenie, wyjąć wtyczkę z kontaktu i odczekać, aż urządzenie całkowicie ostygnie. 2. Do czyszczenia obudowy urządzenia należy używać wilgotnej szmatki. 3. Należy regularnie czyścić kratki i wylot powietrza. 4. Do czyszczenia nie należy używać wody, płynów, żrących detergentów ani substancji chemicznych (alkohol, benzyna itp.).
- Page 78 OCHRONA ŚRODOWISKA OCHRONA ŚRODOWISKA Ten symbol jest powszechnie znany jako "przekreślony kubeł”. Jeżeli umieszczono go na produkcie lub baterii, oznacza to, że takiego przedmiotu nie wolno wyrzucać z odpadami domowymi. Niektóre substancje chemiczne zawarte w produktach elektrycznych i elektronicznych lub bateriach są niebezpieczne dla zdrowia i środowiska. Produkty elektryczne/elektroniczne i baterie należy utylizować...
- Page 79 Producent: Kingfisher International Products Limited 3 Sheldon Square London W2 6PX United Kingdom Dystrybutor: Castorama Polska Sp. z o.o. ul. Krakowiaków 78, 02-255 Warszawa www.castorama.pl...
- Page 80 ALÜMINYUM RADYANT PANEL ISITICI NE10EPC 840-1000W 3663602912941 NE15EPC 1250-1500W 3663602912958 NE20EPC 1680-2000W 3663602912965 NE5EPC 420-500W 3663602688549 NE10PCS 840-1000W 3663602688570...
- Page 81 Haydi başlayalım... Bu talimatlar sizin güvenliğiniz içindir. Lütfen kullanımdan önce bunları iyice okuyunuz ve ileride başvurmak üzere saklayınız. Başlarken… Güvenlik Başlamadan önce Hızlı başlangıç Daha fazla detay… Teknik bilgi Bakım ve temizlik Çevre koruma...
- Page 82 Güvenlik LÜTFEN ALETI KULLANMADAN ÖNCE TÜM TALİMATLARI DİKKATLİCE OKUYUNUZ. • Bu cihaz, gözetilmeleri veya cihazın emniyetli bir şekilde kullanımına ilişkin talimat verilmesi ve ilgili tehlikeleri anlamaları kaydıyla, 8 ve üzeri yaştaki çocuklar ve düşük fiziksel, duyusal veya zihinsel yetenekleri olan ya da deneyim ve bilgisi olmayan kişiler tarafından kullanılabilir.
- Page 83 Güvenlik servis ya da kalifiye bir kişi tarafından değiştirilmelidir. • Cihaz hemen priz çıkışının altına yerleştirilmemelidir. • DİKKAT: Aşırı ısınmadan kaçınmak için ısıtıcıyı örtmeyin. • Bu ısıtıcıyı programlayıcı, zamanlayıcı, ayrı bir uzaktan kumanda sistemi veya ısıtıcıyı otomatik olarak açan herhangi başka bir cihazla kullanmayın;...
- Page 84 Güvenlik sayfa 7-10 'deki "KURULUM" bölümüne bakın. • Not: aşağıdaki çizim sadece referans içindir. Yardım için veya uzman bir elektrikçiye başvurmanızı öneririz...
- Page 85 Lütfen plastik torbaları dikkatli bir biçimde bertaraf ediniz ve çocuklardan uzak tutunuz. Ürününüz 1. Gövde 2. Kontrol paneli 3. Duvara monte kitler NE10EPC/NE15EPC NE10PCS /NE20EPC ADET NE10EPC Açıklama Çizim /NE15EPC...
- Page 86 Braketi aşağı çekerek çıkarın (Şekil 2). 3. Su terazisi kullanarak askı aparatının mükemmel bir şekilde yatay olduğundan emin olun ve duvarda deliklerin yerlerini işaretleyin (NE10EPC/ NE15EPC/ NE20EPC için 4, NE5EPC için 3, NE10PCS için 2). Deliklere dübeli takın, sonra sıkıca duvara braketi monte vidalayın.
- Page 87 Başlamadan önce hizaya getirin. B: alt kancada onu muhafaza ederken ısıtıcıyı yukarı çekin. C: Yukarı doğru olan üst kancayı ısıtıcı ile aynı hizaya getirin. D: Isıtıcıyı aşağı çekin. 5. Metal plakayı deliğe kaydırın ve montaj braketini sıkmak için vidayı sıkın (Şekil 5).
- Page 88 Başlamadan önce NE10EPC/NE15EPC/NE20EPC için bağlantı NE5EPC için bağlantı...
- Page 89 Başlamadan önce NE10PCS için bağlantı...
- Page 90 Hızlı başlangıç LCD gösterge: LCD ekrandaki simgelerin işlevleri: Sembol İşlev Bekleme Modu (cihazın gücü açıktır ancak çalışmaz) Anti donma modu (cihaz sıcaklığı 7°C civarında tutar) Konfor Modu (istenilen sıcaklığa ayarlayın) ECO Modu (ECO sıcaklığı konfor sıcaklığından 3,5°C altında tutar. Bu mod konfor moduna istenen sıcaklığı...
- Page 91 Hızlı başlangıç Kontrol paneli Sembol İşlev Saati, haftanın günü, sıcaklığı ayarlayın; veya haftalık kişiselleştirilmiş Dokunmatik ekran programlar altında, konfor modu, eko modu veya bekleme modu arasında seçim yapın. Dokunmatik ekran Bekleme Dokunmatik ekran PRG Haftalık kişiselleştirilmiş programı seçmek için Dokunmatik ekran Pencere detektör fonksiyonu ile Dokunmatik ekran M Çalışma modunu seçmek için konfor/ anti-friz/ P1 / P2 / P3 / P...
- Page 92 Hızlı başlangıç II. Sıcaklık ayarı: 1. Konfor modu veya Eco modu altında (anti donma modu hariç) istenilen sıcaklığı seçmek için veya tuşuna basın. ECO ve konfor modu arasındaki sıcaklık farkı 3,5°C'dir, yani ECO modu sıcaklığı 1,5°C ve 25,5°C arasındadır. 2. Ayarı sonlandırmak için hariç...
- Page 93 Hızlı başlangıç 4. Ayarı sonlandırmak için hariç diğer düğmelere basın ya da 10 saniye sonra otomatik olarak kaydedecektir. IV. Program ayarı 1. Önceden yüklenmiş programlar Mon-Sun day workables weekends day workables weekends P1 / P2 / P3 programları önceden yüklenmiş programlardır. Programı onayladıktan sonra, program simgesi ve ayarlanan sıcaklık ekranda gösterilir.
- Page 94 Hızlı başlangıç Haftanın günü Saat 2. PRG düğmesine tekrar basın, saati seçmek için tuşuna basın, konfor modunu seçmek için tuşuna basın ve tüm 24 saat için tekrar edin 3. Eylemden 30 saniye sonra, ayar kaydedilir. Notlar: Elektrik kesintisi durumunda, ünite hafızasında sadece parametreleri, sıcaklık ve çalışma modunu tutar.
- Page 95 Hızlı başlangıç VI: Pencere detektör fonksiyonu ile Pencere detektör işlevine girmek için düğmeye basın. Cihaz varsayılan olarak konfor moduna girecektir. Eğer sıcaklık düşüşü algılanırsa, cihaz otomatik olarak anti donma moduna geçer. Eğer sıcaklık yükselirse, cihaz tekrar konfor moduna geri döner. Diğer modları...
- Page 96 Daha fazla detay… Teknik bilgi Bakım ve temizlik Çevre koruması...
- Page 97 Ürün Boyutları Sınıf Gerilim ve Model no. Y x G x D (mm) Frekans NE10EPC 840-1000W 450x570x110 220-240V~ Doble aislamiento IPX4 CLASE II 50/60Hz NE15EPC Doble aislamiento IPX4 220-240V~ 1250-1500W 450x720x110 CLASE II 50/60Hz NE20EPC 220-240V~ Doble aislamiento IPX4 1680-2000W 450x870x110...
- Page 98 Fotoselli oda sıcaklığı kontrolü [hayır] açık pencere sensörlü oda sıcaklığı kontrol [evet] ü uzaktan kontrol seçeneği [hayır] adapte açılma kontrolü [hayır] zaman sınırlı çalışma [hayır] siyah bulb yuvası sensörlü [hayır] Kingfisher International Products Limited İletişim 3 Sheldon Square, London W2 6PX, United Kingdom...
- Page 99 Teknik bilgi Elektrikli Isıtıcılar için gerekli bilgiler Model Bilgileri: NE15EPC Başlık Sembol Değer Birim Başlık Birim Isı yükleme yöntemi, sadece duvar tipi elektrikli ısıtı Isıtma calar için (birini seçiniz) Entegre termostat ile manuel ısı yükleme Nominal Isıtma N.A. kontrolü Minimum ısı çıkış...
- Page 100 Fotoselli oda sıcaklığı kontrolü [hayır] açık pencere sensörlü oda sıcaklığı kontrol [evet] ü uzaktan kontrol seçeneği [hayır] adapte açılma kontrolü [hayır] zaman sınırlı çalışma [hayır] siyah bulb yuvası sensörlü [hayır] Kingfisher International Products Limited İletişim 3 Sheldon Square, London W2 6PX, United Kingdom...
- Page 101 Fotoselli oda sıcaklığı kontrolü [hayır] açık pencere sensörlü oda sıcaklığı kontrol [evet] ü uzaktan kontrol seçeneği [hayır] adapte açılma kontrolü [hayır] zaman sınırlı çalışma [hayır] siyah bulb yuvası sensörlü [hayır] Kingfisher International Products Limited İletişim 3 Sheldon Square, London W2 6PX, United Kingdom...
- Page 102 Fotoselli oda sıcaklığı kontrolü [hayır] açık pencere sensörlü oda sıcaklığı kontrol [evet] ü uzaktan kontrol seçeneği [hayır] adapte açılma kontrolü [hayır] zaman sınırlı çalışma [hayır] siyah bulb yuvası sensörlü [hayır] Kingfisher International Products Limited İletişim 3 Sheldon Square, London W2 6PX, United Kingdom...
- Page 103 Bakim ve temizlik BAKIM VE TEMİZLİK 1. Cihazı temizlemeden önce, cihazın elektrik bağlantısını kapatın ve tamamen soğuyana kadar bekleyin. 2. Cihazın gövdesini temizlemek için nemli bir bez kullanın. 3. Düzenli olarak ızgaraları ve hava çıkışını temizleyin. 4. Temizlemek için su, sıvı, aşındırıcı deterjan ya da kimyasallar (alkol, benzin, vs.) kullanmayın.
- Page 104 ÇEVRE KORUMASI ÇEVRE KORUMASI Bu sembol “Tekerlekli Çöp Kutusu Yasaktır Sembolü” olarak bilinmektedir. Bir ürün veya batarya üzerinde bu sembolün işaretli olması malzemenin genel ev çöplerinizle beraber bertaraf edilmemesi gerektiği anlamına gelir. Elektrikli/elektronik ürün veya pil içerisinde bulunan bazı kimyasallar insan sağlığı ve çevreye zararlı olabilir. Elektrikli/elektronik/pil malzemelerini her birinin geri dönüşüm için toplandığı...
- Page 105 Üretici: Kingfisher International Products Limited 3 Sheldon Square London W2 6PX United Kingdom Yetkili servis istasyonları ve yedek parça temini için aşağıda yer alan Koçtaş Müşteri Hattı ve Koçtaş Genel Müdürlük irtibat bilgilerinden faydalanınız. İthalatçı Firma: KOÇTAŞ YAPI MARKETLERİ TİC. A.Ş.
- Page 106 ПАНЕЛЬНЫЙ ОБОГРЕВАТЕЛЬ NE10EPC 840-1000Вт 3663602912941 NE15EPC 1250-1500Вт 3663602912958 NE20EPC 1680-2000Вт 3663602912965 NE5EPC 420-500Вт 3663602688549 NE10PCS 840-1000Вт 3663602688570...
- Page 107 Давайте приступим… Эти инструкции предназначены для вашей безопасности. Внимательно их прочтите перед использованием и сохраните для будущего использования. С чего начать… Безопасность Перед началом Быстрое начало Подробнее… Техническая информация Уход и очистка Защита окружающей среды...
- Page 108 Безопасность ВНИМАТЕЛЬНО ПРОЧТИТЕ СЛЕДУЮЩИЕ ИНСТРУКЦИИ ПЕРЕД ИСПОЛЬЗОВАНИЕМ ПРОДУКТА. • Данным устройством могут пользоваться дети в возрасте от 8 лет, а также лица с ограниченными физическими или умственными возможностями, с нарушениями органов чувств или не имеющие опыта или знаний по использованию данного устройства под...
- Page 109 Безопасность использованию устройства безопасным образом, с разъяснением возможных опасностей. • Не следует разрешать детям в возрасте от 3 до 8 лет подключать устройство к сети или производить его регулировку и техническое обслуживание. • ОСТОРОЖНО! – Некоторые детали данного устройства сильно нагреваются и могут вызвать...
- Page 110 Безопасность нагреватель автоматически, так как это приведет к опасности, если обогревателем чем-нибудь накрыт или установлен неправильно. • ВНИМАНИЕ! Чтобы избежать опасности из-за случайного срабатывания термопредохранителя, данное устройство запрещено подключать через внешний переключатель, такой как таймер, или подключать к цепи с постоянными включениями...
- Page 111 Безопасность • Подробную информацию о монтаже устройства на стену см. в разделе «УСТАНОВКА» на стр. 8-11. Примечание. Схема ниже приводится толькодля справки. Мы рекомендуем обратиться за помощью к профессиональному электрику.
- Page 112 эксплуатировать устройство, использовать устройство без присмотра. Утилизируйте пластиковые пакеты надлежащим образом и держите их вдали от детей. Ваша продукция 1. Корпус 2. Панель управления 3. Комплекты для крепления на стену NE10EPC/NE15EPC NE10PCS /NE20EPC Кол-во NE10EPC Описание Рисунок /NE15EPC NE5EPC NE10PCS /NE20EPC Винт...
- Page 113 кронштейн (не извлекайте, только открутите), и выдвиньте металлическую пластину из отверстия. Потяните кронштейн вниз, чтобы извлечь (Рис. 2). 3. С помощью спиртового уровня убедитесь, что кронштейн расположен строго горизонально, после чего отметьте расположения отверстий на стене (4 отверстия для NE10EPC / NE15EPC/...
- Page 114 Перед началом NE20EPC, 3 отверстия для NE5EPC, 2 отверстия для NE10PCS). Вставьте дюбели в отверстия, затем надежно прикрутите настенный кронштейн к стене (Рис. 3). 4.Повесьте обогреватель на кронштейн (Рис. 4). A: Совместите обогреватель с 2 нижними крючками, обращенными вниз. B: Потяните обогреватель вверх, чтобы он зацепился...
- Page 115 Перед началом КРЕПЛЕНИЯ ДЛЯ NE10EPC/NE15EPC/NE20EPC КРЕПЛЕНИЯ ДЛЯ NE5EPC...
- Page 116 Перед началом КРЕПЛЕНИЯ ДЛЯ NE10PCS...
- Page 117 Быстрое начало ЖК-экран: Значения символов на ЖК-экране: Символ Значение Режим ожидания (устройство включено, но не работает) Режим защиты от замерзания (устройство поддерживает температуру около 7°C) Комфортный режим (установлена желаемая температура) Режим ЭКО (поддерживает температуру на 3,5 °C ниже комфортной. Этот режим снижает...
- Page 118 Быстрое начало Панель управления Символ Значение Установка времени, дня недели, температуры или выбор Коснитесь комфортного режима, режима ЭКО или режима ожидания в еженедельных персонализированных программах. Коснитесь Переход в режим ожидания Коснитесь PRG Выбор еженедельной персонализированной программы Функция обнаружения окна Коснитесь Выбор...
- Page 119 Быстрое начало II. Настройка температуры Когда комнатная температура превышает установленную, устройство прекращает обогрев.ng 1. В комфортном режиме или режиме ЭКО (кромережима защиты от замерзания) нажмите или , чтобы выбрать желаемую температуру. Разница температур между режимом ЭКОи комфортным режимом составляет 3,5 °C, поэтому температура...
- Page 120 Быстрое начало 4. Нажмите любую кнопку, кроме , чтобы завершить настройку, или параметры автоматически сохранятся через 10 секунд. IV.Настройка программы 1. Предустановленные программы P1/P2/P3 Пн - Вс рабочие дни выходные рабочие дни выходные Программы P1 / P2 / P3 являются предустановленными. После подтверждения программы...
- Page 121 Быстрое начало День недели Час 2. Нажмите кнопку PRG еще раз, нажмите , чтобы выбрать час, , чтобы выбрать комфортный режим, затем повторите для всех 24 часов. 3. Через 30 секунд бездействия настройки автоматически сохранятся. Примечания. При сбоях в электропитании устройство сохраняет только настройки...
- Page 122 Быстрое начало VI: Функция обнаружения окна Нажмите кнопку для включения функции обнаружения открытого окна. Устройство по умолчанию перейдет в комфортный режим. Теперь при резком снижении температуры устройство будет автоматически переходить в режим защиты от промерзания, а при повышении — назад в комфортный режим. С...
- Page 123 Подробнее… Техническая информация Уход и очистка Защита окружающей среды...
- Page 124 (Ватт) устройства и частота В х Ш х Г (мм) NE10EPC 840-1000Вт 450x570x110 Двойная изоляция IPX4 220-240 В~, 50/60 Гц КЛАСС II NE15EPC Двойная изоляция IPX4 220-240 В~, 1250-1500Вт 450x720x110 КЛАСС II 50/60 Гц NE20EPC 220-240 В~, Двойная изоляция IPX4 1680-2000Вт...
- Page 125 ЗАЩИТА ОКРУЖАЮЩЕЙ СРЕДЫ ЗАЩИТА ОКРУЖАЮЩЕЙ СРЕДЫ Этот символ называется "перечеркнутый мусорный ящик на колесах". Изделие или батарею, на которой он присутствует, нельзя выбрасывать вместе с обычными бытовыми отходами. Некоторые химические вещества, входящие в состав электрических/электронных изделий и батарей, могут быть вредными для здоровья...
- Page 126 Дистрибьютор: Импортер: ООО “Касторама РУС” Дербеневская наб., дом 7, стр 8 Россия, Москва, 115114 www.castorama.ru...
- Page 127 PANEL RADIANTE NE10EPC 840-1000W 3663602912941 NE15EPC 1250-1500W 3663602912958 NE20EPC 1680-2000W 3663602912965 NE5EPC 420-500W 3663602688549 NE10PCS 840-1000W 3663602688570...
- Page 128 Comencemos… Estas instrucciones son para su seguridad. Por favor, léalas por completo antes de utilizar el producto y guárdelas para futura referencia. Comienzo… Seguridad Antes de comenzar Inicio rápido Con más detalle... Información técnica y legal Cuidado y limpieza Protección del medio ambiente...
- Page 129 Seguridad POR FAVOR, LEA LAS SIGUIENTES INSTRUCCIONES CON ATENCIÓN ANTES DE UTILIZAR EL APARATO. • Este aparato puede ser utilizado por niños de a partir de 8 años de edad en adelante y personas con capacidades físicas, sensoriales o mentales reducidas o falta de experiencia y conocimiento si han sido supervisados o instruidos acerca del uso del aparato de una manera segura y comprenda...
- Page 130 Seguridad • PRECAUCIÓN - Algunas partes de este producto pueden llegar a estar muy calientes y causar quemaduras. Prestar particular atención en aquellos lugares donde los niños y las personas vulnerables están presentes. • Si el cable está dañado, debe ser reemplazado por el fabricante, su agente de servicio o una persona de cualificación similar para evitar peligros.
- Page 131 Seguridad • Este radiador no debe eliminarse con la basura doméstica; debe llevarse a un centro local de recuperación y reciclaje de aparatos eléctricos. • El radiador se debe instalar de modo que los interruptores y otros controles no los pueda tocar una persona que está...
- Page 132 Por favor, deseche las bolsas de plástico con cuidado y manténgalas alejadas de los niños. Su producto 1. Estructura principal 2. Panel de control 3. Conjuntos para montar en la pared NE10EPC/NE15EPC NE10PCS /NE20EPC Cantidad NE10EPC Descripción Dibujo /NE15EPC NE5EPC...
- Page 133 (figura 2). 3. Compruebe que el soporte esté perfectamente horizontal utilizando un nivel de burbuja, y marque en la pared la posición de los orificios (4 orificios para los modelos NE10EPC/NE15EPC/NE20EPC, 3 orificios para el NE5EPC, 2 orificios para el NE10PCS).Inserte...
- Page 134 Antes de comenzar los tacos en los orificios y después atornille de forma segura el soporte a la pared. (Figura 3) 4. Coloque el radiador contra el soporte (figura 4): A: Alinee el radiador sobre los ganchos inferiores que están hacia abajo. B: Tire hacia arriba del radiador, manteniéndolo en los 2 ganchos inferiores.
- Page 135 Antes de comenzar ELEMENTOS DE SUJECIÓN PARA EL NE10EPC/NE15EPC/NE20EPC ELEMENTOS DE SUJECIÓN PARA EL NE5EPC...
- Page 136 Antes de comenzar ELEMENTOS DE SUJECIÓN PARA EL NE10PCS...
- Page 137 Inicio rápido Pantalla LCD: Funciones de los símbolos de la pantalla LCD: Símbolo Función Modo de espera (el aparato no está en funcionamiento pero está encendido) Modo anticongelación (el aparato mantiene la temperatura alrededor de 7°C) Modo Confort (ajuste de la temperatura deseada) Modo ECO (ECO mantiene una temperatura 3,5°C por debajo de la temperatura de Confort.
- Page 138 Inicio rápido Panel de control Símbolo Función Ajustar la hora, el día de la semana, la temperatura; o bien, en los Tocar programas personalizados semanales, para seleccionar el modo confort, el modo eco o el modo de espera. Tocar En espera Tocar PRG Para seleccionar el programa personalizado semanal Tocar...
- Page 139 Inicio rápido II. Ajuste de la temperatura: 1. Estando en el modo Confort o en el modo Eco (excepto en el modo anticongelación), pulse para seleccionar la temperatura que desee. La diferencia de temperatura entre el modo ECO y el modo confort es 3,5°C, por lo que la temperatura del modo ECO está...
- Page 140 Inicio rápido 4. Pulse otros botones excepto para finalizar el ajuste, o se guardará automáticamente al cabo de 10 segundos. IV. Ajuste de programas 1. Programas preconfigurados P1/P2/P3 Mon-Sun day workables weekends day workables weekends Los programas P1 / P2 / P3 están preconfigurados. Después de confirmar el programa, se visualiza en la pantalla el símbolo del programa y la temperatura ajustada.
- Page 141 Inicio rápido Día de la semana Hora 2. Pulse de nuevo el botón PRG, pulse para seleccionar la hora, para seleccionar el modo confort y después repita para 24 horas. 3. Al cabo de 30 segundos sin que se realice ninguna acción, se guarda el ajuste. Notas: En caso de que se produzca un fallo de corriente, la unidad solo guarda en la memoria los parámetros, la temperatura y el modo de funcionamiento.
- Page 142 Inicio rápido VI: Función de detección de ventanas Pulse el botón para entrar en la función de detección de ventanas. El aparato entrará por defecto en el modo de confort. Si se detecta que baja la temperatura, el aparato pasará automáticamente al modo anticongelación. Si la temperatura aumenta, el aparato regresará...
- Page 143 Con más detalle... Información técnica y legal Cuidado y limpieza Protección del medio ambiente...
- Page 144 Tensión y N.º de modelo (vatios) producto frecuencia Al x An x P (mm) NE10EPC 220-240V~ 840-1000W 450x570x110 Doble aislamiento IPX4 CLASE II 50/60Hz NE15EPC Doble aislamiento IPX4 220-240V~ 1250-1500W 450x720x110 CLASE II 50/60Hz NE20EPC 220-240V~ Doble aislamiento IPX4 1680-2000W 450x870x110...
- Page 145 [no] con control de puesta en marcha adaptable [no] con limitación de tiempo de funcionamiento [no] con sensor de lámpara negra [no] Información de Kingfisher International Products Limited contacto 3 Sheldon Square, London W2 6PX, United Kingdom...
- Page 146 Información técnica y legal Requisitos de información que deben cumplir los aparatos de calefacción local eléctricos Identificador(es) del modelo: NE15EPC Partida Símbolo Valor Unidad Partida Unidad Potencia calorífica Tipo de aportación de calor, únicamente para los aparatos de calefacción local eléctricos de acumulación (seleccione uno)
- Page 147 [no] con control de puesta en marcha adaptable [no] con limitación de tiempo de funcionamiento [no] con sensor de lámpara negra [no] Información de Kingfisher International Products Limited contacto 3 Sheldon Square, London W2 6PX, United Kingdom...
- Page 148 [no] con control de puesta en marcha adaptable [no] con limitación de tiempo de funcionamiento [no] con sensor de lámpara negra [no] Información de Kingfisher International Products Limited contacto 3 Sheldon Square, London W2 6PX, United Kingdom...
- Page 149 [no] con control de puesta en marcha adaptable [no] con limitación de tiempo de funcionamiento [no] con sensor de lámpara negra [no] Información de Kingfisher International Products Limited contacto 3 Sheldon Square, London W2 6PX, United Kingdom...
- Page 150 Cuidado y limpieza CUIDADO Y LIMPIEZA 1. Antes de limpiar el aparato, desconecte la alimentación eléctrica y espere hasta que se haya enfriado completamente. 2. Utilice un paño húmedo para limpiar la carcasa del aparato. 3. Limpie regularmente las rejillas y la salida de aire. 4.
- Page 151 PROTECCIÓN DEL MEDIO AMBIENTE PROTECCIÓN DEL MEDIO AMBIENTE El símbolo es conocido como el “símbolo del contenedor de ruedas tachado”. Cuando aparece este símbolo en un producto o en una batería, significa que no debería desecharse con la basura general del hogar. Algunas sustancias químicas contenidas en los productos electrónicos/eléctricos o en las baterías pueden ser perjudiciales para la salud y el medioambiente.
- Page 152 Fabricante: Kingfisher International Products Limited 3 Sheldon Square London W2 6PX Reino Unido Distribuidor: Euro Depot España, S.A.U. c/ La Selva, 10 - Edificio Inblau A 1a Planta 08820-El Prat de Llobregat www.bricodepot.es...
- Page 153 AQUECEDOR RADIANTE EM Í PAINEL DE ALUM NE10EPC 840-1000W 3663602912941 NE15EPC 1250-1500W 3663602912958 NE20EPC 1680-2000W 3663602912965 NE5EPC 420-500W 3663602688549 NE10PCS 840-1000W 3663602688570...
- Page 154 Comecemos... Estas instruções são para sua segurança. Por favor, leia-as antes de utilizar o produto e guarde-as para referência futura. Começo... Segurança Antes de começar Início rápido Com mais detalhe... Informação técnica e legal Cuidados e limpeza Proteção ambiental...
- Page 155 Segurança POR FAVOR, LEIA AS SEGUINTES INSTRUÇÕES ANTES DE USAR O APARELHO. • Este dispositivo pode ser usado por crianças a partir de 8 anos e mais e pessoas com reduzidas capacidades físicas, sensoriais ou mentais ou falta de experiência e conhecimento, se tiverem recebido supervisão ou instruções relativas à...
- Page 156 Segurança encontram as crianças e pessoas vulneráveis. • Se o cabo de alimentação estiver danificado, deve ser substituído pelo fabricante, pelo agente autorizado ou pessoa qualificada para aaim se evitarem perigos. • O aparelho não deverá ser colocado imediatamente abaixo de uma tomada. •...
- Page 157 Segurança • O radiador deve ser instalado de modo que os interruptores e outros controles não possam ser tocados por uma pessoa que esteja na banheira ou chuveiro. • Se for colocado numa casa de banho, tem de usar um dispositivo de corrente residual de 30mA.
- Page 158 Elimine cuidadosamente os sacos de plástico e mantenha-os afastados das crianças. O seu produto 1. Estrutura 2. Painel de controlo 3. Kits de montagem na parede NE10EPC/NE15EPC NE10PCS /NE20EPC Q.DE NE10EPC Descrição Esquema /NE15EPC NE5EPC...
- Page 159 (Imagem 2). 3. Certifique-se de que o suporte está completamente na horizontal usando um nível de bolha, e assinale a localização dos orifícios (4 orifícios para NE10EPC/NE15EPC/NE20EPC, 3 orifícios para NE5EPC, 2 orifícios para NE10PCS) na parede.
- Page 160 Antes de começar Insira a bucha nos orifícios, a seguir enrosque bem o suporte de fixação na parede. (Imagem 3) 4. Coloque o aquecedor contra o suporte (Imagem 4): A : Alinhe o aquecedor nos ganchos inferiores virados para baixo. B : Puxe o aquecedor para cima enquanto o suporta nos ganchos inferiores.
- Page 161 Antes de começar FIXADORES PARA NE10EPC/NE15EPC/NE20EPC FIXADORES PARA NE5EPC...
- Page 162 Antes de começar FIXADORES PARA NE10PCS...
- Page 163 Início rápido Ecrã LCD: Funções dos ícones no LCD: Símbolo Função Modo de Espera (o aparelho está ligado, mas não funciona) Modo Anti-gelo (o aparelho mantém a temperatura por volta dos 7 °C) Modo Conforto (defina a temperatura desejada) Modo ECO (ECO mantém a temperatura 3,5 °C inferior à temperatura de conforto. Este modo reduz a temperatura sem perturbar a temperatura desejada no modo de conforto) Modo P (No modo P , o aparelho funciona por definição no modo de conforto...
- Page 164 Início rápido Painel de controlo Símbolo Função Definir as horas, dia da semana, a temperatura ou, nos programas Tocar em personalizados semanais, para escolher entre o modo Conforto, Eco ou Espera. Tocar em Espera Tocar em PRG Escolher o programa personalizado semanal Tocar em Função de deteção de janelas Para selecionar o modo de funcionamento conforto / Eco / anti-gelo...
- Page 165 Início rápido II. Definições da temperatura 1. No modo Conforto ou modo Eco (excluindo o modo Anti-gelo), prima para escolher a temperatura desejada. A diferença de temperatura entre o modo Eco e o modo Conforto é de 3,5 °C, assim, a temperatura do modo Eco encontra-se entre 1,5 °C e 25,5 °C.
- Page 166 Início rápido 4. Prima qualquer botão exceto para terminar o acerto, ou, passados 10 segundos, o aparelho guarda automaticamente. IV. Definição do programa 1. Programas pré-instalados P1/P2/P3 Mon-Sun day workables weekends day workables weekends Os programas P1 / P2 / P3 são programas pré-instalados. Após confirmar o programa, o ícone do programa e a temperatura definida serão apresentados no ecrã.
- Page 167 Início rápido Dia da semana Hora 2. Prima de novo o botão PRG, prima para escolher a hora, para escolher o modo Conforto e depois repita para todas as 24 horas. 3. Passados 30 segundos sem qualquer ação, as definições são guardadas. Notas: No caso de falha de energia, a unidade mantém na memória apenas os parâmetros, temperatura e modo de funcionamento.
- Page 168 Início rápido VI: Função de deteção de janelas Prima o botão para entrar na função de deteção de janela. O aparelho entra por defeito no modo de conforto. Se for detetada uma diminuição da temperatura, o aparelho entra automaticamente no modo anti-gelo. Se a temperatura aumentar, o aparelho volta a entrar no modo de conforto.
- Page 169 Com mais detalhe... Informação técnica e legal Cuidados e limpeza Proteção ambiental...
- Page 170 Voltagem e Modelo Nº (Watts) produto Frequência A x C x D (mm) NE10EPC 840-1000W 450x570x110 Duplo isolamento IPX4 220-240V~ CLASSE II 50/60Hz NE15EPC Duplo isolamento IPX4 220-240V~ 1250-1500W 450x720x110 CLASSE II 50/60Hz NE20EPC 220-240V~ Duplo isolamento IPX4 1680-2000W 450x870x110...
- Page 171 Com opção de comando à distância [não] Com comando de arranque adaptativo [não] Com limitação do tempo de funcionamento [não] Com sensor de corpo negro [não] Kingfisher International Products Limited Elementos de contacto 3 Sheldon Square, London W2 6PX, United Kingdom...
- Page 172 Informação técnica e legal Requisitos de informação para aquecedores de ambiente local elétricos Identificador(es) de modelo: NE15EPC Elemento Símbolo Valor Unidade Elemento Unidade Tipo de potência calorífica, apenas para os Potência calorífica aquecedores de ambiente local elétricos de acumula ção (selecionar uma opção) Potência calorífica...
- Page 173 Com opção de comando à distância [não] Com comando de arranque adaptativo [não] Com limitação do tempo de funcionamento [não] Com sensor de corpo negro [não] Kingfisher International Products Limited Elementos de contacto 3 Sheldon Square, London W2 6PX, United Kingdom...
- Page 174 Com opção de comando à distância [não] Com comando de arranque adaptativo [não] Com limitação do tempo de funcionamento [não] Com sensor de corpo negro [não] Kingfisher International Products Limited Elementos de contacto 3 Sheldon Square, London W2 6PX, United Kingdom...
- Page 175 Com opção de comando à distância [não] Com comando de arranque adaptativo [não] Com limitação do tempo de funcionamento [não] Com sensor de corpo negro [não] Kingfisher International Products Limited Elementos de contacto 3 Sheldon Square, London W2 6PX, United Kingdom...
- Page 176 Cuidado e limpeza CUIDADO E LIMPEZA 1. Antes de proceder à limpeza do aparelho, desligue-o da alimentação e espere que arrefeça por completo. 2. Utilize um pano ligeiramente embebido em água para limpar a estrutura do aparelho. 3. Limpe regularmente as grelhas e saídas de ar. 4.
- Page 177 PROTEÇÃO AMBIENTAL PROTEÇÃO AMBIENTAL O símbolo é conhecido como o "símbolo da caixote lo lixo com rodas com um X". Quando este símbolo aparecer num produto ou bateria, significa que ele não deve ser descartado juntamente com o lixo doméstico. Algumas substâncias químicas contidas nos produtos eletrônicos / produtos eléctricos ou baterias podem ser prejudiciais à...
- Page 178 Fabricante: Kingfisher International Products Limited 3 Sheldon Square London W2 6PX United Kingdom Distribuidor: Brico Depot Portugal SA Rua Castilho, 5 - 1 esquerdo, sala 13 1250-066 Lisboa www.bricodepot.pt...
- Page 179 NE10EPC 840-1000W 3663602912941 NE15EPC 1250-1500W 3663602912958 NE20EPC 1680-2000W 3663602912965 NE5EPC 420-500W 3663602688549 NE10PCS 840-1000W 3663602688570...
- Page 183 7-10.
- Page 184 NE10EPC/NE15EPC NE10PCS /NE20EPC NE10EPC Descriere Ilustrație /NE15EPC NE5EPC NE10PCS /NE20EPC Șurub NE5EPC Diblu INSTALAREA APARATULUI • Acest aparat este destinat numai pentru utilizare în interior. • Respectați distanțele minime conform indicațiilor din Fig. 1. • În locuri precum săli de baie, spălătorii, bucătării,...
- Page 185 Scoateți suportul trăgând în jos (Figura 2). 3. Asigurați-vă că suportul este perfect orizontal cu ajutorul unei nivele și marcați amplasamentul găurilor (4 găuri pentru NE10EPC/NE15EPC/NE20EPC, 3 găuri pentru NE5EPC, 2 găuri pentru NE10PCS) pe perete. Introduceți diblurile în găuri, după care prindeți bine suportul cu șuruburi de perete.
- Page 186 A : Aliniați radiatorul pe cele cârlige de jos îndreptate în jos. B : Împingeți radiatorul în sus în timp ce acesta este prins în cele cârlige de jos. C : Aliniați radiatorul pe cele cârlige de sus îndreptate în sus. D : Trageți radiatorul în jos.
- Page 187 ELEMENTE DE PRINDERE PENTRU NE10EPC/NE15EPC/NE20EPC ELEMENTE DE PRINDERE PENTRU NE5EPC...
- Page 188 ELEMENTE DE PRINDERE PENTRU NE10PCS...
- Page 189 Funcţiile simbolurilor de pe ecranul LCD: Simbol Funcție Modul de veghe (aparatul nu este în funcțiune dar este alimentat) Modul Anti-îngheț (aparatul menține o temperatură aproximativă de 7°C) Modul Confort (setați temperatura dorită) Modul ECO (ECO menține temperatura care este cu 3,5 ° C inferioară temperaturii de confort.
- Page 190 În modul P , aparatul va funcționa automat în modul confort (cu excepția Franței).
- Page 196 IPX4 50/60Hz IPX4 50/60Hz IPX4 50/60Hz NE5EPC IPX4 220-240V~ 420-500W 450x400x110 50/60Hz NE10PCS 220-240V~ IPX4 840-1000W 283x790x110 50/60Hz...
- Page 197 [nu] cu demaraj adaptabil [nu] cu limitarea timpului de funcționare [nu] cu senzor cu bulb negru [nu] Kingfisher International Products Limited Date de contact 3 Sheldon Square, London W2 6PX, United Kingdom...
- Page 198 Cerințe privind informațiile referitoare la aparatele electrice pentru încălzire locală Identificatorul de model(e): NE15EPC Parametru Simbol Valoare Unitate Parametru Unitate Modul de acumulare a căldurii, numai în cazul aparatelor Puterea termică electrice pentru încălzire locală cu acumulator de căldură (alegeți o variantă) Puterea termică...
- Page 199 [nu] cu demaraj adaptabil [nu] cu limitarea timpului de funcționare [nu] cu senzor cu bulb negru [nu] Kingfisher International Products Limited Date de contact 3 Sheldon Square, London W2 6PX, United Kingdom...
- Page 200 [nu] cu demaraj adaptabil [nu] cu limitarea timpului de funcționare [nu] cu senzor cu bulb negru [nu] Kingfisher International Products Limited Date de contact 3 Sheldon Square, London W2 6PX, United Kingdom...
- Page 201 [nu] cu demaraj adaptabil [nu] cu limitarea timpului de funcționare [nu] cu senzor cu bulb negru [nu] Kingfisher International Products Limited Date de contact 3 Sheldon Square, London W2 6PX, United Kingdom...
- Page 202 Îngrijirea și curățarea...
Need help?
Do you have a question about the NE15EPC and is the answer not in the manual?
Questions and answers
Set to come on anytime the temperature goes below 5 degrees
To set the Kingfisher NE15EPC to turn on when the temperature goes below 5°C, use the Anti-freeze mode. This mode maintains the temperature around 7°C, preventing the room from dropping too low.
To activate it:
1. Press the "M" button to cycle through modes.
2. Select the Anti-freeze mode.
The appliance will automatically turn on when the temperature drops near 7°C, which helps protect against freezing.
This answer is automatically generated
How much space do you need between the heater and sofs
The required space between the Kingfisher NE15EPC heater and sofas is at least 250 mm from the level of the ground; however, the specific distance from sofas is not mentioned.
This answer is automatically generated
Posiadam grzejnik DILLAM NE 10EPC 840-1000W. Nie wyświetla się wyświetlacz po włączeniu do gniazdka i nie grzeje Gdzie można kupić płytki sterownicze np.AK-HT20TAR-P16. Został wymieniony jeden elektrolit 4,7 uf 400v bo był uszkodzony, triak jest dobry. Brak informacji o serwisach. Działał 1-rok.Kupiony był w Castoramie. Chodzi mi o naprawę bo okres gwarancji przegapiony.