Table of Contents
Advertisement
Quick Links
December 15, 2019
Lit. No. 74258, Rev. 01
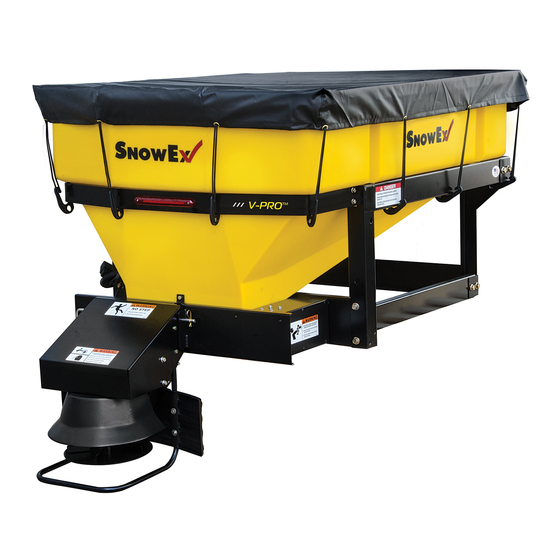
V-Pro™ Hopper Spreader
32300 & 32600
Installation Instructions
CAUTION
Read this document before installing
or operating the spreader.
These Installation Instructions are for SnowEx
V-Pro 32300 and 32600 hopper spreaders
®
with serial numbers beginning with 190901 and higher.
A DIVISION OF DOUGLAS DYNAMICS, LLC
Advertisement
Table of Contents

Subscribe to Our Youtube Channel
Related Manuals for SnowEx V-Pro 32300


Summary of Contents for SnowEx V-Pro 32300
- Page 1 32300 & 32600 Installation Instructions CAUTION Read this document before installing or operating the spreader. These Installation Instructions are for SnowEx V-Pro 32300 and 32600 hopper spreaders ® with serial numbers beginning with 190901 and higher. A DIVISION OF DOUGLAS DYNAMICS, LLC...
-
Page 3: Safety Definitions
SAFETY SAFETY DEFINITIONS WARNING/CAUTION LABELS Become familiar with and inform users about the WARNING warning and caution labels on the spreader. Indicates a potentially hazardous situation that, if not avoided, could result in death or NOTE: If labels are missing or cannot be read, see serious personal injury. -
Page 4: Serial Number Label
SAFETY Warning/Caution Labels, continued Warning Label – Read Owner's Manual • Read Owner’s Manual for Installation Instructions. • Secure spreader to truck with ratchet straps. • Anchor spreader securely to truck body with bolt kit provided to prevent slipping or sliding. •... -
Page 5: Safety Precautions
SAFETY SAFETY PRECAUTIONS CAUTION • Do not operate a spreader in need of Improper installation and operation could cause maintenance. personal injury and/or equipment and property • Before operating the spreader, reassemble damage. Read and understand labels and the any parts or hardware removed for cleaning Owner's Manual before installing, operating, or making adjustments. -
Page 6: Personal Safety
SAFETY PERSONAL SAFETY BATTERY SAFETY • Remove the ignition key and put the vehicle in CAUTION PARK or in gear to prevent others from starting Batteries normally produce explosive gases the vehicle during installation or service. which can cause personal injury. Therefore, •... -
Page 7: Determining Vehicle Payload
LOADING DETERMINING VEHICLE PAYLOAD These instructions cover vehicles that have been recommended for carrying the hopper spreader. Please see your local dealer for proper vehicle applications. WARNING WARNING Overloading could result in an accident or damage. Do not exceed GVWR of the vehicle. Overloading could result in an accident or See Loading section to determine maximum damage. -
Page 8: Mounting The Spreader
MOUNTING THE SPREADER MOUNTING SPREADER 4. Install the chute/defl ector assembly to the spinner assembly using the four 5/16" x 1-1/2" tapping screws and 5/16" locknuts in the supplied NOTE: Periodically throughout the snow and ice hardware kit to complete the drive assembly. control season, verify that mounting devices are secure. - Page 9 MOUNTING THE SPREADER 10. Install the spreader to the vehicle using the CAUTION supplied 1/2" x 3" carriage bolts and 1/2" locknuts. Before drilling holes, check to be sure that no vehicle wiring or other components could be 11. Tighten all fasteners according to the torque chart. damaged.
-
Page 10: Wiring Instructions
WIRING AND HARNESS INSTRUCTIONS WIRING INSTRUCTIONS 8. Tighten the fuse holder nuts to 106–159 in-lb (12–18 N•m). Snap the fuse holder cover into place. Spreaders are shipped from the factory with the spreader harness wired to the motor and spreader 9. -
Page 11: Final Checklist
WIRING AND HARNESS INSTRUCTIONS 4. Install the control/bracket assembly to the CAUTION vehicle-side bracket using 1/4" x 1/2" machine Before drilling any holes, check both sides screws, 1/4" nylon shoulder washers, 1/4" lock of the material for any wires, fuel lines, fuel washers, and 1/4"... -
Page 12: Harness Wiring Diagram
HARNESS WIRING DIAGRAM Cab Control 18 ga Red 4-Way Connector To Vehicle Switched Accessory Vehicle Control Harness Connectors 18 ga Shielded Twisted-Pair Cable 6 ga Red Fuse 6 ga Red 12 ga Black 6 ga Black Vehicle Cable Assembly 7-Pin Connect to Connector spreader harness. - Page 13 SPREADER MODULE & CABLES 5-POST SPREADER MODULE To Port A (BLUE) To Vibrator Relay/Fuse Block To Auger To Spinner Motor Accessory Taps 7-Pin To Vehicle Cable Assembly Lit. No. 74258, Rev. 01 December 15, 2019...
- Page 14 Do not exceed vehicle ratings with a spreader. TrynEx International off ers a limited warranty for all spreaders and accessories. See separately printed page for this important information. The following are registered ( ) or ® unregistered (™) trademarks of Douglas Dynamics, LLC: SnowEx , V-Pro™. ® Printed in U.S.A.
Need help?
Do you have a question about the V-Pro 32300 and is the answer not in the manual?
Questions and answers