Table of Contents
Advertisement
Quick Links
Advertisement
Table of Contents

Summary of Contents for Dudek GLOBE 120
- Page 1 www.dudek.eu...
-
Page 3: Table Of Contents
CAUTION! Read the manual before using the equipment INDEX Page 1. Purpose..................3 2. Technical data...................4 3. Attached documents................4 4. Inspections and repacking..............5 5. Repairs....................5 6. Storage and maintenance..............5 7. Design....................6 8. Packing....................7 9. Placing in the container..............13 10. Connecting the V-risers ..............17 11, 12. -
Page 5: Purpose
As an option, you can get at Dudek Paragliders the externally mounted container, its release handle and V-risers. It can be attached to the front or side of the harness, depending on your preferences and harness characteristics. -
Page 6: Technical Data
2. Technical Data 2. Technical Data TYPE TYPE GLOBE 120 GLOBE 120 Canopy system Canopy system single, pulled-down apex single, pulled-down apex Number of panels/lines Number of panels/lines Surface flat [m ] Surface flat [m ] 37,15 37,15 21,10 21,10... -
Page 7: Inspections And Repacking
USER MANUAL 4. Inspections and repacking IP parachute must be aired and repacked every 12 months, and inspected every 24 months. It should be done by the manufacturer or authorised paragliding riggers. 5. Repairs Any repairs are to be carried out exclusively by the manufacturer , or company authorized by the manufacturer. -
Page 8: Design
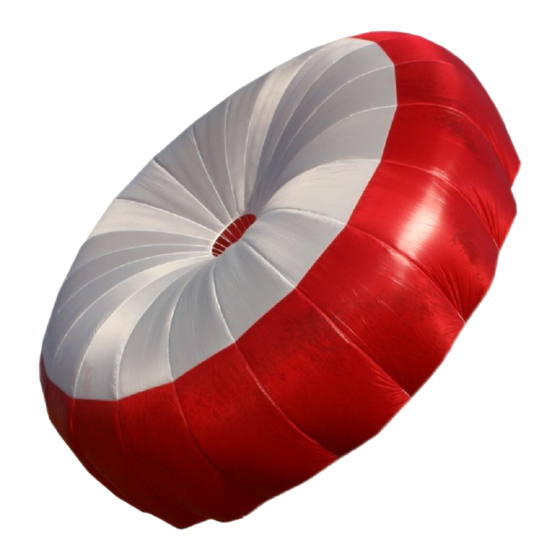
7. The structure of the rescue system The rescue system consists of following elements: canopy (gores, wedges, canopy brink, vent opening, vent brink) suspension lines central line connecting riser bag (keeps the system folded) gore wedge canopy brink vent brink spill hole suspension lines central line... -
Page 9: Packing
USER MANUAL 8. Packing the system Before you start packing your parachute, it needs to be aired (that is - spread the canopy and straighten lines for 24 hours in a dry place of room temperature). Then carefully check the canopy gore by gore, as well as suspension lines and connecting riser for any damages. - Page 10 Place the data sheet gore on the right side of the table. Grab the first two suspension lines together with central line and start flaking each wedge out with the other hand, adding subsequent lines to the bundle. Stop after flaking half of the total gores number.
- Page 11 USER MANUAL Drawing and pictures show correct organisation of the canopy brink and top (number of wedges on the picture was reduced for sake of clarity). canopy brink canopy top data sheet gore Check if the lines cleanly split into right and left halves and if the central lines (fixed in the middle of connector link) do not cross with suspension lines all the way to the spill-hole.
- Page 12 Fold the canopy into an ‘S’ shape. Remove the assistance line from canopy top. Place the bag in the vicinity and start folding canopy as shown.
- Page 13 USER MANUAL Slid the bag over folded canopy. Fold the lines into three ‘double eights’ and put rubber loops over the ends. Picture shows correct appearance of the double eights before placing them in the bag. Lead the middle loop through nearest eyelet.
- Page 14 Place the three double loops in the bag. Close it with middle rubber loop, interlacing lines through it. Lead the lines through other rubber loops, completely closing the bag. Remaining lines (length about 40-70 cm) are to be fixed on top of the bag. If there are any rubber loops left unused, they should be detached from the bag.
-
Page 15: Placing In The Container
USER MANUAL 9. Placing parachute in the external container Attach release handle to the bag by fixing its strap to one of the loops. The connecting riser should be pointing sidewise, towards narrow flap of the container. Place the bag in the container, lines down. Lead assistance lines through loops and eyelets of the container. - Page 16 Using assistance lines and pins close the container side lips. Close the lower lid then, replacing the assistance pin with those of the release handle. The last additional lip should be closed with the other pin of the handle. Pull the assistance lines out, fix the handle with velcro and stick the ends of the handle into elastic...
- Page 17 USER MANUAL Connect the connecting riser with V-shaped risers, using direct knot or stainless steel quicklink (at least 6 mm rod diameter). Possible knot must be well tightened up, without possibility of sliding, while quicklink should be secured with rubber loops.
- Page 18 Close the cover lid with release handle using Velcro strap (the one better suited to actual bag size). Excess of the stiff Velcro tape should be covered with its soft counterpart. The last picture shows buckles attaching container to the harness and a pocket with parachute ID card.
-
Page 19: Connecting The V-Risers
USER MANUAL 10. Connecting the V-risers of the harness method I - knot metoda II - quicklink... -
Page 20: 11, 12. Fixing
11. Fixing the Globe on the side of the harness... - Page 21 USER MANUAL 12. Fixing the Globe on the front of the harness...
-
Page 22: Example Of A Rescue Throw
13. Example of a rescue throw... -
Page 23: Placing Parachute In A Harness-Integrated Container
USER MANUAL 14. Placing parachute in a harness-integrated container. Connect the connecting riser with harness risers. Attach release handle to the bag. Put parachute in harness container. Close container using release handle pin. Make sure the pin is secured, so that it will not drop out on its own. It is recommended to have the container pin sealed by an authorised rigger with a thread of max. - Page 24 Dudek Paragliders ul. Centralna 2U 86-031 Osielsko tel. +48 52 324 17 40 export@dudek.eu www.dudek.eu made in europe...


Need help?
Do you have a question about the GLOBE 120 and is the answer not in the manual?
Questions and answers