Samsung NX58H9500W Series User Manual
Slide-in
Hide thumbs
Also See for NX58H9500W Series:
- Installation manual (120 pages) ,
- User manual (216 pages) ,
- User manual (186 pages)
Table of Contents
Advertisement
Advertisement
Table of Contents

Related Manuals for Samsung NX58H9500W Series


Summary of Contents for Samsung NX58H9500W Series
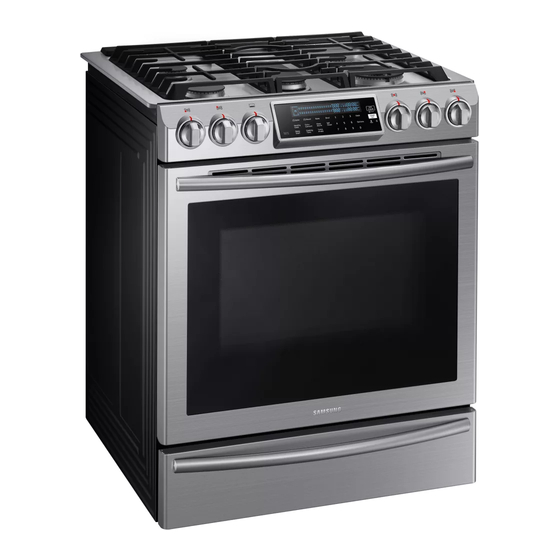
- Page 1 Slide-In Gas Range User manual NX58H9950W*/NX58H9500W*/NX58K9500W*...
- Page 2 Regulatory Notice ANTI-TIP DEVICE WARNING If the information in this manual is not followed exactly, WARNING a fire or explosion may result causing property damage, personal injury, or death. To reduce the risk of tipping the range, the range must be secured by a properly installed Anti-Tip device.
- Page 3 Bigger is better cause the range to tip, resulting in burns or serious injuries. With a capacity of 5.8 cubic feet, this Samsung gas oven range Confirm that the Anti-Tip device is installed properly. Then, to offers more space than many other leading brands in the verify that the Anti-Tip device is engaged, grasp the top rear United States and Canadian markets.
-
Page 4: Table Of Contents
Contents Griddle Important safety information Gas burners Symbols used in this manual Ignition California proposition 65 warning Commonwealth of massachusetts Gas oven General safety Cooking mode Fire safety Recipe guide Gas safety Racks Electrical and grounding safety Cooking options Installation safety Special features Location safety Changing option settings... -
Page 5: Important Safety Information
Important safety information READ ALL INSTRUCTIONS BEFORE USING THIS APPLIANCE CALIFORNIA PROPOSITION 65 WARNING • All electrical and gas equipment with moving parts can be WARNING dangerous. Please read the important safety instructions Cancer and Reproductive Harm - www.P65Warnings.ca.gov. for this appliance in this manual. The instructions must be followed to minimize the risk of injury, death, or property COMMONWEALTH OF MASSACHUSETTS damage. -
Page 6: General Safety
Important safety information GENERAL SAFETY • Remove all packaging materials from the range before operating to prevent ignition of these materials. Keep WARNING all packaging materials out of children’s reach. Properly To reduce the risk of fire, electric shock, personal injuries, and/ dispose the packaging materials after the range is or death, obey the following precautions. -
Page 7: Fire Safety
Important safety information • When disposing of the range, cut off the power cord and FIRE SAFETY remove the door to prevent children and animals from WARNING getting trapped. To reduce the risk of fire, electric shock, personal injuries, and/ •... -
Page 8: Gas Safety
Important safety information • Do not use water on a grease fire. To put out a grease fire, GAS SAFETY turn off the heat source and smother the fire with a tight- WARNING fitting lid or use a multipurpose dry chemical or foam-type To reduce the risk of fire, electric shock, personal injuries, and/ fire extinguisher. -
Page 9: Electrical And Grounding Safety
Important safety information Checking for gas leaks • Do not use a damaged power plug, power cord, or loose power outlet. • Leak testing of the appliance shall be conducted according • Do not modify the power plug, power cord, or power outlet to the manufacturer’s instructions. -
Page 10: Installation Safety
Important safety information • The range is supplied with a 3-pronged grounded plug. This INSTALLATION SAFETY cord must be plugged into a mating, grounded 3-prong WARNING outlet that meets all local codes and ordinances. If codes To reduce the risk of fire, electric shock, personal injuries, and/ permit the use of a separate ground wire, we recommend or death, obey the following precautions. - Page 11 Important safety information • Due to the size and weight of the range, have two or more • Installation of this range must conform with local codes people move the range. or, in the absence of local codes, with the National Fuel •...
-
Page 12: Location Safety
Important safety information LOCATION SAFETY • If the range is located near a window, do not hang long curtains or paper blinds on that window. WARNING • For the range to ventilate properly, make sure the range’s To reduce the risk of fire, electric shock, personal injuries, and/ vents are not blocked or covered, and that there is enough or death, obey the following precautions. -
Page 13: Cooktop Safety
Important safety information COOKTOP SAFETY • This cooktop is designed to cook with a wok or wok ring attachment. If foods are flamed, they should only be flamed WARNING under a ventilation hood that is on. To reduce the risk of fire, electric shock, personal injuries, and/ •... - Page 14 Important safety information • To avoid cookware discoloration, deformity, and/or • To prevent delayed eruptive boiling, always allow heated carbon monoxide poisoning, do not use cookware that is liquids to stand at least 20 seconds after you have turned substantially larger than the grate. off the burner so that the temperature in the liquid can •...
-
Page 15: Oven Safety
Important safety information • Never leave plastic items on the cooktop. Hot air from the OVEN SAFETY vent can melt or ignite plastic items or cause build up of WARNING dangerous pressure in closed plastic containers. You may To reduce the risk of fire, electric shock, personal injuries, and/ get severe burns if you touch the surfaces near the vent or death, obey the following precautions. -
Page 16: Warming Drawer/Lower Drawer Safety
Important safety information • Do not use aluminium foil or foil liners anywhere in the WARMING DRAWER/LOWER DRAWER SAFETY oven. Do not use aluminium foil or like material to cover WARNING any holes or passages in the oven bottom or to cover an To reduce the risk of fire, electric shock, personal injuries, and/ oven rack. -
Page 17: Self-Cleaning Oven Safety
Important safety information • To avoid steam burns, use caution when opening the • Before starting a self-cleaning cycle, remove all racks, drawer. cookware, and utensils from the oven. Only porcelain- • Do not use aluminium foil to line the drawer. coated oven racks may be left in the oven. -
Page 18: Overview
* Gliding rack (1) * Split rack (1) NX58H9950W* Only NX58H9500W*/ NX58K9500W* Only If you need an accessory marked with a *, you can buy it from the Samsung Contact Center (1-800-726-7864). 01 Touch display 02 Surface burner 03 Warming drawer... -
Page 19: Control Panel
Overview Control panel 12 Temp Probe: Activate the temperature probe mode. 13 Numbers: Use to set the time, temperature, or preset. 14 Clock: Set the clock time. 15 Options: Display the user 9 options available. 16 OFF/CLEAR (Lock): Cancel the current operation but not the timer. Lock the control panel and the door to prevent accidents. -
Page 20: Before You Start
Before you start You should know about the following features and components before you use Clock your range for the first time. It is important to set the clock correctly to ensure automatic features work Display mode properly. This product supports two time formats: 12-hour (default) and 24-hour. To set the clock time Sleep After 2 minutes of inactivity (or 1 minute when the oven is in standby mode), the... -
Page 21: Kitchen Timer
Before you start Gas range 1. Put all ingredients into a cooking Kitchen timer container (pan, pot, etc). The kitchen timer gives you an extra timer you can use to time cooking tasks such a boiling eggs. It does not, however, start or stop any cooking operation. You can set the timer from 1 minute to 9 hours and 99 minutes. -
Page 22: Cookware
Gas range Cookware Size limitations CAUTION Requirements 6” or less • Do not place a small pan or pot with a • Flat bottom and straight sides bottom diameter of about 6” or less on • Tight-fitting lid the center grate. This cookware may •... -
Page 23: Wok Grate
Gas range Wok grate Griddle Woks are often used for stir frying, pan frying, deep frying, and poaching. The The removable coated griddle provides an extra cooking surface. This is useful provided wok grate supports 12” to 14” woks. especially when cooking meats, pancakes, or other foods requiring a large cooking space. -
Page 24: Gas Burners
Gas range Gas burners CAUTION • Do not remove the griddle until the cooktop grates, surfaces, and griddle itself Each burner has a corresponding knob that cool down. enables you to set the flame level from LO • The griddle on the cooktop may become very hot when you use the cooktop or to HI. -
Page 25: Ignition
Gas range Ignition Flame level The flames on the burners should always stay under the cookware, and should not Make sure all surface burners are properly extend beyond the cookware bottom at any time. installed. WARNING 1. Push in and turn the control knob to the •... -
Page 26: Gas Oven
Gas oven 1. Put all ingredients in a heat-safe Cooking mode container. • Make sure to close the door before you start cooking. • If you leave the door open for 30 seconds while the oven is in convection baking/roasting, baking, broiling, 2. - Page 27 Gas oven Limitations Convection cooking The convection fan at the back of the gas oven circulates hot air evenly Feature Minimum Maximum throughout the oven cavities so that food is evenly cooked and browned in less Bake 175 °F (80 °C) 550 °F (285 °C) time than with regular heat.
- Page 28 Gas oven Broiling Temperature probe Broiling uses the oven broil burner at the top of the oven to cook and brown food. The temperature probe lets you cook roasts and poultry to the exact internal Meat or fish must be put on a broiling grid in a broiling pan. Preheating for 5 temperature you want, taking the guess work out of determining whether a piece minutes before broiling is recommended.
- Page 29 Gas oven Temperature table 2. Insert the temperature probe plug into the socket on the top side wall of the Type of food Internal temperature (°F) oven. Rare 140-150 Beef/Lamb Medium 160-170 Well done 175-185 Pork 175-185 Poultry 185-195 CAUTION •...
-
Page 30: Recipe Guide
Gas oven Recipe guide Roasting time Temperature Food Amount (lb) (minutes per pound) (°F/°C) Roasting guide Lamb For detailed instructions, see page 26 Medium 25–30 325/163 Half Leg Roasting time Temperature Well Done 30–35 325/163 Food Amount (lb) (minutes per pound) (°F/°C) Medium 25–30... - Page 31 Gas oven Broiling guide 1st side 2nd side Rack For detailed instructions, see page 28. Food Quantity and/or Thickness Power time time position (min.) (min.) 1st side 2nd side Rack Food Quantity and/or Thickness Power time time position (min.) (min.) 0.5”...
-
Page 32: Racks
Gas oven Racks Multi-rack Baking • When baking cakes on two racks, place Position the racks in position 3 and 5 for the The gas oven range comes with 3 racks in 7 different positions. Each rack guide best performance. has a stop to prevent loosening during operation. -
Page 33: Cooking Options
Gas oven Inserting and removing an oven rack Cooking options To insert an oven rack CAUTION Food that can easily spoil such as milk, eggs, fish, poultry, and meat, should be 1. Place the rear end of the rack on a rack guide. -
Page 34: Special Features
Gas oven Special features NOTE To change the programmed cooking time, press the Cooking Time button and Healthy Cook enter a different time. Then, press the START/SET button. Healthy Cook provides 6 different specialized cooking options. To use a Healthy Delay start Cook option, follow the instructions below. - Page 35 Gas oven Specialized items CAUTION • Do not use Bread proof when the oven temperature is above 100 °F. If 1. Dehydrate Dehydrate dries food or removes moisture from food via heat circulation. temperature is above 100 °F, this mode won’t be able to use. Wait until the After drying the food, keep it in a cool and dry place.
- Page 36 Gas oven NOTE Rack Temperature Cooking Food Quantity Recommendations position (˚F) time (min.) • You can cancel warming at any time by pressing the OFF/CLEAR button. • To set the warming function during a timed cooking, press the Keep Warm Put the fish fillets on a button in timed cooking mode.
-
Page 37: Changing Option Settings
Gas oven To enable the Sabbath option CAUTION • Do not attempt to activate any other functions except for Bake when the Sabbath option is on. Only the following buttons will function properly: Number Pad, Bake, Oven Start/Set, and Oven Off. •... - Page 38 Gas oven Favorite Cook To use or recall a favorite cook mode Create a favorite cooking recipe with 3 different personalized settings. This is 1. Press the Options button and then 1 on available only with baking, convection baking, or convection roasting. the number pad.
- Page 39 Gas oven Temp. Unit (°F/°C) Time/date (12hr/24hr) Change the temperature format of the oven to Fahrenheit or Centigrade. The Set the clock to display the time in the 12-hour or 24-hour format. default is Fahrenheit. 1. Press the Options button and then 5 on 1.
- Page 40 Gas oven Language Demo mode Select a preferred language from English, French, or Spanish. This is used by retailers for display purposes only. In this mode, the heating element does not operate. 1. Press the Options button and then 7 on the number pad.
-
Page 41: Others
Gas oven Others Conv. Convert Switch between baking and convection baking modes. In baking mode, press the Oven light Conv. Convert button to switch to convection baking mode. Turns the oven light on and off. When you press the Conv. Convert button in the Bake mode, the cooking mode will be Press the Oven Light button to turn the changed to Convection Bake. -
Page 42: Warming Drawer
Warming drawer 1. Put the cooked food in its container into Warming drawer the warming drawer. Keep your cooked food warm. This drawer is designed to keep hot food warm, but not for heating cold food. The drawer takes about 25 minutes to warm up. 1. -
Page 43: Maintenance
Warming drawer Maintenance CAUTION Cleaning • Do not use plastic containers or plastic wraps. • Do not cover the inner area of the warming drawer with aluminum foils. Control panel • Do not store liquid or water inside the warming drawer. First, lock the control panel and the door to prevent accidental operations and/or •... - Page 44 • If a rack becomes too difficult to slide in or out, lubricate the rack. • To order Graphite Lubrication, call our customer center at 1-800-SAMSUNG (726-7864). • For online shopping, visit http://www.samsungparts.com/Default.aspx and search for part DG81-01629A.
- Page 45 Maintenance Surface burners CAUTION • Do not leave racks in the oven during the self-cleaning cycle. The extreme heat Burner controls generated in this cycle can permanently peel off the rack coating and make it Make sure all surface burner knobs are in the OFF position. difficult to remove the rack.
- Page 46 Maintenance CAUTION 6. Return the burner heads to their positions on top of the manifold valves. • Do not use a steel-wool pad or abrasive cleaner, which can scratch or damage Make sure a starter electrode is inserted the enamel surface. through the hole in each burner head.
- Page 47 Maintenance • Do not use oven cleaners. Commercial oven cleaners or oven liners should CAUTION NEVER be used in or around any part of the oven. Residue from oven cleaners • The starter electrodes are not removable. Do not attempt to remove them by will damage the inside of the oven during a self-cleaning operation.
-
Page 48: Replacement
Maintenance To delay starting the self-cleaning cycle CAUTION Do not attempt to open the oven door immediately after the self-cleaning cycle is complete. The oven is still very hot when the door unlocks. Escaping hot air and/or steam could burn you. Replacement Oven light The oven light is a standard 40-watt appliance bulb. -
Page 49: Reinstallation
Maintenance Reinstallation To reinstall the door 1. Firmly grasp both sides of the door at Oven door the top. 2. With the door set at the same angle as To remove the oven door the removal position (about 5 degrees from vertical), slide the hinge arms into 1. -
Page 50: Checkpoints
Maintenance Troubleshooting If you encounter a problem with the gas oven, first check the table below and try 4. Put the drawer in the roller guides on the suggestions. either side, and then snap the clips into place. Checkpoints Gas safety Problem Possible cause Action... -
Page 51: Troubleshooting
Troubleshooting Oven Problem Possible cause Action Surface The control knob is not set Push in the control knob and Problem Possible cause Action burners do not properly. turn it to the LITE position. The oven You have a function information Press the OFF/CLEAR button and light. - Page 52 Troubleshooting Problem Possible cause Action Problem Possible cause Action Oven burner will The oven door lock is turned on. The display will show the Lock Oven smokes Meat or food not properly Cut away excess fat and/or fatty not shut off. icon.
- Page 53 Troubleshooting Problem Possible cause Action Problem Possible cause Action Excessive This is the first time the oven has This is normal. The oven will Steam or smoke This is normal. The oven vent is located there. smoking during been cleaned. always smoke more the first time coming from More steam is visible when using...
- Page 54 Troubleshooting Warming drawer Others Problem Possible cause Action Problem Possible cause Action Warming The controls are not set Reset the controls as The product is The appliance has been Make sure the floor is level, drawer will not properly. described on page 42. not level.
-
Page 55: Information Codes
If this does not solve the Oven overheating. Oven thermostat needs See page 38. problem, contact a local Samsung service center. adjustment. Door locking error. There is aluminum foil on Remove foil. racks and/or oven bottom. Clock or timers not set See pages 20 and 21. -
Page 56: Warranty (U.s.a)
SAMSUNG authorized servicer is not available, you may use and care guide are not covered by this limited warranty. be responsible for a trip charge or required to bring the product to a SAMSUNG The cost of repair or replacement under these excluded circumstances shall be the authorized service center for service. - Page 57 REMODELING EXPENSES, LOSS OF REVENUE OR PROFITS, FAILURE TO REALIZE SAVINGS OR OTHER BENEFITS REGARDLESS OF THE LEGAL THEORY ON WHICH THE CLAIM IS BASED, AND EVEN IF SAMSUNG HAS BEEN ADVISED OF THE POSSIBILITY OF SUCH DAMAGES. Some states do not allow exclusion or limitation of incidental or consequential damages, so the above limitations or exclusions may not apply to you.
-
Page 58: Warranty (Canada)
CAUSED BY THE USE, MISUSE, OR INABILITY TO USE THIS PRODUCT, REGARDLESS service center, and any unauthorized service will void this warranty. The OF THE LEGAL THEORY ON WHICH THE CLAIM IS BASED, AND EVEN IF SAMSUNG original dated bill of sale must be presented upon request as proof of purchase HAS BEEN ADVISED OF THE POSSIBILITY OF SUCH DAMAGES. - Page 59 For questions about features, operation/performance, parts, accessories, or service, call 1-800-SAMSUNG (726-7864), or visit our Web site at www.samsung.com/ca/support To obtain warranty service, please contact SAMSUNG at: (English), or www.samsung.com/ca_fr/support (French).
- Page 60 How-to Videos and Live Shows * Requires reader to be installed on your smartphone Please be advised that the Samsung warranty does NOT cover service calls to explain product operation, correct improper installation, or perform normal cleaning or maintenance. QUESTIONS OR COMMENTS?
Need help?
Do you have a question about the NX58H9500W Series and is the answer not in the manual?
Questions and answers