Table of Contents
Advertisement
Available languages
Available languages
Advertisement
Table of Contents

Related Manuals for Midland BIKE GUARDIAN


Summary of Contents for Midland BIKE GUARDIAN
- Page 1 BIKE DVR BIKE GUARDIAN BIKE GUARDIAN ACTION CAM...
- Page 2 All trademarks and registered trademarks are the property of their respective owners. Tutti i marchi di fabbrica registrati sono di proprietà dei rispettivi titolari...
-
Page 3: Informazioni Su Questa Guida
Informazioni su questa guida Il contenuto del presente documento viene divulgato solo a scopo informativo ed è soggetto a mo- difiche senza preavviso. Abbiamo fatto il possibile per garantire che il presente manuale sia preciso e completo. Tuttavia, non ci assumiamo alcuna responsabilità per eventuali errori e omissioni che potrebbero essere stati commessi e fatti. -
Page 4: Descrizione Delle Parti
Descrizione delle parti 2 3 4 1. Lente 2. LED blu accensione 3. Pulsante ON/REC 4. LED rosso registrazione 5. Pulsante Foto 6. Coperchio a vite 7. Microfono 8. Alloggiamento MicroSD 9. LED ricarica 10. Connettore ricarica 11. Selettore modalità 12. -
Page 5: Contenuto Della Confezione
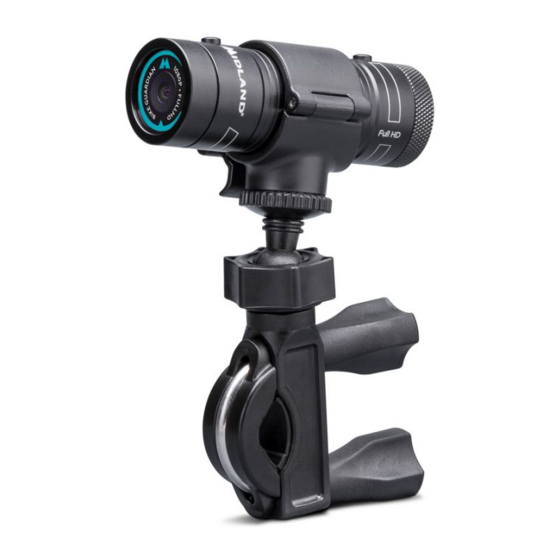
Contenuto della confezione 1. Supporto telecamera 2. Supporto manubrio 3. Supporto adesivo (piatto e curvo) con attacco Go-Pro 4. Supporto a fascia con strap 5. Cavo alimentazione Waterproof 6. Cavo connessione PC 7. Laccetto... -
Page 6: Ricarica Della Batteria
1. Scarica il software di programmazione dal sito www.midlandeurope.com 2. Collegare il cavo USB alla videocamera e connettere al PC 3. Lanciare il software Bike Guardian 4. Premere il pulsante “Sync Date & Time” per aggiornare l’orario della videocamera. 5. Quando i campi sulla destra riportano data/ora potete scollegare la videocamera e spegnerla. - Page 7 Fissaggio della videocamera sul manubrio 1. Fissare BIKE GUARDIAN al supporto, facendo attenzione a far coincidere la parte piatta supe- riore della videocamera con l’incavo nel supporto, quindi chiudere la leva laterale. 2. Fissare il supporto da manubrio 3. Avvitare BIKE GUARDIAN sul supporto 4.
- Page 8 è piena. Modalità Actioncam: la registrazione deve essere avviata e fermata manualmente, inoltre al riempimento della scheda microSD la BIKE GUARDIAN smetterà di registrare. La tabella sotto riassume il funzionamento nelle 2 modalità: Start/Stop Registrazione Start/Stop registrazione all’avvio/...
- Page 9 2. Inserire la scheda nella camera mentre BIKE GUARDIAN è spenta. 3. Premere 3 secondi il pulsante Foto per accendere la videocamera. Si accenderà il led BLU e la videocamera vibrerà...
-
Page 10: Specifiche Tecniche
Foto Premendo il pulsante Foto è possibile scattare foto (mentre la videocamera è accesa ed in stand by) e catturare fotogrammi durante la registrazione. Reset In caso di malfunzionamenti o comportamento anomalo, si consiglia di seguire questi passi: 1. premere il pulsante “reset” posto sul retro della videocamera (a fianco del connettore d’alimen- tazione) 2. -
Page 11: About This Guide
About this Guide The content of this document is for information purpose and is subject to change without prior no- tice. We made every effort to ensure that this User Guide is accurate and complete. However, no liability is assumed for any errors and omissions that may have occurred. The manufacturer reserves the right to change the technical specifications without prior notice. -
Page 12: Description Of The Controls
Description of the controls 2 3 4 1. Lens 2. Blue LED: power on 3. ON/REC button 4. Red LED: recording 5. Photo control 6. Screw cap 7. Microphone 8. MicroSD Slot 9. Recharge LED 10. Recharge connector 11. Operating mode selector 12. -
Page 13: What's In The Box
What’s in the box 1. Lock mount 2. Handlebar mount 3. Adhesive support (flat and curved) with Go-Pro adaptor 4. Strap mount 5. Waterproof power cable 6. Cable for the connection to PC 7. Wrist belt... -
Page 14: Battery Recharge
Battery recharge BIKE GUARDIAN can be recharged by connecting the USB cable to a proper charger or to a PC (you can use both cables supplied in the package: the waterproof cable or the one suitable for the connection PC) While the camera is being charged the RED led next to the recharge connector will light up and will turn off once the charge is full. - Page 15 Fixing the camera on the handlebar 1. Fix the camera to the support, paying attention to match the upper flat part of the camera with the notch of the support, then close the side lever. 2. Install the handlebar mount 3.
- Page 16 On the rear side of the camera there are two selectors suitable to set the resolution and the operating mode. BIKE GUARDIAN can work either as a DVR or as an action cam. DVR mode: the camera automatically starts re- cording when it’s powered and stops recording...
- Page 17 BIKE GUARDIAN supports micro SD cards from 8 up to 64 GB. Note1: We recommend to use SD cards class 10 high speed or higher.
-
Page 18: Technical Specifications
Reset When the camera does not work properly or is jammed, we suggest that you follow these steps: 1. Press the “reset” button on the rear of the camera 2. Pull out the micro SD card from the camera and format it with a PC 3. - Page 19 Einleitung Der Inhalt dieses Dokuments dient zu Informationszwecken und kann ohne vorherige Ankündigung geändert werden. Wir haben uns bemüht sicherzustellen, dass dieses Benutzerhandbuch genau und vollständig ist. Es wird jedoch keine Haftung für eventuelle Fehler und Auslassungen übernommen. Der Hersteller behält sich das Recht vor, die technischen Spezifikationen ohne vorherige Ankünd- igung zu ändern.
-
Page 20: Tasten Und Funktionen
Tasten und Funktionen 2 3 4 1. Linse 2. Blaue LED: eingeschaltet 3. Ein/Aus/Aufnahme 4. Rote LED: Aufnahme 5. Foto Auslöser (FOTO) 6. Abdeckung 7. Mikrofon 8. MicroSD Buchse 9. LED Ladeanzeige 10. Ladebuchse 11. Modus Auswahl 12. Reset 13. Auflösung... - Page 21 Lieferumfang 1. Kamera Befestigung 2. Lenkerhalterung 3. Klebehalterung (flach und gebogen) mit Go-Pro Adapter 4. Gurthalterung 5. Wasserdichtes USB Kabel 6. Datenkabel zur Verbindung mit PC 7. Handschlaufe...
-
Page 22: Einstellung Datum Und Uhrzeit
Aufladen Die BIKE GUARDIAN Kamera kann mit beiden Kabeln im Lieferumfang (wasserdichtes Kabel und Datenkabel) an einer geeigneten Stromversorgung oder am PC aufgeladen werden. Während des Ladevorgangs leuchtet die Ladeanzeige rot und erlischt, sobald die Kamera vollständig aufgeladen ist. Einstellung Datum und Uhrzeit 1. - Page 23 Befestigung der Kamera am Lenker 1. Legen Sie die Kamera in die Befestigung (1). Achten Sie darauf, dass die flache Oberseite der Kamera an der passenden Stelle Befestigung liegt. Fixieren Sie nun die Kamera, indem Sie den Verschluß einhaken und nach unten ziehen. 2.
- Page 24 Auf der Rückseite der Kamera befinden sich 2 Auswahl- schalter, mit denen Sie die Auflösung und die Betriebsart wählen können. BIKE GUARDIAN kann als Dashcam oder Action Ka- mera verwendet werden. Dashcam Modus: die Aufnahme beginnt/endet automatisch mit dem Ein-/Ausschalten der Ka- mera.
-
Page 25: Micro Sd Karte
Auflösung - wählen Sie eine der folgenden Einstellungen: • FullHD 1080p@27fps • HD 720p@55fps Die folgende Tabelle zeigt die geschätzte Aufnahmedauer je nach Auflösung und Speicherkarte: Speicher 1080p Auflösung 720p Auflösung 70 min 90 min 16GB 140 min 180 min 32GB 280 min 360 min... -
Page 26: Technische Spezifikationen
Reset Falls die Kamera mal nicht mehr reagieren sollte und abgestürzt ist, gehen Sie bitte wie folgt vor: 1. Drücken Sie die “Reset” Taste auf der Rückseite der Kamera. 2. Entnehmen Sie die MicroSD Karte und formatieren Sie diese am PC. 3. -
Page 27: Funciones Principales
Acerca de esta guía El contenido de este documento tiene fines informativos y está sujeto a cambios sin previo aviso. Hicimos todos los esfuerzos posibles para garantizar que esta Guía del usuario sea precisa y completa. Sin embargo, no se asume ninguna responsabilidad por cualquier error u omisión que pueda haber ocurrido. -
Page 28: Descripción De Los Controles
Descripción de los controles 2 3 4 1. Lente 2. LED azul: encendida 3. Botón ON/REC 4. LED rojo: grabando 5. Foto 6. Tapón de rosca 7. Micrófono 8. Ranura MicroSD 9. LED de carga 10. Conector de carga 11. Selector de modo operativo 12. -
Page 29: Qué Hay En La Caja
Qué hay en la caja 1. Soporte de fijación 2. Soporte de manillar 3. Soporte adhesivo (plano y curvo) con adaptador Go-Pro 4. Soporte de correa 5. Cable de alimentación waterproof 6. Cable para conexión al PC 7. Correa de muñeca... -
Page 30: Ajustar La Fecha Y La Hora
Carga de la batería BIKE GUARDIAN puede cargarse conectando el cable USB a un cargador adecuado o al PC (puede usar los dos cables suministrados: el cable waterproof o el cable para PC) Durante la carga, el RED rojo junto al conector de cargase encenderá y se apagará cuando la carga esté... - Page 31 Montar la cámara en el manillar 1. Fije la cámara al soporte, prestando atención para hacer coincidir la parte plana superior de la cámara con la muesca del soporte. Después cierre la palanca lateral. 2. Instale el soporte de manillar 3.
- Page 32 Grabar / modos operativos En la parte posterior de la cámara hay dos selectores para configurar la resolución y el modo de funcionamiento. BIKE GUARDIAN puede funcionar como DVR o como cámara de acción. Modo DVR: la cámara comienza a grabar automá- ticamente cuando está...
- Page 33 El led rojo parpadeará mientras se formatea y la cámara vibrará al principio y al final del proceso. BIKE GUARDIAN soporta tarjetas micro SD desde 8 hasta 64 GB. Nota1: recomendamos usar tarjetas SD de Clase 10 alta velocidad, o superiores.
-
Page 34: Especificaciones Técnicas
1. Pulse el botón “reset” en la parte trasera de la cámara 2. Extraiga la tarjeta micro SD y formatéela con un PC 3. Inserte de nuevo la tarjeta micro SD y formatéela desde la cámara (encienda BIKE GUARDIAN y mantenga pulsado el botón Foto durante unos 15 segundos) Especificaciones técnicas... - Page 35 IT / RSM A CTE INTERNATIONAL declara que este aparelho Cte International Srl dichiara che il prodotto è conforme cumpre com o disposto na Directiva 2014/53/UE do ai requisiti essenziali e alle disposizioni della Direttiva Parlamento Europeu. A Declaração de Conformidade 2014/53/UE.
- Page 36 Käesolevaga kinnitab Cte International Srl selle mudeli С настоящото CTE international Srl декларира, че vastavust direktiivi 2014/53/UE. Vastavusdeklaratsioon продукта е в съответствие с основните изисквания и on kättesaadav veebilehel http://www.midlandeurope. съответните модификации на Директива 2014/53/UE. com/it/pagina/10090-certifications Декларацията за съвместимост е налична на сайта: http://www.midlandeurope.com/it/pagina/10090-cer- CTE International patvirtina, kad šis modelis atitinka visus tifications...
- Page 37 • INFORMAZIONE AGLI UTENTI: Ai sensi dell’art. 13 del decreto legislativo 25 luglio 2005, n.151 “Attuazione delle Direttive 2002/95/CE, 2002/96/CE e 2003/108/CE, relative alla riduzione dell’uso di sostanze pericolose nelle apparecchiature elettriche ed elettroniche, nonché allo smaltimento dei ri- fiuti”. Il simbolo del cassonetto barrato riportato sull’apparecchiatura indica che il prodotto alla fine della propria vita utile deve essere raccolto separatamente dagli altri rifiuti.
- Page 38 Vertrieb durch: ALAN ELECTRONICS GmbH Daimlerstraße 1K - D-63303 Dreieich Deutschland. Vor Benutzung Bedienungsanleitung beachten. Importado por: MIDLAND IBERIA, SA C/Cobalt, 48 - 08940 Cornellà de Llobregat, Barcelona - España. Antes de utilizar, lea atentamente el manual de uso. Importé par: ALAN FRANCE S.A.R.L.
Need help?
Do you have a question about the BIKE GUARDIAN and is the answer not in the manual?
Questions and answers