
Related Manuals for ComNav SinoGNSS T300


Summary of Contents for ComNav SinoGNSS T300
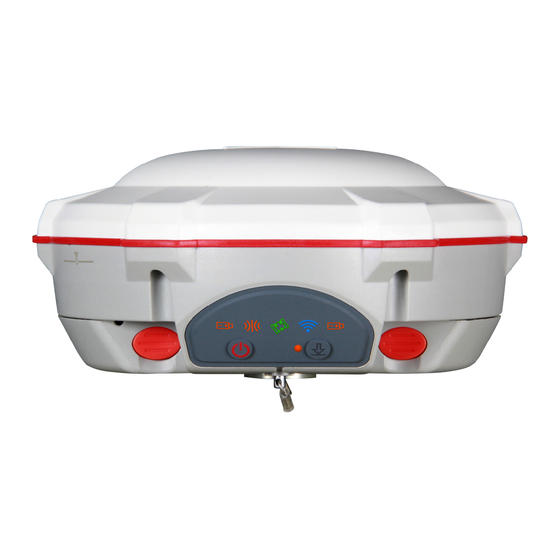
- Page 1 ○ SinoGNSS T300 User Guide T300 GNSS Receiver User Guide Version 1.05 October 2017...
- Page 2 Copyright Notice This is the V1.05 (October, 2017) revision of the T300 GNSS Receiver User Guide. It cannot be copied or translated into any language without the written permission of ComNav Technology. Technical Assistance If you have any question and can't find the answer in this manual, please contact your local dealer from which you purchased the T300 receiver.
- Page 3 CAUTION- A Caution alerts you to a possible risk of damage to the equipment and/or data loss. Warranty Notice ComNav Technology does not warranty devices damage because of force majeure (lighting, high voltage or collision). ComNav Technology does not warranty the disassembled devices.
-
Page 4: Table Of Contents
○ SinoGNSS T300 User Guide CONTENTS 1 Introduction ..........................3 1.1 About the receiver ......................3 1.2 Receiver Features ......................3 1.3 T300 Receiver parts list ..................... 3 1.3.1 Basic Supply kit ....................... 3 1.3.2 Optional Datalink kit ....................5 1.3.3 Transport Cases ...................... - Page 5 ○ SinoGNSS T300 User Guide 7 Specifications ..........................42 Appendix A: 7-Pin Lemo definition ....................43 Appendix B: Setting up of PDL ...................... 43 Appendix C: Connect your controller to the Internet ..............46...
-
Page 6: Introduction
○ SinoGNSS T300 User Guide 1 Introduction ○ The SinoGNSS T300 GNSS Receiver User Guide is aimed to help you get familiar with the T300 receiver and start your project effectively. We highly recommend you to read this manual before surveying, even though you have used other Global Positioning System (GPS) receivers before. - Page 7 ○ SinoGNSS T300 User Guide Item Picture 2* Kits T300 Receivers 1*GNSS Connector 2*7-pin Lemo to RS232 Cable 2* 7-pin Lemo to USB Cable External Power Cable 2* Whip Antenna (UHF) 1*2m-Range Pole with yellow 4* Lithium-ion Battery...
-
Page 8: Optional Datalink Kit
○ SinoGNSS T300 User Guide 2* Battery Charger ALL STAR Controller (with battery and TF card inside) USB Data Cable of Controller Controller Charger and Cable Controller Bracket Optional accessories: Double Bubbles Tribrach with High Adapter 1* 30cm Extension bar 1.3.2 Optional Datalink kit This kit is necessary for long distance radio communication, shown in the following figures:... -
Page 9: Transport Cases
○ SinoGNSS T300 User Guide PDL to T300 Datalink cable Configuration cable Datalink Antenna External Power Cable Aluminum Bracket Extension Bar 1.3.3 Transport Cases ○ Standard transport Case is designed for containing Basic supply kit of one SinoGNSS T300 GNSS Receiver. - Page 10 ○ SinoGNSS T300 User Guide Base Rover The optional choice is provided to have capacity of two kits of T300 receivers.
-
Page 11: Setting Up The Receiver
○ SinoGNSS T300 User Guide 2 Setting up the receiver This chapter provides general information on environmental requirements, setup, power supply and connection of the T300 receiver. 2.1 Environmental requirements To keep the receiver with a reliable performance, it is better to use the receiver in safe environmental conditions: •... -
Page 12: Power Supply
○ SinoGNSS T300 User Guide 2.4 Power supply T300 GNSS receiver supports internal batteries and external power input. 2.4.1 Internal batteries The receiver is equipped with two rechargeable Lithium-ion batteries, which can be removed for charging. The T300 receiver adopts the hot swap battery design that provides you an effective survey workflow. -
Page 13: External Power Supply
○ SinoGNSS T300 User Guide time. Storage of the Lithium-ion Battery – Do not keep batteries inside the receiver if the receiver not used for long time. – Keep batteries in dry conditions. – Take out the batteries from receiver for shipment. ... -
Page 14: General Operation
○ SinoGNSS T300 User Guide Thread the receiver onto the range pole Mount the controller bracket to the pole Install the controller into the bracket Tip: Do not tightly clamp the controller on the Range Pole. 3 General Operation This chapter introduces all controls for the general operation, including button functions and all LED behaviors on the front panel. -
Page 15: Static Survey
○ SinoGNSS T300 User Guide LEDs States Description Enough power Power Flashing Low power Receiving/transmitting differential Differential Data Flashes once per second data Fast flashing No satellite received Satellite Tracking Flashes N times every 5 seconds Received N satellite signals Internal 3G Flashes in blue color GPRS function is working... -
Page 16: Receiver Configuration
○ SinoGNSS T300 User Guide 4.1 Receiver Configuration 1. Download and install CRU software from (ensure the driver is properly installed in your PC): http://www.comnavtech.com/download.asp?bigclassid=28 2. Connect the receiver and your PC through 7-pin lemo to USB cable. 3. Turn on your T300 receiver and click set port in CRU -> USB in the serial port option ->... -
Page 17: Static Data Collection
○ SinoGNSS T300 User Guide 5. Complete all configurations and click Apply Settings to save settings. Exit and restart the receiver to activate configurations. 4.2 Static Data Collection Static survey is mainly used for the control survey. To reach millimeter accuracy, follow guidelines below: ... -
Page 18: Convert To Rinex
Click Delete to remove raw data from the receiver. 4.3.2 Convert to RINEX After downloading raw observation data to your PC, go to to convert from ComNav binary format (*.cnb) to RINEX. Click in standard toolbar to change Convert Settings, mainly export format and export observation information. - Page 19 ○ SinoGNSS T300 User Guide Tip: In some Post Processing software, the BeiDou observations cannot be processed, you can uncheck the BeiDou B1,B2,B3 observations. Click to select the Antenna Type and Measurement. If you cannot find T300 antenna, 1) input the value of R0 (horizontal offset from measurement mark to phase center) and h0 (vertical offset from measurement mark to phase center), R0 is 0.079m and h0 is 0.0411m respectively for T300 receiver;...
-
Page 20: Memory Management
○ SinoGNSS T300 User Guide Then click to convert to RINEX, the RINEX data will be save in the same path as raw observation data. 4.3.3 Memory Management The receiver will stop recording raw data if the internal memory runs out, the differential LED and data logging LED will flash simultaneously with 2-second interval. -
Page 21: Real-Time Kinematic Survey (Rtk)
○ SinoGNSS T300 User Guide memory card, connect the receiver to your PC through Lemo to USB cable, and copy the data file out. 5 Real-Time Kinematic Survey (RTK) This chapter introduces how to conduct RTK Survey with CGSurvey software, including software installation, start a new project, receiver connection and RTK working modes (radio, CORS and GPRS). -
Page 22: Start A New Project
○ SinoGNSS T300 User Guide 5.2 Start a New Project 1. Click Start to open CGSurvey, start a new project based on instructions below: File -> New Project, input project name, Datum, Local Time Zone and basic information shown in figure -> OK to start a new project. - Page 23 ○ SinoGNSS T300 User Guide 2. To add a new Datum if you cannot find the coordinate system you need. Go to Config->Datum Manager -> click New and input Datum name. 3. In Ellipse Par, select the existing ellipsoid or create a new ellipsoid by inputting parameters;...
-
Page 24: Bluetooth Connection
○ SinoGNSS T300 User Guide 4. To enter 3 or 7 parameters, you have to login as administrator. Go to Config -> Administrator -> Login (user/password: admin/admin). 5.For Horizontal and Vertical Adjustment, it will be shown after Site Calibration (see chapter 6.5.1). - Page 25 ○ SinoGNSS T300 User Guide 2. In Devices tab, click Add new device to search the Bluetooth device -> select corresponding SN number of the receiver -> click Next. Tip: Make sure T300 receiver is powered on before searching devices. 3.
- Page 26 ○ SinoGNSS T300 User Guide 5. Select proper SN of the receiver -> click Next -> choose a COM port (uncheck Secure Connection) -> Finish. 6. The SN and corresponding COM port are shown in COM ports tab, click OK -> Done to come back to work mode window.
-
Page 27: Internal Radio Mode
○ SinoGNSS T300 User Guide If you want to delete one connection, just right click it and choose delete Note: Go to COM Ports tab to modify or delete Bluetooth connection with receivers, the COM Ports cannot be allocated again if deleted in Devices tab. Warning: When need to delete one COM port for connecting another device, you MUST delete it in COM Ports interface firstly. -
Page 28: Start Base Station By Cgsurvey
○ SinoGNSS T300 User Guide Tip: The external power supply is recommended when T300 set as a base station. More: Aim improving the radius of survey work, we can change the base receiver’s Whip Antenna to External Antenna. Any others don’t need to change. ①... - Page 29 ○ SinoGNSS T300 User Guide RTK: Select Transparent as Protocol (transmitting & receiving mode) Set proper frequency and Power Tip: If you use external antenna in internal radio mode, you’d better set Power as 2.0 W. Click Set For Position tab, you can: ...
-
Page 30: Start Rover Station By Cgsurvey
○ SinoGNSS T300 User Guide Note: Uncheck Fix Base to start Base station in Auto Base mode, which means that the receiver can get current coordinates and broadcast correction data automatically. Click OK to save configuration Check the differential LED in the front panel, flashing once per second means that the base station is transmitting correction... - Page 31 ○ SinoGNSS T300 User Guide RTK: To achieve a successful data link, set the same protocol and frequency as the base. Click Set -> OK -> Start to complete the configuration. indicates that the Rover is set up successfully.
-
Page 32: External Radio Mode
○ SinoGNSS T300 User Guide 5.5 External radio mode The external radio mode can extend RTK working distance, which is ideal for areas with high constructions or strong signal interference. To set up external radio mode, it requires: Base station ○... -
Page 33: Pda Net Mode
○ SinoGNSS T300 User Guide After connecting Base station with external radio, select External radio as Style. Be sure to set the same band rate as your PDL (default value is 38400, you also can change in Param tab based on your PDL). 5.6 PDA Net Mode Without setting up your own base stations, the T300 GNSS receiver can receive correction data transmitted from continuously operating reference station via... -
Page 34: Internal Gprs Mode
○ SinoGNSS T300 User Guide RTK: Enter CORS IP and port -> Click Get to acquire Source List (select the proper source) -> enter User name and password -> click Connect -> Start to receive correction data. Click Save to add CORS station to list, which provides a quick acquisition. -
Page 35: Internal 3G Ntrip Client Mode
○ SinoGNSS T300 User Guide 2) The flashing Internal 3G LED (blue) shows that the correction data is transferred via GPRS network. For the rover, select the same protocol, APN, address and Source as the base -> click OK when GPRS network ready. 5.7.2 Internal 3G Ntrip client mode For Ntrip client mode, rover station acquires correction data from Ntrip(CORS) server. -
Page 36: Phone Call Mode
○ SinoGNSS T300 User Guide 5.7.3 Phone call mode Two SIM cards are required in phone call mode, select Internal 3G -> GSM PHONE CALL Protocol for the Base and Rover, settings are shown below: Phone number of the Base 6 Basic Survey Functions This section describes the basic survey functions of CGSruvey, including point measurement, Topo survey, staking, site calibration, import and export measured... -
Page 37: Ppk
○ SinoGNSS T300 User Guide 6.2 PPK PPK is a special part in Measuring Points function, which apply to the survey that cannot do RTK. The rover survey dynamic data and another receiver record static data, and then do PPK processing in Compass Solution software. ... - Page 38 ○ SinoGNSS T300 User Guide Check configuration information and click OK. Click to make PPK initialization. After that just click as normal measurement.
-
Page 39: Continuous Topo
○ SinoGNSS T300 User Guide Export data to PC, and using Compass Solution software to do PPK with concurrent static data. You can find the .cnb file in corresponding folder. 6.3 Continuous Topo Click Survey -> Continuous Topo to measure points continuously. - Page 40 ○ SinoGNSS T300 User Guide Click Survey -> Stake Points-> Add to add stake-out points to the points list. Then select the point name you want to stake and click Stake. It shows the navigation from the current position to the target point.
-
Page 41: Cogo
○ SinoGNSS T300 User Guide 6.5 Cogo The function COGO CGSurvey includes Compute inverse, Compute point, Compute area, Compute azimuth, Compute rotate angle, Compute distance, Divide line and Calculator. 6.6 Localization-- Site Calibration and Reset Grid 6.6.1 Site Calibration Site calibration is applied to convert projection from WGS 84 to Local coordinate system. -
Page 42: Reset Grid Function
○ SinoGNSS T300 User Guide 4. After adding all the points in the list, click Cal button, the software will calibrate all the points inputted (ensure Max H.Resid < 0.015m, Max V.Resid < 0.02m). 5. Click complete site calibration. 6.6.2 Reset Grid Function Grid Reset function is applied when you need to change the position of base station in the same project. -
Page 43: Export Points To Your Pc
○ SinoGNSS T300 User Guide 1. Click Edit -> Element Manager -> point manager -> double-click on the point you need to reset (Point 2). 2. Click Reset Grid to add the known point (Point 1) -> OK to finish Grid Reset. 6.7 Export Points to your PC The measured data can be exported directly from CGSurvey to your PC with a wide range of exported file type. -
Page 44: Import Points To Current Project
○ SinoGNSS T300 User Guide Go to File -> Export -> points, select the coordinate frame, give the new file a name and choose a file type > OK. Connect the Controller to your PC through cable, exported result will be saved in the path:YourController\\\Program Files\CGSurvey\Project. -
Page 45: Specifications
-Vertical: 0.5 m + 1 ppm RMS pluggable memory card •SBAS: Typically <1 m 3D RMS Software •Standalone: <1.5 m 3D RMS •ComNav field data collection software CGSurvey Communications •Carlson SurvCE field data collection software •1 Serial port (7 pin Lemo) Baud rates up to (optional) 921,600 bps •MicroSurvey FieldGenius field data collection... -
Page 46: Appendix A: 7-Pin Lemo Definition
○ SinoGNSS T300 User Guide Appendix A: 7-Pin Lemo definition The following figures show the definition of 7-pin lemo, and the structure of 7-pin Lemo to RS232 Cable: 7 pin Lemo Description Signal GND TX data out (TXD) NONE NONE Power In (+) Serial data in (RXD) Appendix B: Setting up of PDL... - Page 47 ○ SinoGNSS T300 User Guide 2. The default frequency of PDL: Channel Frequency Channel Frequency (MHz) (MHz) 458.050 462.050 459.050 463.050 460.050 464.050 461.050 465.050 3. Follow instructions to configure PDL: 1) Power on the PDL and Connect to your PC with Lemo to RS232 cable. 2) Install PDL configuration software ->...
- Page 48 ○ SinoGNSS T300 User Guide Mode. The T300 receiver supports two protocols: Transparent w/EOT Timeout and Transparent w/EOT Timeout. 5) In Frequencies, change the output frequencies of PDL based on your requirements -> click Program to save all the settings -> Exit to complete PDL configuration.
-
Page 49: Appendix C: Connect Your Controller To The Internet
○ SinoGNSS T300 User Guide Appendix C: Connect your controller to the Internet To connect to the internet, you can use GPRS mode or through WI-FI. For GSM/GPRS connection: Insert SIM card into your controller, and turn Phone mode on. ... - Page 50 ○ SinoGNSS T300 User Guide Add a new modem connection at first time, enter a name for the connection as you like and choose Cellular Line (GPRS). Then click several Next and finish (no need to key in). Tip: turns to when the Internet connected.
- Page 51 ○ SinoGNSS T300 User Guide Appendix D: Physical Parameter of Modules inside of T300 1. Radio module Frequency Range: 450Mhz-470Mhz Default 410Mhz-450Mhz Optional Modulation: GMSK Power: 0.5W, 1W, 2W Configurable 2. Bluetooth Module Frequency Range: 2.402Ghz-2.480Ghz RF Power(Max): 4dBm Band Width: 2Mhz 3.
Need help?
Do you have a question about the SinoGNSS T300 and is the answer not in the manual?
Questions and answers