
Related Manuals for ComNav SinoGNSS M300 Pro


Summary of Contents for ComNav SinoGNSS M300 Pro
- Page 1 M300 Pro GNSS Receiver User Guide ComNav Technology User Guide M300PRO GNSS Receiver 2018 April...
-
Page 2: Table Of Contents
M300 Pro GNSS Receiver User Guide CONTENTS 1. Introduction ..........................1 1.1 Safety Information ....................... 1 1.2 Warning and Cautions ......................1 1.3 Use and Care ........................1 1.4 Technical Assistance ......................2 1.5 Your Comments ........................2 2. Overview ............................3 2.1 Receiver features ......................... - Page 3 M300 Pro GNSS Receiver User Guide 4.6.1 Serial Port Config ....................21 4.6.2 TCP/IP Config ......................22 4.6.2.1 Direct connection model ..................23 4.6.3 NtripConfig ......................23 4.7 Internet Service ......................... 27 4.7.1 Internet Config ....................... 27 4.7.2 Email Client......................28 4.7.3 Email Alert ......................
-
Page 4: Introduction
-Do not use the damaged battery -Do not expose the battery to fire or high temperature -Internal battery can be replaced only at Authorized ComNav distributors. 1.2 Warning and Cautions An absence of specific alerts does not mean that there are no safety risks involved. A Warning or Caution information is intended to minimize the risk of personal injury and/or damage to the equipment. -
Page 5: Technical Assistance
If you have any question and can’t find the answer that you need in this manual, please contact your local dealer from which you purchased the M300Pro. Alternatively, please request technical support using the ComNav Website at: www.comnavtech.com or technical support email: support@comnavtech.com... -
Page 6: Overview
- Extended NMEA-0183 BDGGA, • 496 channels with simultaneously tracked GPNTR, GPCDT, GPHPR Satellite signals • Observations ComNav binary, BINEX, RTCM3.X, - GPS: L1 C/A code, L1/L2 P code, L2C, L5 compatible with major CORS software - BeiDou: B1, B2, B3(See Appendix - GLONASS: L1, L2 (VRS, FKP and iMax). - Page 7 GNSS - 1TB External memory maximum pseudo range measurements • File format • Signal Noise Ratios reported in dB-Hz - Rinex 3. X or 2.X or ComNav binary format Time Precision • File log session • GPS+Glonass+Beidou 10ns - Days or hours can be set by user •...
-
Page 8: M300Pro Basic Kit
• 3 SMA male connectors - LCD panel shows the status and - 1 PPS output setting - Event input • ComNav M300 Pro Web Server - Reserve for WLAN and Bluetooth M300 Pro • 2 TNC connectors Specifications subject to change - GNSS Antenna connector without notice. - Page 9 M300 Pro GNSS Receiver User Guide Items Picture M300Pro GNSS Receiver Charger Network Cable GNSS Antenna Cable/ Special cable can be provided if you require Transport Case Lemo to USB cable...
-
Page 10: Setting Up The Receiver
M300 Pro GNSS Receiver User Guide Double Female DB9 Serial Port Cable ComNav also supply various types of antennas, for additional introduction please see chapter 3.1.3. 3. Setting up the receiver 3.1 Guidelines Please follow these guidelines when setting up your receiver. -
Page 11: M300Pro Connection View
Avoid mounting the antenna close to electrical cables, metal masts and generally close to other antennas AT-series antenna is recommended, if use other kinds of antenna please check the specifications with the ComNav support team. Antenna AT330 AT350... -
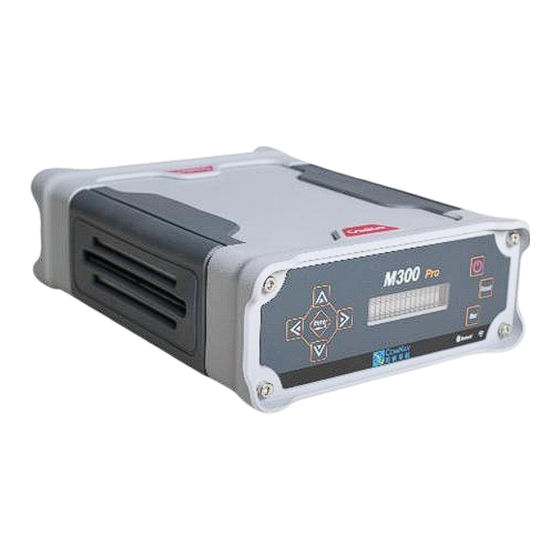
Page 12: Front Panel
M300 Pro GNSS Receiver User Guide 3.2 Front Panel You can do some basic settings for receivers including IP, port, storage mode and check the receiver status, such as the version, SN number, current position, residual memory and power etc. ①... -
Page 13: Status Screens
M300 Pro GNSS Receiver User Guide ⑧Power button Turn on or off the receiver Receiver is turned on automatically when connecting with the power charger. Without the power supply, press the power button to turn on the receiver with screen display【M300 pro System Init…】. ... -
Page 14: Rear Connectors
M300 Pro GNSS Receiver User Guide 3.3 Rear connectors All connectors are located on the back of the receiver, you can connect other external devices through these connectors. ① ② ③ ④ ⑤ ⑥ ⑦ ⑧ ⑨ ⑩ ⑪ ① Power Supply and Battery Charge Port Port for external power supply, and internal Battery charging of the receiver ②... -
Page 15: Receiver Configuration Through A Web Browser
M300 Pro GNSS Receiver User Guide ⑩ 10 MHz frequency input 10MHz external frequency input, Used for precision timing ⑪WIFI Antenna connector(Reserved) 4. Receiver configuration through a Web Browser M300Pro has the advanced built-in web server, you can access the web setting page and do configurations remotely. -
Page 16: Checking The Receiver Status
M300 Pro GNSS Receiver User Guide port number. As example showed above: http://192.168.1.148:8000 3. Enter the default login settings to access the main page: Username: admin Password: admin After accessing the main page, configuration menus are listed on the left, and receiver’s settings on the right. -
Page 17: Receiver Configuration
M300 Pro GNSS Receiver User Guide Status: work mode (Base, Rover or Single point positioning), Disk Capacity etc. Position Information: GNSS constellation system tracked etc. 4.3 Receiver Configuration Use configuration menu to do basic configurations of your receiver. 4.3.1 General Config There are 2 work modes you can choose: ... -
Page 18: Antenna Setup
M300 Pro GNSS Receiver User Guide 4.3.2 Antenna Setup Enter the proper values of marker name and antenna height (height limited 0 to 6.5535m), select the antenna type and measurement method. 4.3.3 Base setup After setting M300Pro in the base mode, the base setup menu is available for you. However, you can change the base setup only when it’s on manually start station mode with stopped status. -
Page 19: Satellite Tracking
M300 Pro GNSS Receiver User Guide 4.3.4 Satellite Tracking Select smooth pseudorange, setup the mask angle and select the types of the tracking signal based on surveying requirements. 4.3.5 Receiver Utility In this section, you can control M300Pro remotely, including: ... -
Page 20: Running Log
M300 Pro GNSS Receiver User Guide 4.3.6 Running Log Download user/system log to local; User Log contains power on/off, search satellite completed, TCP changed, data record changed, email alert, OEM status System Log contains system warning and system info. 4.3.7 Default Language Two language options are available: Chinese/English 4.4 Satellite Information... -
Page 21: Data Record
M300 Pro GNSS Receiver User Guide including Tracking Table, Tracking Chat and Sky View. You can enable/disable GPS, BDS, GLONASS, GAL and SBAS (WAAS/EGNOS/MSAS) satellites’ display without stopping tracking status. These displays refresh every 5 seconds, always keeping satellites information up to date. - Page 22 M300 Pro GNSS Receiver User Guide External Memory: If set as external memory without inserting a USB drive, it will be prompted with a message that “please connect to an external memory”. Show record name, status, data format, record mode and operation in table, click Setting button to configure the data recording settings.
-
Page 23: Data Download
M300 Pro GNSS Receiver User Guide 4.5.2 Data Download You can download internal data files through a web server, USB drive or FTP 1. Data download through a web server Firstly, select data source (Internal or external memory), folder name, file type (CNB\BINEX \Rinex3.02\Rinex2.10) and date. -
Page 24: I/O Configuration
M300 Pro GNSS Receiver User Guide 3. Data download through FTP Input FTP address in your brewer, for example: ftp://192.168.1.236. Then download your files. 4.6 I/O Configuration There are two ways to transfer raw data from the M300Pro receiver to your office computer, LAN ports or serial ports. -
Page 25: Tcp/Ip Config
Select proper baud rate and data flow, and click Enter, the corresponding serial port will output data. The format of Data flow includes: Raw observation data: ComNav binary format raw data Correction data: format from RTCM ... -
Page 26: Direct Connection Model
M300 Pro GNSS Receiver User Guide 4.6.2.1 Direct connection model The M300Pro provides a more machine friendly method for users to check and configure receivers by TCP/IP. This function only can be used in TCP/IP1. Enable Active and Client button ... - Page 27 M300 Pro GNSS Receiver User Guide The M300Pro can support NtripClient, NtripServer and NtripCaster protocols. You can acquire correction data from CORS through Ntrip Client protocol if setting the receiver as a rover. It is also very easy to transmit correction data as the base station by using NtripServer and NtripCaster protocol.
- Page 28 M300 Pro GNSS Receiver User Guide Click position information in Status menu to check the rover’s status, and position status should be Fixed. 2. Ntrip Server Before setting the Ntrip Server, you should configure the receiver as Base mode, also select correction data format as RTCM3.0 or RTCM3.2 (recommended).
- Page 29 M300 Pro GNSS Receiver User Guide Enter the server IP address as NtripCaster address and NtripCaster port. As the example showed above, our company’s server is under running: 211.144.120.104: 8888 Set custom username and password (Username and password of our server can be anything you choose).
-
Page 30: Internet Service
M300 Pro GNSS Receiver User Guide Press Enter to save the configuration 2. Configuration of NtripCaster: Enable Active button of NtripCaster Enter port, this port should be same with NtripServer Enter Password, this password should be also same with NtripServer ... -
Page 31: Email Client
M300 Pro GNSS Receiver User Guide 4.7.2 Email Client Before setting a Email Client, open your mail client SMTP authorization firstly, then set SMTP Server, SMTP Port, Email Address and password. Enable Enter button to save configuration. 4.7.3 Email Alert After set the Email Client, you can add no more than 3 email addresses to receive M300Pro’s alarm, including Power on/External Power Break/Battery low/FTP Push Failed/Code expired. -
Page 32: Firmware Update
M300 Pro GNSS Receiver User Guide 4.8 Firmware Update You can update the system firmware, board firmware and front panel firmware in this menu. Select system, board or front panel upgrade according to your demand, then click Browse to select the latest firmware version. Click Install, a progress bar shows 0 to 100% and status will be ”Not allowed to do other operations during the upgrade”. -
Page 33: User Management
Press Enter button at the end of every command to check receivers’ feedback information or input another command For More detailed programmatic commands, please refer to ComNav OEM CARD REFERENCE MANUAL WARNING-These commands are only suitable for COM1. The COM2 and COM3 are connected to the web interface, please do not change the baud rate and the data output of these two ports. -
Page 34: Frequently Used Commands
M300 Pro GNSS Receiver User Guide 5.1 Frequently used commands Check Version Information log version // Version information about the board Check Port Information log com configa // Information of the port. Change the serial port baud rate com com1 9600// Change the baud rate of com1 to 9600 ... -
Page 35: Commands Related To External Devices
M300 Pro GNSS Receiver User Guide Lockout/unlockout satellite system Command Description (un)lockout bd2 (un)lockout Beidou system (un)lockout gps (un)lockout GPS system (un)lockout GLONASS (un)lockout Glonass Unlockoutall Unlock all GNSS system NMEA data output The serial port is for COM1, you can output any NMEA data through COM1. For example: log com1 gpgga ontime 1 log com1 gpgsv ontime 1... -
Page 36: Pps Output
M300 Pro GNSS Receiver User Guide MARKCONTROL to control the event functions. Format MARKCONTROL signal switch [polarity] [timebias [timeguard]] Description At present, Signal only supports mark1, and Switch supports ENABLE and DISABLE. Polarity supports POSITIVE (positive pulse triggering) and NEGATIVE (negative pulse triggering). -
Page 37: 10 Mhz Frequency Input
M300 Pro GNSS Receiver User Guide Example PPSCONTROL ENABLE POSITIVE 1 1000 5.2.3 10 MHz frequency input This port is used for external clock input, and it can be an external atomic clock. Command: Set atom on/off // on: use the external atomic clock; off: use the internal atomic clock. -
Page 38: Appendix A:beidou Coverage And The Positioning Stability
M300 Pro GNSS Receiver User Guide Appendix A:Beidou Coverage and the positioning stability The BeiDou Navigation Satellite System(BDS) has been offering positioning services to customers in the Asia-Pacific region since December 2012. The global service is planned to open in 2020. All user can get 6 to 10 Beidou satellites within this area currently, you may also receive 1 to 5 Beidou satellites if you are out off this coverage. - Page 39 M300 Pro GNSS Receiver User Guide GPS + COMPASS 0.08 0.08 rms( dE) = 0.007m rms( dE) = 0.006m rms( dN) = 0.007m rms( dN) = 0.005m 0.06 0.06 rms( dU) = 0.015m rms( dU) = 0.009m 0.04 0.04 0.02 0.02 0.00 0.00...
-
Page 40: Appendix B:advantages Of Beidou B3 Signal
ComNav technology is a high-tech company with CORE GNSS Positioning technology, in China. So we have a better understanding of Beidou signal, providing reliable receivers and positioning solutions for you. ComNav declares that Beidou B3 signal is only used for customers in China with its two advantages: E-RTK: long baseline RTK(supper wide int solution) , which can reach 100km distance.
Need help?
Do you have a question about the SinoGNSS M300 Pro and is the answer not in the manual?
Questions and answers