Table of Contents
Advertisement
Quick Links
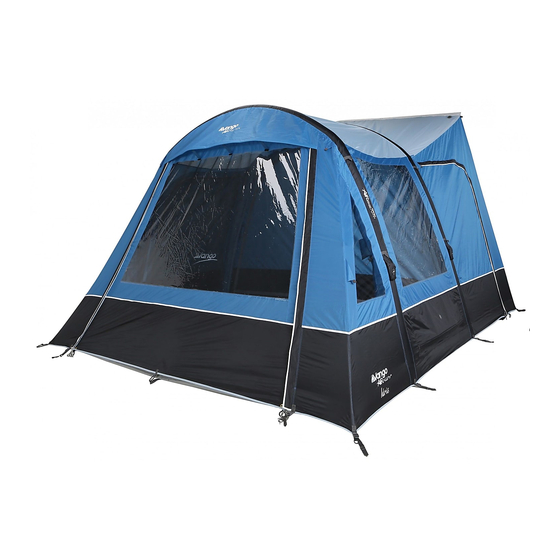
PITCHING INSTRUCTIONS – IDRIS II (UK)
All - in - one pitching
Park your vehicle in the best location on your pitch ensuring that there is at least 4.6m free space at the side where you would like to pitch your AirAway/Awning.
Unpack and position the AirAway in the required direction with the rear attachment section facing the vehicle side.
Attach the AirAway to your vehicle using one of the 4 available options:
Kador - The AirAway comes fited with a 6mm kador strip. This can be slid directly into a kador rail on the vehicle but Vango recomends using figure eight strips and an extra kador
adaptor (sold seperately) to ensure the kador fits snuggly and to provide flexibility when driving the vehicle away whilst the AirAway is pitched.
Webbing Straps - Remove the supplied webbing straps from the peg bag and clip into the corresponding buckles on the rear of the AirAway roof. Pass the straps over the roof of the
vehicle and peg into the ground. Adjust the straps to fully tension the roof.
Hook & Loop Tabs - Use the pre-attached hook & loop tabs to connect to the roof bars of your vehicle.
Pole & Clamp - Slide the pole into the sleeve at the top of the rear section of the AirAway. Place the pole and fabric into the gutter on the vehicle and use the clamps to secure at both
ends and in the centre.
Peg out the rear corners of the attachment section of the AirAway/AirAwning at the base of the vehicle.
Pull the front pegging points of the AirAway away from the vehicle until the base of the flysheet is straight.
Peg out the four main corners of the AirAway using the pegs supplied
Locate inflation points on each beam
Remove the valve cap (figure 1)
Insert the correct pump adaptor, which will lock onto the valve
There is no need to turn the white valve button as the adaptor will move this to the correct position
Inflate all tubes to 7psi. The tubes MUST be guided into an arch as they are inflated
Final tube pressure MUST NOT exceed 8psi
DO NOT OVER-INFLATE THE BEAMS
Inflate all AirBeams to 7psi.
Start with the rear AirBeam and guide into an upright position whilst it is inflating
A small amount of air may leak from the valve when it is being inflated but this is normal
Remove the pump adaptor as soon as the beam is at the correct psi
Replace the valve cap to create an air tight seal
Peg out the remaining poles and pegging points using pin pegs at the base of the beams.
Repeat for front AirBeam
Tighten the webbing adjusters to ensure that the AirAway is evenly tensioned all round.
Peg out ALL guy lines, ensuring that they are in line with the AirBeam or seam they are attached to.
Re-position and adjust tensioning where necessary.
Bracer AirBeam:
The AirAway is supplied with a short "Bracer" AirBeam. This AirBeam can be pumped up separately and attached to the hook and loop points at the top centre of the main AirBeams.
The Bracer AirBeam is slightly curved and should be attached to the main beams with the curve pointing upwards into the roof.
This Bracer AirBeam will increase the tension in the roof and will provide extra strength during poor weather.
Tension Band System:
Adjust the straps until they are taut
DO NOT OVERTENSION. Excess tension will alter the shape of the tent
Storm Straps:
When driving the vehicle away but leaving the AirAway up, Vango recommends using the supplied storm straps.
TO DEFLATE AIRBEAM/ AIRAWAY/ AIRAWNING:
To deflate the AirBeam (remove the cap (figure 7)) press & turn (figure 8) the button from CLOSED to OPEN
In the unlikely event of a puncture:
Deflate the air beam. Unzip the internal flysheet sleeve which contains the affected beam.
Remove the tube and its protective outer.
The zips for the protective outer are cable tied together to prevent accidental access. Cut the cable tie and open the zip.
DO NOT open these zips when the tube is inflated.
Remove the clear rubberised tube from the protective sleeve taking care when removing the valve from the sleeve.
Partially inflate the tube and pass through a bucket or basin of water, looking for air bubbles. This will indicate location of puncture
Use the repair patch provided and cover hole, using instructions on patch. Re-insert tube into protective outer, closing zip from both ends, so that zip pullers are in the flysheet sleeve
(this might be easier with the tube partially inflated)
AIRBEAM INFLATION:
Figure 1
Figure 2
Remove locking
Insert locking pump
cap
connector
AIRBEAM DEFLATION:
Figure 8
Figure 7
Push button to deflate & twist
Unlock locking
to open position
cap
Figure 3
Figure 4
Inflate with
Lock locking pump
connector
AirBeam pump
Figure 5
Figure 6
Insert locking
Lock locking cap
cap
Advertisement
Table of Contents

Related Manuals for Vango IDRIS II


Summary of Contents for Vango IDRIS II
- Page 1 Kador - The AirAway comes fited with a 6mm kador strip. This can be slid directly into a kador rail on the vehicle but Vango recomends using figure eight strips and an extra kador adaptor (sold seperately) to ensure the kador fits snuggly and to provide flexibility when driving the vehicle away whilst the AirAway is pitched.
- Page 2 Kador – La tente AirAway est montée à l'aide d'une bande kador 6 mm. Cela peut être glissé directement sur un rail kador, posé sur le véhicule, mais Vango recommande d'utiliser une baguette de raccordement "figure en 8" et un adaptateur kador (vendu séparément), pour s'assurer que le kador est bien ajusté, et apporter de la souplesse, lorsque le véhicule doit être déplacé, pendant que la tente AirAway est montée.
- Page 3 Profilo a scorrimento - L'AirAway è dotato di una striscia di 6 mm per inserimento in un profilo. Essa può essere inserita direttamente in un profilo sul veicolo, ma Vango consiglia di utilizzare un doppio profilo a 8 e un adattatore del profilo (venduti separatamente) per fare in modo che il profilo aderisca perfettamente e affinché sia più flessibile mentre si sposta il veicolo mentre l'AirAway è...
- Page 4 Kador - De AirAway is uitgerust met een 6mm kador strip. Deze kan gemakkelijk in een kador rail op het voertuig geschoven worden maar Vango beveelt aan in figuur acht, strips en een extra kador adapter (los verkocht) te gebruiken om er zeker van te zijn dat de kador strak aansluit en flexibiliteit geeft wanneer u het voertuig weg rijdt terwijl de AirAway opgezet ...
- Page 5 Kador - AirAway má 6 mm pásku Kador. To lze zasunout přímo do kolejnice Kador na vozidle, ale Vango doporučuje použít osm pásů a další Kador adaptér (prodává se zvlášť), který zajišťuje, že kador pasuje a poskytuje flexibilitu během řízení vozidla, zatímco AirAway je upevněn.
Need help?
Do you have a question about the IDRIS II and is the answer not in the manual?
Questions and answers