Advertisement
Available languages
Available languages
Table of Contents
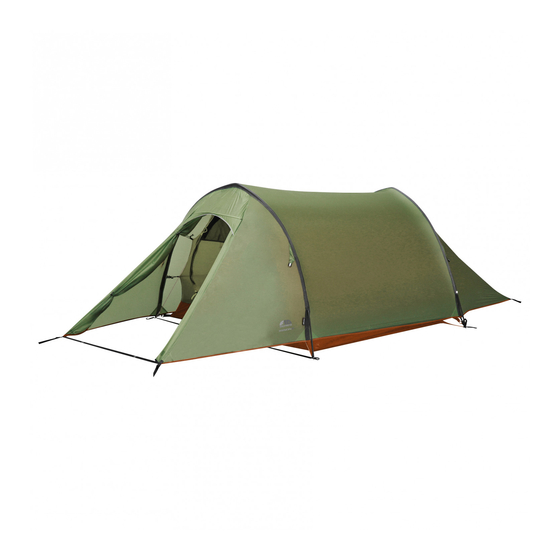
TENT PITCHING INSTRUCTIONS – XENON UL2 (UK)
Flysheet First Pitching
1. Assemble poles and lay them on the ground.
2. Open flysheet on ground and position in desired direction. Check internal TBS cords are un-
tensioned and flysheet door is closed.
3. Locate pole sleeves on the flysheet and insert poles. The poles are colour coded to the pole sleeves.
4. On one side, locate the end of each pole into the corresponding eyelets on pole anchor straps.
5. On opposite side, push poles into an arch and locate pole ends into the corresponding eyelets on
pole anchor straps.
6. Tighten the flysheet by adjusting the tension straps at the base of the poles.
7. Peg out adjustable anchor straps at the rear of the tent using pegs supplied.
8. Pull the tent forwards, away from pegging points, until tent takes shape,. Peg the two anchor
straps at the front of the tent.
9. Peg down pole anchor straps and remaining flysheet pegging points
10. Peg out ALL guy lines.
Inner Attachment
1. Open out inner tent inside flysheet and position doorways to correspond with the living area
2. Starting from the rear corners of the tent, attach the elasticated hooks on the groundsheet to
corresponding rings on the flysheet
3. Suspend the inner by attaching elastic of inner tent to the clips on the inside of the flysheet
Tension Band System
1. Insert tension bands through corresponding access points in the inner tent (ceiling and sidewall).
Connect the straps into the side-release buckles.
2. Adjust the tension of the TBS straps until the slack is taken out
3. DO NOT OVERTENSION. Excess tension will alter the shape of the tent
4. Tension band pockets are provided for storage when not in use.
...........................................................................................................................................................................
Advertisement
Table of Contents

Related Manuals for Vango F10 Series


Summary of Contents for Vango F10 Series
- Page 1 TENT PITCHING INSTRUCTIONS – XENON UL2 (UK) Flysheet First Pitching 1. Assemble poles and lay them on the ground. 2. Open flysheet on ground and position in desired direction. Check internal TBS cords are un- tensioned and flysheet door is closed. 3.
- Page 2 AUFBAUANLEITUNG – XENON UL2 (DE) Mit Außenzeltaufbau zuerst 1. Stecken Sie die Stangen zusammen und legen Sie sie auf den Boden 2. Breiten Sie das Vordach auf dem Boden aus und positionieren Sie es in der gewünschten Richtung. Prüfen Sie, ob die inneren TBS-Schnüre keine Spannung aufweisen, und dass die Tür des Überdachs geschlossen ist.
- Page 3 INSTRUCTIONS DE MONTAGE – XENON UL2 (FR) Montage en commençant par le double toit 1. Rassembler les arceaux et les poser sur le sol 2. Ouvrir le double toit sur le sol et le positionner dans la direction désirée. Vérifier que les cordons TBS intérieurs ne sont pas tendus, et que la porte du double toit est fermée.
- Page 4 ISTRUZIONI PER IL MONTAGGIO – XENON UL2 (IT) Primo montaggio del telo esterno 1. Unire i pali e distenderli al suolo 2. Aprire il telo esterno al suolo e posizionarlo nella direzione desiderata. Verificare che i tiranti TBS interni non siano tesi e che la porta del telo esterno sia chiusa. 3.
- Page 5 OPZETINSTRUCTIE – XENON UL2 (NL) Buitentent Voor Het Eerst Opzetten 1. Monteer de stokken en leg ze op de grond 2. Open de buitentent op de grond in de gewenste richting. Controleer of er geen spanning op de interne Spanband Systeem banden staat en dat de deur van de buitentent gesloten is. 3.
- Page 6 NÁVOD KE STAVBĚ – XENON UL2 (CZ) Stavění tropika poprvé 1. Sestavte tyče a položte je na zem 2. Roztáhněte tropiko na zemi a umístěte jej v požadovaném směru. Zkontrolujte, zda vnitřní provazy jsou povolené and dveře tropika jsou zavřené. 3.
Need help?
Do you have a question about the F10 Series and is the answer not in the manual?
Questions and answers