Table of Contents
Advertisement
Advertisement
Table of Contents

Subscribe to Our Youtube Channel
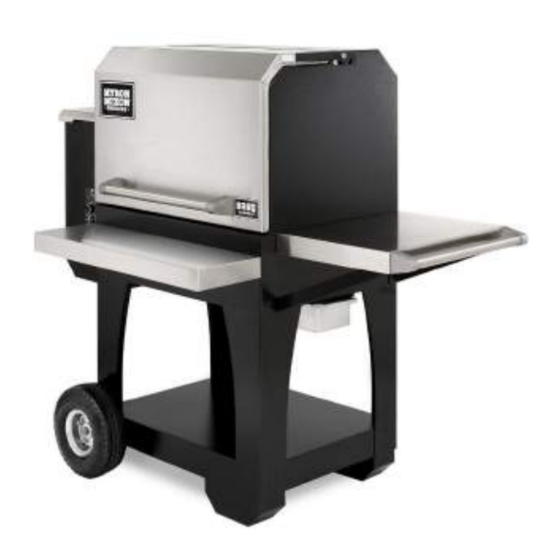
Related Manuals for Myron Mixon Smokers BARQ-1700


Summary of Contents for Myron Mixon Smokers BARQ-1700
- Page 1 BARQ-1700, BARQ-2400, BARQ-3600 FOR OUTDOOR USE ONLY A MAJOR CAUSE OF FIRES IS FAILURE TO MAINTAIN REQUIRED CLEARANCES (AIR SPACES) TO COMBUSTABLE MATERIALS. IT IS OF UTMOST IMPORTANCE THAT THIS PRODUCT BE INSTALLED ONLY IN ACCORDANCE WITH THESE INSTRUCTIONS. SAVE THESE INSTRUCTIONS...
-
Page 2: Important Safety Information
IMPORTANT SAFETY INFORMATION READ ALL INSTRUCTIONS BEFORE INSTALLING AND USING THE APPLIANCE Please read this entire manual before installation and use of this pellet-burning appliance. Failure to follow these instructions could result in property damage, bodily injury or even death. Contact local building or fire officials about restrictions and installation inspection requirements in your area. - Page 3 smokers, and people with blood or circulatory system problems, such as anemia, or heart disease. When operating this grill, maintain a minimum distance of 12 inches (305mm) to combustibles. If this grill is operated under overhead combustibles, a minimum distance of 36 inches (914mm) is required. residue accumulates on the flue lining.
-
Page 4: Table Of Contents
Table of Contents Important Safety Information ..........................2 Grill Components ..............................5 Unpacking and Assembly ............................7 Unpacking the Grill .............................. 8 Installing the Legs, Wheels and Lower Shelf ....................... 9 Front and Side Shelf Installation ........................15 Attaching the Lid Handle ........................... 18 Installing the Cooking Components ........................ -
Page 5: Grill Components
Grill Components BARQ-1700 Item Description Item Description Grill Main Body Grease Pan Grill Lid Handle Leg #1 Cook Racks Leg #2 Drip Pan Leg #3 Flame Deflector Leg #4 Grease Funnel Bottom Shelf Grease Trap Axle Front Shelf Thick Washer Grease Funnel Rail 10”... -
Page 6: Www.myronmixonsmokers.com
Grill Components BARQ-2400 and BARQ-3600 (BARQ-2400 Shown) Item Description Item Description Grill Main Body Grease Pan Grill Lid Handle Leg #1 Cook Racks Leg #2 Drip Pan Leg #3 Flame Deflector Leg #4 Grease Funnel Bottom Shelf Grease Trap Axle Front Shelf Thick Washer Grease Funnel Rail... -
Page 7: Unpacking And Assembly
Unpacking and Assembly Tools required: Pliers, 7/16” wrench, 5/32” and 3/16” hex keys. Assistance from another person will be required for certain steps during assembly. Hardware (included): BARQ-1700 Description Picture 1/4"-20 x 5/8” Button Head Screw 1/4"-20 Flange Nuts 3/4” Thick Washer 5/16”... -
Page 8: Unpacking The Grill
Unpacking the Grill: 1. Position the box on a flat area where 4. Remove all the components and packing there is plenty of space to work safely. material from around and on top of the Ensure the box is upright. main body of the grill. -
Page 9: Installing The Legs, Wheels And Lower Shelf
7. Attach Leg-1 and Leg-2 (legs have the number cut in them for easy identification) to hopper side of the grill using (4) Screw #1 and (8) Flange Nut #2. Loosely tighten flange nuts. NOTE: The BARQ-1700 (2) leg mounting holes closest to the center have nuts welded in the hopper, so Screw #1 will be installed into the weld nuts and only (6) Flange Nut #2 will be required. - Page 10 The studs will help hold the shelf in place on the Leg-3 and Leg-4 side. Axle BARQ-1700 (If assembling a BARQ-2400 or BARQ-3600 skip to Step 11) 9. With a second person holding the axle 10.
- Page 11 BARQ-2400 and BARQ-3600 11. With a second person holding the axle side of the lower shelf, install the caster mounting plates over the lower shelf studs and attach with (2) Screw #1 and (4) Flange Nut #2. Loosely tighten hardware. All Models 12.
- Page 12 13. Fully tighten all installed hardware. BARQ-2400 and BARQ-3600 (If Assembling a BARQ-1700 Skip to Step 15) 14. Secure the swivel locking casters with (8) Screw #6. Fully tighten hardware. www.myronmixonsmokers.com | 12...
- Page 13 All Models 15. With the axle in place, slide two Thick Washer #3 onto the axle, one on each side. Thick Washer #3 16. Install 10” tire and wheel onto each side of the axle. The grease fitting side of the wheel hub should be facing inward toward the grill.
- Page 14 19. With the assistance of a second person, carefully turn the grill over to the upright position. www.myronmixonsmokers.com | 14...
-
Page 15: Front And Side Shelf Installation
Front and Side Shelf Installation: 20. Remove protective vinyl from front and side Shelf. 21. Install side shelf supports and secure with (1) Screw #1 and (1) Nut #2. Remove the screw closest to the back of the unit that was previously installed in the leg and reinstall it with the support in place. www.myronmixonsmokers.com | 15... - Page 16 24. Attach one of the handle blocks to the side shelf. Loosely secure with (2) Screw #1 from under side of shelf. The Barq-1700 will use the outer set of holes in the support, the Barq-2400 and Barq-3600 will use the inner set of holes. Insert the handle tube into the previously installed hand block and install the handle block on the opposite side of the handle tube with (2) additional Screw #1.
- Page 17 25. Fully tighten all shelf hardware. 26. Open the cook door. Install the front shelf onto the unit. Secure with (3) Flange Nut #2. Fully tighten hardware. www.myronmixonsmokers.com | 17...
-
Page 18: Attaching The Lid Handle
Attaching the Lid Handle 27. Attach one of the handle blocks to the cook door. Loosely secure with (2) Shoulder Bolt #4. Insert the handle tube into the previously installed hand block and install the handle block on the opposite side of the handle tube with (2) additional Shoulder Bolt #4. -
Page 19: Grease Trap
For the BARQ-3600, make sure the open side of the flame deflector is facing toward the right and the closed side is fitted over the auger assembly. BARQ-1700 & BARQ-2400: BARQ-3600: www.myronmixonsmokers.com | 19... -
Page 20: Drip Pan
31. Install drip pan above the flame deflector. Align the right flange pointed downward and over the grease funnel. The tab on the left side of the cook chamber should fit into the slot of the drip pan. 32. Slide the grease pan into place from the bottom right side of the grill. -
Page 21: Grill Features
• Easy Mobility: BARQ-1700 has sturdy skids opposite the flat free tires. Simply use the handle to lift and roll the grill. The BARQ-2400 and BARQ-3600 have locking swivel casters opposite the flat free tires. -
Page 22: Specifications And Capacity
Specifications BARQ-1700 BARQ-2400 BARQ-3600 Approximate Weight 230 lbs. 280 lbs. 360 lbs. Dimensions* 53.75" W x 32.3" D x 46.5" H 57.75" W x 35.9" D x 46.5" H 71.75" W x 35.9" D x 46.5" H Cooking Racks Cooking Rack Dimensions 23.375"... -
Page 23: Controller Features
Basic Controller Features Controller Components: On/Off Switch – Turns the controller on and off. Dial – Selects Smoke, Temperature or Shut Down Cycle. Display – Displays temperatures or error codes. Probe Ports – Allows the use of up to (2) meat probes. Probe Selector Button –... - Page 24 Premium Controller Features Controller Components: Power Button – Turns the unit on and off. Prime Button – Activates the auger only to prime the auger with pellets. Temp Button – Adjusts the desired grill or meat temperature. Display – Displays temperatures or error codes. Display Button –...
-
Page 25: Operating Instructions
Er-3: Power Failure Error. If the grill is in the Run Mode and power is lost. When power is re-applied, if the system detects a temperature of less than 160°F, the assumption is that power was lost and the fire went out while power was removed. -
Page 26: Flame Deflector
2. Make sure that the control switch is in the OFF (o) position, then plug the power cord into an appropriate grounded electrical outlet. 3. Open the hopper lid, check that no foreign objects are in the auger, turn the control switch ON (-) and the temperature dial to the SMOKE setting. - Page 27 2. Plug the power cord into an appropriate grounded electrical outlet. 3. With the lid closed, turn the control switch to ON (-), and turn the temperature dial to SMOKE. 4. After a few minutes, heavy smoke will come from the grill as the pellets ignite. Once the pellets are fully lit the heavy smoke will subside.
-
Page 28: Operation Premium Controller
Operation – Premium Controller If your grill is equipped with the Standard Controller, go back to Operation – Standard Controller on page 26. Initial Firing The initial systems check, initial ignition and seasoning instructions are intended for the first time firing up your grill. - Page 29 5. Once flames can be seen from the firepot, press the power button. 6. When the grill is cool. Install the flame deflector, drip pan and cook racks. DANGER! Never add pellets by hand to the firepot. If the pellets run out during a cook, let the grill cool completely and follow the initial firing instructions.
-
Page 30: Hopper Cleanout
1. Insert the meat probe into the receptacle located on the right side of the controller. 2. Insert the probe into the thickest part of the meat. The wire just runs through the cook door opening into the cook chamber. Closing the cook door on the wire will not damage the probes. -
Page 31: Cleaning, Maintenance And Best Practices
2. To remove the pellets left in the auger, power the grill back ON and set the temperature dial to HIGH. Allow the auger to run until no pellets remain. Turn the temperature dial to Shut Down Cycle. After the Shut Down Cycle has completed, switch the control switch to OFF (o) and unplug the unit. - Page 32 We also recommend using a loaf pan in the grease pan or lining the pan with foil to ease cleanup. At the end of the cook and the grill is cool, simply remove and discard the loaf pan or foil. If you choose not to line the grease pan with a loaf pan or foil, or buildup does occur, the grease pan can be washed with...
-
Page 33: Premium Controller Wi-Fi Module
The outside of the grill should be wiped down with a cloth dampened with water and mild dish soap. Do not use oven cleaner or other abrasive cleaning methods. If the grill is stored outside, be sure that no water penetrates the pellet hopper. When wet, wood pellets expand and can cause an auger jam. - Page 34 with your grill from anywhere with internet service (this mode of operation requires your home network to have internet service). Use the following instructions to set up the module to all three modes of communication. Installing the RECWifiGrill App Android App Installation – Installation of the RECWiFiGrill Android app is done as all other Android apps.
- Page 35 The module then starts displaying four pieces of information in a round robin fashion. If you need to call for help with a problem, be sure to make note of these four pieces of information before calling. Host 55 SDK 152 There are two microprocessors in the Wi-Fi module.
- Page 36 The initial page of the iPhone app is the discovery page that will show all available grills that the app can find. If operating in an “ad hoc” mode where the grill is not connected to a network and is operating as a wireless access point, then the only grill that will be listed is the grill that you are wirelessly connected to.
- Page 37 You should return to the main page as shown below: You should see a temperature appear under Grill Temp and the lower left-hand corner will give some status information (in the case of this screen shot, the ignitor is off and the grill is warm) followed by the product ID of the grill (1001).
- Page 38 list will show available grills listed RECGRILLXXXXXX. Select the available grill where XXXXXX is equal to the last significant 6 digits of your Mac ID number. When prompted, enter the password “password” to connect to the grill: After selecting the grill, the app will display information about the grill: If so, you have the first mode of operation functioning.
- Page 39 Connecting with your Home Network with an Android Phone or Tablet Connect your phone to the Wi-Fi module as you did in the previous instructions and launch the RECWiFiGrill app. Again, the initial page will show all grills that the app can find (usually just one). Select your grill. The main page will be displayed and the grill should be communicating with the app.
- Page 40 Connect your phone to the Wi-Fi module as you did in the previous instructions and launch the RECWiFiGrill app. The app should begin communicating with your grill. If the blue line at the bottom of the screen traverses completely from left to right on the screen, then it is communicating properly. Press “Settings”...
- Page 41 Hold for Cloud On Press and hold the switch until the blue LED comes on. Then release the switch. Cloud Operation has been enabled. Registering Your Wi-Fi Module at ROANOKECONTROLS.CLOUD The next step is to create an account at ROANOKECONTROLS.CLOUD. You can do this from the settings page of the phone app or just visit www.roanokecontrols.cloud on your computer.
-
Page 42: Troubleshooting
Setting the Wi-Fi Module to Default Settings While the Wi-Fi module is displaying the four round robin displays, press and hold the pushbutton switch located at the top center of the Wi-Fi module until the unit displays: Hold for Exit Release the pushbutton switch, then press and release the pushbutton switch until the unit displays: Hold for Defaults... - Page 43 Controller shown removed from Hopper for clarity 5. Gently pull on the top of the fuse holder to access the fuse. Slide the fuse out of the top of the fuse holder and verify if it is blown. 6. If the fuse is blown, insert a new fuse into the top of the fuse holder and push the top of the fuse holder back into place on the back of the control.
- Page 44 Controller shown removed from Hopper for clarity 4. Gently pull on the fuse to remove it from the holder and verify if it is blown. If the fuse is blown, insert a new fuse into the holder by gently pressing it into place. Make sure it is properly seated in the fuse holder.
-
Page 45: Wiring Diagram
Standard Controller Wiring Diagram www.myronmixonsmokers.com | 45... - Page 46 Premium Controller Wiring Diagram www.myronmixonsmokers.com | 46...
-
Page 47: Warranty
Myron Mixon Smokers Pellet Grill LIMITED WARRANTY Myron Mixon Smokers guarantees our products to be free from defects in material and workmanship when utilized for normal residential use, and when the Myron Mixon Smoker has been set up, cleaned and maintained per the instructions. - Page 48 THIS LIMITED WARRANTY. For warranty claims, please verify that you have registered your smoker within 30 days of purchase to validate your warranty. Contact Myron Mixon Smokers Customer Service via email sales@myronmixonsmokers.com...
Need help?
Do you have a question about the BARQ-1700 and is the answer not in the manual?
Questions and answers
max temperature on a the Miron Maxon Barq 2499