Table of Contents
Advertisement
Advertisement
Table of Contents

Subscribe to Our Youtube Channel
Related Manuals for Vents VKM EC Series


Summary of Contents for Vents VKM EC Series
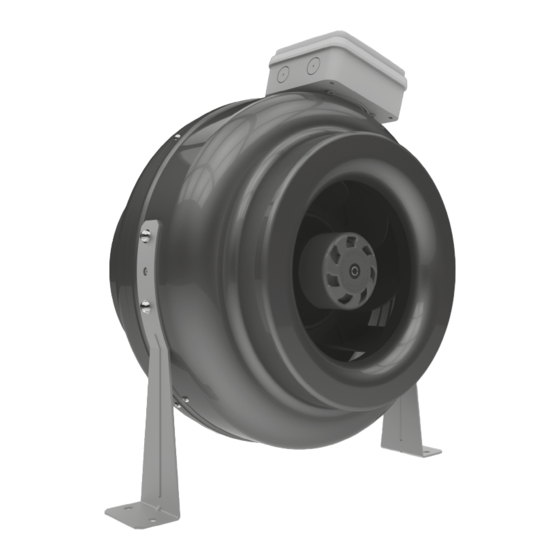
- Page 1 USER’S MANUAL VKM EC (120/60) Centrifugal inline fan...
-
Page 2: Table Of Contents
• Disconnect the unit from power mains • Unpack the unit with care. prior to any installation operations. • While installing the unit, follow the • The unit must be grounded! safety regulations specific to the use of electric tools. http://vents-us.com/... - Page 3 • Do not sit on the unit and avoid placing • Use the unit only for its intended foreign objects on it. purpose. THE PRODUCT MUST BE DISPOSED SEPARATELY AT THE END OF ITS SERVICE LIFE. DO NOT DISPOSE THE UNIT AS UNSORTED MUNICIPAL WASTE. http://vents-us.com/...
-
Page 4: Purpose
1 pc. Packing box 1 pc. DESIGNATION KEY MOTOR TYPE C: electronically commutated motor EXHAUST SPIGOT DIAMETER [MM] FAN SERIES VKM: centrifugal fan enclosed in a metal casing VKMS: centrifugal fan enclosed in a metal casing with a high-power motor http://vents-us.com/... -
Page 5: Technical Data
Power supply voltage, 60 Hz [V] ~120 Max. power consumption [W] 57,1 75,1 133,6 173,5 Current consumption [A] 0,51 0,84 1,08 1,45 1,89 2,41 Air capacity [m 1133 1360 CFM [ft /min] Noise level, 3 m [dB(A)] Transported air temperature [˚F] -13...+104 http://vents-us.com/... -
Page 6: Installation And Set-Up
1/2 inch to prevent uncontrollable access to the fans. While installing the fan ensure convenient access for subsequent maintenance and repair. The unit must be mounted on a an even wall. http://vents-us.com/... - Page 7 INSTALLATION STEPS Disconnect the fan from power supply Install the fixing brackets Lean the fan against the installation place and mark the Drill the holes and insert the expansion anschors |fastening holes Fix the fan Connect air ducts http://vents-us.com/...
-
Page 8: Connection To Power Mains
Connection of the fan to power supply is performed via the terminal block located in the terminal box attached to the fan casing in compliance with the wiring diagram and designation of terminals. EXTERNAL WIRING The recommended fan speed controller is Vents R-1/010. +10V +10V 0-10V For smooth air flow control it is recommended to use the speed controller R-1/010. - Page 9 ACCESS TO THE TERMINAL BOX Disconnect the fan from power supply Unscrew the 4 screws that fix the terminal box lid Route the cables through the cable glad and complete electric Install the terminal box cover again connection http://vents-us.com/...
-
Page 10: Technical Maintenance
Installation of an air filter prolongs the interval between the cleaning. To perform the cleaning first remove the screws and the fan cover. Wipe the impeller blades with a cloth wetted in a mild detergent solution. Avoid water dripping on the electric motor! After cleaning of the impeller install the cover and tighten the screws. TECHNICAL MAINTENANCE STEPS http://vents-us.com/... -
Page 11: Storage And Transportation Requirements
The unit must be transported only in the working position. • Avoid sharp blows, scratches, or rough handling during loading and unloading. • Prior to the initial power-up after transportation at low temperatures allow the unit to warm up at room temperature for at least 3-4 hours. http://vents-us.com/... -
Page 12: Manufacturer's Warranty
Production meets standard operating requirements in the USA and Canada. VENTS warrants to the original purchaser of the unit that it will be free from defects in materials or workmanship for a period of 24 months from the date of original purchase. The VENTS warrants to the original purchaser of the unit that the integrated control unit will be free from defects in materials and workmanship for a period of 24 months from the date of original purchase. -
Page 13: Certificate Of Acceptance
The unit operates normally as intended by the manufacturer. Signature: WARRANTY CARD Unit Type Centrifugal inline fan Model VKM _________________ EC Serial Number Manufacture Date Purchase Date Warranty Period Seller Seller’s Stamp http://vents-us.com/... - Page 14 VKM EC http://vents-us.com/...
- Page 15 http://vents-us.com/...
- Page 16 VUSA88-1EN-04...
Need help?
Do you have a question about the VKM EC Series and is the answer not in the manual?
Questions and answers