Table of Contents
Advertisement
Quick Links
Bedienungsanleitung / Owners manual
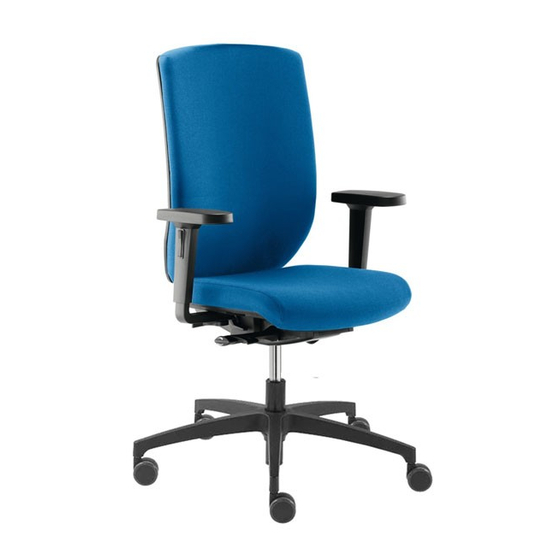
Bionic syncro®
Diese Bürodrehstühle sind das Ergebnis langjähriger Sitzforschung. Sie haben nur
dann den vollen Gewinn, wenn Sie den Drehstuhl richtig auf Ihre Körperproportionen
einstellen. (Alle Richtungsangaben verstehen sich aus der Position des Sitzenden.)
These office swivel chairs are the result of many years of seat research. You can get
the full benefit from your chair only if it has been adjusted correctly to your body size.
(All of the directions given are from the position of the person sitting.)
1. Sitzhöhe / Seat height
Optimale Sitzhöhe: die Ober- und Unterschenkel bilden zueinander einen Winkel von mindestens (besser:
größer) 90°.
Sitz höher stellen: Sitz entlasten, Hebel nach oben ziehen, in der gewünschten Sitzhöhe loslassen.
Sitz tiefer stellen: Sitz belasten, Hebel nach unten drücken, in der gewünschten Sitzhöhe loslassen.
Optimum seat height: the thigh and lower leg together form an angle of at least (though ideally more than) 90°.
To raise the seat: take your weight off the seat, pull the lever upwards, adjust the seat to the desired height.
To lower the seat: put your weight on the seat, pull the lever downwards, adjust the seat to the desired height.
2. Sitztiefe / Seat depth (Option)
Optimale Sitztiefe: Nutzen Sie zur optimalen Abstützung der Oberschenkel die Sitztiefenverstellung, so dass
zwischen der Sitzvorderkante und den Kniekehlen für ungefähr zwei Finger bis zu einer Handbreite Platz ist.
Größere Sitztiefe: Taste herausziehen und die Sitzfläche nach vorn führen; Taste zur Arretierung loslassen.
Kleinere Sitztiefe: Sitz entlasten und Taste herausziehen: der Sitz wird automatisch in die Grundposition geführt.
Optimum seat depth: in order to achieve optimum support for your thighs, use the seat-depth adjustment so
that there is enough space for about two fingers up to the width of a hand between the front edge of the seat
and the backs of the knees.
To increase the seat depth: pull the button out and guide the seat for wards; to lock, let go of the button.
To reduce the seat depth: take your weight off the seat and pull the button out; the seat is automatically
guided into the basic position.
3. Rückenlehnenhöhe / Backrest height
Stellen Sie die Höhe der Rückenlehne so ein, dass die Lumbalstütze (stärkste Polsterung der Rückenlehne)
ungefähr auf Gürtelhöhe positioniert ist.
Rückenlehne hoch: Taste drücken und die Rückenlehne in die optimale Position hochziehen.
Rückenlehne herunter: Taste drücken und die Rückenlehne in die optimale Position herunterlassen.
Adjust the height of the backrest so that the lumbar support (where the upholstery of the backrest is thickest)
is positioned roughly at the level of your belt.
To raise the backrest: depress the button and pull the backrest up into the optimum position.
To lower the backrest: depress the button and lower the backrest into the optimum position.
4. Synchrontechnik / Synchron mechanism
Wechseln Sie die Oberkörperhaltung möglichst oft, damit sich die Muskulatur nicht verkrampft = dynamisches Sitzen.
Aktivieren der Synchrontechnik: Hebel nach vorn drehen; Sitzfläche und Rückenlehne folgen synchron der
Körperbewegung = dynamisches Sitzen.
Arretieren der Synchrontechnik: Hebel nach hinten drehen; Sitz und Rückenlehne werden stufenlos in beliebiger
Position fixiert.
Change your upper-body posture as often as possible so that your muscles do not become cramped = dynamic
seated posture.
To activate the synchronised mechanism: Turn the cupped handle towards the front; the seat and backrest
follow your body's movements in a synchronised manner = dynamic seated posture.
To lock the synchronised mechanism: Turn the cupped handle towards the back; the seat and backrest are
fixed in any desired position in an infinitely adjustable manner.
5. Sitzneigeverstellung / Seat tilt adjustment (Syncro ® -Tension) = Option
Arbeiten Sie vorwiegend in den vorderen Sitzhaltungen (z.B. am Bildschirm), nutzen Sie bitte die Sitzneigeverstellung,
um Druckstellen an den Unterseiten der Oberschenkel zu vermeiden.
Stärkere Neigung: Sitz zur Verstellung vollständig entlasten. Hebel (Grundposition 0°) im Uhrzeigersinn (nach
vorn) bis zum 1. Rastpunkt (-6°; Abb.) oder zum 2. Rastpunkt (-3°) drehen. Flachere Neigung: Zur Rückführung
in die Grundposition (0°) Hebel gegen den Uhrzeigersinn (nach hinten) zurückdrehen.
-3°
If you work in predominantly forward postures (e.g. at a monitor), please use the seat-tilt adjustment in order to
0°
avoid pressure points on the undersides of the thighs.
-6°
To increase the seat tilt adustment: Take all your weight off the seat. Turn the lever (basic position 0°) clockwise
(towards the front) to the 1st locking point (-6°; ill.) or the 2nd locking point (-3°). To reduce the seat tilt adustment:
To return the seat to the basic position (0°), turn the lever anticlockwise (towards the rear).
Advertisement
Table of Contents

Related Manuals for Dauphin Bionic syncro


Summary of Contents for Dauphin Bionic syncro
- Page 1 Bedienungsanleitung / Owners manual Bionic syncro® Diese Bürodrehstühle sind das Ergebnis langjähriger Sitzforschung. Sie haben nur dann den vollen Gewinn, wenn Sie den Drehstuhl richtig auf Ihre Körperproportionen einstellen. (Alle Richtungsangaben verstehen sich aus der Position des Sitzenden.) These office swivel chairs are the result of many years of seat research. You can get the full benefit from your chair only if it has been adjusted correctly to your body size.
- Page 2 Bedienungsanleitung / Owners manual Bionic syncro® 6. Rückenlehnengegendruck / Tension adjustment Stellen Sie den Gegendruck der Rückenlehne so ein, dass der Oberkörper aufgerichtet, aber nicht nach vorn gedrückt wird. Adjust the backrest tension so that the upper body is held upright but is not pushed forwards.
Need help?
Do you have a question about the Bionic syncro and is the answer not in the manual?
Questions and answers