VTech Kidizoom Duo Parents' Manual
Hide thumbs
Also See for Kidizoom Duo:
- User manual (53 pages) ,
- Parents' manual (33 pages) ,
- Instruction manual (31 pages)
Table of Contents
Advertisement
Advertisement
Table of Contents

Subscribe to Our Youtube Channel
Related Manuals for VTech Kidizoom Duo


Summary of Contents for VTech Kidizoom Duo
- Page 1 Parent’s Guide 91-003050-032...
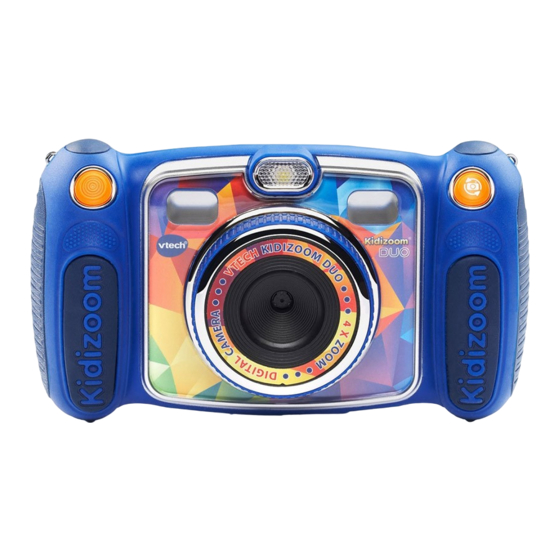
- Page 2 INTRODUCTION Kidizoom ® DUO is a fun, durable and easy-to-use digital camera with front- and rear-facing cameras so you can take fun photos and selfies. The camera also features movie recording and voice recording with five different voice changing effects. There are also fun games with motion control and creativity options allowing you to enhance your photos with a variety of frames, stamps and wacky effects.
- Page 3 Swap Camera Button When in Camera Mode, press this button to toggle between the front and rear cameras. Shutter Button Press this button to take a photo, or to start and stop video recording. Playback Button Press this button to browse your photos or videos. Cursor Buttons Press these buttons to move the cursor and to make selections.
-
Page 4: Included In This Package
Memory Card Slot Insert a microSD card here for memory expansion. INCLUDED IN THIS PACKAGE • One Kidizoom ® • One USB cable • One wrist strap • One parent’s guide WARNING: All packing materials such as tape, plastic sheets, packaging locks, removable tags, cable ties and packaging screws are not part of this toy, and should be discarded for your child’s safety. - Page 5 Internal Memory 256 MB built-in memory (shared with program data, actual memory available for user storage will be less) File Format Photos: Standard Baseline JPEG Videos: AVI (Motion JPEG) Memory Card microSD / microSDHC card (not included) with Format and capacity from 1 GB to 32 GB are recommended Capacity Connectivity...
-
Page 6: Getting Started
GETTING STARTED BATTERY INSTALLATION Note: Adult assembly is required for battery installation. • Make sure the camera is turned OFF. • Locate the battery covers on the handles of the camera. Open the battery covers by separately pressing each trigger inwards. •... -
Page 7: Memory Card Installation
MEMORY CARD INSTALLATION • Kidizoom ® DUO is compatible with microSD/microSDHC memory cards up to 32 GB. • Make sure the camera is turned OFF. • Locate the memory card slot at the bottom of the camera. • Pull up the rubber cover. •... -
Page 8: Battery Status
A USB port is usually marked with this symbol • Two removable drives called VTech 1708 and VT SYSTEM will appear. VTech 1708 is for storage of your data, VT SYSTEM is for storage of system data and cannot be accessed. If there is a memory card in the camera, the removable drive will show the content on the memory card only. -
Page 9: System Requirements For Computer Connection
To back up photo or video files taken by the camera: • Locate and open the DCIM folder in the removable drive VTech 1708. • Your photos or video files will be placed in the subfolders such as 100VTECH. - Page 10 ACTIVITIES Home Menu • Press the HOME BUTTON to go to the Main Menu to select different activities. • Press the CURSOR BUTTONS to select different modes and press the OK BUTTON to enter the selected mode. • The interactive wallpaper will move according to the angle the camera is tilted to.
-
Page 11: Delete Button
Self-Timer Turn the Self-Timer on in the Settings Menu to allow a count down period before taking a photo. In the preview screen, you can also press the Down CURSOR BUTTON to turn the Self-Timer on or off. Flash By default, the Flash will be set to Auto-Flash Mode , and the camera will decide whether flash is needed automatically during capture. -
Page 12: Cursor Buttons
When all frame pictures are taken, press the OK BUTTON to confirm and save the picture. You can review the You & Me Camera pictures anytime in playback. 3. Video In Video Mode you can take normal movies, or take movies adding funny cartoon animations, as well as adding a color filter effect. -
Page 13: Shutter Button
can press the SHUTTER BUTTON or OK BUTTON to start recording at any time. • While recording, press a CURSOR BUTTON to move to the specific effects. Press the SHUTTER BUTTON or OK BUTTON to stop recording. Music Video Theme •... - Page 14 Zoom Out or press the OK BUTTON to return to standard viewing. • Press the STAR BUTTON to show the wallpaper menu. Select Yes to confirm setting the current photo as the Main Menu wallpaper. 5. Voice Recorder In Voice Recorder mode, you can record your own voice for up to 10 minutes per file.
- Page 15 settings information below). There are also several different transition effects that can be seen when the photos change. Note: The photos with the applied effects will not be saved. Press the STAR BUTTON to go to the Wacky Photo Shaker Menu to change the settings.
- Page 16 Photo Frames Choose this icon to add a photo frame to your photo. Press the Left or Right CURSOR BUTTONS to select a frame, then press the OK BUTTON to confirm your selection. Stamps Choose this icon to add a stamp to your photo. Press the Left Right CURSOR BUTTONS to choose a stamp, then press the Up CURSOR BUTTONS...
- Page 17 Face Library In Face Library, you can take pictures of your friends and view each face with a funny theme. Tilt the camera in different directions or shake the camera to explore the theme and see funny responses. Press the OK BUTTON to start the voice re- peater function.
-
Page 18: Star Button
Cursor Buttons - Use the CURSOR BUTTONS to move the character or object in the games. Some people may find it difficult to operate using the motion control, in this case you can press the STAR BUTTON in the game’s title screen to change the control method if needed. - Page 19 9. Settings You can adjust different settings for your Kidizoom® DUO. Press the Left or Right CURSOR BUTTONS to navigate between different pages. A. Set Wallpaper Here you can set your favorite wallpaper or your own photo as the back- ground picture in the Main Menu.
- Page 20 Front Camera Resolution – for the best picture quality, please select 2.0 megapixels, otherwise choose the lower quality 0.3 megapixels if you would like to save more pictures. Indoor Light Frequency - The default frequency is set according to the A.C. frequency of your region. Please leave your camera set to the default value unless you are traveling.
-
Page 21: Care And Maintenance
CARE & MAINTENANCE 1. Keep the camera clean by wiping it with a slightly damp cloth. 2. Keep the camera out of direct sunlight and away from any direct heat source. 3. Remove the batteries when the camera is not in use for an extended period of time. -
Page 22: Troubleshooting
TROUBLESHOOTING Go through this section if you experience difficulty in operating Kidizoom DUO. ® Problem Solution Camera stops working 1. Let the camera sit for a few minutes without batteries, then replace batteries. 2. Turn the camera ON. It should now work properly. -
Page 23: Technical Support
Can’t view the 1. Check if the Downloaded files are put in the correct directory in the Kidizoom ® Downloaded video or DUO. Photos should be put in the photo files DOWNLOAD/PHOTO folder, videos should be put in the DOWNLOAD/ VIDEO folder when the Kidizoom ®... -
Page 24: Disclaimer And Limitation Of Liability
Electronics North America, L.L.C. and its suppliers ® assume no responsibility for any loss or claims by third parties that may arise through the use of this product. VTech Electronics North ® America, L.L.C. and its suppliers assume no responsibility for any damage or loss caused by deletion of data as a result of malfunction, dead battery, or repairs. - Page 25 • Reorient or relocate the receiving antenna. • Increase the separation between the equipment and receiver. • Connect the equipment into an outlet on a circuit different from that to which the receiver is connected. • Consult the dealer or an experienced radio/TV technician for help. THIS DEVICE COMPLIES WITH PART 15 OF THE FCC RULES.
- Page 26 HOW TO TAKE A GOOD PHOTO Are you ready to have fun taking photos? Here are some tips on how to get the best results from your new Kidizoom DUO. ® Step One First, slide the wrist strap over your hand to help you hold your new Kidizoom properly.
- Page 27 ® KIDIZOOM DUO FREQUENTLY ASKED QUESTIONS Question 1: I have bought a VTech ® Kidizoom ® DUO, but it will not work with my PC, my PC is looking for a driver. I have searched the internet and cannot find a VTech ®...
- Page 28 Answer: Please make sure you are using new batteries. If there is not a bad contact due to dirt on the contact spring/plate or deformation of the contact spring or plate, the camera should be able to turn on. If the problem persists after normal battery installation, you might have a defective unit.
- Page 29 Question 9: When connecting the camera to the USB port, I get the message ‘USB device not recognized, one of the USB devices attached to this computer ® has malfunctioned and Windows does not recognise it.’ I am running Windows ®...
- Page 30 WRIST STRAP ATTACHMENT INSTRUCTIONS Step 1: Locate the thread loop on the end of the strap. Insert it into the groove behind the bar and then push it through Step 2: Feed the end of the strap up through the loop and pull it all the way through Step 3: Make sure the loop is securely...
- Page 31 Visit our website for more information about our products, downloads, resources and more. vtechkids.com Read our complete warranty policy online at vtechkids.com/warranty TM & © 2015 VTech Holdings Limited. All rights reserved. Printed in China. 91-003050-032...
Need help?
Do you have a question about the Kidizoom Duo and is the answer not in the manual?
Questions and answers