Table of Contents
Advertisement
Advertisement
Table of Contents

Subscribe to Our Youtube Channel
Related Manuals for VTech KidiZoom Creator Cam


Summary of Contents for VTech KidiZoom Creator Cam
- Page 1 Parent’s Guide 91-003803-000...
-
Page 2: Included In This Package
INTRODUCTION Thank you for purchasing the KidiZoom Creator Cam camera! ® Get creative with all the built-in cool tools. With or without the included green screen, you can create photos and videos and save them to your computer. Use 20+ animated backgrounds and loads of special effects on this camera with the tripod/selfie stick included. - Page 3 WARNING: All packing materials such as tape, plastic sheets, packaging locks, removable tags, cable ties and packaging screws are not part of this toy, and should be discarded for your child’s safety. NOTE: Please keep this parent’s guide as it contains important information. ATTENTION : Pour la sécurité...
- Page 4 K I D I Z O O M C R E A T O R C A M...
-
Page 5: Product Features
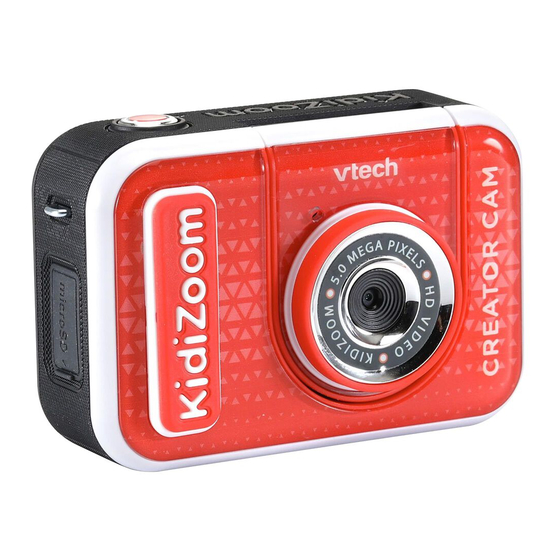
PRODUCT FEATURES 1. Master Power Switch When the switch is set to the position, the camera is disconnected from the battery and the battery will not charge. Move the switch to the position to connect the camera to the battery and allow it to be recharged. -
Page 6: Product Specifications
10. Micro-USB Port Connect to a computer with the included Micro-USB Cable to transfer files to a computer and to charge the camera. 11. Flip-Up Selfie Lens Flip up the lens to see yourself on-screen as you film and take pictures. PRODUCT SPECIFICATIONS Display 2.4"... - Page 7 Memory Card microSD / microSDHC card (not included) with Format and capacity from 1 GB to 32 GB Class 10 or above Capacity is recommended File Format Photo: Standard baseline JPEG Video: AVI (Motion JPEG) Connectivity Micro-USB 2.0 cable (included) for connecting to a computer Battery Rechargeable lithium ion battery (battery is not...
-
Page 8: Getting Started
GETTING STARTED When you use the KidiZoom Creator ® Cam camera for the first time, switch the Master Power Switch to the position. When the Master Power Switch is in the position, it is not possible to charge the camera or play any activities, and the system clock will be reset. -
Page 9: Automatic Shut-Off
Typical charging time is between 3-4 hours if the battery is fully depleted. Disconnect the device when it is fully charged. Do not leave the device charging for more than 5 hours. Note: The actual charging time depends on the charging current, the existing charge and the ambient temperature of the charging environment. -
Page 10: Memory Card Installation
To remove the memory card from the camera, push the card once and it will eject. Note • VTech recommends that you format your memory card before using it with the KidiZoom Creator Cam camera. ® • Data stored on the camera’s internal memory will not be accessible while the memory card is in use. - Page 11 GREEN SCREEN BACKGROUND SETUP (INDOOR USE RECOMMENDED) Some of the features of the camera use the included Green Screen fabric. Parent assistance is required to safely secure the fabric. Depending on your home environment, the Green Screen can be hung any number of ways: with clothespins, binder clips, books or weights, sticky tack, thumb tacks and magnets are just a few ideas.
- Page 12 TO BEGIN USING KIDIZOOM ® CREATOR CAM Make sure the Master Power Switch is in the position and charge the camera before using. Press the Home/On/Off button to turn the camera On. When turning the camera On for the first time, you will be asked to select the language. Press the Up or Down buttons to select your desired language...
- Page 13 • On the computer, you will see a removable drive called VTech 5318. Please use this to transfer files to and from the camera. There is another removable drive called VT SYSTEM, which is for the storage of system data only.
- Page 14 To back up photos or videos: • Open the DCIM folder on the removable drive VTech 5318. • Drag and drop your photos or videos from their subfolders to a location on your computer to back them up.
- Page 15 • Press the Shutter button or OK button to start recording a video. Press either button to stop recording. • Press the Up or Down button to take a photo. • After recording completes, press the OK button to play your video, or press the Delete button to delete the video.
- Page 16 • In the News Report theme, you can take an instant photograph or select a picture to customize your news background. You can also press the Delete button and skip the picture selection, using a plain news background instead. • The Weather Forecast theme allows you to set the weather for your report.
- Page 17 Timer Modes From the camera preview screen, press the Star button to pop up the option menu. In Timer mode, select Self-timer to use a 10 second countdown timer before taking a photo or select Face-timer to automatically take a photo when a stable face is detected. The Timer mode will turn off every time the camera is switched off.
- Page 18 Video Trimming Press the Directional buttons to select the new video start point and end point. The video parts excluded from between the two points will be removed. Video Opening Press the Left or Right button to select an intro and press the OK button to confirm.
- Page 19 last frame from part 1 to align the action. Press the Shutter button to resume recording. It will stop automatically after the set duration, or press either button to stop recording at any time. D. Floating Object ( Green Screen Required) Use the Green Screen fabric in this mode to make objects appear to float in front of your videos.
- Page 20 NOTE: With the maximum interval selected, the camera can record for up to five hours, so ensure it is fully charged before starting to record a time-lapse video. Games There are three built-in games on the KidiZoom Creator Cam camera. ®...
- Page 21 2. Factory Reset Factory Reset will erase the contents (including photos, videos and files) stored in the internal memory and reset all system settings to factory default, such as the file index, camera settings and game level. Files in the memory card (if used) will not be erased. NOTE: When a memory card is inserted, data stored in the internal memory cannot be accessed on the camera unless the memory card is removed.
-
Page 22: Care And Maintenance
No Limit – This is the default option in which games can be played for any amount of time. Disable Games – This will disable all games and the Games menu will be hidden from the Main menu. 15 / 30 / 60 / 90 minutes per day – When the accumulated game play time reaches the selected time limit, the player will not be able to play any games until the following day. - Page 23 while they play games. If your child experiences dizziness, altered vision, disorientation, or convulsions, discontinue use immediately and consult your doctor. Please note that focusing on the KidiZoom ® Creator Cam camera at close range and handling it as a game controller for a prolonged period of time may cause fatigue or discomfort.
- Page 24 WRIST STRAP ATTACHMENT 1. Locate the thread loop on the end of the strap. Insert it into the Strap Hook and push through. 2. Feed the end of the strap up through the loop and pull it all the way through. 3.
-
Page 25: Troubleshooting
TROUBLESHOOTING Consult this section if you experience difficulty while operating your Creator Cam camera. KidiZoom ® Problem Solution 1. Turn the Master Power Switch off for 30 seconds. 2. Turn the Master Power Switch on again and The camera then press the Home button to turn it on. The isn’t working camera should now work properly. - Page 26 • Check if the Indoor Light Frequency setting is correct. Flickering in recorded • Avoid having both sunlight and indoor lighting video appear at the same time in your video composition. • Check if the Green Screen fabric is evenly lit. •...
-
Page 27: Technical Support
TECHNICAL SUPPORT If you have a problem that cannot be solved by using this manual, we encourage you to visit us online or contact our Consumer Services Department with any problems and/or suggestions that you might have. A support representative will be happy to assist you. Before requesting support, please be ready to provide the information below: •... -
Page 28: Disclaimer And Limitation Of Liability
Electronics North America, L.L.C. and its suppliers ® assume no responsibility for any loss or claims by third parties that may arise through the use of this product. VTech Electronics North America, ® L.L.C. and its suppliers assume no responsibility for any damage or loss caused by deletion of data as a result of malfunction, dead battery, or repairs. - Page 29 ® Model: 5318 Product Name: KidiZoom Creator Cam ® Responsible Party: VTech Electronics North America, LLC Address: 1156 W. Shure Drive, Suite 200, Arlington Heights, IL 60004 Website: vtechkids.com THIS DEVICE COMPLIES WITH PART 15 OF THE FCC RULES. OPERATION IS SUBJECT TO THE FOLLOWING TWO...
- Page 30 Visit our website for more information about our products, downloads, resources and more. vtechkids.com Read our complete warranty policy online at vtechkids.com/warranty TM & © 2020 VTech Holdings Limited. All rights reserved. Printed in China. 91-003803-000 US...
Need help?
Do you have a question about the KidiZoom Creator Cam and is the answer not in the manual?
Questions and answers
The camera shuts off when selecting video or picture from the home screen. Games, green screen, studio all work fine.