Advertisement
Quick Links
Dear Customer:
Thank you for purchasing your equipment from Component Playgrounds!!! We are proud of
our commercial grade products made for kids of all ages & sizes, and we are confident that you
will enjoy your equipment for many years.
Because you have purchased a top of the line commercial grade product, you will need to
be aware of some specific shipping requirements that may be different from shipments you
have received in the past through other delivery companies (such as UPS), and you should
follow the guidelines below carefully.
1. In most cases your product will arrive via common carrier truck line directly to your
home with curbside delivery only. This means the driver will facilitate the offloading of the
shipment at the curb, or most reasonable place near the curb and your house. You are then
responsible to have someone physically capable to help unload the product upon delivery
and note the condition of the product as per below instructions.
2. Your product may arrive on a pallet and upon delivery—locate the packing list (usually
attached to the hardware box & orange & black in color) and verify that each piece listed is with
the shipment. *** Please disregard any delivery driver stated "time crunches" or "needs to
leave quickly" and in-speck the product to your satisfaction = this is your product so
make sure it is all there in good condition or noted properly before the driver leaves.***
3. If there are any parts/pieces missing, note this directly on the delivery receipt BEFORE
you sign and receive your copy of the receipt, with wording such as "missing xyz part" etc.
Note: some shipments will have more than one pallet so check both before noting missing.
4. Similar to #3 above, also note the condition of the pieces and if any parts have been
damaged in shipping note this directly on the delivery receipt BEFORE you sign and get your
copy from the driver (in particular inspect slides for damage).
5. If your shipment appears to have damage and /or missing pieces, a freight claim must
be fi led with the freight company w/in two business days. Component Playgrounds will assist
you with this process if it is necessary. Contact the shipping manager toll free @ 877-530-0222
for claims assistance.
6. Ask your driver to sign or initial the freight slip acknowledging any damage or
discrepancies.
7. Get a copy of the signed delivery receipt from your delivery driver BEFORE he leaves.
8. If you are concerned or don't know what you should do with a certain situation
regarding the shipment, please call the shipping manager toll free @ 877-530-0222 before the
driver leaves.
All shortages and damaged items are the sole responsibility of the carrier. You are
responsible to notify Component Playgrounds of any shortages or damage relating to your
shipment w/in 2 business days of receipt of your equipment. After this time, any claim for
shortage or loss cannot be honored.
Component Playgrounds cannot be responsible for replacement of any parts,
missing or damaged, that have not been properly noted on the delivery receipt.
Component Playgrounds cannot be responsible for damaged or missing pieces due to
the fault of, or loss by the freight company.
Thanks again & remember to tell your friends about your product from Component Playgrounds!
Advertisement

Related Manuals for Component Playgrounds CH45


Summary of Contents for Component Playgrounds CH45
- Page 1 5. If your shipment appears to have damage and /or missing pieces, a freight claim must be fi led with the freight company w/in two business days. Component Playgrounds will assist you with this process if it is necessary. Contact the shipping manager toll free @ 877-530-0222 for claims assistance.
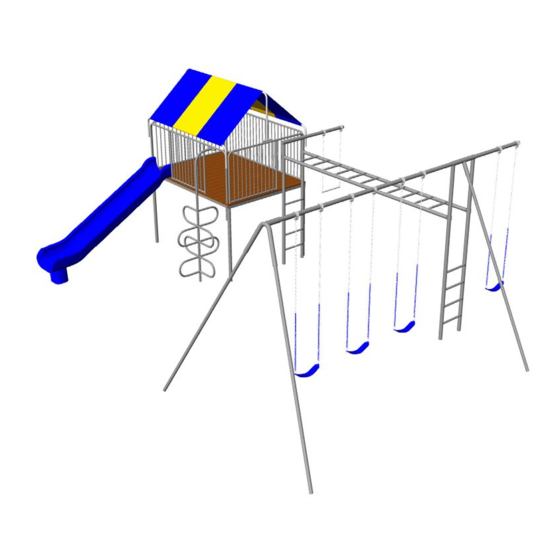
- Page 2 Parts Identification CH45 Swing Set (Page 1 of 3) Quantity Description Box Containing Swing Set Parts Wild Climber Side Canopy Support Center Canopy Support 2 3/8” x 6’ Clubhouse Legs CH Plastic Deck Package (3 Bundles Total of 16 Boards)
- Page 3 Parts Identification CH45 Swing Set (Page 2 of 3) Quantity Description 6’ CH Center Opening Barrier 6’ CH One Opening Barrier 8’ CH Full Barrier 8’ CH Two Opening Barrier 12’6” Horizontal Ladder 8’ Upright Ladder with Sleeves (Actual length 10’)
- Page 4 Parts Identification CH45 Swing Set (Page 3 of 3) Quantity Description 1 7/8” x 9’ Leg Triple End 2 3/8” X 11’7” Top rail 2 3/8” X 5’6” Top rail 6’ Long square tubing floor joists with stubs 7’8” Square Tubing Floor Joists 2 3/8”...
- Page 5 CH45 Swing Set Parts Identification Page The Small Parts Tap Bolt Nyloc Nut Flat Washer Lag Screw Hex Bolt Hex Nut Loc Washer #14 Truss Screw Carriage Bolt 2 ½” Self Tapping Screw Carabineer/Spring Clip Set Screw with Allen Wrench...
- Page 6 PLEASE READ AND UNDERSTAND ALL INSTRUCTIONS BEFORE BEGINNING The CH45 can be installed as a one day project. The normal time required to install the CH45 is about 6 – 7 hours for a two to four man crew. This time requirement will vary dependent upon the composition of the soil and the speed of the installers.
- Page 7 Model CH45 GROUND SPACE 27’ X 27’ MINIMUM RESIDENTIAL PLAY SPACE 25’ x33’ 25’ 9’ 5’ 12’9” 33’ 10’ Swinging Clearance...
- Page 8 Model CH45 Continued #1 Top rail Assembly (Clubhouse End) #2 Top rail Assembly (Swing End) 21” 20” 20” 24” 20” 15” 20” 20” 20” 24” Ladder #3 Hole Sizes for cementing in the Set (a) Upright (b) A-Frame (c) Clubhouse...
- Page 9 1.c. Place the 5’ 6” top rail, 12’ 6” horizontal ladder, and 9’ top rail in the play space as shown below. Mark where the ladder holes will need to be dug. Remove the top rails and horizontal ladder and dig the ladder hole to the measurements specified below.
- Page 10 2.a. To assemble 17’1” top rail take the 11’7” top rail and the 5’6” top rail with welded 1 7/8” pipe. Sleeve the 24” of 1 7/8” into the 11’7” top rail. Now that you have it sleeved all the way in, secure it by using 2- 3/8”...
- Page 11 Two piece Top Rail Assembly Step 3: Step 2: Step 1: *Make sure to line up the set screws so they make a straight line as show in the graphic above.
- Page 12 3.b. Assemble the legs into the triple end and top rail as shown below. 1. Slide the end of the drilled legs into the triple end. 2. Align the holes in the legs with the holes in the triple end and join together using 3/8” x 2 ¾” hex bolts and 3/8”...
- Page 13 5.a. Position parts as shown below and insert assembly into ladder. Use the mark previously made on the top rail to show you how far the assembly needs to be inserted. Insert set screws into the ladder top sleeve and tighten until barely snug. Do not secure them at this point. Notice Ladder rungs are facing down.
- Page 14 5.c. Make a mark in the soil for the A-Frame leg holes. Move the legs out of the way and dig the holes. “A” Frame leg holes are to be dug at 18” in diameter by 12” deep. Notice Most of the A-Frame leg hole needs to be dug towards the inside of the A-Frame leg.
- Page 15 6.a. Set 8’ ladder over the hole, with the rungs facing up. Slide 5’6” top rail into top sleeve. Stand the ladder in the hole and let it lean back. While you attach the horizontal ladder to the other side. Slide 5’6”...
- Page 16 The person in place #1 push the ladder up and sleeve the adjustable sleeves into the horizontal ladder. 6.c. Next level out and make any necessary adjustments to level out the play structure. Secure all set screws (on top of upright ladders, & bottom of the horizontal ladder. Secure Set Secure Set Screws...
- Page 17 **Important Notice! Please read and understand prior to proceeding** Pre-Assembly: Assembling the Club House Floor Joists 2.a. Locate the Floor Joist End with the four holes in it as shown below and determine which holes you will be using for your particular swing set configuration. This is the end that will bolt to the vertical ladder.
- Page 18 Installing the plastic Lumber Tools needed: Electric drill, 13/64” drill bit, 18 or 20 volt impact driver (preferred tool) or a cordless or electric drill can be used to drive the screws. A- Secure the first two boards into place at each end of the platform structure using the 13/64” drill bit to pre drill the holes through the plastic and into the floor joist.
- Page 19 2.c. Position assembled deck frame on the ground as shown below. Mark the holes for the Club House Legs. Dig the holes to the specifications below. Hole size for Club House Legs is 18” wide by 16” deep.
- Page 20 4.b. Having pre-assembled the floor joist system, it is now best to have at least three people to assemble the Club House Legs to the floor Joists. Insert all four legs. Then insert and secure one set screw into each leg to hold them in place. *Note: We suggest you use a structure of some kind to support the platform as you place the assembled deck structure in the previously dug holes as shown.
- Page 21 4.d. Attach the Platform Support Structure to the vertical ladder using the 5” carriage bolts pushed through the ladder and through the support structure as shown, attaching platform to 8’ vertical ladder. You may need to adjust the depth of the individual holes to make the platform structure and the ladder level up to each other and to make the holes line up.
- Page 22 4.g. Level the Club House platform and the swing structure. If you are assembling this structure in one day, disregard this step. When you are satisfied that the structure is level, mix and pour the concrete according to the package directions. You will use approximately five to seven 80# bags in the ladder hole, one to one and a half bags in each Club House leg hole.
- Page 23 Installing the Plastic Lumber 5.a. With the first two boards secured into place, lay out the remaining boards onto the support structure. Evenly space the boards as shown in the diagram shown below. Beginning at one end, it works best to secure each board in turn using one screw at each end of the board to secure it to the support structure, repeating this process until all of the boards are attached to the support structure.
- Page 24 Assembling the Barriers 6.a. Position the Barriers onto the platform and connect the corners together at 45 degree angles as shown below. Use two of the eight sets of panel clamps with the 3/8” x 2” carriage bolt and 3/8” hex nut that are provided at each corner.
- Page 25 Assembling the Canopy Kit 7.a. Attach the canopy ridge pole brackets to the center of both of the six foot barriers with panel clamps as shown below. 7.b. Insert the canopy ridge pole into the brackets previously attached to the barriers.
- Page 26 Insert the canopy side rails through the sleeves of the canopy fabric and loosely attach the barrier attachment sockets with set screws and an allen wrench Connect the barrier attachment sockets by sliding them onto the side rail and loosely tightening the set screws with the allen wrench Attach the canopy side rails to the barriers and tighten them in place so that the canopy is stretched over the canopy ridgepole tightly.
- Page 27 Slide Installation Instructions #14 x 1 ½”” Deck Mount Truss Screws Flat Washers Step 1: Position slide on deck in desired location Step 2: Attach slide to deck with two #14 x 1 ½”” Truss Screws...
- Page 28 8.c. Fire Pole. Dig the hole for the footing about 15” away from the Clubhouse Platform and center the hole with the desired opening in the barrier. Attach the Fire Pole to the Barrier using two sets of Panel Clamps, two 3/8”...
-
Page 30: Installation Instructions
Installation Instructions Steering Wheel Steering Wheel Bracket with welded 3/8” bolt. Push two 1-3/8” Nyloc Plastic 7/16” Pivot Plugs in the ends Pivot Plug Washer Assemble Steering Wheel as shown above. Then attach Bracket to the Barrier with panel clamps and 3/8”... - Page 31 Installation Instructions Telescope Using a small Phillips head screw driver and a 1/4” socket. Use 4-40 x 3/4” Machine Screws and 4-40 Nyloc Nuts to attach one side of the plastic ring to the Bracket with welded washer. Place the Base of the Telescope under the lip of the plastic ring and attach the other half of the plastic ring.
-
Page 32: Read Before Use
While every attempt is made by Component Playgrounds to ensure the highest degree of safety in all of our equipment, we cannot guarantee freedom from injury. The user assumes all risk of injury due to use. - Page 33 We hope that you and your family will enjoy many of hours of great family fun while using your Component Playgrounds Products. We appreciate your business. Our goal is to provide safe, durable and fun products using the best materials available. Your product should be mostly maintenance free.
- Page 34 (“spray paint”) at most hardware stores and at Component Playgrounds.) 5. Plastic Lumber Platforms: If you have purchased a structure which includes a platform, the plastic lumber does not need to be finished or stained. It is 100% maintenance free.
- Page 35 To Help Prevent Injuries from Falls & Other Hazards 1. Never attach, or allow children to attach the following items to your swing set: Ropes, jump ropes, clotheslines, pet leashes or any similar type of item to your swing set. Any item such as these may present a strangulation hazard.
- Page 36 Residential Products Limited Lifetime Warranty Component Playgrounds works to build heavy duty products that will stand up to the heavy use of active children. You can trust Component Playgrounds because of the way we design and build our products. We make products that are simple to own, and easy to maintain. This adds up to the best value on playground products that you can count on, and that kids will play on time after time.
-
Page 37: Warranty Registration Sheet
Return this form via fax to (801)530-0221, via e-mail to Contact Person:_____________________________________ sales@componentplaygrounds.com, or via U.S. mail to: Address:___________________________________________ City: ____________________State:______Zip:_________ Component Playgrounds Phone: ____________________Fax:___________________ 1630 North Beck Street Purchase Date: __________Completion Date: ____________ Salt Lake City, UT 84116 SALES REPRESENTATIVE/DEALER INFORMATION Today’s Date:_____________________________________...
Need help?
Do you have a question about the CH45 and is the answer not in the manual?
Questions and answers