Advertisement
Quick Links
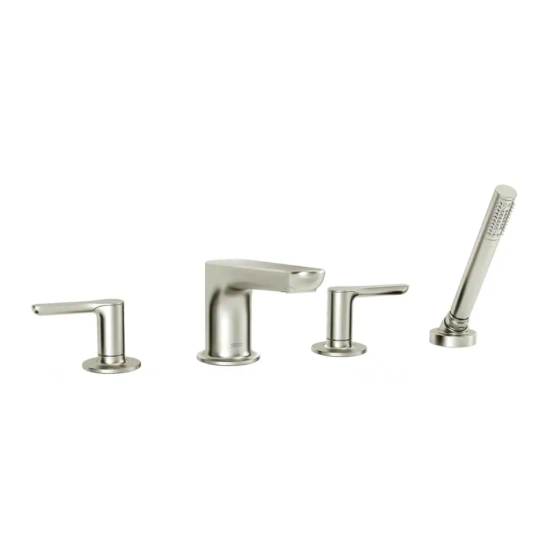
STUDIO
S
®
DECK MOUNT BATH FILLER
Thank you for selecting American Standard...
the benchmark of fine quality for over 140 years.
To ensure that your installation proceeds smoothly-please read
these instructions carefully before you begin.
RECOMMENDED TOOLS
ROUGHING-IN DIMENSIONS
12"
(306 mm)
1
INSTALL SPOUT
• Thread DIVERTER INSERT (5) carefullyit touches the
installation surface, be sure the RUBBER RING (4)
is properly seated in it's RECESS at the base of the
SPOUT (1).
• Thread SET SCREW (3) using 5 mm hex wrench supplied.
Make certain SET SCREW (3) is properly aligned and tight
so that SPOUT (1) is locked in place.
• Install PLUG BUTTON (2).
Product names listed herein are trademarks of AS America, Inc.
© AS America, Inc. 2018
INSTALLATION
INSTRUCTIONS
Phillips Screwdriver
Flat Blade Screwdriver
9-7/16"
(240 mm)
4-3/4"
(120 mm)
1" MAX.
(25 mm)
Turn off hot and cold water
CAUTION
supplies before begining.
T105900
T105901
Channel Locks
2-15/16"
(74 mm)
5-11/16"
(145 mm)
12" MIN.
(305 mm)
1
- 1 -
Certified to comply with ANSI A112.18.1M
Adjustable Wrench
4-5/8"
(118 mm)
2-1/2"
(64 mm)
2
3
Hex wench
(supplied)
RECESS
3
4
Hex Wench
(supplied)
7-13/16"
(199 mm)
MOUNTING
SURFACE
M965957 (7/18)
Advertisement

Related Manuals for American Standard Studio S T105900


Summary of Contents for American Standard Studio S T105900
- Page 1 STUDIO ® T105901 DECK MOUNT BATH FILLER Thank you for selecting American Standard... the benchmark of fine quality for over 140 years. To ensure that your installation proceeds smoothly-please read these instructions carefully before you begin. Certified to comply with ANSI A112.18.1M...
- Page 2 VALVE ASSEMBLY • Remove PLASTER GUARDS. • Thread INSERT (1) into SIDE VALVE (2) until it touches the installation surface. • Thread INSERT (3) into SIDE VALVE (4) until it touches the installation surface. • Tighten COUPLING (5) into TEE (6) for products without hand shower.
- Page 3 HANDSHOWER INSTALLATION • Drop SPRAY ESCUTCHEON (1) through the fourth hole of the tub ledge (12" max from SPOUT center) with SPRAY ESCUTCHEON (1) directed towards tub center. Be sure RUBBER RING (2) is properly seated in ESCUTCHEON (1). Install RUBBER WASHER (3) and LOCKNUT (4) from underside of ledge.
- Page 4 STUDIO ® DECK MOUNT BATH FILLER M970261-0070A MODEL NUMBERS SPOUT SCREW T105900 T105901 M910270-0070A AERATOR M970549-YYY0A LEVER HANDLE M911705-0070A SEAL SPOUT 1660609.YYY HAND SHOWER 030278-0070A TRANSFER M970507-0070A SEAL KIT TRANSFER ROD ASSEMBLY (T353901) M970550-YYY0A ESCUTCHEON M911116-0070A M970477-0070A SPACER VALVE SHANK SLEEVE KIT 918555-0070A (T353901) HANDLE SCREW...