
Related Manuals for Pelgrim EKV 500


Summary of Contents for Pelgrim EKV 500
- Page 1 elektrische kookplaat Handleiding electric hob Manual table de cuisson Notice électrique d’utilisation Elektro Kochfeld Anleitung EKB / EKV...
- Page 2 CERTIFICAT DE GARANTIE GARANTIEZERTIFIKAT Pelgrim confère 5 années de garantie sur l'appareil à condition que celui-ci ait été raccordé selon les règles de l'art par un installateur agréé conformément aux prescriptions d'installation. Pelgrim s'engage à remplacer gratuitement et ce pendant 5 années à dater de l'achat les pièces.
- Page 3 Nederlands ............. . .1 - 6 English .
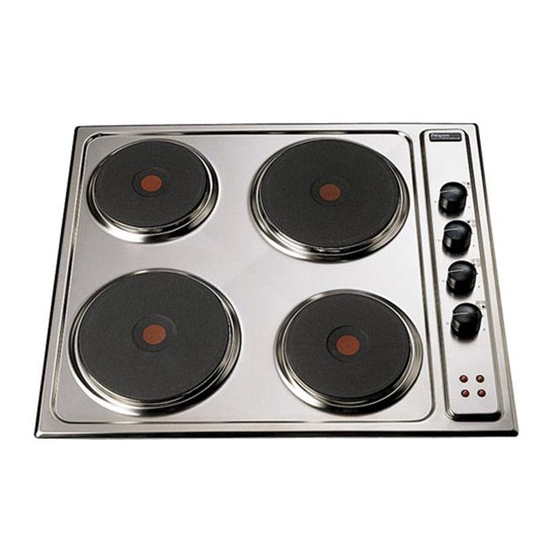
- Page 4 Fig. 1 EKV 500 Fig. 2 EKB 550 Fig. 3 • Fig. 4 Fig. 5...
- Page 5 1 2 3 4 1 2 3 4 Fig. 6 5 1 0 480 (EKB 550) 190 (EKV 500) Fig. 7 30 mm 40 mm Fig. 8...
-
Page 6: Table Of Contents
Introductie Inhoud Als u deze gebruiksaanwijzing doorleest, bent Veiligheid ......2 u snel op de hoogte van alle mogelijkheden Waarop u moet letten . -
Page 7: Veiligheid
Waar u op moet letten Dit toestel mag alleen door een erkend De kookzones mogen niet zonder pan(nen) installateur worden aangesloten (zie worden gebruikt. Nooit aluminium folie elektrische aansluiting). direkt op de kookzone leggen! Maak het toestel spanningsloos voordat Geen licht ontvlambare of vervormbare met reparatie of schoonmaken wordt voorwerpen direkt onder de kookplaat gestart. -
Page 8: Bediening
Het eerste gebruik Pannen zijn belangrijk (Fig. 3) Kookplaat inschakelen De beste bodemdikte is: Voordat u de kookplaat definitief in gebruik Bij roestvrijstalen pannen gaat nemen dient elk element gedurende 3 4 - 6 mm. à 4 minuten op de hoogste stand te worden Bij staal-emaille pannen ingeschakeld zonder dat er een pan op 2 - 3 mm. -
Page 9: De 11-Standen Schakelaar
De 11-standen schakelaar De 7-standen schakelaar (Fig. 4) (Fig. 5) Stand 11 Stand 6 Aan de kook brengen van alle gerechten. Aan de kook brengen van alle gerechten. Slinken van bladgroenten. Slinken van bladgroenten. Aanbraden van vlees. Aanbraden van vlees. Bakken van biefstuk, vis en aardappelen. -
Page 10: Afvoeren Verpakking En Toestel
Reiniging en bescherming Opmerking De tabel is uitsluitend bedoeld als leidraad, omdat de instelwaarde afhankelijk is van de De kookplaten reinigen kunt u het beste hoeveelheid, samenstelling van het gerecht met een vochtige doek of keukenpapier. en de pan. Verwijder overkooksel zo snel mogelijk. Vooral rode kool, rabarber en appelmoes werken in op emaille of roestvrijstaal. -
Page 11: Installatie
Installatie Algemeen Elektrische aansluiting Wanneer het toestel niet is voorzien van een 230 V - 50 Hz aansluitsnoer met stekker, dan dient het alleen door een erkend installateur op het Het toestel moet altijd geaard zijn. lichtnet te worden aangesloten. Gebruik voor het aansluiten een kabel van Stekker en stopcontact moeten na installatie goede kwaliteit, bijv. - Page 12 Introduction Table of contents When you have read these instructions for For your safety ..... . .8 use, you will quickly be aware of all the Things to watch for .
-
Page 13: For Your Safety
Things to watch for Clean immediately. Spills of foods or fruit juices with a high sugar content, such as The appliance should only be connected by plum juice or rhubarb, can impair the a qualified fitter (see electrical connection). colour of the enamel or stainless steel. These should therefore be cleaned Disconnect the appliance before starting immediately. -
Page 14: Pans Are Important
Pans are important The 11 settings switch (Fig. 3) (Fig. 4) The best thickness for the base of the pan is: Level 11 4-6 mm for stainless steel pans. Bringing all foods and liquids to the boil. 2-3 mm. for steel-enamel pans. Reducing leaf vegetables. -
Page 15: The 7 Settings Switch
The 7 settings switch (Fig. 5) Note This table is intended purely as a guideline, Level 3 the level to be set will depend on the quantity Bringing all foods and liquids to the boil. and composition of the food and the pan. Reducing leaf vegetables. -
Page 16: Maintenance
Cleaning and protection Installation The hobs are best cleaned with a damp General cloth or kitchen paper. When the appliance does not have a connecting cable and plug, then it may be Remove all spillages as soon as possible. connected to the mains only by an approved Red cabbage, rhubarb and apple sauce in installer. - Page 17 Electrical connection 230 V -50 Hz The seal between the hob and the work surface must be moisture-proof. The work The appliance should always be earthed. surface must be absolutely level, as must Use good quality cable for connecting e.g. the hob of course! H05RRF, 1,5 or 2,5 mm , with 3 or 5 cores,...
- Page 18 Introduction Table des matières Ce manuel est un aperçu des possibilités Sécuritée ......14 offertes par cet appareil. Il vous fournira des Précautions à...
-
Page 19: Sécuritée
Précautions à prendre Cet appareil ne peut être raccordé que par Ne pas placer d'objets légèrement un installateur agrée (voir aussi inflammables ou susceptibles de se Installation). déformer directement sous la plaque de cuisson. Avant de réparer ou de nettoyer l'appareil, couper le courant. -
Page 20: Commande
Avant la première mise en marche Les récipients sont importants (Fig. 3) Enclenchement du plan de cuisson Avant que vous ne mettiez définitivement L'épaisseur idéale du fond est: en service l'élément, chauffez-le pendant 3 Pour des récipients en acier inoxydable: 4 - 6 à... -
Page 21: La Manette De Commande À 11 Positions
La manette de commande à 11 La manette de commande à 7 positions positions (Fig 4) (Fig 5) Position 11 Position 6 Faire bouillir tous les aliments. Faire bouillir tous les aliments. Réduire les légumes verts. Réduire les légumes verts. Faire revenir la viande. -
Page 22: Elimination De L'emballage Et Appareil
Nettoyage et protection Remarque Les plans de cuisson seront le plus faciles Ces positions ne sont données qu'à titre à entretenir à l'aide d'un chiffon mouillé ou indicatif car il faut également tenir compte de d'essuie-tout (papier absorbant). la quantité d'aliments, de la composition du mets et du récipient choisi. -
Page 23: Installation
Installation Generalités Raccordement électrique Pour les appareils sans câble à fiche, ne les 230 V -50 Hz faites brancher sur l’électricité que par un installateur agrée. L’appareil doit être mis à terre. Après l’installation, la fiche et la prise de Servez-vous pour le raccordement d’un courant doivent toujours être accessibles. - Page 24 Einleitung Inhaltsangabe Wenn Sie diese Gebrauchsanleitung lesen, Sicherheit ......20 sind Sie rasch über alle Möglichkeiten Worauf Sie achten müssen .
-
Page 25: Sicherheit
Worauf Sie achten müssen Lassen Sie das Gerät durch einen Die Kochzonen dürfen nicht ohne Töpfe anerkannten Installateur an das benutzt werden. Niemals Aluminiumfolie Elektrizitätsnetz anschließen. direkt auf die Kochzone legen! Bei Reparaturen oder Reinigungen muß Keine leicht entflammbaren oder das Gerät vomStromnetz getrennt werden. -
Page 26: Bedienung
Der erste Gebrauch Töpfe sind wichtig (Fig. 3) Kochplatte einschalten Die beste Bodendicke ist: Bevor Sie die Kochplatte definitiv in bei rostfreien Stahltöpfen Gebrauch nehmen, muß jedes Element 3 4 - 6 mm. bis 4 Minuten auf den höchsten Stand Bei Stahl-Emaille-Töpfen geschaltet werden, ohne daß... -
Page 27: Der 11-Stufige Einstell-Regler
Der 11-stufige Einstell-Regler Der 7-stufige Einstell-Regler Fig. 4 Fig. 5 Stufe 11 Stufe 6 Zum Ankochen aller Gerichte. Zum Ankochen aller Gerichte. Einkochen lassen von Blattgemüse. Einkochen lassen von Blattgemüse. Anbraten von Fleisch. Anbraten von Fleisch. Backen von Beefsteak, Fisch und Kartoffeln. Backen von Beefsteak, Fisch und Kartoffeln. -
Page 28: Beseitigung Von Verpackung Und Gerät
Reinigung und Schutz Die Kochplatten können Sie am besten mit Stufe 0 einem feuchten Tuch oder Küchenpapier Bei diesem Stand ist das Element reinigen. ausgeschaltet. Durchkochen von Gerichten mit einer Kochzeit Entfernen Sie übergekochte Speisen so von weniger als 10 Minuten, nachdem das schnell wie möglich. -
Page 29: Installation
Installation Elektrischer Anschluß 230 V -50 Hz Allgemeines Wenn das Gerät nicht mit einem Das Gerät muß geerdet sein. Anschlußkabel mit Stecker ausgestattet ist, ist Benutzen Sie für den Anschluß ein Kabel es ausschließlich von einem Fachman an das guter Qualität, zum Beispiel HO5RRF, 1,5 Lichtnetz anzuschließen. - Page 30 Pelgrim is obliged for the period of 5 year from purchase date to replace parts free of charge. For the period of 1 year from purchase date no charges will be made for housecalls or labour.
Need help?
Do you have a question about the EKV 500 and is the answer not in the manual?
Questions and answers