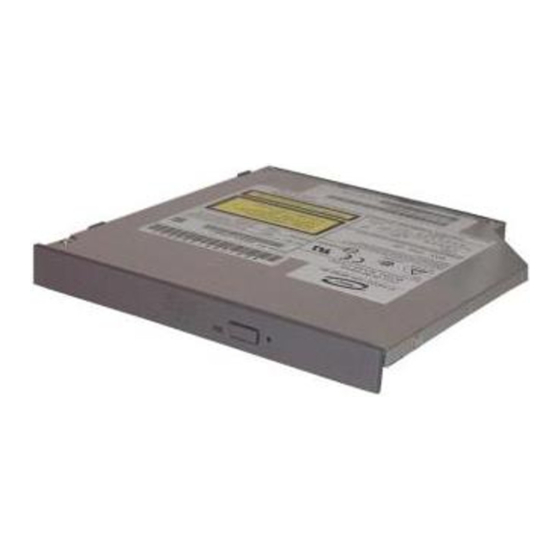
Summary of Contents for Toshiba SD-C2732
- Page 1 TOSHIBA AMERICA INFORMATION SYSTEMS STORAGE DEVICE DIVISION IRVINE, CALIFORNIA SD-C2732 DVD-ROM MOBILE DRIVE USER MANUAL...
-
Page 2: Table Of Contents
CONTENTS Introduction...1 Setup ...3 Using the DVD-ROM ...4 Troubleshooting...6 Specifications ...7 Drive Connectors...10... -
Page 3: Introduction
DVD+R DL DVD+RW DVD-RAM (read, 2.6GB, 4.7GB/1.46GB) CD-DA, CD+(E)G, CD-MIDI, CD-TEXT, CD-ROM, CD-ROM XA, MIXED MODE CD, CD-I, CD-I Bridge (Photo-CD, Video-CD), Multi-session (Photo-CD Disc, CD-Extra, Portfolio, CD-R, CD-RW), CD-R (read), CD-RW (read) Front Panel Figure 1.SD-C2732 DVD-ROM Front Panel... - Page 4 Eject Button The EJECT button is used to open the disc tray so you can install or remove a disc Busy Indicator When you install a disc into the DVD-ROM drive, the BUSY light flashes slowly as it attempts to locate the disc. One of the following will occur: •...
-
Page 5: Setup
Toshiba's SD-C2732 drive does not require any unique device drivers for Windows '98/2000/XP/NT. After installing your drive and re-booting, your system should recognize your drive. Win '98/2000/XP/NT Operating Systems support all Toshiba's ATAPI drives natively. If you prefer using DOS, download the ATAPI driver from our web site. -
Page 6: Using The Dvd-Rom
USING THE DVD-ROM Drive – SD-C2732 Drive Operation Inserting Media – Horizontally or Vertically To insert a DVD in a DVD-ROM drive that is mounted horizontally, perform the following steps: 1. Open the drive's loading tray by pressing the Eject Button and pulling out the tray. - Page 7 The SD-C2732 DVD-ROM/CD-RW drive supports the current RPC phase 2 industry specifications. This means that when the DVD-ROM drive ships from the factory it is set to the region for which the Operating System was intended.
-
Page 8: Troubleshooting
TROUBLESHOOTING – SD-C2732 Problem Disc tray cannot be opened Drive is not recognized by system Drive is not recognized by system during Boot process, but is recognized by the Operating System (i.e. XP, Win2000, Win98, Win NT, etc.) BUSY Indicator LED flashes... -
Page 9: Specifications
SPECIFICATIONS –SD-C2732 General Interface: ATAPI Compatible DVD-ROM Standard - Read DVD: DVD-ROM (DVD-5, DVD-9, DVD-10, DVD-18) DVD-R (ver 1.0 & 2.1, read) DVD-RW (ver 1.0, 1.1 read) DVD+R, DVD_R DL, DVD+RW DVD-RAM (ver 2.1, read) CD-ROM: CD-DA, CD+(E)G, CD-MIDI, CD-TEXT, CD-ROM, CD-ROM XA, MIXED MODE CD,... - Page 10 Transfer Rate DVD (Single) DVD (Dual) DVD±R/±RW DVD+R Double Layer DVD-RAM (Ver 2.1) CD (mode 1) CD (mode 2) Rotational Speed DVD single layer: DVD dual layer: DVD-R (ver 1.0) DVD-R (ver 2.1) DVD±RW, DVD+R, DVD+R DL DVD-RAM (ver 2.1): CD-ROM, CD-R, CD-RW: CD-DA, Video-CD CD-DA Transfer:...
- Page 11 DC Voltage and Current Requirements Physical Height Width Depth Weight Connectors IDE Interface Connector Regulatory The SD-C2732 DVD Writeable drive has been certified by the following regulatory agencies • UL 1950 • CSA C22.2 No. 950 • TUV (EN60950I) • CE standard •...
-
Page 12: Drive Connectors
Drive Connectors –SD-C2732 Figure 1.SD-C2732 DVD Writeable Drive Rear Panel – Connector A 50-pin ATAPI interface connector is found at the rear of the SD-C2732 DVD-ROM drive. ATAPI Connecting cable should use Japan Aviation Electronics Industry Limited KX14-50Series L Connector or equivalent connector.


Need help?
Do you have a question about the SD-C2732 and is the answer not in the manual?
Questions and answers