
Related Manuals for PERFECTPRO DIGITUBE


Summary of Contents for PERFECTPRO DIGITUBE
- Page 1 INSTRUCTION MANUAL MANUEL DE L'UTILISATEUR GEBRUIKSAANWIJZING BEDIENUNGSANLEITUNG...
-
Page 2: Table Of Contents
CONTENTS IMPORTANT SAFETY INSTRUCTIONS Read these instructions. CONTENTS………………………………………………………………..................… 1 Keep these instructions. IMPORTANT GENERAL SAFETY INSTRUCTIONS…………….….................………………. 2 Heed all warnings. CONTROLS……………………………………………….....................………………. 3 Follow all instructions. Clean only with dry cloth. POWER SUPPLY………………………………………….....................……………… 5 Do not block any ventilation openings. Install in accordance with the instructions. GENERAL FUNCTIONS………………………………….....................………………... -
Page 3: Controls
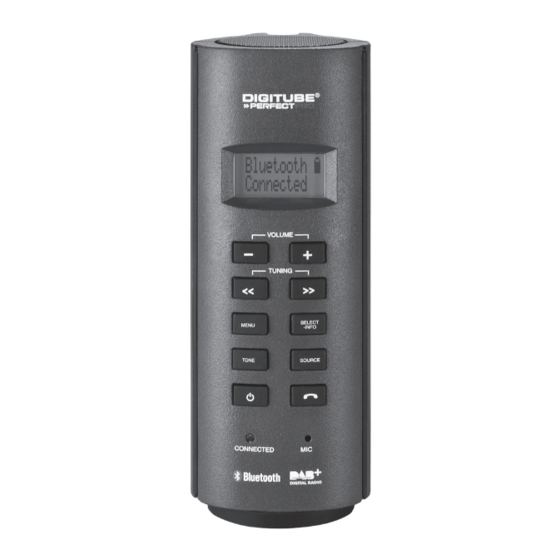
CONTROLS Bottom View Top View 16. Rubber Foot 17. Battery Door Antenna 18. Battery Charger Switch Speaker Side Views Front View 19. Jack Rubber Cover 20. Aux-in LCD Display 21. DC Adaptor In Volume Down Tuning Down Menu-Preset Tone On/Off Bluetooth Connected LED Light 10. -
Page 4: Power Supply
Loosen the screw of the door by unscrewing it in anti-clockwise direction. Observe correct polarity as indicated on the unit (+ and -). Insert Alkaline batteries (6 x 1,5V type IEC LR6 / AM3 / Size AA) or Recharge the batteries in any case at least every 2 months. NiMH rechargeable batteries (6 x 1,2V PerfectPro Rechargeable Accu, Size AA / HR6 / 2500mAh) with the correct polarity into Make sure the Battery charger switch next to the battery compartment is set to the “CHARGE / NiMH ON” position. the compartment. Put the batteries in the compartment whilst paying attention to the correct polarity of the batteries (+ and -). -
Page 5: General Functions
Playing music from your mobile phone in Bluetooth mode 11. Do not use a mix of old and new rechargeable batteries. Use the media player in the mobile phone. 12. Do not use a mix of rechargeable and non-rechargeable batteries. 13. Do not use a mix of full and empty rechargeable batteries. Playing music stored in a paired mobile phone from DigiTube in Bluetooth mode 14. Do not use batteries that have a different mAh capacity. Press the SELECT-INFO button for Play/Pause, the TUNING buttons for Forward and Backwards control. 15. Do not use damaged, deformed or leaking batteries. -
Page 6: Dab Mode
When the scan is completed, the 10 strongest FM stations will be stored as presets and the available DAB stations will be in the Display modes – DAB list of stations. The radio will switch to standby with the updated clock and date showing on the display. If no signals are found, the clock will not be updated. It may be necessary to relocate the radio to a position with better reception. In DAB mode, the radio can display a range of information on the display. Press the INFO button to cycle through the various modes. DAB MODE (DAB –... -
Page 7: Fm Mode
Press the TUNING buttons to select the desired Channel or Frequency and then the SELECT-INFO button to tune to Press the TUNING buttons to select between “Yes” or “No” (default is No). Select “Yes” to enable this function if the chosen frequency. required, otherwise, select “No”. 3. When DAB stations in the tuned channel are found, the display will show the name of the station. Any new radio stations found Press the SELECT-INFO button to confirm your setting. The display will return to last menu and press MENU to go to the normal radio display. will be added to the list stored in the radio. 4. The signal strength display shows the reception of the station. The clear unfilled rectangle indicates minimum signal level required for satisfactory reception. The signal strength bars will go up or down showing the changing signal strength as you Note: If you have moved the radio to a different part of the country, you should also carry out a search for new stations (please see the section “Finding new stations – DAB”). -
Page 8: Preset Stations
Pairing Bluetooth with your mobile phone Press the SELECT-INFO button to confirm your setting. The display will return to normal radio display. Press the On/Off button to switch on the radio. Select Bluetooth mode by pressing the SOURCE button. The blue Bluetooth connected LED on the front will be blinking when the DigiTube radio is not yet paired with your mobile phone. -
Page 9: Bluetooth Mode
In your mobile phone open the Setting menu and select Bluetooth, then select “PP- DigiTube” in the Bluetooth devices list Press and hold the PHONE (Phone icon) button on the right for more than 2 seconds. The last dialed phone number on your (Bluetooth pairing instructions may vary per type of mobile phone, please check your mobile phone manual). mobile phone will be redialed. When Bluetooth pairing is successful, the Bluetooth connected LED will stop blinking and the LCD display will show “Bluetooth Adjust the conversation volume by pressing the VOLUME – or + buttons if necessary. -
Page 10: Aux-In Mode
Notes: Never use the Aux-In socket in rainy or moist conditions to prevent moist from entering the radio. Keep the rubber cover well closed under these conditions. The Auto-Power management function will be activated in AUX mode. If there is no signal* from the Aux-In socket for a period of over 15 minutes, the DigiTube radio will automatically switch to standby mode. Pressing the On/Off button will wake up the unit. * Also when the incoming signal from the external device is too low and cannot be detected for a period of over 15 minutes by the Auto-Power management, the DigiTube radio will switch to standby mode. To prevent this raise the output level of the external device enough to be detected. -
Page 11: Tone
Press the SELECT-INFO button to confirm. The day flashes. Switching on/ off the alarm Press the TUNING buttons to set the current day. To switch the alarm on, press the SELECT-INFO button and hold for 2 seconds. The alarm icon will be shown at the top left Press the SELECT-INFO button to confirm. The month flashes. corner. Press the TUNING buttons to set the current month. To switch the alarm off, press the SELECT-INFO button again and hold for 2 seconds. The alarm icon will be disappear. 10. Press the SELECT-INFO button to confirm. The year flashes. To turn off the alarm when it buzzes, simply press the On/Off button. -
Page 12: Language Setting
LANGUAGE SETTING SYSTEM RESET The menu of the radio can be configured to various languages. If the radio fails to operate correctly, or some digits on the display are missing or incomplete, carry out the following procedure. Press the On/Off button to switch on the radio. Press the On/Off button to switch on the radio. Press the MENU button, and then the TUNING buttons until the display shows “System”. Press the MENU button, and then TUNING button until the display shows “System”. -
Page 13: Backlight
Mains AC/DC adaptor Input: 110-240V 50/60Hz AC~, Output: 12V DC button was pressed. When the radio was connected to mains again with AC power supplied, the last user settings would be applied Batteries 6 x 1,5V (Type IEC LR6 / AM3 / size AA) again. Rechargeable batteries 6 x 1,2V (Type HR06 / size AA / 2500mAh NiMH rechargeable battery) Batteries of PerfectPro brand are highly recommended Frequency coverage FM 87.5 – 108 MHz DAB 174,928 – 239,200 MHz Circuit features Loudspeaker 1 x Ø2 1/4 inch Output power...
Need help?
Do you have a question about the DIGITUBE and is the answer not in the manual?
Questions and answers