Table of Contents
Advertisement
Issue Date: 10
th
June 2009
________________________________________________________________________
SERVICE MANUAL
________________________________________________________________________
550A/650A
Power output:
THD (unweighted):
Frequency response (-1dB)
S/N ratio (ref 1W)
Input impedances
Power Amp damping factor
Max. power consumption:
Standby power consumption
Bass/Treble controls
Dimensions
Weight:
550A
60 watts (into 8Ω)
650A
75 watts (into 8Ω)
<0.002% @ 1kHz, 80% of rated power
550A
<0.05% 20Hz - 20kHz, 80% of rated power
<0.02% 20Hz - 20kHz @ 10W
<0.002% @ 1kHz, 80% of rated power
650A
<0.03% 20Hz - 20kHz, 80% of rated power
<0.02% 20Hz - 20kHz @ 10W
5Hz - 50kHz
>92dB (unweighted)
47kohms
>100
550A
500W
650A
600W
<1W @ rated mains
Shelving, ultimate boost/cut +/- 7.5dB @ 20Hz and
20kHz
120 x 430 x 350mm
(4.7 x 16.9 x 13.8")
550A
8.0kg (17.6lbs)
650A
8.4kg (18.5lbs)
Gallery Court Hankey Place London SE1 4BB UK
Tel: +44 (0)20 7940 2200 Fax: +44 (0)20 7940 2233
550A/650A
Advertisement
Table of Contents

Related Manuals for Cambridge Audio 550A


Summary of Contents for Cambridge Audio 550A
- Page 1 550A/650A Issue Date: 10 June 2009 ________________________________________________________________________ SERVICE MANUAL ________________________________________________________________________ 550A/650A Power output: 550A 60 watts (into 8Ω) 650A 75 watts (into 8Ω) <0.002% @ 1kHz, 80% of rated power THD (unweighted): 550A <0.05% 20Hz - 20kHz, 80% of rated power <0.02% 20Hz - 20kHz @ 10W...
-
Page 2: Table Of Contents
TABLE OF CONTENTS Specifications_____________________________________________________________ 1 Table of Contents__________________________________________________________ 2 ‐ 3 Front Panel Controls________________________________________________________ 4 ‐ 5 Rear Panel Connections_____________________________________________________ 6 ‐ 9 Safety Instructions_________________________________________________________ 10 ‐ 12 Exploded Diagram__________________________________________________________ 13 Parts Table________________________________________________________________ 14 Front Panel PCB ‐ Schematic__________________________________________________ 15 Front Panel PCB – Bill of Materials_____________________________________________ 16 Front Panel PCB – Layout_____________________________________________________17 Speaker PCB – Schematic_____________________________________________________18 ‐ 19 Speaker PCB – Bill of Materials________________________________________________ 20 Speaker PCB – Layout________________________________________________________21 Input PCB – Schematic_______________________________________________________22 Input PCB – Bill of Materials___________________________________________________23 ‐ 24 Input PCB – Layout__________________________________________________________25 Preamp PCB – Schematic____________________________________________________ 26 ‐ 28 Preamp PCB – Bill of Materials________________________________________________ 29 ‐ 30 Preamp PCB – Layout_______________________________________________________ 31 Volume PCB – Schematic_____________________________________________________32 Volume PCB – Bill of Materials________________________________________________ 33 Volume PCB – Layout________________________________________________________34 Power Amp PCB ‐ Schematic__________________________________________________35 ‐ 39 Power Amp PCB – Bill of Materials (550A)_______________________________________40 ‐ 41 Power Amp PCB – Bill of Materials (650A)_______________________________________42 ‐ 43 Power Amp PCB ‐ Layout____________________________________________________ 44 Mains PCB (EU 230V) – Schematic_____________________________________________ 45 ... - Page 3 Mains PCB (EU 230V) – Bill of Materials___________________________________________46 Mains PCB (115V) – Schematic__________________________________________________47 Mains PCB (115V) – Bill of Materials_____________________________________________ 48 Mains PCB (115V) – Layout_____________________________________________________49 Protection PCB – Schematic____________________________________________________ 50 Protection PCB – Bill of Materials________________________________________________ 51 Protection PCB – Layout________________________________________________________52 Set‐up Procedure_____________________________________________________________ 53 IC Details____________________________________________________________________ 54 ‐ 61 ...
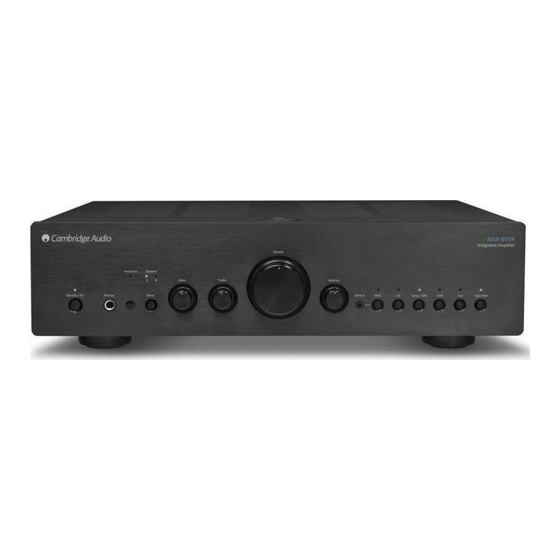
- Page 4 Cambridge Audio 550A & 650A Front panel connections 1. Standby/On Switches the unit between Standby mode (indicated by dim power LED) and On (indicated by bright power LED). Standby is an eco power mode where the power consumption is less than one watt. The unit is designed so that it can be left safely in Standby mode when not in use.
- Page 5 Cambridge Audio 550A & 650A affect the Tape Out connections. It is advisable to turn the Volume control fully anti-clockwise before switching the amplifier on. 9. Balance This control allows you to adjust the relative output levels of the left and right channels. In the central position the output from each channel is equal.
-
Page 6: Rear Panel Connections
Loop out for control bus commands to another unit. 6. Pre-Out Connect these sockets to the inputs on an external power amplifier(s), such as Cambridge Audio’s 840W model, or an active subwoofer, etc. 7. Tape In... - Page 7 Tape In sockets. The Tape Input circuit of the 550A/650A is a ‘monitor’ type, different from the other five inputs. For the five normal inputs, the source selected for listening to will also be sent out of the Rec 1/Rec 2 outputs for recording.
- Page 8 Cambridge Audio 550A & 650A Tape connection The diagram below shows how to connect the amplifier to a tape recorder or other source with a record and monitor connection. Please note that either of the tape loop outputs can be used (as they are both the same signal in parallel).
- Page 9 Cambridge Audio 550A & 650A Pre-Out connections The Pre-Out sockets are for connecting to the input sockets of a power amplifier, such as Cambridge Audio’s 840W model, or active subwoofer. The diagram below shows how to connect the amplifier to an active subwoofer via the Line In inputs on the subwoofer.
-
Page 10: Safety Instructions
Cambridge Audio 550A & 650A Important safety instructions For your own safety please read the following important safety instructions carefully before attempting to connect this unit to the mains power supply. They will also enable you to get the best performance from and prolong the life of the unit: 1. - Page 11 This product complies with European Low Voltage (2006/95/EC) and Electromagnetic Compatibility (89/336/EEC) Directives when used and installed according to this instruction manual. For continued compliance only Cambridge Audio accessories should be used with this product and servicing must be referred to qualified service personnel. C-Tick mark This product meets the Australian Communications Authority’s Radio communications and EMC...
- Page 12 Cambridge Audio 550A & 650A Electronic audio components have a running in period of around a week (if used several hours per day). This will allow the new components to settle down and the sonic properties will improve over this time. Power sources The unit should be operated only from the type of power source indicated on the marking label.
-
Page 13: Exploded Diagram
550A/650A Exploded Diagram... - Page 14 PY1481 3200-073322E000 TOROID TR. 115VAC@60Hz TI-073324 NORATEL FOR 650A PY1482 3200-073324E000 PY1597 9465-015000E041 Azur 550A/650A F/P CONTROL BOARD ASSY (TWO BOARDS) PY1598 9465-015000E231 Azur 550A/650A Preamp+MCU BOARD ASSY REV A PY1599 9465-015000E311 Azur 550A/650A VOLUME BOARD ASSY REV A PY1600...
-
Page 15: Front Panel Pcb Schematic
Cambridge Audio 550A & 650A "(( - 6(= < > , "( " 0 " "" & 6= ", "/ "8 "# "6 " @ " 4 *# #(+#$" < < < < "( - 6(= "( - 6(= "( - 6(= "( - 6(=... - Page 16 550A/650A Front Panel PCB BOM Factory Part Value Description/Type Component Ident ManPN Tolerance PackageInfo AP Part Number Number RESISTORS 1/4W Metal Film R5, R6 10mm Pitch 220R 1/4W Metal Film R7-R12, R14 10mm Pitch 1/4W Metal Film R4, R13 10mm Pitch...
-
Page 17: Front Panel Pcb Layout
Cambridge Audio 550A & 650A Front Panel PCB Layout... - Page 18 " Cambridge Audio 550A & 650A ,# 0 "% $ "% "(:: & "6> ,# 0 "% "(:: " 0 " 1" " 4 !""< (",< ,=# 4 !""< (",< ,=# & 6> " "6 "(:: "6 " #((# " #((# "...
-
Page 19: Speaker Pcb Schematic
Cambridge Audio 550A & 650A & "6> " & 6> & 6> & 6> !" ,# 0 "(:: ,# 0 "+ "* "(:: "/( :: E & 6:: "# "# "7 0 "5 70 4 "5 70 4 0 "... - Page 20 550A 650A Speaker PCB BOM Factory Part Value Description/Type Component Ident ManPN Tolerance PackageInfo AP Part Number Number RESISTORS 1/4W Metal Film 10mm Pitch 1/8W Metal Film 7.5mm Pitch 1/2W Carbon R1, R2 12mm Pitch 1/4W Metal Film 10mm Pitch...
-
Page 21: Speaker Pcb Layout
Cambridge Audio 550A & 650A Speaker PCB Layout... -
Page 22: Input Pcb Schematic
Cambridge Audio 550A & 650A -15V Met. Polyester 47nF 63V RC4580P 10nF 50V CN11:A U6:A Audio Op Amp Ceramic U12:A 47nF 63V PreOut Right LK48 LK52 Met. Polyester 10pF 50V LK22 1/8W Metal Film TM R CN10:C AV2-8.4-9 NE5532P 24 AWG... - Page 23 550A 650A Input PCB BOM Factory Part Value Description/Type Component Ident ManPN Tolerance PackageInfo AP Part Number Number RESISTORS 100R 1/4W Metal Film R5, R16, R17 10mm Pitch 220R 1/4W Metal Film 10mm Pitch 220R 2W Carbon 20mm Pitch Raise off PCB...
- Page 24 4 Way Straight Header B4P-VH 3.96mm Pitch Red-Bottom, 4 Way Gold Plated Phono CN8-CN10, CN13 AV4-8.4-9 2330-006900E001 White-Top Red-Bottom, 2 Way Gold Plated Phono CN11 AV2-8.4-9 2330-003911E034 White-Top DIODES 400V 1A Rectifier D1-D9, D11 1N4004 DO41 1401-140040-000 75V 150mA Signal Diode 1N4148 D035 1401-141480-000...
-
Page 25: Input Pcb Layout
Cambridge Audio 550A & 650A Input PCB Layout... -
Page 26: Preamp Pcb Schematic
Cambridge Audio 550A & 650A 2P2T SW1:B Pushbutton Switch VR2:A R POut RCh Out NP Electrolytic 1/4W Metal Film 47uF 16V 150k Balance Pot LK30 1/4W Metal Film 24 AWG 10mm Pitch Amp GND 100nF 100V 1/4W Metal Film 6 Way... - Page 27 Cambridge Audio 550A & 650A -15V Tone -15V Tone U3:B Black Cable Tie NE5532P Tie cables AP23887/# and AP23910/# together RL1:C Audio Op Amp LK37 RCh HP Out R POut 24 AWG 10mm Pitch NP Electrolytic LK36 ME2-5S Black Cable Tie...
- Page 28 Cambridge Audio 550A & 650A LK50 24 AWG 1/4W Metal Film 1/4W Metal Film +15V Tone +5V Protect 10mm Pitch -15V Tone CN12 2X5 Way +5V D 1/8W Metal Film DIL Male Header LK48 Clock Data 24 AWG DGND LK49...
- Page 29 550A 650A Preamp PCB BOM Factory Part Value Description/Type Component Ident ManPN Tolerance PackageInfo AP Part Number Number RESISTORS 1/4W Metal Film 10mm Pitch 1/4W Metal Film R14, R15 10mm Pitch 1/8W Metal Film R38, R49 7.5mm Pitch 1/4W Metal Film...
- Page 30 C1, C2, C4, C7, C19, C20, C24, 47nF 63V Met. Polyester 5mm Pitch Box 1117-473053E000 C26, C36, C37, C47, C53 CMPA104K100RB07 7.5mm Pitch 100nF 100V Polypropylene C14, C16 1114-104063E000 C55, C60, C62, 100nF 50V Mono Ceramic 5mm Pitch 1100-104043-000 680nF 63V Met.
-
Page 31: Preamp Pcb Layout
Cambridge Audio 550A & 650A Preamp PCB Layout... -
Page 32: Volume Pcb Schematic
Cambridge Audio 550A & 650A @ "6 @ "8 " " /( : : = & 6: : "7 0 & "692 1" ,# 0 "( "5 70 4 < "% "" " "5 70 4 "5 70 4 ",(8 <... - Page 33 550A 650A Volume PCB BOM Factory Part Value Description/Type Component Ident ManPN Tolerance PackageInfo AP Part Number Number RESISTORS 1/8W Metal Film R3, R18 7.5mm Pitch 1/8W Metal Film R9, R12 7.5mm Pitch 1/8W Metal Film R7, R13 7.5mm Pitch 1/8W Metal Film 7.5mm Pitch...
-
Page 34: Volume Pcb Layout
Cambridge Audio 550A & 650A Volume PCB Layout... -
Page 35: Power Amp Pcb Schematic
+45V L 2 +45V L Cambridge Audio 550A & 650A 2SC2240GR R126 NPN Low Noise 1/8W Metal Film R105 10uF 63V 220uF 63V 47nF 63V 150R 150R 1N4148 Electrolytic Electrolytic Met. Polyester Signal Diode R104 R101 MPSA92 100k MPSA92 PNP Signal... - Page 36 Cambridge Audio 550A & 650A +45V R 2 +45V R 2SC2240GR R128 NPN Low Noise 1/8W Metal Film 10uF 63V 220uF 63V 47nF 63V 150R 150R 1N4148 Electrolytic Electrolytic Met. Polyester Signal Diode R120 R124 MPSA92 100k MPSA92 PNP Signal...
- Page 37 Cambridge Audio 550A & 650A 650A Only Test Points No Stuff Fast Blow Fuse No Stuff No Stuff No Stuff No Stuff Rectifier Rectifier No Stuff Mono Ceramic Met Polyester Straight Header +45V L PSU +45V R PSU No Stuff...
- Page 38 Cambridge Audio 550A & 650A LK107 Clip FB L Tinned Link Wire Tinned Link Wire 24AWG 24AWG 1/8W Metal Film Tinned Link Wire 24AWG Clip In L Tinned Link Wire LK123 24AWG 1/8W Metal Film PIC Clip Detect +45V R...
- Page 39 Cambridge Audio 550A & 650A AP23069/# 550A Extruded Heatsink WIRE8 WIRE7 WIRE3 WIRE4 WIRE6 WIRE5 WIRE2 WIRE1 WIRE10 BRK1 BRK2 BRK3 BRK4 WIRE11 AP17507/# AP17507/# AP17507/# 650A Power Amp PCB Spacer AP23476/# INS1 To be placed near CN6 WIRE12 WIRE9...
- Page 40 550A Power Amp PCB BOM Factory Part Value Description/Type Component Ident ManPN Tolerance PackageInfo AP Part Number Number RESISTORS R27, R65, R78, 0.22R 3W Wirewound 20mm Pitch 1072-208330E000 Raise off PCB R113 3W WireWound R28, R66 20mm Pitch 1074-707330E000 Raise off PCB...
- Page 41 10pF 50V NP0 Ceramic C8, C31 2.5mm Pitch 1181-100042-000 100pF 50V NP0 Ceramic C7, C32 2.5mm Pitch 1181-101042-000 1nF 63V Polypropylene C4, C13, C14, C49 5mm Pitch Box 1114-102052E000 C63, C64, C69, 4.7nF 50V NP0 Ceramic 2.5mm Pitch C9, C17, C21, 47nF 63V Met.
- Page 42 650A Power Amp PCB BOM Value Description/Type Component Ident ManPN Tolerance PackageInfo Yanion P/N NOTES RESISTORS R27, R65, R78, 0.22R 3W Wirewound 20mm Pitch 1072-208330E000 Raise off PCB R113 3W WireWound R28, R66 20mm Pitch 1074-707330E000 Raise off PCB R23, R36, R37, 1/8W Metal Film 7.5mm Pitch R9, R54, R67,...
- Page 43 650A Power Amp PCB BOM 100pF 50V NP0 Ceramic C7, C32 2.5mm Pitch 1181-101042-000 1nF 63V Polypropylene C4, C13, C14, C49 5mm Pitch Box 1114-102052E000 C63, C64, C69, 4.7nF 50V NP0 Ceramic 2.5mm Pitch 47nF 63V Met. Polyester C9, C21, C29, C38 5mm Pitch Box 1117-473053E000 100nF 100V...
- Page 44 Cambridge Audio 550A & 650A AMP Layout...
- Page 45 Cambridge Audio 550A & 650A " ! "7 0 ! "7 0 ""( B B D & 8B B ""( B B D & 8B B "7 0 "7 0 ,C 8@ "(( ,C 8@ "(( "% " " " #((# <...
- Page 46 550A 650A EU 230V Mains PCB BOM Value Description/Type Component Ident ManPN Tolerance PackageInfo Factory Part Numer AP Part Number RESISTORS 1/8W Metal Film 7.5mm Pitch 1/8W Metal Film 7.5mm Pitch CAPACITORS 1nF 400V X1/Y1 Mains Rated C1, C2 CCDE102MBV09 9.5mm Pitch...
- Page 47 Cambridge Audio 550A & 650A " ! "7 0 ! "7 0 ""( B B D & 8B B ""( B B D & 8B B "7 0 "7 0 ,C 8@ "(( ,C 8@ "(( "% " " " #((# <...
- Page 48 550A 650A Mains CU 115V PCB BOM Value Description/Type Component Ident Manufacturer ManPN Tolerance PackageInfo Yanion P/N NOTES RESISTORS 1/8W Metal Film 7.5mm Pitch 1/8W Metal Film 7.5mm Pitch CAPACITORS C & C 1nF 400V X1/Y1 Mains Rated C1, C2 CCDE102MBV09 9.5mm Pitch...
- Page 49 Cambridge Audio 550A & 650A Mains PCB Layout...
-
Page 50: Protection Pcb – Schematic
Cambridge Audio 550A & 650A +15V 10pF 50V 0805 Thick Film +15V 0805 NP0 Ceramic 0805 Thick Film +15V 4.7uF 25V 105deg EL Capacitor SMT 100nF 25V 0805 Thick Film 0805 Ceramic 100k +15V U6:A 0805 Thick Film 3 Way 4.7uF 25V 105deg... - Page 51 550A/650A Protection PCB BOM Value Description/Type Component Ident Manufacturer ManPN Tolerance PackageInfo Yanion P/N NOTES RESISTORS 0805 Thick Film R74, R103 R95, R96, R116, 0805 Thick Film R122 R92, R94, R97, 100k 0805 Thick Film R98, R106, R130 0805 Thick Film...
-
Page 52: Protection Pcb – Layout
Cambridge Audio 550A & 650A Protection PCB Layout... -
Page 53: Set‐Up Procedure
Cambridge Audio 550A & 650A Set‐up Procedure When replacing the STD03NY and STD03PY (U1 – U4) output devices, adjust PR1/PR2 to achieve 13mV (+/‐ 1mV) DC with no signal applied, measured across each of the 0.22R emitter resistors. ... - Page 54 IC Pin Layouts for the Cambridge Audio Azur 550A/650A Amplifier Input PCB BC327 (Q1) NE5532 (U4, U7, U8, U9, U10, U11 & U12) 7915 (U1) 7805 (U3) 7815 (U2)
- Page 55 IC Pin Layouts for the Cambridge Audio Azur 550A/650A Amplifier TC9163AF (U5) RC4580P (U6) Preamp PCB BC327 (Q2) BC337 (Q3) NE5532 (U3, U4, U5 & U6)
- Page 56 IC Pin Layouts for the Cambridge Audio Azur 550A/650A Amplifier RC4580P (U1 & U2) PIC16F882 (U7) BA6218 (U8) Power Amp PCB 2SC2240GR (Q1, Q6, Q7, Q9, Q10, Q15, Q19, Q20, Q23, Q24, Q26 & Q32)
- Page 57 IC Pin Layouts for the Cambridge Audio Azur 550A/650A Amplifier MPSA92 (Q3, Q8, Q25, Q28, Q29 (650A ONLY) Q30, Q34, Q35, Q36, Q38, Q41 & Q46) 2SA970GR (Q2, Q4, Q5, Q11, Q14, Q16, Q21, Q22, Q27 & Q29) MPSA42 (Q12, Q13, Q17, Q18, Q31, Q37 & Q40)
- Page 58 IC Pin Layouts for the Cambridge Audio Azur 550A/650A Amplifier STD03NY (U2 & U4) Mains PCB MPSA14 (Q3) Front Panel PCB BC337 (Q1) M74HC4094B1R (U2)
- Page 59 IC Pin Layouts for the Cambridge Audio Azur 550A/650A Amplifier TSOP34836 (U1) Speaker PCB BC337 (Q1) BC327 (Q4) CD4011BE (U1) OP4N25 (U2) TSOP34836 (U3)
- Page 60 IC Pin Layouts for the Cambridge Audio Azur 550A/650A Amplifier LM393AP (U4) BC337 (Q1) MPSA14 (Q2 & Q3) Volume PCB NE5532D (U1 & U2) Protection PCB NE5532D (U5)
- Page 61 IC Pin Layouts for the Cambridge Audio Azur 550A/650A Amplifier LM393D (U6)
Need help?
Do you have a question about the 550A and is the answer not in the manual?
Questions and answers
Protection light flashes 650a
If the protection light flashes on a Cambridge Audio 550A, it indicates that the CAP5 protection technology has been activated to protect the amplifier. This may happen due to overheating, overcurrent, short circuits, or other fault conditions.
This answer is automatically generated
Protection light flashes on Cambridge 650a