Xirrus XR Series Quick Installation Manual
Wireless arrays
Hide thumbs
Also See for XR Series:
- User manual (662 pages) ,
- User manual (200 pages) ,
- Quick installation manual (27 pages)

Related Manuals for Xirrus XR Series


Summary of Contents for Xirrus XR Series
- Page 1 QUICK INSTALLATION GUIDE XR Series Wireless Arrays XR-600 Series March 20, 2014 High Performance Wireless Networks...
- Page 2 Xirrus, Inc. All other trademarks and brand names are marks of their respective holders. Please see Legal Notices, Warnings, Compliance Statements, and Warranty and License Agreements in the Wireless Array User’s Guide. All rights reserved. This document may not be reproduced or disclosed in whole or in part by any means without the written consent of Xirrus, Inc.
- Page 3 NOTE: The XR-600 must be connected to PoGE networks without routing cabling to the outside plant. This ensures that cabling isn’t exposed to lightning strikes or possible crossover from high voltage lines. Xirrus PoGE Injectors or Switches and XR-600 APs must be installed and used indoors.
- Page 4 Mounting Hardware and XR-600” on page 3.) Note that you cannot use old T-bar clips from XN or XS Arrays with the XR Series. Identify new clips by their white studs - don't use old clips whose studs aren't white.
- Page 5 XR Series Wireless Arrays Keep the unit away from electrical devices or appliances that generate RF noise-at least 3 to 6 feet (1 to 2 meters). Install the Locking Slug (Optional) If you are using a mounting kit and you wish to secure (lock) the XR-600 to its mounting plate...
- Page 6 XR Series Wireless Arrays 4A-Direct Ceiling or Grid Mount without Mounting Plate Suspended Ceiling Grid: You may attach the XR-600 directly to a 15/16” ceiling grid without using a mounting plate. There are two ceiling grid tabs on the back of the XR-600, indicated in blue in the photo.
- Page 7 NOTE: You MUST use the mounting studs furnished with the T- BAR accessory kit. You cannot use old T-bar clips from XN or XS Arrays with the XR Series. The new clips have studs that are painted white—don’t use old clips that have studs that are not...
- Page 8 XR Series Wireless Arrays Twist the four T-bar clips onto the metal ceiling grid at the marked locations and tighten the screw posts to 10-12 lbf.ft (1.38-1.66 kgf.m). Do not over tighten the screw posts. Cut an access hole for the cable(s) in the ceiling tile and draw the cable(s) through.
- Page 9 XR Series Wireless Arrays 4C-Ceiling Mount with Mounting Plate The following steps use a mounting plate, which offers ease of dismount and a locking option for the AP. NOTE: Steps 1 and 2 are only required if you wish to lock the XR-600 to its mounting plate after it is installed.
- Page 10 XR Series Wireless Arrays Align the two slots in the back of the XR-600 chassis shown here with the corresponding tabs in the XR-600 mounting plate. Push the XR-600 chassis up on the mounting plate tabs and rotate the XR-600 to the right until it snaps in place.
- Page 11 802.3at PoE-compliant switches, may be used to power the XR-600. Connect the cable that carries power and data to this port. If you are using a Xirrus-supplied injector, its CONNECT LED should light (for 30W and higher injectors, it is OK if it blinks).
- Page 12 Zero-Touch Provisioning and Ongoing Management Most customers employ the Xirrus Management System (XMS) for the initial setup and continuing management of Xirrus devices. XMS users can readily set up their new devices for zero-touch provisioning and ongoing maintenance via the following platforms.
- Page 13 XR Series Wireless Arrays Using the Reset Button The reset button returns the AP to factory default settings while rebooting. It is located in a small hole on the bottom of the unit next to the slot for the locking slug, opposite the side with the Gigabit ports as shown.
- Page 14 XR Series Wireless Arrays Drawings XR-600 Mounting Bracket Wall Mounting Bracket...
- Page 15 XR Series Wireless Arrays Direct Mounting Template...
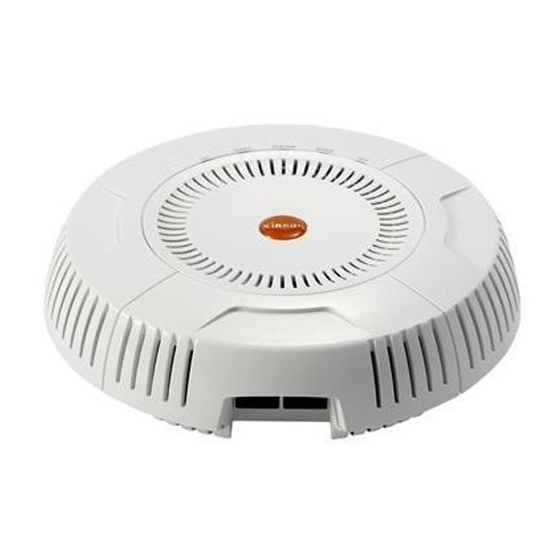
- Page 16 XR Series Wireless Arrays Physical/Environmental Specifications Dimensions (WxDxH): 7.70 x 7.70 x 1.96 in / 19.56 x 19.56 x 4.98 cm Weight: 1.6 lb / 0.73 kg Operating Temperature: 0-55C / 32-131F, 0-90% humidity, non-condensing...
- Page 18 High Performance Wireless Networks Thousand Oaks, CA 91320, USA © 201 Xirrus, Inc. All Rights Reserved. The Xirrus logo is a registered trademark of Xirrus, Inc. 812-0085-007 Rev A All other trademarks are the property of their respective owners. Content subject to change without notice.
Need help?
Do you have a question about the XR Series and is the answer not in the manual?
Questions and answers