Table of Contents
Advertisement
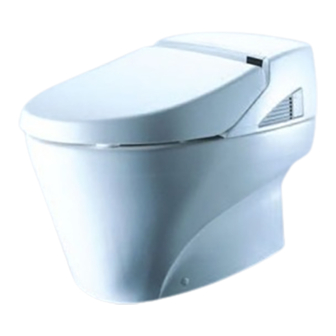
NEOREST 600
MS990CG
✲
Thank you for your recent purchase of the TOTO Neorest.
Please read the enclosed information to ensure the safe
use of your product.
All manuals and user guides at all-guides.com
Instruction Manual
Important Safety Instructions ..........
Operational Instructions ..................
Performance Features ....................
Parts and Features .........................
For Best Results .............................
G
Adjusting the Temperature ..............
Deodorizing .....................................
G
Seat and Lid....................................
G
Flushing Water ................................
G
Using the Energy Saver Feature -
"TIMER ON/OFF"............................
G
G
Features at the Same Time ............
Caring for your NEOREST..............
G
G
Daily Care and Maintenance ..........
G
G
Other Care and Maintenance .........
G
..............................
.................................
.....................................
...............................
2
5
6
7
9
11
13
15
15
16
17
20
23
24
25
27
28
29
29
30
31
34
38
...........................
38
39
46
47
Advertisement
Table of Contents

Related Manuals for Toto NEOREST 600 MS990CG


Summary of Contents for Toto NEOREST 600 MS990CG
-
Page 1: Table Of Contents
......How to Prevent Damage (Pipe Drain Method) ......Troubleshooting ......... Specifications ........✲ Thank you for your recent purchase of the TOTO Neorest. Please read the enclosed information to ensure the safe Limited Warranty ....... use of your product. -
Page 2: Important Safety Instructions
All manuals and user guides at all-guides.com Important Safety Instructions When using electrical products, especially when children are present, basic safety precautions should always be followed, including the following: READ ALL INSTRUCTIONS BEFORE USING To reduce the risk of electrocution: DANGER 1. - Page 3 All manuals and user guides at all-guides.com To reduce the risk of electrocution: DANGER 13. Periodically remove dust and dirt from the power plug and make sure they are tightly plugged into the wall outlet. Failure to do so may result in electrical shock or fire. Pull the plug out from the outlet and wipe clean with a dry cloth.
- Page 4 All manuals and user guides at all-guides.com To reduce the risk of burns, electrocution, fire WARNING or injury to persons: 17. Always use the NEOREST at a room temperature of 32°F (freezing temperature) or above to prevent frozen pipes and hoses. Frozen water pipes will cause the toilet and the pipes to break resulting in water leakage.
-
Page 5: Operational Instructions
All manuals and user guides at all-guides.com Operational Instructions Always follow these precautions to ensure the safe use of your product. Do not wipe the toilet unit or seat Do not expose the NEOREST to with a dry cloth or toilet paper. direct sunlight. -
Page 6: Tips For Using The Neorest 600
All manuals and user guides at all-guides.com Tips for Using the NEOREST 600 Protect the environment and reduce the use of water and electricity. Use the timer and Use the Auto save energy. Energy Saver. Set the timer so that it Use the Auto Energy shuts off the toilet seat Saver to automatically... -
Page 7: Performance Features
All manuals and user guides at all-guides.com Performance Features Washing Functions Page Rear cleansing The Pulsating wash alternates cycles strong and soft sprays of water approximately 70 times per second for a very thorough Soft rear cleansing rear wash. The soft wash and Front features provide a soft, yet thorough, Front cleansing whirling flow of water. - Page 8 All manuals and user guides at all-guides.com Energy Saving Features Page Timer ON/OFF Conserve energy by pre-setting the timer to turn off the toilet seat heater for the same time period each day.(Can be set for 23, 24 3, 6 or 9 hour periods of time). Auto ON/OFF The unit memorizes the time of day at which the toilet is least used and automatically reduces the toilet seat temperature to...
-
Page 9: Parts And Features
All manuals and user guides at all-guides.com Parts and Features anti-bacterial Remote controller Label Remote controller hanger Main unit Toilet seat sensor Washlet water shutoff valve (See page 14) Heated toilet seat anti-bacterial Connection hose (See page 15) Power plug (see page 12, 34) Wand (Wand head is... - Page 10 All manuals and user guides at all-guides.com The main control buttons have imprints for vision-impaired users. Remote Controller a digital “ping” will sound off while the main unit is receiving signals from the remote controller. Cover Closed The control buttons have been Anti- treated with an anti-bacterial bacterial...
-
Page 11: Before Using The Neorest 600
All manuals and user guides at all-guides.com Before Using the NEOREST 600 Preparation Insert batteries into the remote controller. ➀ Remove the remote controller from its wall hanger. Grasp the remote controller at each side and pull straight ➁ Open the battery cover on the back of the remote controller. - Page 12 All manuals and user guides at all-guides.com Insert the plug into the wall outlet. Connect the power cord to a 120V (60 Hz) GFCI protected power outlet. Open the water shutoff valve. Use the wrench provided or a flat head screwdriver to turn to the left open the water shutoff valve.
-
Page 13: How To Use The Neorest 600
All manuals and user guides at all-guides.com How to Use the NEOREST 600 When you stand at a distance of approximately 1 foot from the front of the toilet, the lid will automatically open. (Auto OPEN/CLOSE, see page 17, 18) Sit on Seat Functions become available when toilet seat sensor is activated In preparation for wash, water is released from wand... - Page 14 All manuals and user guides at all-guides.com Dryer DRYER button Stop Button Dry wet areas with the Turns the Dryer OFF. warm air dryer. Wipe excess water away with a piece of toilet paper for faster drying. Move away from the toilet The deodorizer is automatically shut off after 1 minute.
-
Page 15: For Best Results
All manuals and user guides at all-guides.com For Best Results Adjusting the Temperature Use the remote controller to adjust the water temperature, toilet seat temperature, or dryer heat to the desired setting. Open the Remote Controller Cover. Cover Adjust the temperature Adjust the temperature setting for the water and toilet seat by pushing the buttons. -
Page 16: G Deodorizing
All manuals and user guides at all-guides.com Deodorizing Sit on the toilet seat The deodorizer funciton (lights up) automatically starts The “DEODORIZER” light on the main unit display lights up. Move away from the toilet seat (lights goes out) The deodorizer function automatically stops after 1 minute. -
Page 17: Opening And Closing The Toilet Seat And Lid
All manuals and user guides at all-guides.com Opening and Closing the Toilet Seat and Lid There are 2 settings for opening and closing the toilet seat and lid. The remote controlled setting and the auto setting. Remote Controlled Opening/Closing of Toilet Seat and Lid The toilet seat and lid can be opened and closed by pushing the desired button on the remote controller. - Page 18 All manuals and user guides at all-guides.com Stand in front of the Motion Detection Sensor toilet. The Lid automatically opens If the lid does not open, move at least 1 foot away from the toilet, wait 10 seconds, and then stand in front of the toilet (lights up) again.
- Page 19 All manuals and user guides at all-guides.com When Standing in Front of the Toilet G Raise the toilet seat with the Remote Controller. You must stand in front of the toilet for at least 6 seconds or the lid will not automatically close.
-
Page 20: Flushing Water
All manuals and user guides at all-guides.com Flushing Water There are 2 settings for flushing water. The remote controlled setting and the auto setting. Remote Controlled Flushing The toilet can be flushed by pushing the flush button on the remote controller. Push the flush button on the remote controller. - Page 21 All manuals and user guides at all-guides.com Automatic Flushing The toilet will automatically flush when the user moves away from the toilet. (This function prevents the toilet bowl from being left unflushed.) Confirm that the "Flush" function is displayed from the remote controller display. Auto Flush ON/OFF button "FLUSH"...
- Page 22 All manuals and user guides at all-guides.com When standing in front of the toilet G You must stand in front of the toilet for at least 6 seconds in order to activate the automatic flush function. 1.2 Gallon light flush (4.5 LPF) Motion Detection When finished, move Sensor...
-
Page 23: To Conserve Energy
All manuals and user guides at all-guides.com To Conserve Energy Using the Energy Saver Feature - “TIMER ON/OFF” You can set your Neorest to turn off the seat heater to save energy by pressing the “TIMER ON/OFF” button. The heater turns off for 3, 6 or 9 hours to save energy. Each day afterwards, the NEOREST automatically goes into Energy Saver mode at the same time. -
Page 24: Shutting Off Energy Saver Feature - "Timer On/Off
All manuals and user guides at all-guides.com * Example When you want to save energy for 6 hours between 0:00 a.m. and 6:00 a.m. (while your family is sleeping), press the “Timer” button at midnight. The energy saving starts automatically at the same time and duration on every following day. Note When the toilet seat is occupied during energy saving mode, the seat heater temporarily turns on. -
Page 25: Using The Energy Saver - "Auto On/Off
All manuals and user guides at all-guides.com Using the Energy Saver - “AUTO ON/OFF” The Neorest can be set to remember the times of day that you normally use the toilet, and will automatically lower the temperature of the toilet seat to save energy when you do not expect to use the toilet. - Page 26 All manuals and user guides at all-guides.com Notes Precaution concerning the Energy Saver: It takes the Neorest two or three days to establish during which time periods the toilet is not used often. During that time, the energy-saving mode will go into effect gradually. When replacing the batteries of the remote control: The energy-saving settings will disappear and must be re-entered.
-
Page 27: G Shutting Off The Energy Saver Feature - "Auto On/Off
All manuals and user guides at all-guides.com Shutting Off the Energy Saver Feature - “AUTO ON/OFF” Open the cover of the remote control, and press the Energy Saver button. “AUTO” disappears from the remote control display. The main unit accepts the operation, and a beep sounds. The green “Power”... -
Page 28: G If You Are Using The "Timer On/Off" And The "Auto On/Off" Features At The Same Time
All manuals and user guides at all-guides.com If You Are Using the “TIMER ON/OFF” and the “AUTO ON/OFF” Features at the Same Time Open the cover of the remote control, and press the “TIMER ON/OFF” button when you want to begin saving energy. Note: For more details, see “TIMER ON/OFF”... -
Page 29: Caring For Your Neorest
All manuals and user guides at all-guides.com Caring for your NEOREST 600 Before Cleaning the Neorest Each component can be disassembled for a thorough cleaning. Caution! Be sure to turn off the Auto Lid OPEN/CLOSE and Auto Flush buttons before cleaning the unit. Main unit Toilet seat, (removable,... -
Page 30: Daily Care And Maintenance
All manuals and user guides at all-guides.com Daily Care and Maintenance Cleaning the main unit, toilet seat and lid. Wipe the components with a soft damp cloth. Wet and wring out a soft cloth for wiping the surface of the components. 1, 2 Cleaning very dirty components. -
Page 31: Thorough Cleaning Of The Product
All manuals and user guides at all-guides.com Thorough Cleaning of the Product Cleaning the main unit, toilet seat and lid. Each component can be disassembled for a thorough cleaning. Remove the lid. Open the lid at a 90° angle, grasp with both hands and lift straight up. - Page 32 All manuals and user guides at all-guides.com Reattach the toilet seat Grasp the toilet seat with both hands, making Approximately sure to keep the blue line on the seat cord 90û angle straight. Insert the toilet seat straight into the seat pins. Lower the toilet seat.
- Page 33 All manuals and user guides at all-guides.com Cleaning the deodorizer filter. (Filter should be cleaned once a month.) Follow the steps below to remove dust from the filter. Remove the deodorizer filter. Pull the filter (gray) forward. Filter Clean the deodorizer filter Brush the dust off of the filter surface with a small brush, such as a toothbrush.
-
Page 34: Other Care And Maintenance
All manuals and user guides at all-guides.com Other Care and Maintenance Cleaning and inspecting the power plug. Check the power plug once a month to make sure that it is in proper working condition. Remove the power plug. Grasp plug (never the cord) and pull straight out. - Page 35 All manuals and user guides at all-guides.com Water supply filter Remove the water supply filter Remove the filter cover with the wrench. Filter The filter will come out with the filter cover. Filter cover Water shutoff valve unit Wrench Turn to the left Container to catch the water that leaks out when removing the filter...
- Page 36 All manuals and user guides at all-guides.com Cleaning the wand. The wand can be cleaned without spraying warm water. Extend the wand. Push the “Wand Cleaning” button on the remote controller. The wand comes out. "Wand Cleaning" The wand will automatically retract after 5 minutes. button Wand Clean the wand.
- Page 37 All manuals and user guides at all-guides.com Cleaning the toilet bowl. The toilet bowl can easily be cleaned while flushing with water. Perform routine cleaning of the toilet bowl. ✲ Be careful not to get toilet bowl cleaner on the plastic components. Clean the toilet bowl with toilet bowl cleaner before pushing the "Rinse Cycle"...
-
Page 38: Preventing Damage Due To Frozen Water Pipes
All manuals and user guides at all-guides.com Preventing Damage Due to Frozen Water Pipes During cold months, or when there is a risk of frozen water pipes, follow the steps below to prevent the pipes and hoses from freezing, which could cause damage to the components and result in water leakage. -
Page 39: Troubleshooting
All manuals and user guides at all-guides.com Troubleshooting WARNING If water leakage occurs, close the water shutoff Turn to the right valve and turn off the water. Water shutoff Always perform valve the following Wrench or flat head screw driver Please check the following before calling for service. - Page 40 All manuals and user guides at all-guides.com Rear Wash · Front Wash (Continued) Problem Possible Cause Solution Adjust the water temperature by The wash water is too Is the water temperature setting button OFF or pushing the + or - buttons on the cold set too low? remote controller.
- Page 41 All manuals and user guides at all-guides.com Deodorizer Problem Possible Cause Solution The deodorizer is not Is the toilet seat sensor working properly? Refer to the toilet seat sensor working. instructions on page 44. Odors are sometimes Is the deodorizer filter dirty? Clean the deodorizer filter.
- Page 42 All manuals and user guides at all-guides.com Auto OPEN/CLOSE Problem Possible Cause Solution Is the Auto OPEN/CLOSE function OFF? When Push the "Auto" function of the seat and it is OFF, the Auto OPEN/CLOSE will not be lid OPEN/CLOSE on the remote controller display.
- Page 43 All manuals and user guides at all-guides.com Remote Controller Problem Possible Cause Solution Do the batteries need replacing? Replace the batteries (See page 11.) Are the batteries inserted in the correct position Reinsert the batteries in the correct (+/-)? position.(See page 11.) Is the remote controller transmitter covered with Remove any objects that may be something?
- Page 44 All manuals and user guides at all-guides.com Toilet Seat Sensor Problem Possible Cause Solution Even when not seated Is the toilet seat sensor covered with something? Make sure that the sensors are not on the toilet seat, the covered, as this will prevent the "Rear Wash", "Air infrared light from projecting.
- Page 45 All manuals and user guides at all-guides.com Auto Flush (Continued) Problem Possible Cause Solution The toilet bowl flush Is the "sensor" light on the main unit display Move away from the toilet and wait for function does not OFF? When it is OFF, standing in front of the 3 seconds.
-
Page 46: Specifications
All manuals and user guides at all-guides.com Specifications Item Contents Power 120 V AC, 60 Hz Power Usage 1288 W Average Power Consumption per Hour 20 Wh Flush Volume 1.6 Gallons per Flush (6.0 LPF) with alternate 1.2 Gallon light flush (4.5 LPF) Cord Length 3 feet Flush Type... -
Page 47: Limited Warranty
This written warranty is the only warranty made by TOTO. Repair or replacement as provided under this warranty shall be the exclusive remedy available to the purchaser. TOTO shall not be responsible for loss of the product or for other incidental, special or consequential damages or expenses incurred by the purchaser, or for labor or other costs due to installation or removal, or costs of repairs by others, or for any other expense not specifically stated above. - Page 48 Is the power plug covered with dust? Is the outlet loose? Is your Neorest 600 operating differently than usual? * In case anything is abnormal, contact TOTO USA to prevent a fire or an electrical shock. ©2003 TOTO USA, Inc. 0GU9001...
Need help?
Do you have a question about the NEOREST 600 MS990CG and is the answer not in the manual?
Questions and answers