Table of Contents
Advertisement
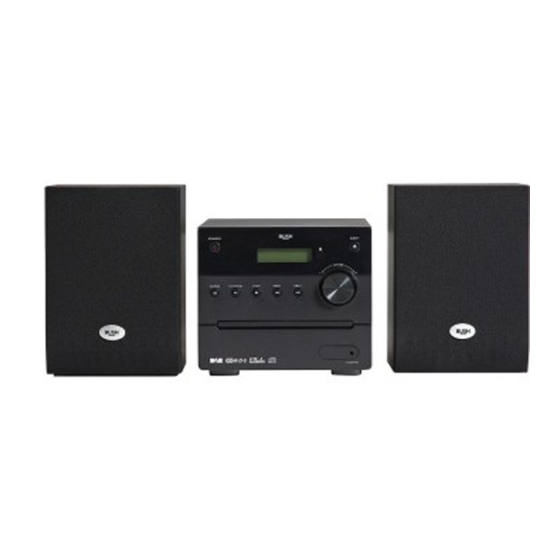
BUSH - CD/DAB Hi-Fi Micro System
Installation & User Instructions – Please keep for future reference
Important
– Please read these instructions fully before installing or using
These instructions contain important information which will help you get the best from your
appliance and ensure safe and correct installation, use and maintenance.
If you need help or have damaged or missing parts, call the Customer Helpline: 0870 600 3030
259/3089 (D)
AUDIO IN
Advertisement
Table of Contents

Related Manuals for Bush CMC6DAB


Summary of Contents for Bush CMC6DAB
- Page 1 BUSH - CD/DAB Hi-Fi Micro System Installation & User Instructions – Please keep for future reference 259/3089 (D) AUDIO IN Important – Please read these instructions fully before installing or using These instructions contain important information which will help you get the best from your appliance and ensure safe and correct installation, use and maintenance.
-
Page 2: Table Of Contents
Manual tuning . . . . . . . . . . . . . . . . . . . . . . . . . . . . . . . . . . 6 CMC6DAB Storing station presets . -
Page 3: Safety Information
Safety information Important – Please read these instructions fully before using CAUTION: TO REDUCE THE RISK OF ELECTRIC SHOCK, DO NOT REMOVE ANY COVER. NO USER-SERVICEABLE PARTS INSIDE, REFER ANY SERVICING TO QUALIFIED SERVICE PERSONNEL. • Please read this owner’s guide This symbol means that this unit is double •... -
Page 4: Accessories Included
Functions & controls Please familiarize yourself with the parts and accessories listed below Accessories included • 1 x CMC6DAB • 1 x Remote control • 2 x Speakers • 1 x Instruction manual (with batteries) Overview of controls STANDBY EJECT... -
Page 5: Preperation For Use
Installation Preperation for use Connecting the loud speakers (cont) 4: When connecting ensure the RED wire connects to Remote control battery installation the RED terminal and the BLACK wire to the BLACK 1: Remove the battery cover (as shown) . terminal . -
Page 6: Tone Controls
User instructions Tone controls DAB (Radio) operation (cont) Adjust the Bass & Treble tone controls if required. NOTE: The station name will be shown on the top 1: Press the TONE button (25) on the remote control . of the display. Information about the DAB radio 2: The first adjustment is Bass . -
Page 7: Manual Tuning
User instructions Manual tuning Display modes As well as an auto tune function, you can manually Every time you press the INFO button on the remote tune the receiver. control, the display will cycle through the following display modes: The information is displayed on the 1: Press the MENU button in DAB mode, and use either lower segment of the LCD display. -
Page 8: Secondary Services
User instructions Secondary services DRC ( Dynamic Range Control ) (cont) 2: Choose between DRC off, DRC Low and DRC High On some occasions you will see a “>>” symbol directly after the name of the station . This indicates that there using either (8) or (9) on the unit,... -
Page 9: Storing Station Presets
User instructions Storing station presets CD operation It is possible to store up to 10 of your favourite stations. Playback This will enable you to access your favourite stations 1: Make sure you are in CD mode, if not press the CD quickly &... -
Page 10: Programme Playback
User instructions Programme playback Connecting an external audio device You may wish to play back tracks of a CD in a different External audio sources such as iPod’s & MP3 players order than the original disc was recorded in. can be connected using a 3.5mm to 3.5mm audio cable (not supplied). -
Page 11: Uk Mains Plug Information
User instructions UK Mains plug information Disc handling information For your convenience a mains plug with a fuse (3 • Do not touch the playback side of the disc. Amp) has been fitted to this appliance. For your safety • Do not attach paper or tape to disc. please observe the following information. - Page 12 User instructions Troubleshooting In the unlikely event of difficulties with your appliance please follow the trouble shooting guide below . If the problem persists, contact the retailer if the machine is still under guarantee . Customer helpline: 0870 600 3030 0345 600 3021 Problem Reason(s)
-
Page 13: Product Guarantee
Guarantee PRODUCT GUARANTEE This product is guaranteed against manufacturing defects for a period of Year This product is guaranteed for twelve months from the date of original purchase. Any defect that arises due to faulty materials or workmanship will either be replaced, refunded or repaired free of charge where possible during this period by the dealer from whom you purchased the unit.
Need help?
Do you have a question about the CMC6DAB and is the answer not in the manual?
Questions and answers