
Related Manuals for Blancpain 500 Fathoms GMT


Summary of Contents for Blancpain 500 Fathoms GMT
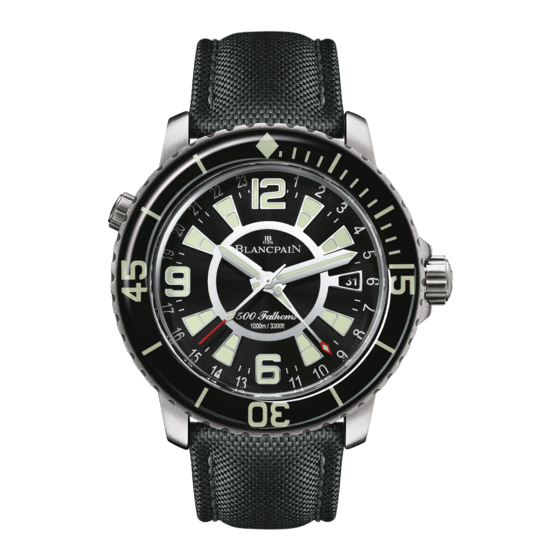
- Page 2 Your watch...
- Page 3 “ 500 FATHOMS GMT ”, DATE AND SECONDS, DECOMPRESSION VALVE, ONE-WAY ROTATING BEZEL, SELF-WINDING Calibre 5215, up to 120-hour power reserve. 50021...
-
Page 4: Operating Instructions
OPERATING INSTRUCTIONS Kindly unscrew the crown (position A) before performing any corrections, and screw it in again once the watch has been adjusted. The crown has three distinct positions : Position A, crown in manual-winding position. Position B, time-zone (GMT) and fast date correction position (only the hour hand turns), enabling adjustment of the time-zone hours and of the date, either forwards or backwards. - Page 5 2) Allen key type screwdriver for triple-blade safety folding clasp. The adjustable tip of your Blancpain tool is initially turned to the “ Allen key ” side to adjust the triple-blade safety folding clasp (refer to page 28 for wristband adjustment).
- Page 6 Only Blancpain wristbands specially designed for this folding clasp should be used. For your safety and comfort, we advise you to have your new clasp fitted by an authorised Blancpain retailer. You can always then adjust the length of the wristband yourself using the dedicated Blancpain tool supplied with your watch.
- Page 7 Wristband length adjustment : Loosen the screw using the Blancpain tool supplied with the watch (Fig. 5). Slide the wristband section into the clasp and insert the welded hollow cylindrical stud designed to house the screw into the required hole (Fig. 6). Place the screw back in position and tighten it using the Blancpain tool (Fig.
- Page 8 500 FATHOMS WRISTBAND CHANGE The watch holder for changing the wristbands of Fifty Fathoms and 500 Fathoms watches was specifically designed by Blancpain to hold your watch securely, thus considerably facilitating the task of changing the wristband, such as if you want to switch from the leather strap to the rubber one.
- Page 9 Supplies and spare parts : Holding block Pushrod Tool holder (Allen key) Rod and shank with detachable cap clamping screws Wristband attachment tubes Key shanks (Allen key) Tube fastening screws Detachable cap The two tool holders are kept in recesses on the sides of the holding block. The pushrods, key shanks, attachment tubes and tube fastening screws are stored on either side of the watch holder.
- Page 10 Removing the wristband : Slide the tool holders towards each other in the two guide holes. The guide holes allow some clearance to help you direct the keys towards the hollowed screw heads of the wristband tube. Once the keys are in place, insert them as far as possible into the hollowed screw heads.
- Page 11 Fitting the wristband : Using a pushrod, ensure that the attachment holes and the passage for the diving wristband are precisely aligned. Make sure that the wristband part fitted with the clasp is fastened at 12 o’clock. With the help of a pushrod if needed, slide an attachment tube into one of the guide holes on the side of the holding block.
Need help?
Do you have a question about the 500 Fathoms GMT and is the answer not in the manual?
Questions and answers