Table of Contents
Advertisement
Available languages
Available languages
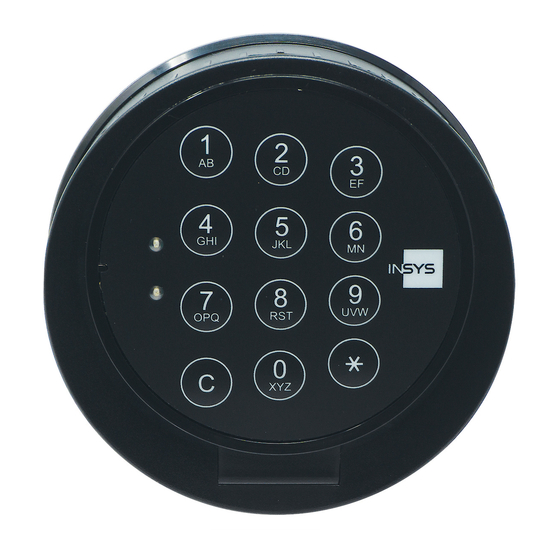
CombiLock 200 Simplex
Öppna och låsa låset
1. Tryck in din sexsiffriga kod. Vid rätt inmatning bekräftas det med en signal och
att den gröna lysdioden blinkar till.
2. Efter att koden slagits måste låset öppnas inom 10 sekunder genom att vrida
panelen medurs annars låser låset sig automatiskt.
Låst läge
Om felaktig kod slås fyra gånger i rad startas en 10 sekunders blockeringsperiod.
3. Nu kan regelverket vridas upp och dörren kan öppnas.
Vid låsning av skåpet.
För att låsa, stäng dörren ordentlig och vrid tillbaka regelverket till låst läge.
Sen vrid panelen moturs till låst läge.
Upplåst läge
Innan ni lämnar skåpet är det viktigt att vrida på panelen och regelverket för att
säkerställa att låset är låst på ett korrekt sätt.
2017-10-16
Upprättat av: Kristian Torsson
Snabbanvändarguide
Kod
Sida 1 av 2
Upplåst läge
Låst läge
Version 2.0
Art.nr: 805340
Advertisement
Chapters
Table of Contents

Subscribe to Our Youtube Channel
Related Manuals for INSYS CombiLock 200 simplex


Summary of Contents for INSYS CombiLock 200 simplex
- Page 1 CombiLock 200 Simplex Snabbanvändarguide Öppna och låsa låset 1. Tryck in din sexsiffriga kod. Vid rätt inmatning bekräftas det med en signal och att den gröna lysdioden blinkar till. 2. Efter att koden slagits måste låset öppnas inom 10 sekunder genom att vrida panelen medurs annars låser låset sig automatiskt.
- Page 2 CombiLock 200 simplex CombiLock 200 pro CombiLock 200 RFID...
-
Page 3: Impressum / Imprint
Alle Rechte an dieser Dokumentation und an den Geräten liegen bei INSYS MICROELECTRONICS GmbH Regensburg. Any duplication of this manual is prohibited. We appreciate comments and suggestions. All rights on this documentation and the devices are with INSYS MICROELECTRONICS GmbH Regensburg. Warenzeichen und Firmenzeichen / Trademarks Die Verwendung eines hier nicht aufgeführten Waren- oder Firmenzeichens ist kein... -
Page 4: Zulassungen / Approvals
CombiLock 200 simplex / pro / RFID Zulassungen / Approvals EN 45011 0908 / HSL14-01A DIN EN 1300 M113331 Hochsicherheitsschloss – Klasse 2 High Security Lock – Class 2 G105127 Sperreinrichtung - Klasse C Blocking Device – Class C Handbuch / Manual V. 1.05... -
Page 5: Table Of Contents
CombiLock 200 simplex / pro / RFID Inhaltsverzeichnis – Table of Contents Impressum / Imprint ..................2 Zulassungen / Approvals ................3 Deutsch German Inhaltsverzeichnis – Table of Contents ............4 Inhaltsverzeichnis ................... 5 Zu dieser Anleitung ................6 Allgemeine Bedienung CombiLock ............11 Bedienung CombiLock 200 simplex ............. -
Page 6: Inhaltsverzeichnis
Inhaltsverzeichnis CombiLock 200 simplex / pro / RFID Inhaltsverzeichnis Handbuch Deutsch German Zu dieser Anleitung ......................6 Inhalt und Nutzung ....................6 Textauszeichnungen und Formatierung ..............7 Bestimmungsgemäßer Gebrauch ................8 Gefahren durch elektrische Energie ................8 Verantwortung des Betreibers ................... 8 Personalanforderungen .................... -
Page 7: Zu Dieser Anleitung
Montage des Hochsicherheitsschlosssystems CombiLock 200 simplex / pro / RFID und soll Sie bei der Montage sowie beim Öffnen und Schließen der Wertbehältnisse unterstützen. Es beschreibt die Abläufe für die Systeme CombiLock 200 simplex / pro / RFID der VdS-Klasse 2. -
Page 8: Textauszeichnungen Und Formatierung
Zu dieser Anleitung CombiLock 200 simplex / pro / RFID Textauszeichnungen und Formatierung 1.2.1 Sicherheitshinweise Gefahr Unmittelbare Lebensgefahr / Gefahr der schweren Körper- verletzung und von Gesundheitsschäden. Folgen, die sich aus der Missachtung ergeben können. Anleitung zur Vermeidung oder Behebung der Gefahr. -
Page 9: Bestimmungsgemäßer Gebrauch
In der Montageanleitung beschriebene Arbeiten, für die Gehäuse von Einheiten des Systems geöffnet werden müssen, dürfen ausschließlich von Elektrofachkräften (Definition siehe S. 9), die von INSYS MICROELECTRONICS oder berechtigten Partnerunternehmen geschult und autorisiert wurden, durchgeführt werden. Vorsicht Gefahr von Kurzschluss der elektronischen Komponenten. -
Page 10: Personalanforderungen
Personalanforderungen 1.6.1 Qualifikationen Benutzer des Hochsicherheitsschlosssystems CombiLock 200 simplex / pro müssen fähig und auch sprachlich in der Lage sein, diese Bedienungsanleitung zu lesen und zu verstehen, um sich mit den in ihr beschriebenen Montage- und Bedienvorgängen vertraut machen zu können und die sichere Montage sowie den sicheren Betrieb des Systems zu gewährleisten. -
Page 11: Hinweise Zum Anlegen Von Codes
CombiLock 200 simplex / pro / RFID Zu dieser Anleitung 1.8 Hinweise zum Anlegen von Codes Vorsicht Mit werksseitigen Codes ist das System nicht gesichert. Gefahr der unberechtigten Öffnung. Ändern Sie werksseitige Codes aus Sicherheitsgründen sofort nach der Installation. Vorsicht Codes mit Ziffern, die persönlichen Daten (Geburtsdatum etc.) -
Page 12: Allgemeine Bedienung Combilock
Allgemeine Bedienung CombiLock CombiLock 200 simplex / pro / RFID 2 Allgemeine Bedienung CombiLock Öffnen und Schließen 2.1.1 Öffnen des Elektronikschlosses mit Code Nur bei Version CombiLock 200 pro / RFID: für einen der Benutzer 1-9 ... -
Page 13: Anlegen / Ändern Des Codes 2 Combilock Simplex 200
CombiLock 200 simplex / pro / RFID Bedienung CombiLock 200 simplex 3 Bedienung CombiLock 200 simplex Anlegen / Ändern des Codes 2 CombiLock simplex 200 (nur bei offenem Elektronikschloss): Code 1 (Bei Änderung Eingabe Code 1 oder Code 2) ... - Page 14 Bedienung CombiLock 200 simplex CombiLock 200 simplex / pro / RFID 3.3.1 Öffnungsverzögerung einschalten Code 1 (Beispielcode) Gewünschte Zeit (von für 1 Minute) (bis für 99 Minuten) 3.3.2 Öffnungsverzögerung ausschalten Code 1 (Beispielcode) ...
-
Page 15: Bedienung Combilock 200 Pro
CombiLock 200 simplex / pro / RFID Bedienung CombiLock 200 pro 4 Bedienung CombiLock 200 pro Ändern CODE des Masters (innerhalb von 10 Sek. nach Öffnung beginnen): Alter CODE des Masters Neuer CODE des Masters (Beispielcode) ... -
Page 16: Aktivieren Einer Codeverknüpfung
Bedienung CombiLock 200 pro CombiLock 200 simplex / pro / RFID Aktivieren einer Codeverknüpfung (innerhalb von 10 Sek. nach Öffnung beginnen): Nach der Aktivierung dieser Funktion kann das Elektronikschloss nur durch die Eingabe von 2 PIDs und 2 CODES geöffnet werden. -
Page 17: Öffnungsverzögerung Und Freigabezeit
CombiLock 200 simplex / pro / RFID Bedienung CombiLock 200 pro Öffnungsverzögerung und Freigabezeit Öffnungs-, Alarmverzögerung und Freigabezeit Mit der Einstellung innerhalb von 10 Sek. nach Öffnung beginnen. Diese Parameter sind jeweils auch einzeln einstellbar. CODE des Masters (Beispielcode) ... -
Page 18: Löschen Öffnungs-, Alarmverzögerung Und Freigabezeit
Bedienung CombiLock 200 pro CombiLock 200 simplex / pro / RFID Löschen Öffnungs-, Alarmverzögerung und Freigabezeit (innerhalb von 10 Sek. nach Öffnung beginnen, jeweils auch einzeln löschbar): CODE des Masters (Beispielcode) Löschen Öffnungsverzögerung ... -
Page 19: Schloss Freigeben
CombiLock 200 simplex / pro / RFID Bedienung CombiLock 200 pro 4.12 Schloss freigeben (nur bei verschlossenem Elektronikschloss): CODE des Masters (Beispielcode) Sperre aufgehoben 4.13 Datum und Uhrzeit einstellen Datum und Uhrzeit ohne Punkt eingeben. -
Page 20: Bedienung Combilock 200 Rfid
Bedienung CombiLock 200 RFID CombiLock 200 simplex / pro / RFID 4.14.1 Optionale Programmiermöglichkeiten für CombiLock 200 pro mit PC-Software des optionalen Parametrier-Sets CombiComm. Zeitprogramme Codeverknüpfung (4-Augenprinzip) IO-Funktionen (z.B. Stiller Alarm, Auslesen Ereignisspeicher) Öffnungsverzögerung / Freigabezeit Datum / Uhrzeit CombiXT und das Parametrier-Set CombiComm können erworben werden bei Firma INSYS MICROELECTRONICS GmbH. -
Page 21: Öffnungsvorgang Und Rfid Freigabe
CombiLock 200 simplex / pro / RFID Bedienung CombiLock 200 RFID Öffnungsvorgang und RFID Freigabe Wenn Stromunterbrechung stattfand, z.B. Batteriewechsel, nach Öffnung der Tastaturklappe, oder mindestens 4 falschen Codeeingaben, PIN und Code 2x eingegeben. CODE PIN für Master = , für Benutzer 1 bis 9 = bis ... -
Page 22: Programmierungen Zur Rfid Freigabe
Bedienung CombiLock 200 RFID CombiLock 200 simplex / pro / RFID Optische- und akustische Signalausgaben während der PIN- und CODE-Eingabe Schloss ist gesperrt: Ein Zeitprogramm ist aktiv. Schloss ist durch den Master Q Rotes LED Signal nach Eingabe PIN gesperrt. - Page 23 CombiLock 200 simplex / pro / RFID Bedienung CombiLock 200 RFID 5.3.2 Löschen der RFID Zuordnung (innerhalb von 10 Sek. nach Öffnung beginnen): PIN Benutzer 1 bis für PIN Benutzer 9 ...
-
Page 24: Pc Software Combicomm (Optional)
Bedienung CombiLock 200 RFID CombiLock 200 simplex / pro / RFID PC Software CombiComm (optional) Die Programmierungen der RFID – Freigabe (Zuordnung und Löschen) werden im Schloss protokolliert und können mittels der PC-Software CombiComm ausgelesen und verwaltet werden. Des Weiteren wird jede zusätzliche RFID-Freigabe eines Benutzers während des Öffnungsvorganges protokolliert. -
Page 25: Störungsabhilfe
CombiLock 200 simplex / pro / RFID 6 Störungsabhilfe Optische und akustische Signal-Ausgaben Signalausgabe Grund Bemerkung Elektronikschloss Zum Einschalten 2 Sek. drücken Richtige grün 1 x Codeeingabe Nach 4 falschen Codeeingaben hintereinander, tritt eine Sperrzeit von 10 Sek. ein. Jede weitere Fehleingabe verlängert die Sperrzeit... -
Page 26: Spezielle Signal-Ausgaben Combilock 200 Rfid
CombiLock 200 simplex / pro / RFID Spezielle Signal-Ausgaben CombiLock 200 RFID Optische- und akustische Signalausgaben während der PIN- und CODE-Eingabe Schloss ist gesperrt: Ein Zeitprogramm ist aktiv. Schloss ist durch den Master Q Rotes LED Signal nach Eingabe PIN gesperrt. -
Page 27: Montageanleitung
CombiLock 200 simplex / pro / RFID 7 Montageanleitung für CombiLock 200 simplex, - pro und CombiLock 200 RFID Montage Elektronikschlosses Tastatur gemäß dieser Montageanleitung vorzunehmen. Die Montageanleitung ist ein Teil der VdS-Anerkennung und die Nichtbeachtung führt zum Verlust dieser Anerkennung. -
Page 28: Gesamteinbau-Übersicht
CombiLock 200 simplex / pro / RFID Gesamteinbau-Übersicht Es gibt zwei unterschiedlich dicke Varianten der Spindel, A und B. Spindel Variante A (links im Bild) besteht aus 2 Halbschalen und Manschetten. Spindel Variante B (rechts) besteht aus einem Rohr. System mit Spindel Variante A System mit Spindel Variante B Der Befestigungsring wird mit 4 Zylinderschrauben M4x10 an der Tresortür fixiert. - Page 29 CombiLock 200 simplex / pro / RFID 7.2.2 Spindel Variante A kürzen und einbauen Kürzen Sie die Spindel so, dass sie mindestens so lang wie die Tresortür dick ist (Dicke Tresortür = T mm) und dass sie mit ihren beiden Enden noch tief genug im Schloss sowie in der Mitte der Bedieneinheit befestigt werden kann (bei Variante A insgesamt etwa 14 mm, Spindellänge = A mm + 14 mm, siehe Zeichnung unten).
- Page 30 CombiLock 200 simplex / pro / RFID 7.2.3 Spindel Variante B kürzen und einbauen Vorsicht Falls die Spindel kürzer ist als angegeben, kann dies bei Spindel Variante B Manipulation ermöglichen. Achten Sie darauf, dass die Spindel nicht kürzer ist als angegeben.
- Page 31 CombiLock 200 simplex / pro / RFID 7.2.4 Befestigungsring montieren Befestigungsring für Tastatur CombiControl nach Skizze montieren. Dazu, falls erforderlich, 4 Gewindebohrungen M4 und (wenn nicht schon durchgeführt, siehe Punkt 7.2.1 oben) 1 Bohrung für Spindel Variante B min. Ø 10,5 max. 13 mm (in Abb.11,4 mm ) oder 1 Bohrung für Spindel Variante A mit Ø...
-
Page 32: Einbau
CombiLock 200 simplex / pro / RFID 7.2.6 Bohrungen für Schloss einbringen Vorsicht Unebene Auflagenflächen können Funktionsausfälle verursachen. Achten Sie darauf, dass das Schloss an eine ebene Fläche verbaut wird. 3 Bohrungen M6 zur Befestigung des Elektronikschlosses gemäß nachfolgender Skizze einbringen. - Page 33 (4 Einbaupositionen, jeweils um 90° versetzt). INSYS Lock 200 simplex / pro / RFID CombiControl Einbaubeispiel Schlosssystem CombiLock 200 simplex / pro / RFID Nach dem Einbau darf der Schlossriegel nicht unter mechanischer Spannung und unter mechanischem Druck stehen.
-
Page 34: Installation Mit Sperrelement
CombiXT Installationsschritte für Einbau von CombiXT Montage des CombiXT Gehäuses (siehe Kapitel 3) Anschluss von CombiXT an das Schloss INSYS Lock 200 pro (siehe Kapitel 4) Anschluss von CombiXT an die Einbruchmeldeanlage (siehe Kapitel 5) Aktivieren des Sperreinrichtung an der Bedieneinheit CombiControl (siehe Kapitel 6) ... - Page 35 CombiLock 200 simplex / pro / RFID 7.4.1 Montage Sperrelement CombiXT CombiXT wird im gesicherten Bereich mittels der beiden im Lieferumfang enthaltenen Schrauben M3x10 mit einem max. Drehmoment von 5 Nm befestigt. 7.4.2 Anschluss CombiXT an Schloss Das Sperrelement CombiXT wird über die Buchse BU1 (siehe Abb. zu 7.4.3 unten) mittels des im Lieferumfang enthaltenen Adapterkabels an die 6-polige Buchse am Schloss angeschlossen.
- Page 36 CombiLock 200 simplex / pro / RFID 7.4.3 Anschluss an die Einbruchmeldeanlage Anschlussverteiler Deckelkontakt Verteiler 1 Verteiler 2 REL2 Klemme Beschreibung SABO1 (Sabotagelinie) SABO2 12VDC Zustandsrelais : NO (Schloss offen) Zustandsrelais : NC (Schloss zu ) Zustandsrelais : C Alarmrelais : NO (Stiller Alarm)
- Page 37 CombiLock 200 simplex / pro / RFID Freigabekontakt Wird der Freigabekontakt geschlossen, so wird das Schloss freigegeben. Im anderen Fall wird das Schloss gesperrt, d.h. das Schloss lässt sich nicht öffnen. Kontakt geschlossen: Schloss freigegeben (Klemme 19 und 20 gebrückt) Kontakt offen: Schloss gesperrt (Öffnen gesperrt)
- Page 38 CombiLock 200 simplex / pro / RFID Sabotagelinie Über einen Deckelkontakt ist eine Sabotagelinie realisiert. Es besteht die Möglichkeit noch zusätzliche Elemente in die Sabotagelinie mit aufzunehmen. Falls keine weiteren Sabotageelemente angeschlossen werden, ist der Jumper J3 neben dem Deckelkontakt gesteckt.
- Page 39 CombiLock 200 simplex / pro / RFID Versorgungsspannung Der Anschluss der Versorgungsspannung erfolgt an den Schraubklemmen 3 und 4. Klemme 4 : 12VDC Klemme 3 : GND Achtung: Stabilisierte Gleichspannung mit 12V verwenden! Richtige Polung beachten! Handbuch V.1.05 Manual V. 1.05...
- Page 40 CombiLock 200 simplex / pro / RFID 7.4.4 Aktivieren Sperrelement an Bedieneinheit Spannungsversorgung über die EMA anschalten Schloss öffnen Eingabe der Benutzernummer Q Eingabe des Codes Schloss öffnet, Tastatur muss gedreht werden Aktivieren des Sperrelements CombiXT ...
- Page 41 CombiLock 200 simplex / pro / RFID 7.4.6 Funktionstest der Sperreinrichtung Schloss schließen Schloss über EMA sperren Codeeingabe, Öffnungsversuch Q Sperrsignal Schloss über EMA freigeben Codeeingabe und Auslösung des stillen Alarms Q Schloss offen, Überprüfung des Zustandsrelais Schloss schließen, Bedieneinheit in Ruhestellung...
-
Page 42: Übersicht Installation Combilock 200 Rfid
CombiLock 200 simplex / pro / RFID Übersicht Installation CombiLock 200 RFID Die Erweiterungseinheit PowerXT ist optional und nicht im Lieferumfang des Standardsystems enthalten. Nur Elektrofachkräfte, die von INSYS oder berechtigten Partnerfirmen geschult und autorisiert wurden, dürfen Montagearbeiten durchführen. Vorsicht Gefahr von Kurzschluss der elektronischen Komponenten. -
Page 43: Technische Daten
Maße 92 mm (Durchmesser) x 26,8 mm (Tiefe) Umwelt 0 bis 50˚C, 75 % relative Luftfeuchtigkeit Umweltklasse II nach VdS Schutzart IP 30 Schloss INSYS Lock 200 simplex / pro / RFID Spannungsversorgung Stromaufnahme Ruhezustand ca.1 μA (simplex) Stromaufnahme Ruhezustand ca.5 μA (pro) Stromverbrauch im Schaltmoment ca. -
Page 44: Entsorgung
CombiLock 200 simplex / pro / RFID 9 Entsorgung Entsorgen Sie Plastik-, Elektronikteile und Kabel, indem Sie sie zu einem zertifizierten Entsorgungsfachbetrieb in Ihrer Nähe bringen oder sie an diese Adresse senden: Frankenberg Metallhandel Niederlassung Coburg Gärtnersleite 8 D 96450 Coburg, Deutschland... -
Page 45: Weitere Angaben
CombiLock 200 simplex / pro / RFID Weitere Angaben gemäß EN 1300:2004+A1:2011 (D), Anhang A Seitenangaben beziehen sich auf diese Montageanleitung, in der Version 1.05 vom Mai 2014. Thema Information Abmessungen Riegel Siehe Abb. S.31 Bewegung Sperrelement Siehe Abb. S.31 Werkstoffe der Wertbehältnisse, an denen... -
Page 46: Table Of Contents
CombiLock 200 simplex / pro / RFID Table of Contents Manual English Englisch General Information on This Manual ................46 Content and Usage ....................46 Text Marks and Formatting ..................47 Intended Use ......................48 Danger Due to Electric Energy ................48 Responsibility of the Operating Company ............... -
Page 47: General Information On This Manual
This manual contains information on how to open and close the locks and on how to assemble the high security lock system CombiLock 200 simplex / - pro / - RFID. Its purpose is to assist you in opening and closing safes and in assembling the high security lock system. -
Page 48: Text Marks And Formatting
CombiLock 200 simplex / pro / RFID Text Marks and Formatting 1.2.1 Safety Warnings Danger Imminent mortal danger / Danger of severe injuries / health hazard. Consequences which might arise from not being aware of the danger. Instructions on how to avoid the danger or remove its cause. -
Page 49: Intended Use
Jobs which require the removal of the housing of units of the system, like described in the Assembly Instructions, may be performed by skilled electricians only (definition see p. 49), which have been trained and entitled to perform these jobs by INSYS MICROELECTRONICS or approved partner companies. -
Page 50: Personnel Requirements
1.6.1 Qualifications Persons operating the electronic lock system CombiLock 200 simplex / pro / RFID have to be capable of reading and understanding this guide in order to be able to get acquainted with the assembly and operation procedures described und to be able to assemble and operate the system safely and securely. -
Page 51: Notes On Programming Codes
CombiLock 200 simplex / pro / RFID Notes on Programming Codes Caution The system is not protected with ex works versions of system manager – and master code. Danger of unauthorised opening. Due to security reasons, change the ex works versions of codes as soon as possible. -
Page 52: General Operating Instructions Combilock
CombiLock 200 simplex / pro / RFID General Operating Instructions CombiLock Opening and Closing 2.1.1 Opening the Electronic Lock with Code With versions CombiLock 200 pro / RFID only: for one of the users 1-9, for the master. -
Page 53: Operating Instructions Combilock Simplex
CombiLock 200 simplex / pro / RFID Operating Instructions CombiLock simplex Programming / Changing the Code 2 CombiLock simplex 200 (with the electronic lock open only): Code 1 (when changing it, input of Code 1 or Code 2) ... - Page 54 CombiLock 200 simplex / pro / RFID 3.3.1 Switching On Timed Delay Code 1 (sample code illustrated) Duration (from for 1 minute) for 99 minutes) 3.3.2 Switching Off Timed Delay Code 1 (sample code) ...
-
Page 55: Operating Instructions Combilock 200 Pro
CombiLock 200 simplex / pro / RFID Operating Instructions CombiLock 200 pro Changing the Master CODE (start within 10 sec. after opening the lock): Enter old Master CODE Enter new Master CODE (sample code illustrated) ... -
Page 56: Activating The Dual Code Function
CombiLock 200 simplex / pro / RFID Activating the Dual Code Function (start within 10 sec. after opening the lock): With dual code activated, the lock can only be opened by entering 2 PIDs and 2 CODES. ... -
Page 57: Timed Delay And Release Period
CombiLock 200 simplex / pro / RFID Timed Delay and Release Period Sequence of functions with timed delay (01-99 minutes) and release period (00 minutes) Enter PIN and Code Open lock within 10 sec 10 sec time span for... -
Page 58: Deleting The Timed Delay, The Alarm Delay And The Release Period
CombiLock 200 simplex / pro / RFID Deleting the Timed Delay, the Alarm Delay and the Release Period (start within 10 sec. after opening the lock; parameters can also be deleted singularly) Master CODE (exemplary code illustrated) ... -
Page 59: Enabling The Lock
CombiLock 200 simplex / pro / RFID 4.12 Enabling the Lock (with electronic lock closed only): Master CODE (sample code) Lock enabled 4.13 Setting the Time and Date Enter the date and time by entering numbers only. -
Page 60: Operation Combilock 200 Rfid
CombiLock 200 simplex / pro / RFID 4.14.1 Optional Programming for CombiLock 200 pro via PC software of optional parameterisation set CombiComm. Timer programs Dual code (four-eye principle) IO functions (silent alarm, audit trail, for instance) Timed delay / release period... -
Page 61: Opening With Additional Rfid Release
CombiLock 200 simplex / pro / RFID Opening with Additional RFID Release After the system has been separated from power supply, after a battery change, for example, after opening the keypad cover or after wrong code has been entered for at least 4 times >... -
Page 62: Programming The Rfid Release
CombiLock 200 simplex / pro / RFID Optical and acoustic signal output during PIN- and CODE input Lock is closed: A timer program is active. Q Red LED signal after the PIN has been Lock has been disabled by the master user. - Page 63 CombiLock 200 simplex / pro / RFID 5.3.2 Deleting the RFID Assignment Start within 10 sec. after opening: for PIN user 1 to for PIN user 9 CODE of the master (exemplary code) ...
-
Page 64: Pc-Software Combicomm (Optional)
CombiLock 200 simplex / pro / RFID PC-Software CombiComm (Optional) The settings of the RFID release (assignment and deletion) are logged in the lock and can be read and administrated via PC software CombiComm. Every additional RFID release of a user during the process of opening is logged as well. -
Page 65: Trouble Shooting
CombiLock 200 simplex / pro / RFID 6 Trouble Shooting Optic and Acoustic Signals Signal Reason Comment In order to switch on, press Electronic lock off 2 sec. Correct code entry. green 1 x A lockout / blocked time of 10 sec. -
Page 66: Special Signals Combilock 200 Rfid
CombiLock 200 simplex / pro / RFID Special Signals CombiLock 200 RFID Optical and acoustic signal output during PIN- and CODE input Lock is closed: A timer program is active. Q Red LED signal after the PIN has been ... -
Page 67: Assembly Instructions
CombiLock 200 simplex / pro / RFID 7 Assembly Instructions for CombiLock 200 simplex, - pro und CombiLock 200 RFID Assemble and install the electronic lock and the keypad according to these assembly instructions. The assembly instructions are part of the VdS approval. Failure to follow these instructions will invalidate that approval. -
Page 68: Assembly - Overview
CombiLock 200 simplex / pro / RFID Assembly - Overview There are 2 variants of the spindle, A and B. Spindle A (below on the left hand side) consists of two half pipe pieces and cuffs. Spindle variant B (below on the right) is a pipe. - Page 69 CombiLock 200 simplex / pro / RFID 7.2.2 Shortening and Assembling the Spindle A Shorten the spindle to a length at least as long as the safe door is deep (depth safe door = T mm) + connecting length in lock and operating unit (in all 14 mm with variant A;...
- Page 70 CombiLock 200 simplex / pro / RFID 7.2.3 Shorten Spindle B and mount it Caution With spindle variant B shorter than specified here, manipulation of the system might be possible. Make sure the spindle is not shorter than specified here.
- Page 71 CombiLock 200 simplex / pro / RFID 7.2.4 Mounting the Attachment Ring Mount the attachment ring for keypad CombiControl according to the illustration. In order to do this, if required, drill 4 M4 threaded holes, and, if not carried out already (see section 7.2.1 above): drill 1 bore for spindle variant B, Ø...
-
Page 72: Mounting The Lock
CombiLock 200 simplex / pro / RFID 7.2.6 Drilling Holes for the Lock Caution Uneven surfaces may cause functional loss. Make sure that the lock is mounted onto an even surface. Drill 3 threaded holes M6 according to the drawing below in order to prepare the attachment of the electronic lock. - Page 73 INSYS Lock 200 simplex / pro / RFID CombiControl Sample installation of electronic lock system CombiLock 200 simplex / pro / RFID The bolt is not to be subjected to tension or pressure after installation. Do not use lubricants or any other substances on or in the electronic lock.
-
Page 74: Installation With Blocking Device
CombiLock 200 simplex / pro / RFID Installation with Blocking Device The blocking element CombiXT is optional and not included in the scope of delivery. System Overview with Blocking Device CombiXT BAS / Lock INSYS Lock 200 pro Operating unit... - Page 75 CombiLock 200 simplex / pro / RFID 7.4.1 Mounting the Blocking Device CombiXT Mount the blocking device CombiXT in a secured area using the two screws (M3x10) that come with the device. Apply a torque of max. 5 Nm. 7.4.2...
- Page 76 CombiLock 200 simplex / pro / RFID 7.4.3 Connecting CombiXT to the Burglar Alarm System Solder connection block Cover contact Solder point 1 Solder point 2 REL2 Terminal Description SABO1 (anti-tamper contact) SABO2 12VDC Status relay : NO (lock open)
- Page 77 CombiLock 200 simplex / pro / RFID Release Contact With the release contact closed, the lock is released / cleared. With the contact open, the lock is disabled / blocked and cannot be opened. Contact closed: Lock is released / cleared...
- Page 78 CombiLock 200 simplex / pro / RFID Anti-Tamper Circuit CombiXT features an anti-tamper circuit implemented as a cover contact. You can add elements to the anti-tamper circuit. If no further anti-tamper elements are to be included, plug the jumper J3 next to the cover contact. You may solder on a resistor for monitoring the anti-tamper circuit as a replacement for the jumper.
- Page 79 CombiLock 200 simplex / pro / RFID Supply voltage Use terminal screws 3 and 4 to connect the supply voltage. Terminal 4 : 12VDC Terminal 3 : GND Attention: Make sure to use stabilized 12V direct current! Make sure to maintain proper polarity! Handbuch V.1.05...
- Page 80 CombiLock 200 simplex / pro / RFID 7.4.4 Activating the Blocking Device via Operating Unit Switch on the power supply via the burglar alarm system Open the lock Enter the user number. Q ...
- Page 81 CombiLock 200 simplex / pro / RFID 7.4.6 Function Test of the Blocking Device Close the lock Disable the lock via burglar alarm system Enter code (attempt at opening) Q Blocking signal Release the lock via the BAS Enter Code.
-
Page 82: Survey Installation Combilock 200 Rfid
Survey Installation CombiLock 200 RFID The blocking element PowerXT is optional and not included in the scope of the standard delivery. Only skilled electricians, which have been trained and entitled by INSYS or approved partner companies, may perform assembly jobs. Caution Danger of short circuit of electric components. -
Page 83: Technical Data
Dimensions 92 mm (diameter) x 26.8 mm (depth) Environment 0 to 50˚C, 75 % relative air humidity Environmental class II according to VdS Protection type IP 30 Lock INSYS Lock 200 simplex / pro / RFID Voltage supply Current consumption standby ca.1 μA (simplex) Current consumption standby ca.5 μA (pro) -
Page 84: Disposal
CombiLock 200 simplex / pro / RFID Disposal Dispose of plastic parts, electronic parts and cables by taking them to a certified waste recycling company near to you where these materials are collected for later recycling and reuse or send them to the following address:... -
Page 85: Further Information
CombiLock 200 simplex / pro / RFID Further Information according to EN 1300:2004+A1:2011 (D), Appendix A Page numbers refer to this manual, version 1.05, May 2014. Topic Information Dimensions of bolt See fig. p. 71 Movement of blocking element See fig. p. 71... -
Page 86: Support / Hotline
CombiLock 200 simplex / pro / RFID Support / Hotline INSYS MICROELECTRONICS GmbH Hermann-Köhl-Str. 22 D 93049 Regensburg Tel.: 49 941 58692 220 Fax.: 49 941 58692 45 E-Mail: info@insys-locks.com Internet: http://www.insys-locks.com Irrtum und technische Änderungen vorbehalten! Errors and technical change without notice excepted! Handbuch V. - Page 87 CombiLock 200 Simplex Snabbanvändarguide Ändra masterkoden Leveranskod: 123456 Viktigt! Skåpet ska vara öppet vid kodändringar. 654321 används som exempel för den nya masterkoden. Påbörja programmeringen nedan inom 10 sekunder efter att låset låsts upp! Knappsatsen behöver inte vridas till upplåst läge vid programmering.
Need help?
Do you have a question about the CombiLock 200 simplex and is the answer not in the manual?
Questions and answers
How do I change my safe code?
To change the code on an INSYS CombiLock 200 Simplex safe:
1. Ensure the safe is open before starting the process.
2. Enter the current master code.
3. Enter the new master code.
4. Re-enter the new master code to confirm.
You must start programming within 10 seconds after unlocking the lock. The keypad does not need to be turned to the unlocked position for programming.
This answer is automatically generated
How do i change language in the display?