Table of Contents
Advertisement
Thank You
for your purchase of one of the finest outboards available.
You have made a sound investment in boating pleasure.
Your outboard has been manufactured by Mercury Marine, a
world leader in marine technology and outboard
manufacturing since 1939. These years of experience have
been committed to the goal of producing the finest quality
products. This led to Mercury Marine's reputation for strict
quality control, excellence, durability, lasting performance
and being the best at providing after the sale support.
Please read this manual carefully before operating your
outboard. This manual has been prepared to assist you in
the operation, safe use and care of your outboard.
All of us at Mercury Marine took pride in building your
outboard and wish you many years of happy and safe
boating.
Again, thank you for your confidence in Mercury Marine.
EPA Emissions Regulations
Outboards sold by Mercury Marine in the United States are
certified to the United States Environmental Protection
Agency as conforming to the requirements of the regulations
for the control of air pollution from new outboard motors.
This certification is contingent on certain adjustments being
set to factory standards. For this reason, the factory
procedure for servicing the product must be strictly followed
and, wherever practicable, returned to the original intent of
the design. Maintenance, replacement, or repair of the
emission control devices and systems may be
performed by any marine engine repair establishment or
individual.
Engines are labeled with an Emission Control Information
decal as permanent evidence of EPA certification.
The engine exhaust from this product contains chemicals
known to the state of California to cause cancer, birth
defects or other reproductive harm.
eng
WARNING
!
i
Advertisement
Table of Contents

Related Manuals for Mercury 4C


Summary of Contents for Mercury 4C
- Page 1 This manual has been prepared to assist you in the operation, safe use and care of your outboard. All of us at Mercury Marine took pride in building your outboard and wish you many years of happy and safe boating.
- Page 2 Warranty Message The product you have purchased comes with a limited warranty from Mercury Marine, the terms of the warranty are set forth in the Warranty Information Section of this manual. The warranty statement contains a description of what is covered, what is not...
- Page 3 Engine type: Outboard Fuel type: Gasoline Combustion cycle: 2‑Stroke This declaration is issued under the sole responsibility of Mercury Marine and Brunswick Marine in EMEA Inc. Name and function: Mark D. Schwabero President, Mercury Marine, Fond du Lac, WI USA...
-
Page 5: Table Of Contents
Warranty Registration United States and Canada....... 2 Warranty Registration Outside the United States and Canada... 3 Outboard Limited Warranty United States, Canada, and Europe ..................... 4 Mercury/Mariner Outboard Limited Warranty–Australia and New Zealand Policy................7 Outboard Limited Warranty (Confederation of Independent States, Middle‑East, and Africa)..........12 3 Year Limited Warranty Against Corrosion...... - Page 6 Transporting Removing the Motor..............38 Carrying the Motor..............38 Storing the Motor............... 38 Trailering the Boat..............39 Fuel and Oil Fuel Recommendations............. 41 Oil Recommendation..............43 Mixing Fuel and Oil..............43 Engine Break‑In................. 43 Filling Fuel Tank................ 44 Features and Controls Remote Control Features............
- Page 7 Protecting External Outboard Components....... 77 Protecting Internal Engine Components........78 Gearcase................... 78 Positioning Outboard for Storage..........79 Owner Service Assistance Local Repair Service..............80 Service Away from Home............80 Parts and Accessories Inquiries..........80 Service Assistance..............80 Mercury Marine Service Offices..........81...
- Page 8 Maintenance Log Maintenance Log............... 83 Accessories Propeller Recommendation............84 Tool Kit and Spare Parts............84 Optional Accessories..............86 Wiring Diagram................88 Wire Color Code Abbreviations..........89 viii...
-
Page 9: Warranty Information
To transfer the warranty to the subsequent owner, send or fax a copy of the Bill of Sale or Purchase Agreement, new owner’s name, address, and engine serial number to Mercury Marine’s Warranty Registration Department. In the United States and... -
Page 10: Warranty Registration United States And Canada
There is no charge for this service. You may change your address at any time, including at the time of the warranty claim, by calling Mercury Marine or sending a letter or fax with your name, old address, new address, and hull identification number (HIN) to Mercury Marine’s Warranty... -
Page 11: Warranty Registration Outside The United States And Canada
WARRANTY INFORMATION 2. To be eligible for warranty coverage, the product must be registered with Mercury Marine. At the time of sale, the dealer should complete the warranty registration and immediately submit it to Mercury Marine via MercNET, E‑mail, or mail. Upon receipt of this warranty registration, Mercury Marine will record the registration. -
Page 12: Outboard Limited Warranty United States, Canada, And Europe
Europe Outside the United States, Canada, and Europe ‑ check with local distributor. WHAT IS COVERED: Mercury Marine warrants its new Outboard and Jet Products to be free of defects in material and workmanship during the period described below. - Page 13 WARRANTY COVERAGE: Warranty coverage is available only to retail customers that purchase from a Dealer authorized by Mercury Marine to distribute the product in the country in which the sale occurred, and then only after the Mercury Marine specified predelivery inspection process is completed and documented.
- Page 14 Mercury dealer authorized to service the product. If purchaser cannot deliver the product to such a dealer, written notice must be given to Mercury. We will then arrange for the inspection and any covered repair. Purchaser, in that case, shall pay for all related transportation charges and/or travel time.
-
Page 15: Mercury/Mariner Outboard Limited Warranty-Australia And New Zealand Policy
No individual or entity, including Mercury Marine authorized dealers, has been given authority by Mercury Marine to make any affirmation, representation, or warranty regarding the product, other than those contained in this limited warranty, and if made, shall not be enforceable against Mercury Marine. - Page 16 WARRANTY INFORMATION WHAT IS COVERED Mercury Marine warrants its new products to be free of defects in material and workmanship during the period described below. The benefits to the consumer given by the warranty are in addition to other rights and remedies of the consumer under a law in relation to the goods or services to which the warranty relates.
- Page 17 Warranty coverage under this Limited Warranty is available only to retail customers that purchase from a Dealer authorized by Mercury Marine to distribute the product in the country in which the sale occurred, and then only after the Mercury Marine specified predelivery inspection process is completed and documented.
- Page 18 Warranty claims shall be made by delivering the product for inspection to a Mercury Marine dealer authorized to service the product. A list of dealers and their contact details is available at www.mercurymarine.com.au.
- Page 19 WARRANTY INFORMATION WHAT IS NOT COVERED This limited warranty does not cover routine maintenance items, tune‑ups, adjustments, normal wear and tear, damage caused by abuse, abnormal use, use of a propeller or gear ratio that does not allow the engine to run in its recommended wide‑open throttle RPM range (see the Operation and Maintenance Manual), operation of the product in a manner inconsistent with the recommended operation/duty cycle section of the Operation...
-
Page 20: Outboard Limited Warranty (Confederation Of Independent States, Middle-East, And Africa)
WARRANTY INFORMATION No individual or entity, including Mercury Marine authorized dealers, has been given authority by Mercury Marine to make any affirmation, representation or warranty regarding the product, other than those contained in this limited warranty, and if made, shall not be enforceable against Mercury Marine. For... - Page 21 WARRANTY COVERAGE: Warranty coverage is available only to retail customers that purchase from a Dealer authorized by Mercury Marine to distribute the product in the country in which the sale occurred, and then only after the Mercury Marine specified predelivery inspection process is completed and documented.
- Page 22 Mercury dealer authorized to service the product. If purchaser cannot deliver the product to such a dealer, written notice must be given to Mercury. We will then arrange for the inspection and any covered repair. Purchaser, in that case, shall pay for all related transportation charges and/or travel time.
- Page 23 No individual or entity, including Mercury Marine authorized dealers, has been given authority by Mercury Marine to make any affirmation, representation, or warranty regarding the product, other than those contained in this limited warranty, and if made, shall not be enforceable against Mercury Marine.
-
Page 24: Year Limited Warranty Against Corrosion
WARRANTY COVERAGE: Warranty coverage is available only to retail customers that purchase from a Dealer authorized by Mercury Marine to distribute the product in the country in which the sale occurred, and then only after the Mercury Marine specified predelivery inspection process is completed and documented. - Page 25 Mercury dealer authorized to service the product. If purchaser cannot deliver the product to such a dealer, written notice must be given to Mercury. We will then arrange for the inspection and any covered repair. Purchaser, in that case, shall pay for all related transportation charges and/or travel time.
- Page 26 Mercury Precision Parts or Quicksilver MerCathode system and/or Galvanic Isolator. Corrosion damage caused by improper application of copper base antifouling paints is also not covered by this limited warranty.
-
Page 27: Warranty Coverage And Exclusions
WARRANTY INFORMATION Warranty Coverage and Exclusions The purpose of this section is to help eliminate some of the more common misunderstandings regarding warranty coverage. The following information explains some of the types of services that are not covered by warranty. The provisions set forth following have been incorporated by reference into the Three Year Limited Warranty Against Corrosion Failure, the International Limited Outboard Warranty, and the United States and Canada Limited... - Page 28 8. Use of other than Mercury Precision or Quicksilver parts when making warranty repairs. 9. Oils, lubricants, or fluids changed as a matter of normal...
- Page 29 WARRANTY INFORMATION 16. Our limited warranty does not apply to any damage to our products caused by the installation or use of parts and accessories which are not manufactured or sold by us. Failures which are not related to the use of those parts or accessories are covered under warranty if they otherwise meet the terms of the limited warranty for that product.
-
Page 30: General Information
GENERAL INFORMATION Boater's Responsibilities The operator (driver) is responsible for the correct and safe operation of the boat and safety of its occupants and general public. It is strongly recommended that each operator (driver) read and understand this entire manual before operating the outboard. -
Page 31: Boat Horsepower Capacity
GENERAL INFORMATION Boat Horsepower Capacity WARNING Exceeding the boat's maximum horsepower rating can cause serious injury or death. Overpowering the boat can affect boat control and flotation characteristics or break the transom. Do not install an engine that exceeds the boat's maximum power rating. - Page 32 GENERAL INFORMATION The lanyard is a cord usually between 1220 and 1524 mm (4 and 5 feet) in length when stretched out, with an element on one end made to be inserted into the switch and a snap on the other end for attaching to the operator.
- Page 33 GENERAL INFORMATION While activation of the lanyard stop switch will stop the engine immediately, a boat will continue to coast for some distance depending upon the velocity and degree of any turn at shut down. However, the boat will not complete a full circle. While the boat is coasting, it can cause injury to anyone in the boat's path as seriously as the boat would when under power.
-
Page 34: Protecting People In The Water
GENERAL INFORMATION Protecting People in the Water WHILE YOU ARE CRUISING It is very difficult for a person standing or floating in the water to take quick action to avoid a boat heading in his/her direction, even at slow speed. 21604 Always slow down and exercise extreme caution any time you are boating in an area where there might be people in the water. -
Page 35: Exhaust Emissions
GENERAL INFORMATION Exhaust Emissions BE ALERT TO CARBON MONOXIDE POISONING Carbon monoxide (CO) is a deadly gas that is present in the exhaust fumes of all internal combustion engines, including the engines that propel boats, and the generators that power boat accessories. - Page 36 GENERAL INFORMATION GOOD VENTILATION Ventilate the passenger area, open side curtains or forward hatches to remove fumes. Example of desired air flow through the boat: 21622 POOR VENTILATION Under certain running and/or wind conditions, permanently enclosed or canvas enclosed cabins or cockpits with insufficient ventilation may draw in carbon monoxide.
-
Page 37: Selecting Accessories For Your Outboard
The misuse of approved accessories or the use of nonapproved accessories can damage the product. Some accessories not manufactured or sold by Mercury Marine are not designed to be safely used with your outboard or outboard operating system. Acquire and read the installation, operation and maintenance manuals for all your selected accessories. - Page 38 GENERAL INFORMATION Know and obey all nautical rules and laws of the waterways. Boat operators should complete a boating safety course. Courses are offered in the U.S.A. by 1) the U.S. Coast Guard Auxiliary, 2) the Power Squadron, 3) the Red Cross, and 4) your state boating law enforcement agency.
-
Page 39: Recording Serial Number
GENERAL INFORMATION Watch fallen skiers. When using your boat for waterskiing or similar activities, always keep a fallen or down skier on the operator's side of the boat while returning to assist the skier. The operator should always have the down skier in sight and never back up to the skier or anyone in the water. -
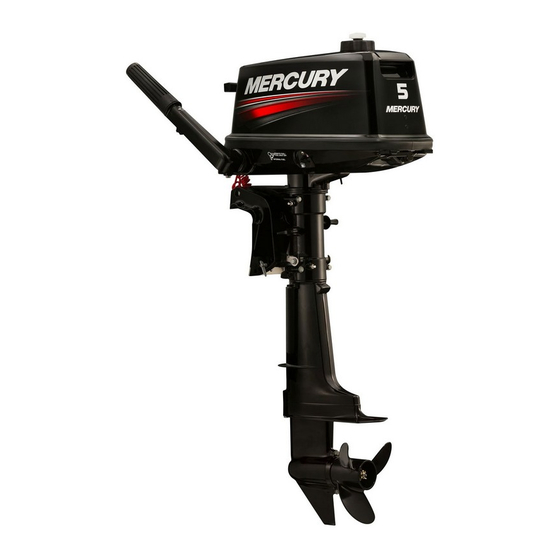
Page 40: Component Identification-4C/4.9/5Bd
GENERAL INFORMATION Component Identification—4C/4.9/5BD 41059... - Page 41 GENERAL INFORMATION Air vent screw Fuel tank cap Tilt handle Upper motor cover Lower motor cover Water pump indicator port Tilt lever Steering friction adjustment screw Anode 10 - Anti‑ventilation plate 11 - Water inlet 12 - Propeller 13 - Starter handle 14 - Shift lever...
-
Page 42: 4/4.9/5 Specifications
Thermostat controlled system Lubrication Engine oil mixed gasoline system Unleaded regular gasoline pump posted 87 Octane Fuel (research octane rating of 92) Engine oil Mercury/Quicksilver or recommended Two‑Stroke engine oil Engine oil 1:50 (Engine oil:fuel) mixing ratio Starting Manual starter system... - Page 43 Ignition Flywheel magneto CDI system Spark plug NGK BPR7HS‑10 Trim position Mercury/Quicksilver gear oil or API GLS, SAE #80 to #90, Gear oil approximately 195 mL (6.6 fl oz) Fuel tank 2.5 L 2.5 L (0.66 US gal), 2.5 L (0.66 US gal) capacity (0.66 US gal)
-
Page 44: Installation
INSTALLATION Installing Outboard INSTALLING OUTBOARD ON TRANSOM IMPORTANT: Most boats are rated and certified in terms of their maximum horsepower, and this is shown on the boat's certification plate. Do not equip your boat with an outboard that exceeds this limit. If in doubt, contact your dealer. Do not operate the engine unit until it has been securely mounted on the boat in accordance with the instructions below. - Page 45 INSTALLATION ATTACH THE ENGINE TO THE BOAT 1. Tighten the clamp screws by turning their handles. Secure with a cable to prevent accidental loss overboard. Clamp screw 42041...
-
Page 46: Removing The Motor
TRANSPORTING Removing the Motor IMPORTANT: Ensure the proper procedures are followed for transportation and storage of the outboard to avoid the possibility of oil leaks. 1. Stop the engine and close the air vent screw. 2. Close the fuel valve knob. Disconnect the fuel connector. 3. -
Page 47: Trailering The Boat
TRANSPORTING 2. Lay the outboard down on its back side so the tiller handle is facing up as shown. Place a protective pad under the outboard. 40803 3. Close the fuel tank vent. Trailering the Boat IMPORTANT: The tilt lock mechanism is not intended to support the outboard in the tilted up position when trailering. - Page 48 TRANSPORTING Set the gear shift into forward (F) gear. This prevents the propeller from spinning freely. 39486 NOTE: The tilt support device supplied on your outboard is not intended for towing. It is intended to support the engine while the boat is docked, beached, etc.
-
Page 49: Fuel And Oil
FUEL RATINGS Mercury Marine engines will operate satisfactorily when using a major brand of unleaded gasoline meeting the following specifications: USA and Canada ‑ having a posted pump Octane Rating of 87 (R+M)/2 minimum. - Page 50 FUEL AND OIL The fuel system components on your Mercury Marine engine will withstand up to 10% alcohol content in the gasoline. We do not know what percentage your boat's fuel system will withstand. Contact your boat manufacturer for specific recommendations on the boat's fuel system components (fuel tanks, fuel lines, and fittings).
-
Page 51: Oil Recommendation
For added protection and lubrication, Mercury or Quicksilver Premium Plus TC‑W3 2‑Cycle oil is recommended. If Mercury or Quicksilver outboard oil is not available, substitute another brand of 2‑cycle outboard oil that is NMMA Certified TC‑W3. Severe engine damage may result from use of an inferior oil. -
Page 52: Filling Fuel Tank
FUEL AND OIL Filling Fuel Tank WARNING Avoid serious injury or death from a gasoline fire or explosion. Use caution when filling fuel tanks. Always stop the engine and do not smoke or allow open flames or sparks in the area while filling fuel tanks. -
Page 53: Features And Controls
FEATURES AND CONTROLS Remote Control Features Your boat may be equipped with the remote control shown. If not, consult your dealer for a description of the functions and operations of the remote control. 37982 Remote control handle Throttle only lever Ignition key switch Lanyard stop switch Throttle grip friction knob: The throttle friction can be adjusted... - Page 54 FEATURES AND CONTROLS Choke knob: Pull completely out when starting a cold engine. Push halfway in as engine is warming up. Push in completely after engine is warmed up. 38349 Steering friction adjustment: The steering friction can be adjusted in accordance with your preference by turning the adjustment screw.
-
Page 55: Tilting Outboard
FEATURES AND CONTROLS Starter rope: Pull the starter handle slowly until you feel engagement. Then pull it quickly. Repeat if necessary until engine is started. 28851 After the engine has started, push the choke knob back then return the grip to SLOW position and run the engine to warm up for several minutes. -
Page 56: Shallow Water Operation
FEATURES AND CONTROLS 3. Then slightly lower the motor for locking at tilt‑up position. Tilt up position Tilt stopper Tilt lever 41065 4. The spring loaded tilt lock lever will engage automatically and lock the outboard in full up position. LOWERING TO RUN POSITION 1. - Page 57 FEATURES AND CONTROLS ENGAGING SHALLOW WATER DRIVE 1. Reduce engine speed to idle in forward gear. Take hold of the top cowl grip and raise outboard to the higher tilt position. The spring loaded tilt lock lever will engage automatically and lock the outboard in the shallow water drive position.
-
Page 58: Trim Angle Adjustment
FEATURES AND CONTROLS 3. To release outboard back down to run position, tilt outboard up slightly (approximately 15°), then pull up on the tilt release lever. Gently lower outboard down to the normal running position. Tilt lever Tilt stopper 41066 Please follow the instructions below. - Page 59 FEATURES AND CONTROLS Arrange passengers and load in the boat so the weight is distributed evenly. The trim angle is adjusted by setting the trim position pin in the correct trim position. TRIM POSITION ADJUSTMENTS • Correct trim: The trim angle is optimum when the boat is parallel to the water surface while running.
-
Page 60: Operation
OPERATION Prestarting Check List • Operator knows safe navigation, boating, and operating procedures. • An approved personal flotation device of suitable size for each person aboard and readily accessible (it is the law). • A ring type life buoy or buoyant cushion designed to be thrown to a person in the water. -
Page 61: Operating At High Elevations
Wash the outboard exterior and flush out the exhaust outlet of the propeller and gearcase with fresh water after each use. Each month, spray Mercury Precision or Quicksilver Corrosion Guard on external metal surfaces. Do not spray on corrosion control anodes as this will reduce the effectiveness of the anodes. -
Page 62: Warming Up The Engine
OPERATION BREAK-IN PROCEDURE Vary the throttle setting during the first hour of operation. During the first hour of operation, avoid remaining at a constant speed for more than two minutes and avoid sustained wide open throttle. Warming Up the Engine It's important to warm‑up the engine for three minutes. -
Page 63: Starting The Engine
OPERATION Starting the Engine Before starting, read the Prestarting Check List, special operating instructions, and Engine Break‑In Procedure in this section. IMPORTANT: Be sure to connect the emergency lanyard to your waist or clothing. The engine will shut down if the lanyard becomes disconnected from the engine. - Page 64 OPERATION 19748 3. Attach the fuel connector to the engine connector. 42043 4. The arrow mark on the primer bulb should be facing the engine (separate fuel tank). 5. Open the fuel valve (internal fuel tank). Air vent screw Fuel valve 41834 6.
- Page 65 OPERATION 7. Move gear shift lever to neutral (N) position. Be sure that the shift lever is in neutral (N) when starting the engine. This model is provided with a function that prevents starting in gear. 27020 NOTE: If the motor somehow does start in gear, do not operate it.
- Page 66 OPERATION 10. Pull the starter rope slowly until you feel the starter engage, then pull rapidly to crank the engine. Allow the rope to return slowly. Repeat until the engine starts. 28840 NOTE: Starting flooded engine ‑ push in the choke knob. Wait 30 seconds, then continue to crank engine for starting.
-
Page 67: Gear Shifting
OPERATION WARNING The exposed moving flywheel can cause serious injury. Keep your hands, hair, clothing, tools, and other objects away from engine when starting or running the engine. Do not attempt to reinstall the rewind starter assembly or top cowl when engine is running. - Page 68 OPERATION 3. Push the stop switch to stop the engine. Lanyard hook Stop switch lock Stop switch 41063...
-
Page 69: Outboard Care
We recommend using original Mercury Precision or Quicksilver replacement parts and Genuine Lubricants. EPA Regulations All new outboards manufactured by Mercury Marine are certified to the United States Environmental Protection Agency, as conforming to the requirements of the regulations for the control of air pollution from new outboard motors. -
Page 70: Epa Emissions
MAINTENANCE EPA Emissions EMISSION CERTIFICATION LABEL An emission certification label, showing emission levels and engine specifications directly related to emissions, is placed on the engine at time of manufacture. EMISSION CONTROL INFORMATION This engine conforms to model year EPA regulations for Marine SI engines. Refer to Owner's Manual for required maintenance. -
Page 71: Inspection And Maintenance Schedule
MAINTENANCE Inspection and Maintenance Schedule BEFORE EACH USE • Visually inspect the fuel system for deterioration or leaks. • Check outboard for tightness on transom. • Check steering system for binding or loose components. • Check propeller blades for damage. AFTER EACH USE •... -
Page 72: Flushing The Cooling System
Exhaust gas contains carbon monoxide, a colorless and orderless gas which can be fatal if inhaled for any length of time. Use a Mercury Precision or Quicksilver accessory (or equivalent) flushing attachment. NOTE: Do not run the engine while flushing the cooling system. -
Page 73: Top Cowl Removal And Installation
MAINTENANCE Top Cowl Removal And Installation REMOVAL 1. Unlock the rear latch by pushing lever down. 27084 2. Lift rear of cowl and disengage front hook. 27091 INSTALLATION 1. Engage the front hook and push cowl back over the cowl seal. -
Page 74: Exterior Care
MAINTENANCE The anode requires periodic inspection especially in saltwater which will accelerate the erosion. To maintain this corrosion protection, always replace the anode before it is completely eroded. Never paint or apply a protective coating on the anode as this will reduce effectiveness of the anode. 27092 Exterior Care Your outboard is protected with a durable baked enamel finish. - Page 75 MAINTENANCE FUEL LINE INSPECTION Visually inspect the fuel line and primer bulb for cracks, swelling, leaks, hardness, or other signs of deterioration or damage. If any of these conditions are found, the fuel line or primer bulb must be replaced. CLEANING THE FUEL FILTERS AND THE FUEL TANK The fuel filter is located between the fuel valve and the fuel pump.
-
Page 76: Propeller Replacement
MAINTENANCE • Fuel tank: Water or dirt in the fuel tank will cause engine performance problems. Check and clean the tank at specified time or after the motor has been stored for a long period of time (over three months). Propeller Replacement WARNING Rotating propellers can cause serious injury or death. - Page 77 6. Apply Quicksilver or Mercury Precision Lubricants Anti‑Corrosion Grease or 2‑4‑C with PTFE to the entire propeller shaft and splines.
-
Page 78: Propeller Selection
MAINTENANCE 8. Place a block of wood between the gearcase and the propeller to prevent rotation and tighten the propeller nut. Secure the propeller nut to the shaft with a cotter pin. Cotter pin Propeller nut Rear thrust hub Propeller Front thrust washer 27094 Propeller Selection... -
Page 79: Lubrication Points
Install plug finger tight, and then tighten 1/4 turn or torque to specifications. Description lb. in. lb. ft. Spark plug Lubrication Points 1. Lubricate the following with Quicksilver or Mercury Precision Lubricants 2‑4‑C with PTFE or Special Lubricant 101. - Page 80 MAINTENANCE Tube Description Where Used Part No. Ref No. Co-pilot threads, swivel 2-4-C with bracket, transom clamp 92-802859A 1 PTFE screws, tiller handle bushing, shift handle detent Co-pilot threads, swivel Special bracket, transom clamp 92-802865Q02 Lubricant 101 screws, tiller handle bushing, shift handle detent •...
- Page 81 • Shift Handle Detent ‑ Lubricate detent. 27099 2. Lubricate the following with Light Weight Oil. • Tilt Pivot. 28863 3. Lubricate the following with Quicksilver or Mercury Precision Lubricants Anti‑Corrosion Grease or 2‑4‑C with PTFE. Tube Description Where Used Part No.
-
Page 82: Gearcase Lubrication
MAINTENANCE • Propeller Shaft ‑ Refer to Propeller Replacement for removal and installation of the propeller. Coat the entire propeller shaft with lubricant to prevent the propeller hub from corroding to the shaft. 27095 Gearcase Lubrication When adding or changing gearcase lubricant, visually check for the presence of water in the lubricant. - Page 83 27146 GEARCASE LUBRICANT CAPACITY Gearcase lubricant capacity is approximately 195 cc (6.6 fl. oz.). GEARCASE LUBRICANT RECOMMENDATION Mercury or Quicksilver Premium or High Performance Gear Lubricant. CHANGING GEAR OIL 1. Place outboard in a vertical operating position. 2. Remove the oil drain plugs (upper and lower), and completely drain the gear oil into a pan.
-
Page 84: Submerged Outboard
4. Replace the oil plug gasket with a new one. Install the upper oil plug, and then remove oil tube nozzle and install the lower oil plug. NOTE: Use Mercury or Quicksilver gear oil or the recommended gear oil (API GL‑5:SAE #80 to #90). Required volume: approx. 195 mL... -
Page 85: Storage
STORAGE Storage Preparation The major consideration in preparing your outboard for storage is to protect it from rust, corrosion, and damage caused by freezing of trapped water. The following storage procedures should be followed to prepare your outboard for out of season storage or prolonged storage (two months or longer). -
Page 86: Protecting Internal Engine Components
STORAGE • Spray Quicksilver or Mercury Precision Lubricants Corrosion Guard on external metal surfaces (except corrosion control anodes). Tube Description Where Used Part No. Ref No. Corrosion External metal surfaces 92-802878 55 Guard Protecting Internal Engine Components NOTE: Make sure the fuel system has been prepared for storage. -
Page 87: Positioning Outboard For Storage
STORAGE Positioning Outboard for Storage Store outboard in an upright (vertical) position to allow water to drain out of the outboard. NOTICE Storing the outboard in a tilted position can damage the outboard. Water trapped in the cooling passages or rain water collected in the propeller exhaust outlet in the gearcase can freeze. -
Page 88: Owner Service Assistance
If you are away from your local dealer and the need arises for service, contact the nearest authorized dealer. Refer to the Yellow Pages of the telephone directory. If, for any reason, you cannot obtain service, contact the nearest Mercury Marine Service Office. Parts and Accessories Inquiries All inquiries concerning genuine replacement parts and accessories should be directed to your local authorized dealer. -
Page 89: Mercury Marine Service Offices
• The name and address of your dealership • Nature of problem Mercury Marine Service Offices For assistance, call, fax, or write. Please include your daytime telephone number with mail and fax correspondence. United States, Canada English ‑ (920) 929‑5040... - Page 90 OWNER SERVICE ASSISTANCE Asia, Singapore Telephone (65) 65466160 Brunswick Asia Pacific Group T/A Mercury Marine Singapore Pte Ltd 29 Loyang Drive (65) 65467789 Singapore, 508944...
-
Page 91: Maintenance Log
MAINTENANCE LOG Maintenance Log Record all maintenance performed on your outboard here. Be sure to save all work orders and receipts. Date Maintenance Performed Engine Hours... -
Page 92: Propeller Recommendation
ACCESSORIES Propeller Recommendation Use Mercury/Quicksilver propeller. A propeller must be selected so that the engine RPM measured at wide‑open throttle while cruising is within the recommended range: 4500–5500 RPM. Light boats ‑‑‑‑‑‑‑‑‑‑‑‑‑‑‑‑‑‑‑‑‑‑‑‑‑‑‑‑‑‑‑‑‑‑‑‑‑‑‑‑‑‑‑‑‑‑‑‑‑‑‑‑‑‑‑‑‑‑‑‑‑ Heavy boats Size as indicated on propeller Propeller size (mm) - Page 93 ACCESSORIES Fuel tank 12 L 5B‑D only Parts packaged with engine Primer bulb 1set 5B‑D only...
-
Page 94: Optional Accessories
ACCESSORIES Optional Accessories 41075... - Page 95 ACCESSORIES Alternator (12 V, 60 W) Extension cord for light (Lights are available on the market.) Rectifier Gear oil (500 mL) Flushing attachment Grease (250 g) Vertical starter Remote control box Touch up paint (300 mL) Engine oil (0.4 L, 1 L, 4 L, 20 L)
-
Page 96: Wiring Diagram
ACCESSORIES Wiring Diagram 41076... -
Page 97: Wire Color Code Abbreviations
ACCESSORIES Battery Extension cord (optional) Rectifier (optional) Light extension cord (optional) Lighting unit (optional) Pulser coil CD unit Ignition coil Spark plug Stop switch (optional) Wire Color Code Abbreviations Wire Color Abbreviations Black Blue Brown Gray Green ORN or ORG Orange Pink PPL or PUR...
Need help?
Do you have a question about the 4C and is the answer not in the manual?
Questions and answers