Table of Contents
Advertisement
Quick Links
IMPORTANT INFORMATION
IMPORTANT INFORMATION
IMPORTANT INFORMATION
IMPORTANT INFORMATION
� � � �
OPERATOR MANUAL
OPERATOR MANUAL
Part Number 121085
Part Number 121085 Rev. B
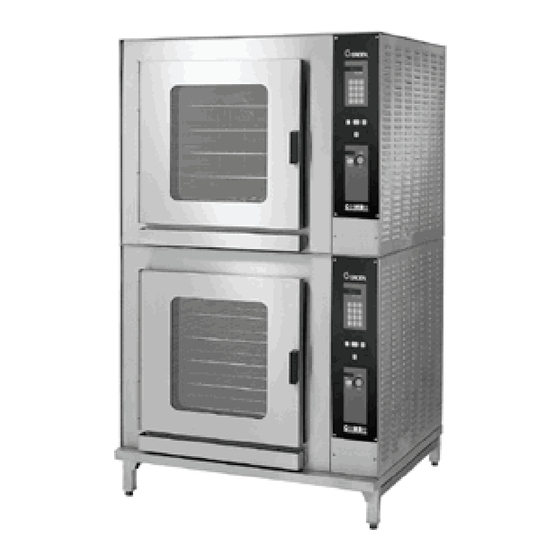
MODELS: CC10-E, (2)CC/0-E,
C/2-20-E, (2)C/2-20E
CONVECTION COMBO™
Combination Steamer-Oven
THIS MANUAL MUST BE RETAINED FOR FUTURE REFERENCE. READ,
UNDERSTAND AND
CONTAINED IN THIS MANUAL.
DO NOT STORE OR USE GASOLINE OR OTHER FLAMMABLE VAPORS AND
LIQUIDS IN THE VICINITY OF THIS OR ANY OTHER APPLIANCE
KEEP FOR OPERATOR
KEEP FOR OPERATOR
KEEP FOR OPERATOR
KEEP FOR OPERATOR
� � � �
CC10-E
FOLLOW THE INSTRUCTIONS AND WARNINGS
FOR YOUR SAFETY
IMPORTANT INFORMATION
IMPORTANT INFORMATION
IMPORTANT INFORMATION
IMPORTANT INFORMATION
� � � �
OM-CC-E and C/2-E
(2)C/2-20EFC
� � � �
DOMESTIC
.
Advertisement
Table of Contents

Related Manuals for Groen CONVECTION COMBO OM-CC-E Series


Summary of Contents for Groen CONVECTION COMBO OM-CC-E Series
- Page 1 IMPORTANT INFORMATION IMPORTANT INFORMATION IMPORTANT INFORMATION IMPORTANT INFORMATION KEEP FOR OPERATOR KEEP FOR OPERATOR KEEP FOR OPERATOR KEEP FOR OPERATOR IMPORTANT INFORMATION IMPORTANT INFORMATION IMPORTANT INFORMATION IMPORTANT INFORMATION � � � � � � � � � � � � �...
- Page 2 HYDROXIDE OR THAT IS ALKALINE. WARNING: USE OF ANY REPLACEMENT PARTS OTHER THAN THOSE SUPPLIED BY GROEN OR THEIR AUTHORIZED DISTRIBUTOR VOIDS ALL WARRANTIES AND CAN RESULT IN BODILY INJURY TO THE OPERATOR AND DAMAGE THE EQUIPMENT. SERVICE BY OTHER THAN FACTORY-AUTHORIZED PERSONNEL WILL VOID ALL WARRANTIES.
-
Page 3: Table Of Contents
OM-CC-E and C/2-E OM-CC-E and C/2-E Table of Contents OPERATOR WARNINGS ............2 REFERENCES . -
Page 4: Equipment Description
OM-CC-E and C/2-E OM-CC-E and C/2-E Equipment Description Your Groen Convection Combo™ has a stainless 3. As a convection oven steel cooking chamber, an air heating compartment 4. As a self-contained, pressureless steamer with electric heating elements and fan, a steam 5. -
Page 5: Inspection And Unpacking
The dual water connections are on the rear of the unit. have a pH (acidity rating) of 7.0 to 9.0. Please follow these simple precautions: 1. The best way to prevent scale is to use a Groen Puresteam™ Water Treatment System which has been specifically designed for Groen steamers and combination ovens. -
Page 6: Installation And Start-Up Instructions
OM-CC-E and C/2-E OM-CC-E and C/2-E Installation and Start-Up WARNING THE UNIT MUST BE INSTALLED BY PERSONNEL WHO ARE QUALIFIED TO WORK WITH ELECTRICITY AND PLUMBING. IMPROPER INSTALLATION CAN CAUSE INJURY TO PERSONNEL AND/OR DAMAGE TO THE EQUIPMENT. THE UNIT MUST BE INSTALLED IN ACCORDANCE WITH APPLICABLE CODES. CAUTION DO NOT INSTALL THE UNIT WITH THE RIGHT SIDE VENTS BLOCKED OR WITHIN 12 INCHES OF A HEAT SOURCE (SUCH AS A BRAISING PAN, DEEP FRYER, CHAR BROILER OR KETTLE). - Page 7 Branch Circuit Protection a. CC10-E and C/2-20E Without Drain Tank (tabletop model) Groen strongly recommends that each A 1.5" hose for 10-E models or a 2" hose for Convection Combo™ have its own branch 20-E models may be attached to the provided...
- Page 8 OM-CC-E and C/2-E OM-CC-E and C/2-E drain elbow with a clamp. Do not use plastic NOTE: Improper drain connection will void the pipe. The drain must withstand boiling water. warranty. b. CC10-E and C/2-20E With Drain Tank WARNING: DO NOT CONNECT THE DRAIN DIRECTLY TO A CC10-E Models: BUILDING DRAIN.
- Page 9 OM-CC-E and C/2-E OM-CC-E and C/2-E Proper Drain Line Connections � � � � 2 in (50 mm)
- Page 10 OM-CC-E and C/2-E OM-CC-E and C/2-E Initial Start-Up WARNING ANY POTENTIAL USER OF THE EQUIPMENT SHOULD BE TRAINED IN SAFE AND CORRECT OPERATING PROCEDURES. After the Convection Combo™ has been installed, 12000 3658 test it to ensure that it is operating correctly. 13000 3962 14000...
- Page 11 OM-CC-E and C/2-E OM-CC-E and C/2-E NOTE: The timer does not control the oven in Examples: 2 minutes = 00:02 either the Combo or Oven Modes. (Just press 2). 1 hour and 30 minutes = 01:30 9. To Test Oven Mode Operation, turn on the (Press 1, 3, and 0, or press 9,0 power and clear the Time/Status display.
- Page 12 OM-CC-E and C/2-E OM-CC-E and C/2-E Standard Operating Controls...
- Page 13 OM-CC-E and C/2-E OM-CC-E and C/2-E Operation WARNING ANY POTENTIAL USER OF THE EQUIPMENT SHOULD BE TRAINED IN SAFE AND CORRECT OPERATING PROCEDURES. A. Controls and Indicators Operator controls are on the right front side of the unit. Their use is described below: 1.
-
Page 14: Operating Instructions
OM-CC-E and C/2-E OM-CC-E and C/2-E 3. Cooking Mode Selection 6. Optional Features a. STEAM — Selects steamer operation If the following features are included, please refer to the control panel guide which was only. provided with the unit: b. COMBO — Selects superheated steam Cook Only Guide: P/N 121084 and convection oven operation. - Page 15 OM-CC-E and C/2-E OM-CC-E and C/2-E e. The WAIT light will be on until the water reaches 200 F (93 C). It will then turn off and the READY light will come on. You are now ready to steam foods in your Convection Combo™.
- Page 16 OM-CC-E and C/2-E OM-CC-E and C/2-E 2. Oven Mode g. Load the food into the pan or pans in a uniform layer. a. To use the Convection Combo™ as a convection oven, first switch on the h. The Convection Combo™ will operate in electric power by pushing the ON touch Oven Mode with the timer either on or off.
- Page 17 OM-CC-E and C/2-E OM-CC-E and C/2-E WARNING WARNING PANS AND INTERNAL PARTS OF THE OVEN WHEN YOU OPEN THE DOOR STAY AWAY WILL BE VERY HOT. AVOID CONTACT WITH FROM ANY STEAM COMING OUT OF THE UNIT. HOT SURFACES. STEAM CAN CAUSE BURNS. Opening the door during operation shuts The WAIT light will be on until the water off power to the heaters and fan and...
- Page 18 OM-CC-E and C/2-E OM-CC-E and C/2-E k. To stop cooking, take the pans out of the oven using hot pads or oven mitts to b. To stop the Fast Cool operation, press protect your hands from the hot pans. any touch pad or close the door. The unit will continue steaming and heating the oven at the set temperature 5.
-
Page 19: Cleaning
Zepper® BEFORE CLEANING THE OUTSIDE OF THE UNIT. 3. Steam generator de-liming agent, such as Groen Delimer Descaler. A liquid de- KEEP WATER AND CLEANING liming agent will be easier to use than SOLUTIONS OUT OF CONTROLS AND crystals or powders. See the warning ELECTRICAL COMPONENTS. - Page 20 OM-CC-E and C/2-E OM-CC-E and C/2-E If you see grease deposits in the steam WARNING generator, add ¼ cup degreaser to generator or DO NOT SPRAY OR CLEAN THE DOOR WHILE lightly coat generator area and elements with HOT. GLASS BREAKAGE MAY OCCUR IF THE spray degreaser.
-
Page 21: Maintenance
Press and hold the 0 touch pad while turning on the unit. The total will show in the Time/Status display. Maintenance The Groen Convection Combo™ is designed for 2. Inspect the cooking chamber drain to be sure it minimum maintenance. Certain parts may need is not blocked. - Page 22 OM-CC-E and C/2-E OM-CC-E and C/2-E Troubleshooting Guide If a problem persists after taking the actions suggested below, call your authorized Groen service representative. CODE INDICATES SUGGESTED ACTION Try cleaning steam generator to remove contamination from the probes. Low water level probe •...
-
Page 23: Diagrams And Schematics
OM-CC-E and C/2-E OM-CC-E and C/2-E Diagrams & Schematics CC10-E Control Schematic CC10-E Heater Schematic... - Page 24 OM-CC-E and C/2-E OM-CC-E and C/2-E Diagrams & Schematics, Continued C/2-20E Control Schematic, 208/240 Volts C/2-20E Control Schematic 480 Volts...
- Page 25 OM-CC-E and C/2-E OM-CC-E and C/2-E Diagrams & Schematics, Continued C/2-20E Heater Schematic, 208/240 Volts C/2-20E Heater Schematic, 480 Volts...
- Page 26 OM-CC-E and C/2-E OM-CC-E and C/2-E Diagrams & Schematics, Continued C/2-20E Heater Schematic 208/240 Volts (Units That Meet Canadian Standards Association Requirements)
Need help?
Do you have a question about the CONVECTION COMBO OM-CC-E Series and is the answer not in the manual?
Questions and answers