Advertisement
Available languages
Available languages
Quick Links
Celestron Microscope Imager – Model # 44420
Information, Specifications, and Instructions
Thank you for purchasing the Celestron Microscope Imager. We hope you will have years of satisfaction with this fantastic
product. You can observe specimen slides or objects magnified through your microscope and capture video or snapshots.
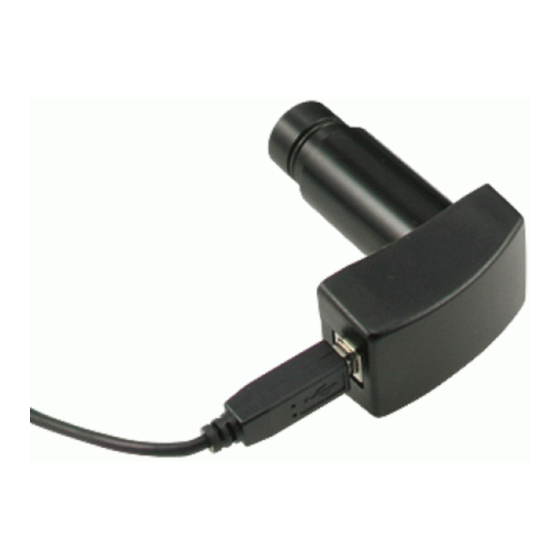
Imager connected to your computer
Imager connected to your computer and your microscope
Computer Requirements
Operating System – Microsoft Windows 98/2000/ME/XP/Vista; CD or DVD Drive; USB Port Available
Specifications
Digital Camera – VGA (0.3mp) using a 1/3" CMOS chip (640 x 480 pixels); Video Frame Rate – 30fps
USB2.0 Cable – interface to PC
Magnification – 10x
CD-ROM – for installation of the driver and software (AMCap and Ulead)
Size – 3.6" x 2.4" x 1.5" (92mm x 60mm x 38mm); Weight – 3 oz. (85gr.)
Warranty – Two year limited
CE/FCC/RoHS – compliant; Made in China
Items Included in the box
Microscope Imager, USB Cable, CD-ROM for the driver & software installation, Adapter for Stereo Microscopes
Uses
This imager can be used with virtually any type of microscope (biological, dissecting, or stereo). You can observe or image
(video or snapshot) at whatever the microscope power is set to (see instructions later in this manual).
Below is an example of what type of snapshot imaging you can do with a specimen slide of a cross section of part of an animal
intestine. From left to right – at 40x, at 100x, and at 400x.
1
Advertisement

Related Manuals for Celestron 44420


Summary of Contents for Celestron 44420
- Page 1 Information, Specifications, and Instructions Thank you for purchasing the Celestron Microscope Imager. We hope you will have years of satisfaction with this fantastic product. You can observe specimen slides or objects magnified through your microscope and capture video or snapshots.
-
Page 2: Getting Started
Getting Started Before using your microscope imager, you first need to install the driver, software, and related files. This is a short and easy process and will only take a few minutes. First, put the included installation CD-ROM in your computer CD/DVD drive. Do not connect the USB cable of the imager to the computer until the driver and software are installed on your computer or the imager may not work properly. - Page 3 You should read the ULead License Agreement. Fill in your name and serial number (found on the If you agree, then click “Yes”. If you don’t agree, CD-ROM cover) and then click “Next”. click “No” and exit the Setup. You will select the folder for Ulead to be installed on your computer.
- Page 4 You can select file association (or defer to a later The Ulead software installation has been installed. Before time) and then click “Next”. proceeding to install the driver for the imager, you need to restart your computer. Before restarting, remove the CD-ROM from the drive and close all open programs.
- Page 5 Choose a setup type. Most people select “Complete” but To begin the installation click “Install”. you can select “Custom” if you opt to. Then click “Next”. The driver is now being installed. The installation of the driver and related files is complete.
- Page 6 Snapshots – You can use “AMCap” to take snapshots but you can only take one image at a time and then save it on your computer. For more efficient snapshot capturing, you can use “Ulead” (you will have to open the program to choose the imager as the device) and instructions on “Ulead”...
- Page 7 Using the Microscope Imager Installing the Imager on a Microscope The imager and adapter are shown in photo # A below. For most biological microscopes, remove one eyepiece and insert the imager into the eyepiece tube (see photo # B below) where it is held in place by friction. Stereo microscopes have a larger diameter eyepiece (and eyepiece tube) and thus require an adapter to use the imager.
- Page 8 Microscope imageur Celestron – Modèle nº 44420 Informations, spécifications et instructions Nous vous remercions d’avoir fait l’acquisition d’un microscope imageur Celestron. Nous espérons que cet incroyable produit vous procurera des années de satisfaction. Vous pouvez observer des lames porte-objets ou des objets grossis par votre microscope et capturer des vidéos ou des instantanés.
-
Page 9: Comment Démarrer
Comment démarrer Avant d’utiliser votre microscope imageur, vous devez installer le pilote au préalable, le logiciel, et les fichiers nécessaires. Ce processus est rapide et simple, et ne prend que quelques minutes. Tout d’abord, mettez le CD-ROM d’installation inclus dans le lecteur CD/DVD de votre ordinateur. Ne pas brancher le câble USB de l’imageur à... - Page 10 Lisez le contrat de licence ULead. Si vous Tapez votre nom et le numéro de série (sur la acceptez, cliquez sur « Yes » (Oui). Si vous couverture du CD-ROM), puis cliquez sur « Next » refusez, cliquez sur « No » (Non) et quittez (Suivant).
- Page 11 Vous pouvez choisir d’associer le fichier (ou L’installation du logiciel Ulead a été effectuée. Vous devez redémarrer remettre l’opération à plus tard), puis cliquez l’ordinateur avant de poursuivre avec l’installation du pilote de sur « Next » (Suivant). l’imageur. Avant de redémarrer, retirez le CD-ROM du lecteur et fermez tous les programmes ouverts.
- Page 12 Choisissez un type d’installation. La plupart des gens Pour lancer l’installation, cliquez sur « Install » choisissent « Complete » (Complète) mais vous pouvez (Installer). sélectionner « Custom » (Personnalisée) si vous le souhaitez. Cliquez ensuite sur « Next » (Suivant). L’installation du pilote et des fichiers requis est terminée.
- Page 13 Instantanés – Vous pouvez utiliser « AMCap » pour faire des instantanés mais vous ne pouvez capturer qu’une seule image à la fois et la sauvegarder sur votre ordinateur. Pour une capture d’instantanés plus efficace, vous pouvez utiliser « Ulead » (vous devrez ouvrir le programme pour choisir l’imageur comme dispositif).
- Page 14 Utilisation de l’imageur du microscope Installation de l’imageur sur un microscope L’imageur et l’adaptateur sont illustrés ci-dessous sur la photo nº A. Pour la plupart des microscopes biologiques, retirez un oculaire et insérez l’imageur dans le tube de l’oculaire (voir photo nº B ci-dessous) là où il est maintenu en place par friction. Les microscopes stéréo possèdent un oculaire (et un tube d’oculaire) de gros diamètre et nécessitent un adaptateur pour utiliser l’imageur.
- Page 15 Celestron Mikroskop-Imager – Modell 44420 Informationen, Technische Daten und Anleitung Wir danken Ihnen für Ihren Kauf des Celestron Mikroskop-Imagers. Wir hoffen, dass Sie lange mit diesem vorzüglichen Produkt zufrieden sein werden. Es ermöglicht Ihnen die Betrachtung von Objektträgern oder Objekten, vergrößert unter Ihrem Mikroskop, und die Aufnahme von Video oder Fotos.
-
Page 16: Erste Schritte
Erste Schritte Vor der Verwendung Ihres Mikroskop-Imagers müssen Sie zuerst den Treiber, die Software und zugehörige Dateien installieren. Das geht ganz schnell und einfach. Es dauert nur ein paar Minuten. Legen Sie zuerst die Installations-CD-ROM in das CD/DVD-Laufwerk Ihres Computers. Schließen Sie das USB-Kabel des Imagers erst dann am Computer an, wenn der Treiber und die Software auf dem Computer installiert sind, sonst funktioniert der Imager u.U. - Page 17 Sie sollten den Ulead-Lizenzvertrag lesen. Wenn Sie Geben Sie Ihren Namen und die Seriennummer ein (auf damit einverstanden sind, klicken Sie auf „Yes“ (Ja). dem CD-ROM-Deckel befindlich) und klicken dann auf Wenn Sie nicht einverstanden sind, klicken Sie auf „Next“ (Weiter). „No“...
- Page 18 Sie können Dateiassoziation wählen (oder für Die Ulead-Softwareinstallation ist abgeschlossen. Bevor Sie mit einen späteren Zeitpunkt aufschieben). Klicken der Installation des Treibers für den Imager fortfahren, müssen Sie Sie dann auf „Next“ (Weiter). den Computer neu starten. Nehmen Sie vor dem Neustart die CD- ROM aus dem Laufwerk und schließen Sie alle geöffneten Programme.
- Page 19 Wählen Sie einen Setup-Typ. Die meisten Benutzer Klicken Sie auf „Install“ (Installieren), um die wählen „Complete“ (Vollständig), aber Sie können Installation zu beginnen. nach Wunsch auch „Custom“ (Benutzerdefiniert) wählen. Klicken Sie dann auf „Next“ (Weiter). Nun wird der Treiber installiert. Die Installation des Treibers und der zugehörigen Dateien ist beendet.
- Page 20 Schnappschüsse – Sie können mit „AMCap“ Schnappschüsse machen, aber immer nur jeweils ein Bild aufnehmen, das Sie auf Ihrem Computer speichern müssen. Mit „Ulead“ ist die Aufnahme von Schnappschüssen effizienter (Sie müssen das Programm öffnen, um den Imager als Gerät zu wählen). Eine Anleitung für „Ulead“ finden Sie im Hilfemenü. Die Website (www.ulead.com) enthält weitere Informationen.
- Page 21 Verwendung des Mikroskop-Imagers Installation des Imagers auf einem Mikroskop Der Imager und Adapter sind im Foto A unten abgebildet. Bei den meisten biologischen Mikroskopen nehmen Sie ein Okular ab und stecken den Imager in den Okulartubus (siehe Foto B unten), wo er durch Reibung festgehalten wird. Stereomikroskope haben ein Okular (und Okulartubus) mit größerem Durchmesser und erfordern daher einen Adapter zur Verwendung des Imagers.
- Page 22 Reproductor de imágenes de Celestron para microscopios – Modelo Nº 44420 Información, especificaciones e instrucciones Le agradecemos por la compra del reproductor de imágenes de Celestron para microscopios. Esperamos lo disfrute durante muchos años. Con este fantástico producto podrá observar con su microscopio diapositivas de muestras u objetos aumentados y también podrá...
- Page 23 Cómo iniciar Antes de utilizar su reproductor de imágenes para microscopios, primero tendrá que instalar el controlador, software y los archivos apropiados. Este es un procedimiento corto y fácil, y sólo le tomará unos minutos. Primero, ponga el CD-ROM de instalación (incluido) en la unidad de disco CD/DVD de su ordenador. No conecte el cable USB del reproductor de imágenes al ordenador hasta que el controlador y el software estén instalados en su ordenador;...
- Page 24 Deberá leer el acuerdo de la licencia de Ulead. Si lo Introduzca su nombre y número de serie (ubicado en acepta, haga clic en “Yes” (sí). Si no lo acepta, haga la cubierta del CD- ROM) y haga clic en “Next” clic en “No”...
- Page 25 La instalación del software Ulead se ha realizado. Antes de Puede seleccionar la asociación de archivos continuar con la instalación del controlador para el reproductor de (o aplazarlo hasta más tarde) y después hacer imágenes, tiene que reiniciar su ordenador. Antes de reiniciar, retire clic en “Next”...
- Page 26 Elija un tipo de instalación. Por lo general se selecciona “Complete” (completa) pero puede seleccionar “Custom” (personalizada) si lo prefiere. A continuación haga clic en Para comenzar la instalación, haga clic en “Install” “Next” (siguiente). (instalar). Se ha completado la instalación del controlador y de los archivos relacionados.
- Page 27 Fotos: Puede utilizar “AMCap” para hacer fotos, pero sólo puede tomar una imagen a la vez y después guardarla en su ordenador. Para hacer fotos de forma más eficiente, puede utilizar “Ulead” (tendrá que abrir el programa para elegir el reproductor de imágenes como el dispositivo) y la información sobre “Ulead”...
- Page 28 Uso del reproductor de imágenes para microscopios Instalación del reproductor de imágenes en un microscopio El reproductor de imágenes y el adaptador se muestran en la foto A. En la mayoría de los microscopios biológicos, hay que quitar un ocular e insertar el reproductor de imágenes en el tubo del ocular (ver foto B) donde la fricción lo sujeta en su lugar. Los microscopios estéreos tienen un ocular de mayor diámetro (y un tubo del ocular), por lo que necesitan un adaptador para utilizar el reproductor de imágenes.
- Page 29 Este dispositivo debe aceptar toda interferencia recibida, incluso aquella que pueda causar un funcionamiento indeseado. RoHS 2835 Columbia St. Torrance, California 90503 U.S.A. www.celestron.com Printed in China / Imprimé en Chine / Gedruckt in China / Impreso en China 010108...
Need help?
Do you have a question about the 44420 and is the answer not in the manual?
Questions and answers