Table of Contents
Advertisement
Available languages
Available languages
Advertisement
Chapters
Table of Contents

Related Manuals for LAMBORGHINI ECO 15


Summary of Contents for LAMBORGHINI ECO 15
- Page 1 AZIENDA CERTIFICATA UNI EN ISO 9001 UNI EN ISO 9001 CERTIFIED COMPANY BRUCIATORE DI GASOLIO LIGHT OIL BURNERS ECO 15 - 20 -15/2 - 20/2 MANUALE DI INSTALLAZIONE E MANUTENZIONE INSTALLATION AND MAINTENANCE MANUAL...
- Page 2 ITALIANO Leggere attentamente le istruzioni ed avvertenze contenute sul presente libretto in quanto forniscono importanti indicazioni riguardanti la sicurezza d’installazione, d’uso e di manutenzione. Conservare con cura questo libretto per ogni ulteriore consultazione. L’installazione deve essere effetuata da per- sonale qualificato che sarà responsabile del rispetto delle norme di sicurezza vigenti. ENGLISH Read all warnings and instructions contained in this manual carefully as they give important safety instructions regarding installation, use and maintenance.
-
Page 3: Table Of Contents
Complimenti….…per l’ottima scelta. La ringraziamo per la preferenza accordata ai nostri prodotti. LAMBORGHINI CALORECLIMA è una Azienda quotidianamente impegnata nella ri- cerca di soluzioni tecniche innovative, capaci di soddisfare ogni esigenza. La presenza costante dei nostri prodotti sul mercato italiano e internazionale è garantita da una rete capillare di Agenti e Concessionari. -
Page 4: Norme Generali
NORME GENERALI E AVVERTENZE Il presente libretto costituisce parte integrante ed essenziale del prodotto e dovrà es- sere consegnato all’installatore. Leggere attentamente le avvertenze contenute nel presente libretto in quanto forniscono importanti indicazioni riguardanti la sicurezza d’installazione, d’uso e manutenzione. Conservare con cura questo libretto per ogni ulteriore consultazione. - Page 5 Prima di effettuare qualsiasi intervento che preveda lo smontaggio del bruciatore o l’apertura di accessi di ispezione, disinserire la corrente elettrica. Non depositare contenitori con sostanze infiammabili nel locale ove è situato il brucia- tore. Il locale del bruciatore deve possedere delle aperture verso l’esterno conformi alle norme locali in vigore.
- Page 6 Non scambiare mai i cavi del neutro con i cavi della fase. Il bruciatore può essere allacciato alla rete elettrica con un collegamento spina-presa, solamente se questo risulti dotato in modo tale per cui la configurazione dell’accop- piamento prevenga l’inversione della fase e del neutro. Installare un interruttore om- nipolare con apertura tra i contatti di almeno 3 mm.
-
Page 7: Dimensioni
(in un luogo idoneo). DIMENSIONI Ø H Modello Ø G ECO 15 ECO 15/L ECO 15/2 ECO 20 ECO 20/L ECO 20/2... -
Page 8: Caratteristiche Tecniche
CARATTERISTICHE TECNICHE ECO 15 ECO 20 DESCRiZiOnE ECO 15/2 ECO 20/2 ECO 15/L ECO 20/L Potenza termica 72.000 112.000 72.000 102.000 kcal/h 151.000 214.000 151.000 204.000 kcal/h Consumo combustibile 7 - 14,8 11 - 21 7 - 14,8 10 - 20... -
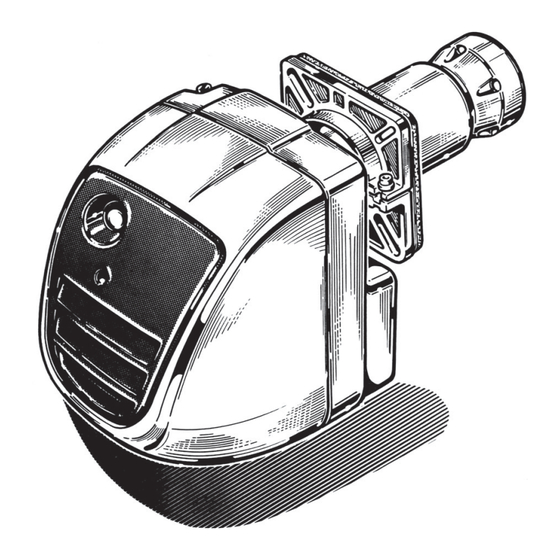
Page 9: Montaggio Alla Caldaia
MONTAGGIO ALLA CALDAIA Fissare la flangia 2 alla caldaia con n° 4 viti 3 interponendo la guarnizione isolante 4 e l’eventuale corda isolante 5. Infilare il bruciatore nella flangia in modo che il boccaglio penetri nella camera di combustione secondo le indicazioni del costruttore della calda- ia. - Page 10 TUBAZIONI DI ALIMENTAZIONE OLIO COMBUSTIBILE IMPIANTO IN ASPIRAZIONE IMPIANTO A CADUTA I diagrammi sono validi per olio combustibile avente viscosità max di 1,5°E (cSt) a 20°C. Legenda A Tubo di aspirazione B Filtro combustibile C Saracinesca su tubazione di aspirazione D Elettrovalvola di arresto flusso E Saracinesca su tubazione di ritorno F Tubazione di ritorno...
-
Page 11: Ciclo Di Funzionamento
è segnalato dalla lampada dell’apparecchiatura e/o da altra eventuale del termostato ambiente. Il riavviamento del bruciatore si effettua premendo il pulsante di ricarica blocco. ECO 15 ECO 20 ECO 15/2 ECO 20/2... -
Page 12: Collegamenti Elettrici
20 mm rispetto ai cavi delle fasi e del neutro - rispettare le norme della buona tecnica ed osservare scrupolosamente le norme locali vigen- N.B. È necessario osservare scrupolosamente la buona norma che indica il collegamento di massimo due cavi per morsetto. ECO 15 ECO 20 LMO 14... - Page 13 ECO 15/2 ECO 20/2 LMO 24 1° 2° 230 V 50 Hz Legenda 1 Apparecchiatura automatica di comando e controllo 2 Fusibile 3A 3 Interruttore generale 4 Lampada blocco a distanza 5 Motore bruciatore 6 Spina di allacciamento linea ed apparecchiatura ausiliaria...
-
Page 14: Regolazioni
REGOLAZIONE PRESSIONE POMPA ECO 15 - ECO 20 La pressione della pompa è tarata in stabilimento al valore di 12 Kg/cm2. Nel caso tuttavia fosse necessario è possibile effettuare la variazione di pressione ruotando la vite (42). - Page 15 REGOLAZIONE ARIA SERVOCOMANDO (ECO 15/2-20/2) Nel motoriduttore l’azionamento dei controlli ausiliari e di fine corsa è ottenuto con camme facilmente accessibili e regolabili la cui taratura è facilitata da una scala gra- duata. TARATURA DEL PUNTO DI SCATTO DEI CONTATTI...
-
Page 16: Installazione
INSTALLAZIONE PRIMA DELLA MESSA IN FUNZIONE DEL BRUCIATORE È BENE ASSICURARSI CHE: - Bruciatore ed apparecchiatura di comando siano collegate a terra. - L’ugello montato sul bruciatore sia di portata idonea alla caldaia. - Il canotto portaugello (10) sia montato con il segno “O” rivolto verso l’alto. - Nel serbatoio ci sia olio combustibile e le saracinesche siano aperte. -
Page 17: Apparecchiatura
APPARECCHIATURA APPARECCHIATURA LMO Il pulsante di sblocco dell’apparecchiatura è l’elemento principale per poter accedere a tutte le funzioni di diagnostica (attivazione e disattivazione), oltre a sbloccare il dispositivo di comando e controllo. Il pulsante di sblocco è corredato di un led multicolore che da l’indicazione dello stato del dispositivo di comando e controllo sia durante il funzionamento che durante la funzione di diagnostica. -
Page 18: Manutenzione
ECO 15 - 15/2 ECO 20 -20/2 ECO 20 ECO 15 - 15/2 -20/2 Legenda A 1 ÷ 4 B 4 ÷ 5 C 8 ÷ 11... - Page 19 FILTRO SULLA TUBAZIONE - POSIZIONAMENTO VENTOLA ATTENZIONE: in caso di pericolo togliere corrente dall’interruttore generale e chiude- re l’afflusso del combustibile tramite l’apposita saracinesca. Chiudere la saracinesca sull’aspirazione e, secondo il tipo, procedere ad una accurata pulizia della parte filtrante. Per una verifica della pulizia della ventola della coclea della serranda aria oppure per un controllo dell’insieme testa di combustione è...
-
Page 20: Irregolarità Di Funzionamento
IRREGOLARITA’ DI FUNZIONAMENTO DIFETTO CAUSA RIMEDIO Controllare i fusibili della linea di Mancanza di energia elettrica alimentazione. Controllare la li- nea dei termostati. Il bruciatore non si avvia Controllare l’apertura dei dispo- Non arriva combustibile al bru- sitivi d’intercettazione posti lungo ciatore la tubazione di alimentazione Le valvole del combustibile non... - Page 21 Constant presence of our products on the Italian and international markets is assured by a widespread network of Agents and Dealers assisted by “LAMBORGHINI SERVI- CE” (Technical Service) who assures qualied service and maintenance of the boiler.
-
Page 22: General Standards
GENERAL STANDARDS This manual is an integral and essential part of the product and must be given to the installer. Read the warnings given in this manual as they supply important indications regarding installation, use and maintenance safety. Keep this manual carefully for future reference. The burner must be installed in com- pliance with the Standards in force, according to the manufacturer’s instructions and by qualified staff Incorrect installation can cause injury/damage to persons, animals or objects, for which the manufacturer cannot be held responsible. - Page 23 The burner room must have openings towards the outside in compliance with local Standards in force. If in doubt relative to the circulation of air, first of all we recommend that the CO2 value is measured, with the burner functioning at maximum flow rate and the room ventilated, only via the apertures destined to feed air to the burner and then by measuring the CO2 value again, with the door open.The value of CO2 measu- red in both cases must not change in a significant manner.
- Page 24 Never stretch (force) power supply cables and keep them away from heat sources.The length of the cables used must allow the burner and any boiler door to be opened. The electric connections must be made exclusively by qualified staff and the regula- tions in force on the subject of electricity must be respected.After all packaging ma- terial has been removed, control the contents and ensure that these have not been damaged in any way during transport.
-
Page 25: Technical Specifications
TECHNICAL SPECIFICATIONS ECO 15 ECO 20 DESCRiZiOnE ECO 15/2 ECO 20/2 ECO 15/L ECO 20/L Output 72.000 112.000 72.000 102.000 kcal/h 151.000 214.000 151.000 204.000 kcal/h Fuel consumption 7 - 14,8 11 - 21 7 - 14,8 10 - 20... -
Page 26: Installation On To The Boiler
INSTALLATION ON TO THE BOILER Fix flange 2 to the boiler using 4 screws 3 interposing the insulation gasket 4 and the possible insulating cord 5. Insert the burner in the flange so that the draught tube pe- netrates into the combustion chamber by the length suggested by the boiler manufac- turer. - Page 27 FUEL FEED PIPES ASPIRATED SYSTEM GRAVITY-DROP SYSTEM Diagrams refer to light oil with max viscosity 1.5°E (6 cSt) at 20°C. A Fuel aspiration line B Fuel filter C Fuel aspiration line gate D Flow-stop solenoid valve E Return line gate F Return line G Bottom valve H Rapid on-off gate with remote control...
-
Page 28: Working Cycle
If the flame accidentally goes out during routine operation an automatic re- ignition sequence begins. Burner shutdown is indicated by the boiler system warning light and/or by the room thermostat indicator. Burner restart is effected by pressing the reset button . ECO 15 ECO 20 ECO 15/2 ECO 20/2... -
Page 29: Wiring
20 mm longer than the phase and neutral cables. - Must be workmanlike performed and comply with the regulations in force. NOTE: Always make sure that no more than two wires are connected to each terminal. ECO 15 ECO 20 LMO 14... - Page 30 ECO 15/2 ECO 20/2 LMO 24 1° 2° 230 V 50 Hz 1 Automatic control unit 2 3A fuse 3 Main switch 4 Lock-out warning light 5 Burner motor 6 Mains connection plug and auxiliary devices 7 Photo-resistor 8 Room thermostat...
-
Page 31: Adjustments
PUMP PRESSURE ADJUSTMENT ECO 15 - ECO 20 Pump pressure is calibrated at the factory at 12 Kg/cm2. However, should it be ne- cessary, pressure can be adjusted by turning the screw (42). To check the obtained pressure fit a pressure gauge on the pressure takeoff point (27). - Page 32 GEARED MOTOR CONTROLLING AIR DELIVERY (ECO 15/2-ECO 20/2) The geared motor limit switch and auxiliary contacts are triggered by easily accessible adjustable cams, which can be set against o graduated scale. SETTING THE CONTACT TRIGGERING POINT General information: CAM V (2 Stufe) - Cam controlling air valve fully open position (maz. firing rate with both stages in operation).
-
Page 33: Installation
INSTALLATION BEFORE STARTING THE BURNER ALWAYS CHECK THE FOLLOWING: - Burner and control unit have a proper earth connection. - The on-burner nozzle (3) has a flow-rate suitable for the boiler. - The nozzle holder (10) is fitted with the “O” marking facing upwards - That there is fuel in the tank and the gates are open. -
Page 34: Equipment
EQUIPMENT LMO EQUIPMENT The release pushbutton on the equipment is the main component for accessing all the diagno- stic functions (activation and deactivation) as well as for releasing the control and checking device. The release pushbutton has a multicoloured led which indicates the state of the control and checking device during operation and when the diagnostic function is in use. -
Page 35: Maintenance
Clean the electrodes without varying their position with respect to the diffuser; if you accidentally move them observe the dimensions given in fig. when re-assembling. ECO 15 - 15/2 ECO 20 -20/2 ECO 20 ECO 15 - 15/2 -20/2 Legenda A 1 ÷ 4 B 4 ÷ 5 C 8 ÷ 11... - Page 36 PIPE FILTER - POSITIONING FAN Close the fuel aspiration gate and, depending on the type, proceed with thorough clea- ning of the filtration component. To check whether the air gate fan is clean or to check the combustion head proceed as follows: - Remove the cover (23) by loosening the screw (22).
-
Page 37: Operating Irregularities
OPERATING IRREGULARITIES PROBLEM CAUSE SOLUTION Check the fuses. Check the thermostats (Room There is no electricity. tem perature, Furnace and sa- fety). The burner does not start Fuel is not arriving to the burner. Check the fuel line. The fuel valve is not open Check operation of valves The motor turns but there is no flame and the system shuts... - Page 40 Le illustrazioni e i dati riportati sono indicativi e non impegnano. La Lamborghini Calor si riserva il diritto di apportare senza obbligo di preavviso tutte le modifiche che ritiene più opportune per l’evoluzione del prodotto. The illustrations and data given are indicative and not binding. Lamborghini Calor re- serves the right to make all modifications it deems appropriate for improvement of the product without forewarning.
Need help?
Do you have a question about the ECO 15 and is the answer not in the manual?
Questions and answers