Subscribe to Our Youtube Channel
Summary of Contents for AXIOMET AX-3003D
-
Page 1: Dc Power Supply
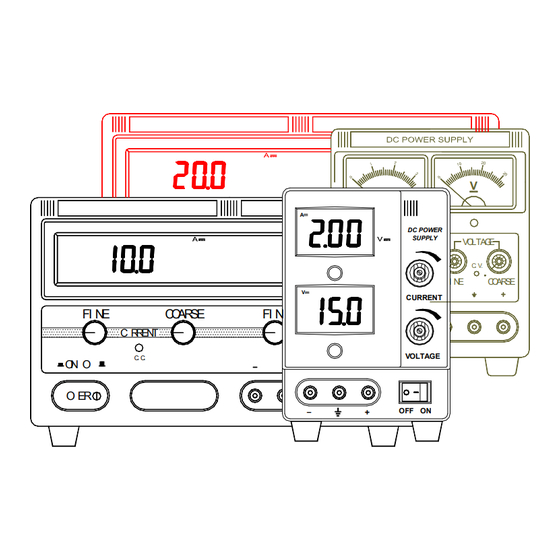
DC POWER SUPPLY AX-3003D, AX-3005D, AX-1803D DC POWER SUPPLY VO LTAG E C . V. I N E C O AR SE CURRENT C O AR SE C R R EN T C . C . VOLTAGE O ER USERS MANUAL... -
Page 2: Table Of Contents
Table of Contents 1. Introduction ..................... 3 Unpacking and Inspection ..................4 Safety Precautions ....................4 Safety Information ....................4 Safety Symbols ..................... 4 Instrument Front Panel ................... 5 Instrument Back Panel .................... 6 2. Operation ......................7 Line Power Supply Setting ..................8 Operation Procedure .................... -
Page 3: Introduction
Chapter 1. Introduction This manual contains information and warnings, which must be followed to ensure safe operation and retain the DC power supply in safe condition. WARNING READ “SAFETY INFORMATION” BEFORE USING,INSTALLING OR MAINTENANCE THE INSTRUMENT. The DC power supply series are a bench top single output variable DC power supply. Stable regulated DC power supplies allowing continuous adjustment of both the output voltage and output current levels. -
Page 4: Unpacking And Inspection
Unpacking and Inspection The packing should include the following items: 1 DC power supply 2 Power line cord 3 Instruction manual 4 Spare fuse Please check to see that all of the above items are included. Safety Precautions 1. Before applying power to your DC power supply, make sure that power select switch is correctly setting for your applicable AC power supply. -
Page 5: Instrument Front Panel
Earth ground. Caution! Hot surface. Avoid contact. Conforms to European Union directives. Instrument Front panel Figure 1-1 DC POWER SUPPLY CURRENT C R R EN T VO LTAG E C . C . C . V. I N E C O AR SE I N E C O AR SE O N O... -
Page 6: Instrument Back Panel
5. COARSE(MAIN) CURRENT REGULATOR Adjust output current of the DC power supply and delivered. 6. FINE CURRENT REGULATOR This is a fine control. Adjust output current of the DC power supply and delivered. 7. C.C. INDICATOR Constant current mode indicator 8. -
Page 7: Operation
OUTPUT VOLTAGE OUTPUT CURRENT FUSE TYPE FUSE TYPE Regulated Regulated Line 220VAC Line 110VAC 0 ~ 2A T 1A L 250V T 2A L 250V 0 ~ 15V 0 ~ 3A T 1A L 250V T 2A L 250V 0 ~ 2A T 1A L 250V T 2A L 250V 0 ~ 18V... -
Page 8: Line Power Supply Setting
Line Power Supply Setting (Figure 2-1) (Only for the instrument with POWER SELECT SWITCH ) Two kinds of AC line, 220VAC 50Hz/60Hz or 110VAC 50Hz/60Hz, can be supplied to the instrument. Set it with a screwdriver to adapt your AC line. Check to be sure that power select switch on back panel is switch to correct line voltage. - Page 9 CONSTANT CURRENT MODE 1. Turn the voltage regulator clockwise to maximum position and the current regulator anti – clockwise to minimum position. Press the power ON/ OFF switch to ON. Connect the positive output terminal and negative output terminal with a load or similar component. Turn the current regulator clockwise to that you are desirous of output current value.
-
Page 10: Specifications
CAUTION Using this appliance in an environment with a strong radiated radio - frequency electromagnetic field (approximately 3V/m) may influence its measuring accuracy. CHAPTER 3. SPECIFICATIONS General Specifications Safety: Designed comply with IEC 1010 -1 specifications. CAT.II300V 0°C to 40°C for operating, −10°C to 50°C for storage Temperature: Under 75% rated output power for continuous, upward of 75% rate output power for one hour. -
Page 11: Technical Parameters
Technical Parameters: Input voltage: 220V AC ± 10% 50HZ/60HZ ± 2HZ or 110V AC ± 10% 50HZ/60HZ ± 2HZ Voltage indication accuracy: LED display and LCD display ±1%±2digits, Pointer meter display 2.5% Current indication accuracy: LED display and LCD display ±2%±2digits, Pointer meter display 2.5% Output Voltage and Current: OUTPUT VOLTAGE (regulated) OUTPUT CURRENT (regulated) -
Page 12: Replacing The Fuse
WARNING Turn off the power switch, remove the power line cord from the power socket and disconnect the test leads at output terminals before replacing the fuse. Replace it only with same type of fuse. Figure 4-1 15/18V FUSE Figure 4-2 CAUTION 30/50V FUSE...


Need help?
Do you have a question about the AX-3003D and is the answer not in the manual?
Questions and answers