Advertisement
Advertisement
Table of Contents

Related Manuals for Wisenet SNK-B73047BW


Summary of Contents for Wisenet SNK-B73047BW
- Page 1 ALL-IN-ONE SECURITY SYSTEM Quick Start Guide...
-
Page 2: Troubleshooting
Troubleshooting If you are experiencing video loss, verify that all cables are properly and securely connected to the NVR. • Check your Network Connection • Check your Username and Password • Restart the NVR if you have trouble connecting. Main Menu > Shutdown > Enter Username & Password > Click “Reboot” To reset your NVR to factory settings, refer to the User manual. -
Page 3: Nvr Setup
NVR Setup KIT Model SNK-B73047BW NVR Model SNR-73207W • Front English _... -
Page 4: Package Contents
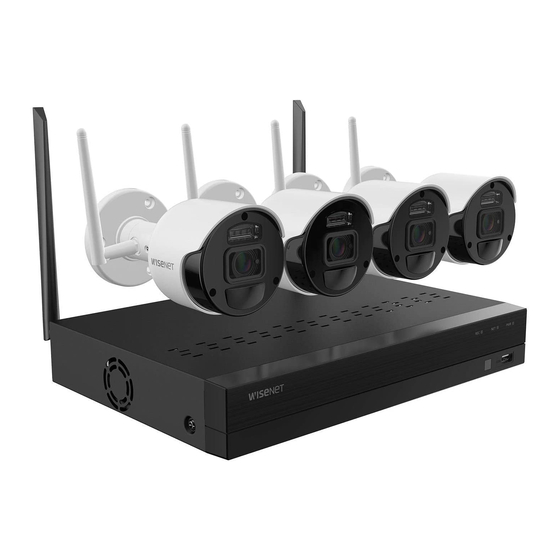
NVR Setup Package Contents The appearance of the components may differ from the image shown. Accessory category and quantity may differ depending on sales region. The administrator is recommended to store the remote control carefully in order to initialize it if the password is lost. - Page 5 CAUTION RISK OF ELECTRI SHOCK DO NOT OPEN CAUTION : TO REDUCE THE RISK OF ELECTRICAL SHOCK DO NOT OPEN COVERS. NO USER SERVICEABLE PARTS INSIDE. REFER SERVICING TO QUALIFIED SERVICE PERSONNEL. WARNING : TO PREVENT FIRE OR SHOCK HAZARD. DO NOT EXPOSE UNITS NOT SPECIFICALLY DESIGNED FOR OUTDOOR USE TO RAIN OR MOISTURE.
- Page 6 NVR Setup Connect one end of the Ethernet cable into your router’s LAN port, and the other end of the cable to the WAN port on the rear panel. CAUTION RISK OF ELECTRI SHOCK DO NOT OPEN CAUTION : TO REDUCE THE RISK OF ELECTRICAL SHOCK DO NOT OPEN COVERS.
- Page 7 Startup Wizard Guide Change your password on a regular basis. Please create a user name and password for your device. Password MUST be 8~13 characters long. When password is 8~9 characters long, it should be with at least a combination of letters, digits and special symbols. If it is 10~13 characters long, it should be with at least a combination of two types of characters.
- Page 8 Startup Wizard Guide Network In DHCP mode the router will automatically assign an IP address to NVR. If the NVR fails to obtain an IP address, refer to the NVR Router Guide. If the problem still cannot be resolved, contact technical support. Date/Time Set the date, time, NTP, DST.
- Page 9 Disk New hard drive(s) connected must be formatted before use. Upon connection, it will indicate to format new hard drive. Click on "Select" to select the unformatted hard drive. Click on "Format HDD" to pop up the user login window and enter the password to log in. A notice window will indicate "Entire Data Will Be Erased.
- Page 10 Startup Wizard Guide Mobile If you scan a QR code using WisenetLife App, the device ID displayed in the NVR will be automatically reflected in the Mobile Viewer ID, and you can use the Mobile Viewer immediately by entering the password of the NVR.
-
Page 11: Main Interface
Main Interface In real-time preview mode: right click on any area to access the desired menu. Right click on it to open a context menu. Menu items may vary depending on the condition, such as sign-in, sign-out, split screen mode and various operation conditions. - Page 12 Main Interface Video Loss Camera is off-line Manual Recording Enable or disable manual recording Manual Capture Make a snapshot of current video Instant Playback Playback of the last five minutes of the video Zoom Hold and drag mouse cursor to select a frame of current video to zoom in Color Setting Set hue, brightness, contrast and saturation of current channel Stream Switch...
- Page 13 Remote Viewing & Cloud Service Once you’ve set up your system, you can access to your cameras from anywhere, anytime using Wisenet Life Cloud service. The appearance of the viewer may differ from the image shown. [With your PC] OS and browser environment •...
- Page 14 Some functions may not work properly depending on the manufacturer of the mobile device Start Wisenet Life monitoring & Cloud Service 1) Open Google Play or the App Store and download the free Wisenet Life app. 2) Once installed, open the Wisenet Life app.
-
Page 15: User Interface
User Interface Main Menu Device name Find the Information about You can check the live and your plan and notice and event images of the device. turn on/off your alert from The split screen configuration the app differs depending on the OS type. English _... - Page 16 Remote Viewing & Cloud Service Device Setup List Editor You can change the settings You can change the display of the device. position of the device. View mode Add Device View mode can be changed. New devices can be added. 16_ English...
-
Page 17: App Interface
App Interface Live & Playback English _... - Page 18 App Interface Go into single view mode 2 or 4 Channel Split-Screen view Multi channel image capture UI guide Change to full screen mode Manual record and save Image capture Go into Event list page Go back to live page Select storage location Refresh the event list Event type...
- Page 19 Camera Installation Template To make camera installation easier, you can tear off this page and adhere it to the place you would like to install your cameras. TEMPLATE This template is used to install the camera on the wall CAMERA FRONT English _...
Need help?
Do you have a question about the SNK-B73047BW and is the answer not in the manual?
Questions and answers
Still will not pair
The Wisenet SNK-B73047BW may not pair because it is set to Auto mode. To resolve this, switch from Auto mode to Manual mode in the Setup menu and select a channel with no interference.
This answer is automatically generated
cannot pair camera
To pair the Wisenet SNK-B73047BW camera, click the icon of the desired channel on the NVR, then press the Pair button on the camera within 30 seconds. This will manually pair the camera and NVR.
This answer is automatically generated