Table of Contents
Advertisement
OPERATION
&
MAINTENANCE
MANUAL
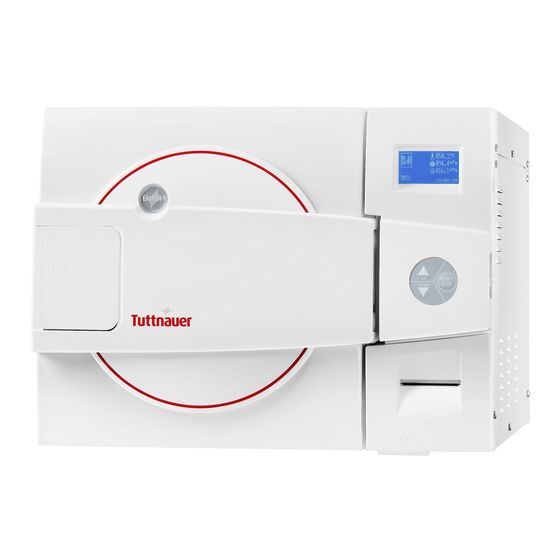
Pre/Post-vacuum Class B
Table–top Autoclave
Model ELARA 11
Cat. No. MAN205-0342001EN Rev Q
Manufactured by: Tuttnauer Co. Ltd., Har Tuv Industrial zone B P.O.Box 170, Beit Shemesh 99000, IsraelTel: 972 2 9904611,
Fax: 972 2 9904730
Tuttnauer U.S.A. Co, Ltd. 25 Power Drive Hauppauge, NY, 11788, USA. Tel (631) 737 4850, (800) 624 5836, Fax: (631)
737 0720
Advertisement
Table of Contents

Related Manuals for Tuttnauer ELARA 11


Summary of Contents for Tuttnauer ELARA 11
- Page 1 Manufactured by: Tuttnauer Co. Ltd., Har Tuv Industrial zone B P.O.Box 170, Beit Shemesh 99000, IsraelTel: 972 2 9904611, Fax: 972 2 9904730 Tuttnauer U.S.A. Co, Ltd. 25 Power Drive Hauppauge, NY, 11788, USA. Tel (631) 737 4850, (800) 624 5836, Fax: (631) 737 0720...
-
Page 3: Table Of Contents
T A B L E O F C O N T E N T 1. GENERAL ........................ 4 1.1................4 NCOMING NSPECTION 1.2....................4 ARRANTY 1.3................5 ARRANTY TATEMENT 2. SAFETY INSTRUCTIONS ..................6 3. INSTALLATION ..................... 7 3.1. - Page 4 10. OPERATING INSTRUCTIONS ................44 10.1....... 44 ILLING THE INERAL ATER ESERVOIR 10.2............... 45 URNING ON THE AUTOCLAVE 10.3................45 PENING THE DOOR 10.4....................45 OADING 10.5................46 LOSING THE 10.6................. 46 ELECTING A ROGRAM 10.7.
- Page 5 T A B L E O F I L L U S T R A T I O N S ........................ 17 RONT ........................18 ......................56 ANDLE ....................... 56 OUCH ..........................56 ......................56 OLDER Page 3 of 57...
-
Page 6: General
11 (Preventive and Scheduled Maintenance). Tuttnauer warrantees all new autoclaves for a period of one full year, covering both parts and labor. This one year warranty covers defects in materials and workmanship on every part in the autoclave except the HEPA filter and the door gasket. -
Page 7: Warranty Statement
No product will be received or accepted for repair without prior return authorization from Tuttnauer. All transportation charges to and from Tuttnauer must be paid by the owner of the autoclave. During the first 90 days after purchase of an autoclave, Tuttnauer will pay shipping costs on an individually evaluated basis and ONLY with pre-approval. -
Page 8: Safety Instructions
SAFETY INSTRUCTIONS The autoclave has unique characteristics. Please read and understand the operation instructions before first operation of the autoclave. This manual includes instructions guidance provided by the manufacturer: how to operate the autoclave, the door safety mechanism, and the hazards involved in circumventing safety means and how to select an adequate sterilization program. -
Page 9: Installation
INSTALLATION 3.1. Placing CAUTION: The installation and all operations described in this chapter must be done only by an authorized technician. 3.1.1 Lifting and carrying CAUTION: Before moving the autoclave, Make sure that the electric cord is disconnected from the power, and there is no pressure in the chamber and in the generator. - Page 10 5. It is recommended that enough space be left around the autoclave to give a technician access for servicing the machine. 6. Check and verify that the room ventilation is 10 cycles per hour minimum. 7. Check and verify that the ambient temperature range is 41°F - 104°F (5ºC-40ºC), it is preferable not to exceed 86°F (30ºC).
- Page 11 If the Vacuum Test is successful then select the B&D Test cycle. At this stage the chamber and steam generator will be heating up. It will take approximately 15 minutes (from selecting the B&D Test). While waiting for the unit to heat up explain and instruct the operator as follows (use the operation manual as reference): Operation principals of the autoclave.
-
Page 12: General Information
GENERAL INFORMATION 4.1. Intended Use This table-top autoclave is designed for sterilization of medical and surgical goods such as unwrapped and wrapped, solid, hollow, porous products and tubes in ophthalmic, dental and medical clinics, first aid rooms, small laboratories etc. 4.2. -
Page 13: Operating Conditions
4.3. Operating Conditions This device is for indoor use only! The sterilizer should be loaded only with autoclavable material! Minimum room ventilation shall be10 cycles per hour The environment shall not exceed an ambient temperature range of 41ºF-104ºF (5ºC-40ºC) and a relative humidity of 85% respectively. The operation altitude shall not be over 6500 feet (2000 meters) (ambient pressure shall not be lower than 80 kPa (11.6 psia)). -
Page 14: Specifications
4.4. Specifications Overall Dimensions Front View Top View Property Value Max. Allowable Working Pressure (MAWP) 2.8 bar (40 psi) Diameter 280 mm (11”) Chamber Depth 504 mm (19.8”) Chamber volume 28.5 lit. (7.5 gal) Width (A) 530 mm (20.8”) Height (B) 444 mm (17.4”) External dimensions Length (C) -
Page 15: Utilities
Property Value Weight 148 lb (67.1 kg) 1.71 N/m2 Weight per support area (max. load) (0.036 lb/ft2) Shipping weight 184 lb (83.4 kg) Width 63 cm (24.8”) Height 71 cm (28.0”) Shipping dimensions Length 80 cm (35.8”) Volume 0.36 m3 (14.5 ft3) Max. -
Page 16: Construction
4.8. Construction The main parts of the autoclave are made of materials as indicated below: Chamber is built of stainless steel 316 L. Door is made of stainless steel 316. Trays are made of stainless steel 304. ... -
Page 17: Water Quality
4.10. Water Quality Physical characteristics and contaminants levels The distilled or mineral – free water supplied to the autoclave should have the physical characteristics and maximum acceptable level of contaminants indicated in the table below: Physical Characteristics and Maximum acceptable contaminants levels in water for sterlizers (According to ANSI/AAMI ST79:2006). -
Page 18: Directives And Standards
4.11. Directives and Standards Every autoclave meets the provisions of the following Directives and is in compliance with the following Standards: 4.11.1. Technical Standards ANSI/AAMI ST55 – Small Steam Sterilizers. ASME Code, section VIII division 1 for pressure vessels. UL 61010-1 electrical equipment for laboratory use; general requirements IEC 61010-2-040 particular requirements for sterilizers and washer disinfectors used to treat medical materials. -
Page 19: Front View
FRONT VIEW No. Description No. Description Water reservoir funnel Operating keypad Autoclave cover Printer cover Water level sight gauge Printer (standard) Mineral-free water reservoir cover Legs Chamber and steam generator safety Mineral-free water reservoir drain valves valve Waste water reservoir cover Waste water reservoir drain valve Display Door cover... -
Page 20: Rear View
REAR VIEW No. Description Mineral-free water reservoir cover Waste water reservoir cover Ventilation grills Air filter service cover Opening for calibration Main power electric cable socket Page 18 of 57... -
Page 21: Keyboard
KEYBOARD Description Display Keypad Printer Page 19 of 57... -
Page 22: Description And Functions Of The Front Panel Keyboard
5.1. Description and Functions of the Front Panel Keyboard The front panel is composed of 3 sections: 1. Display screen. 2. Keypad. 3. Printer 5.1.1. Display screen The display is a graphical screen used to display the current status of the autoclave and any Operational Messages or Error Messages. - Page 23 5.1.2. Keypad The keypad consists of 3 keys as described below: UP key This key has the following functions: In the menu directories: o This key enables the operator to browse through the cycles. In the directories available: o When the cursor is blinking on a number, the UP ▲...
-
Page 24: Displayed Error And Operational Messages
5.2. Displayed Error and Operational Messages Error Error Message Description Corrective Action Number Name Err:001 Pt1 out This error # and symbol are Call the technician. displayed when the Chamber Temperature sensor Pt1 is disconnected or out of range. Err:002 This error # is displayed when Check that the Temperature... - Page 25 Error Error Message Description Corrective Action Number Name Err:012 Manual This error # is displayed and Stop cycle is aborted after the STOP key is pressed. Err:013 Air Valve This error # is displayed after Replace air filter. Error the air valve has been open for 3 minutes and the chamber is unable to reach atmospheric pressure.
- Page 26 Message Description Symbol Corrective Action This symbol is displayed if Pour water in the there is insufficient water in front funnel until the mineral-free water the water level reservoir. sight gauge reaches the full level. This symbol is displayed if the Drain the reservoir.
-
Page 27: Sterilization Programs
STERILIZATION PROGRAMS The autoclave offers 5 sterilization programs and 2 test programs as follows: Sterilization Programs: Program 1 Flash 134 Program 2 Wdry 134 Program 3 No Dry 121 Program 4 Wdry 121 Program 5 Delicate 121 Tests programs: Test 1 B&D Test Test 2 VacTest... -
Page 28: Program 1: Flash 134
6.1. Program 1: Flash 134 Program 1 is recommended for sterilizing unwrapped instruments, at temperatures of 134ºC / 273ºF with 1 minute drying stage, which its manufacturer declares their compliance to be sterilized in the following conditions: The solid load shall not exceed 8kg (17.6 lb). Nominal Parameters ... -
Page 29: Program 2: Wdry 134
6.2. Program 2: WDry 134 Program 2 is recommended for sterilizing double wrapped instruments, porous loads and Hollow A (e.g. dental hand pieces, suction pipes) loads at temperatures of 134ºC / 273ºF with 20 minutes drying stage, which its manufacturer declares their compliance to be sterilized in the following conditions: The solid load shall not exceed 8kg (17.6 lb). -
Page 30: Program 3: N Odry 121
6.3. Program 3: NoDry 121 Program 3 is recommended for sterilizing unwrapped instruments at a temperature of 121ºC / 250ºF without drying stage, which its manufacturer declares their compliance to be sterilized in the conditions specified below. Warning This program is intended for tubing and other temperature sensitive material and is not intended for patient use devices. -
Page 31: Program 4: Wdry 121
6.4. Program 4: WDry 121 Program 4 is recommended for sterilizing double wrapped instruments, porous loads and Hollow A (e.g. dental hand pieces, suction pipes) loads at temperatures of 121ºC / 250ºF with 20 minutes drying stage, which its manufacturer declares their compliance to be sterilized in the following conditions: The solid load shall not exceed 8kg (17.6 lb). -
Page 32: Program 5: Delicate 121
6.5. Program 5: Delicate 121 Program 5 is recommended for sterilizing delicate instruments at temperatures of 121ºC / 250ºF with slow exhaust, which its manufacturer declares their compliance to be sterilized in the following conditions: The solid load shall not exceed 8kg (17.6 lb). Nominal Parameters ... -
Page 33: Test 1: B&D Test
6.6. Test 1: B&D Test Test 1 is the Bowie & Dick test program, with fixed sterilization parameters 134ºC and 3.5mins, which cannot be modified by the operator or the technician. Nominal parameters Sterilization temperature: 134ºC Sterilization time: 3.5 minutes. ... -
Page 34: Test 2: Vactest
6.7. Test 2: VacTest Note: Before performing this test, verify that the autoclave is cold and that the autoclave is dry (not humid and no water drops). Vacuum is produced in the chamber down to P =17 kPa. At this stage all the valves are close. -
Page 35: Modifying Parameters And Other Data
MODIFYING PARAMETERS AND OTHER DATA In order to modify sterilization parameters, change the system clock or print out previous cycles, the operator has access to three sub-directories from the main menu. 7.1. Menu 1. Enter the MENU screen by pressing simultaneously for 2-3 seconds, the UP and DOWN keys. -
Page 36: Parameters
7.2. Parameters This directory enables the operator to see and change the cycle’s parameters. Therefore it is necessary to choose the required cycle before entering the "MENU" directory (see 10.6 Selecting a program"). For seeing or changing the parameters proceed as follows: The CYCLE PARAMETERS screen is displayed when entering the "PARAMETERS"... -
Page 37: Setting The Clock
7.3. Setting the Clock This directory enables the operator to set the time and date. The SET CLOCK screen is displayed when entering the SET CLOCK directory: When entering the directory the curser will be blinking on the "hour" digit. The time is displayed in the upper row in the form “hh:mm:ss”. -
Page 38: History
7.4. History This directory enables you to print the 40 previous cycles. The HISTORY screen is displayed when entering the HISTORY directory: 1. Choose the required cycle according to its number (Log Load Nu) with the UP and DOWN key 2. -
Page 39: Printer
PRINTER 8.1. Printer Operation The autoclave is equipped with a character printer, which prints a detailed history of each cycle performed by the instrument. This can be useful for record keeping or subsequent consideration. The printing is made on thermal paper with 24 characters per line and contains the following information: ... - Page 40 PRINTER OUTPUT DESCRIPTION Operator: To be filled in manually by operator Time: 15:01:48 Time sterilization cycle ended Date: 04/29/2010 Date sterilization cycle ended. CYCLE ENDED! D 00:57:07 191.7 002.8 The time, temperature and pressure during drying. Prints drying data every 3 minutes. D 00:36:49 215.3 000.6...
-
Page 41: Printer Handling
8.2. Printer Handling 8.2.1. Maintenance Wipe off any soiling on the printer surface with a soft cloth and a weak neutral detergent. After that, wipe the printer with a dry cloth. 8.2.2. Setting paper 1. Open the printer's cover door (3) by pulling it at the left bottom corner (2) as shown on Fig. - Page 42 Notes on treatment of the thermal papers: Store the papers in a dry, cool and dark place. Do not rub the papers with hard substance. Keep the papers away from organic solvent. Cautions Never disassemble the printer. Failure to follow this instruction may cause electric shock, overheating or burning of the printer, which may lead to fire.
-
Page 43: Preparation Before Sterilization
Clean instruments immediately after use to remove any residue. It is recommended that all instruments be ultrasonically cleaned using Tuttnauer's CLEAN AND SIMPLE enzymatic cleaning tablets or other suitable solution. After cleaning, rinse instruments under tap water for 30 seconds and pat or air dry to remove residual minerals. - Page 44 18. Do not stack pouches. It is recommended that a pouch rack such as the Tuttnauer POUCH RACK be used to insure proper steam penetration and adequate drying. Surfaces that are hidden because the items are being stacked will not be exposed to the steam and will not be sterilized.
- Page 45 21. If spotting is detected on the instruments, the first step would be to use an ordinary eraser to remove the spot. If there is no pitting under the spot then the spot was only dirt. Dirt spots on an instrument may be an indication that the autoclave needs to be cleaned or that the instruments were not adequately cleaned or dried.
-
Page 46: Operating Instructions
OPERATING INSTRUCTIONS It is recommended to perform a B&D test cycle at the beginning of each working day. 10.1. Filling the Mineral-Free Water Reservoir. Attention: Only use water having the characteristics outlined in section 4.10 Water Quality. Using Tap water will clog the system and invalidate the manufacturer’s guarantee. -
Page 47: Turning On The Autoclave
10.2. Turning on the autoclave When the power is off the door is locked. To start the system, press the main white switch (1) on the right side of the autoclave. When the unit is turned on heating begins. The chamber is preheated and the symbol is displayed until the process is completed. -
Page 48: Closing The Door
10.5. Closing the Door Hold the opening handle in an open position, while pushing the door to a closed position, then release the handle. (The open door symbol is replaced by the next load number). 10.6. Selecting a Program ... -
Page 49: Maintenance Instructions
MAINTENANCE INSTRUCTIONS 11.1. Preventive and Scheduled Maintenance The maintenance operations described in this chapter must be fulfilled periodically in order to keep the autoclave in good working condition and to keep any breakdown time to a minimum. The user’s maintenance personnel can easily perform these operations. The owner of the autoclave is responsible to have an authorized technician perform the periodical tests and preventive maintenance operations, as specified in the technician manual. - Page 50 11.1.3 Periodically 11.1.3.1 By the operator Once a month, check the safety valve (see para. 11.5). Once a month clean the strainer as per para. 11.6. Cleaning frequency may be reduced according to experience. Replace the air filter, every 6 months or after 1000 cycles (which ever comes first) according to para.
-
Page 51: Draining The Reservoirs
11.2. Draining the Reservoirs (Applies to the clean-water reservoir and to the waste-water reservoir) To drain the reservoir, use item (5) with the plastic hose (6) attached to it (supplied with the autoclave). Insert part (5) into valve (3) and press it until you hear a “click”. The drain valve opens immediately, drain into a bucket. -
Page 52: Replacing The Air Filter
11.3. Replacing the Air Filter In order to “break” the vacuum, at the end of the dry phase, filtered atmospheric air enters the chamber via a solenoid valve. The filtration of the air is performed by the bacteriological filter that is placed at the inlet of the solenoid valve. -
Page 53: Replacing The Door Gasket
11.4. Replacing the Door Gasket To avoid injuries replace the gasket while the autoclave is cold. Pull off the gasket from the door groove and install the new gasket referring to the drawings as above points 1, 2 and 3. Apply a mild and diluted soapy solution to the door gasket to ease its installation CAUTION! -
Page 54: Checking The Safety Valve
11.5. Checking the Safety Valve (See "front view"). In order to prevent the safety valve from becoming blocked, it is necessary to open the valve under pressure. This will allow the steam to escape clearing the valve (this needs to be done monthly). There are two safety valves located in the mineral-free water reservoir. -
Page 55: Cleaning Water Strainer
11.6. Cleaning water strainer CAUTION! Before proceeding, make sure that there is no pressure in the chamber. CAUTION! Do not touch the strainer shortly after operation. Touching the hot strainer’s cover may cause severe injuries. If maintenance operation is performed while strainer cover is hot, use heat resistant gloves to avoid injuries. -
Page 56: Emergency Opening Of The Door
11.7. Emergency opening of the door If there is no power to the autoclave and the door is closed the lock will be engaged. If you need to open the door, follow this procedure: 1. Turn the power switch off. 2. -
Page 57: Troubleshooting
Verify that there is electrical power in the main source. If the problem persists, contact your dealer or Tuttnauer USA for further assistance. The printer Make sure the paper is inserted in the printer correctly. -
Page 58: Tray Handle
TRAY HANDLE CT530020 POUCH RACK AR910 TRAY CT520010 TRAY HOLDER TRH411-0004 Page 56 of 57... -
Page 59: Spare Parts List
SPARE PARTS LIST PART NUMBER DESCRIPTION FIL175-0016 Filter, Air, 0.2 Micron, Model 50mm D 01610406 Paper, Roll, Printer DPU30 ACCESSORIES PART NUMBER DESCRIPTION AR910 Pouch rack CT530020 Handle, Tray CT520010 Tray GAS084-0007 Drain P.V.C. Tube, 13mm OD x 10mm ID THE002-0022 Printer, DPU-30, Seiko TRH411-0004...
Need help?
Do you have a question about the ELARA 11 and is the answer not in the manual?
Questions and answers