Bitzer CM-RC-01 Maintenance Instructions Manual
Hide thumbs
Also See for CM-RC-01:
- Maintenance instructions manual (51 pages) ,
- Reference manual (44 pages) ,
- Manual (32 pages)
Table of Contents
Advertisement
Available languages
Available languages
KW-231-1
Instructions for mounting the CM-RC-01 add-on kit
Translation of the original document
English.......................................................................................................................................................
2
Anleitung zur Montage des CM-RC-01 Komplettierungsbausatzes
Originaldokument
Deutsch .....................................................................................................................................................
20
4JE-13Y .. 4FE-35(Y)
6JE-22Y .. 6FE-50(Y)
Advertisement
Chapters
Table of Contents

Related Manuals for Bitzer CM-RC-01


Summary of Contents for Bitzer CM-RC-01
- Page 1 KW-231-1 Instructions for mounting the CM-RC-01 add-on kit Translation of the original document English............................... Anleitung zur Montage des CM-RC-01 Komplettierungsbausatzes Originaldokument Deutsch ..............................4JE-13Y .. 4FE-35(Y) 6JE-22Y .. 6FE-50(Y)
-
Page 2: Table Of Contents
3.7 Laying the cables............................ 9 3.8 Screwing the cover onto the module housing.................... 10 4 Mounting the optional CM-RC-01 extension kits .................... 10 4.1 Mounting the extension kit "Capacity control" (CRII) and "Start unloading" (SU)........ 11 4.2 Mounting the "Pressure transmitter" extension kit .................. 12 4.3 Mounting the "Liquid injection"... -
Page 3: Introduction
2.3 Residual risks This document describes the procedure to follow for Compressors and electronic accessories may present mounting the CM-RC-01 compressor module add-on kit unavoidable residual risks. This is why any person to the compressor models 4JE-13Y .. 4FE-35(Y) and working on this device must carefully read this docu- 6JE-22Y .. -
Page 4: Mounting The Cm-Rc-01 Basic Kit
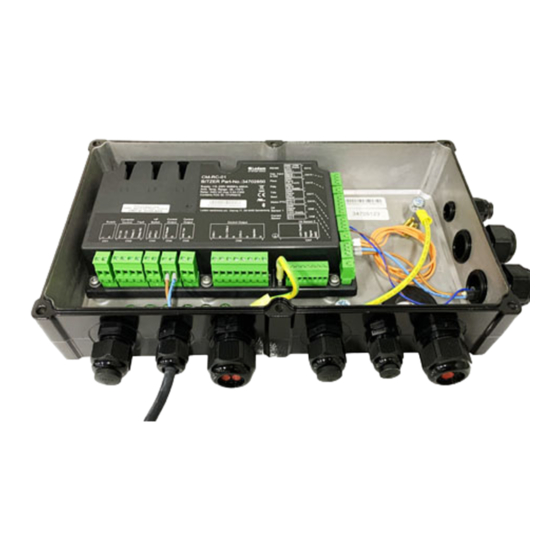
Never apply voltage to the voltage outputs, not even for testing. 3 Mounting the CM-RC-01 basic kit Procedure to follow for mounting the CM-RC-01 basic kit of the compressor module add-on kit: • Mounting the cable holders and cable ties. -
Page 5: Mounting The Cable Holders
3.1 Mounting the cable holders 4JE-13Y .. 6FE-50(Y): Mount 2 cable holders each to the outer cylinder heads and to the bearing cover. • To this end, loosen the corresponding screws on cylinder head and bearing cover, insert the screws again with cable holders and tighten them (tightening torque 80 Nm). - Page 6 • Then loosen the fixing screws of the motor protection device and remove the device. • Put the CM-RC-01 compressor module onto the terminal box. • Guide the orange motor PTC cable of the compressor module downward through the opening in the module housing and connect it to the terminal plate of the compressor.
-
Page 7: Oil Heater
3.3 Oil heater • Loosen and remove the connector and cable of the installed oil heater. • Then plug the electric connector with its cable (labelled "Crankcase Heater") prewired to ter- minal strip CN4, with a seal onto the oil heater and tighten it (tightening torque 5 Nm). -
Page 8: Mounting The Dp1 Oil Monitoring Device
6-cylinder compressors 6JE-22Y .. 6FE-50(Y): • Remove the sealing plug from the connector marked by a circle and clean the threaded bore. • Then screw the discharge gas temperature sensor in (tightening torque 35-40 Nm) and tighten the connector by hand. •... -
Page 9: Further Electrical Connections On The Cm-Rc-01
3.6 Further electrical connections on the CM-RC-01 • Analogue signal for capacity control from the system controller (0 .. 10 V). • Voltage supply of the compressor module on ter- minal strip CN1 (115 .. 230 V +10%/-15%, 50/60 Hz) Schematic wiring diagram and further information, see Technical Information KT-230. -
Page 10: Screwing The Cover Onto The Module Housing
• Put the terminal box cover on the compressor module housing and fasten it using the 6 en- closed screws (M5 x 70 mm). 4 Mounting the optional CM-RC-01 extension kits WARNING The compressor is under pressure! Required components and procedure to follow for Serious injuries are possible. -
Page 11: Mounting The Extension Kit "Capacity Control" (Crii) And "Start Unloading" (Su)
NOTICE 4.1 Mounting the extension kit "Capacity control" (CRII) and "Start unloading" (SU) Serious injuries are possible. New component may suddenly become detached. Check the thread. Information Carefully screw in the new component. Observe In order to allow the solenoid valves for capacity the tightening torques! control (CRII) and start unloading (SU) to be Perform a tightness test before commissioning! -
Page 12: Mounting The "Pressure Transmitter" Extension Kit
4.2 Mounting the "Pressure transmitter" extension kit • Proceed with the other electrical connections on the NOTICE CM-RC-01 (see chapter Further electrical connec- The two pressure transmitters must not be inter- tions on the CM-RC-01, page 9). changed. They differ by the component number •... -
Page 13: Mounting The "Liquid Injection" Extension Kit
4.3 Mounting the "Liquid injection" extension kit • Proceed with the other electrical connections on the Information CM-RC-01 (see chapter Further electrical connec- Use an open ring spanner for mounting the in- tions on the CM-RC-01, page 9). jection nozzle to the injection line! •... - Page 14 NOTICE After mounting all components of the liquid injection Serious injuries are possible. New component system: may suddenly become detached. Check the thread. NOTICE Carefully screw in the new component. Observe After assembly work on the compressor, there is the tightening torques! a risk of oil or refrigerant leakage Perform a tightness test before commissioning! Perform a tightness test before commissioning!
- Page 15 6-cylinder compressors 6JE-22Y .. 6FE-50(Y): The 6-cylinder compressors are equipped with two injection nozzles: Information Make a brazing joint between liquid line and injection valve before definitely mounting the fixing elements. • Before installation, make sure that the injec- tion nozzles are clean. •...
-
Page 16: Mounting The "Additional Fan" Extension Kit
CN5 terminal strip. • Proceed with the other electrical connections on the CM-RC-01 (see chapter Further elec- trical connections on the CM-RC-01, page 9). • Screw the protective earth conductor onto the terminal box cover and attach the cover to the module housing. - Page 17 4-cylinder compressors 4JE-13Y .. 4FE-35(Y): • Loosen the relevant screws on the cylinder head and replace them with the enclosed threaded bolts. • Then fit the fixing plates on the threaded bolts and fasten them using spring washers and nuts (tightening torque 80 Nm). •...
-
Page 18: Communication Via Best Software
• For communication via the USB port: – Plug the BEST interface converter into the com- pressor module (CN14) and the mobile device. Fig. 1: Connecting the CM-RC-01 to the BEST SOFTWARE – Control the compressor via the analogue connec- tion (CN13). Simultaneous capacity control via the •... -
Page 19: Configuration Via Best Software
• Enter Bluetooth password. Factory setting from firm- • Low pressure and high pressure switches. ware version 2.6.58.00 on: "8670", previous ver- Once you have set all parameters, transfer the settings sions: "2" to the device. The C menu appears with the M ONFIGURATION ETUP window. - Page 20 3.6 Weitere elektrische Anschlüsse am CM-RC-01................... 27 3.7 Kabel verlegen............................. 27 3.8 Deckel auf das Modulgehäuse schrauben.................... 28 4 Montage der optionalen CM-RC-01 Erweiterungsbausätze ................ 28 4.1 Erweiterungsbausatz "Leistungsregelung" (CRII) und "Anlaufentlastung" (SU) montieren...... 29 4.2 Erweiterungsbausatz "Druckmessumformer" montieren ................ 30 4.3 Erweiterungsbausatz "Kältemitteleinspritzung" montieren ................ 31 4.4 Erweiterungsbausatz "Zusatzventilator"...
-
Page 21: Einleitung
1 Einleitung die an diesem Gerät arbeitet, muss deshalb dieses Do- kument sorgfältig lesen! Dieses Dokument beschreibt die Montage des CM-RC-01-Verdichtermodul Komplettierungsbausatzes Es gelten zwingend an die Verdichter 4JE-13Y .. 4FE-35(Y) und 6JE-22Y .. • die einschlägigen Sicherheitsvorschriften und Nor- 6FE-50(Y). -
Page 22: Montage Des Cm-Rc-01 Basis-Bausatzes
Klemmen keine Spannung anlegen! An Spannungsausgänge niemals Spannung anlegen, auch nicht zum Prüfen. 3 Montage des CM-RC-01 Basis-Bausatzes Die Montage des CM-RC-01 Basis-Bausatz des Ver- dichtermodul-Komplettierungsbausatzes enthält folgen- de Arbeitsschritte: • Montieren der Kabelhalter und Kabelbinder. • Entfernen des Schutzgeräts SE-B*. -
Page 23: Kabelhalter Montieren
3.1 Kabelhalter montieren 4JE-13Y .. 6FE-50(Y): Je 2 Kabelhalter an den äußeren Zylinderköpfen und am Lagerdeckel montieren. • Dazu die entsprechenden Schrauben am Zy- linderkopf und am Lagerdeckel lösen, die Schrauben mit Kabelhaltern wieder einsetzen und anziehen (Anzugsmoment 80 Nm). •... - Page 24 • Das orangefarbene Motor-PTC-Kabel von der Stromdurchführungsplatte abziehen. • Anschließend Befestigungsschrauben des Motorschutzgeräts lösen und Motorschutzge- rät ausbauen. • Verdichtermodul CM-RC-01 auf den An- schlusskasten stellen. • Orangefarbenes Motor-PTC-Kabel des Ver- dichtermoduls durch die Öffnung im Modulge- häuse nach unten führen und an die Strom- durchführunsgplatte des Verdichters anschlie-...
-
Page 25: Ölheizung
3.3 Ölheizung • Gerätesteckdose und Kabel der vorhandenen Ölheizung am Verdichter lösen und entfernen. • Anschließend die Gerätesteckdose des an Klemmleiste CN4 vorverdrahteten Kabels (mit Kabelaufschrift "Crankcase Heater") mit Dich- tung auf die Ölheizung aufstecken und fest- schrauben (Anzugsmoment 5 Nm). Information Montage der Ölheizung, siehe Techni- sche Information KT-150. -
Page 26: Ölüberwachung Dp1 Montieren
• Kabelschuhe mit beliebiger Polung an DP1- Sensor anschließen. • Anschlusskappe aufstecken und festschrau- ben (Position und Kabelführung nach unten, siehe Bild). Im Anschluss können optionale Erweiterungs- bausätze montiert werden (siehe Kapitel Monta- ge der optionalen CM-RC-01 Erweiterungsbau- sätze, Seite 28). KW-231-1... -
Page 27: Weitere Elektrische Anschlüsse Am Cm-Rc-01
3.6 Weitere elektrische Anschlüsse am CM-RC-01 • Befehl für Verdichteranlauf (Freigabesignal vom An- lagenregler). • Spannungsversorgung des Verdichtermoduls an Klemmleiste CN1 (115 .. 230 V +10%/-15%, • Analogsignal zur Leistungsregelung vom Anlagen- 50/60 Hz) regler (0 .. 10 V). – Klemme 1: L Prinzipschaltbild und weitere Informationen siehe Tech- nische Information KT-230. -
Page 28: Deckel Auf Das Modulgehäuse Schrauben
3.8 Deckel auf das Modulgehäuse schrauben • Beiliegenden Aufkleber „CM-RC-01“ in den Deckel des Anschlusskastens kleben. • Anschließend Schutzleiter an den Deckel des Anschlusskastens schrauben. • Deckel des Anschlusskastens auf das Ver- dichtermodulgehäuse setzen und mit den 6 beiliegenden Schrauben (M5 x 70 mm) befes- tigen. -
Page 29: Erweiterungsbausatz "Leistungsregelung" (Crii) Und "Anlaufentlastung" (Su) Montieren
HINWEIS 4.1 Erweiterungsbausatz "Leistungsregelung" (CRII) und "Anlaufentlastung" (SU) montieren Schwere Verletzungen möglich. Neues Bauteil kann sich schlagartig lösen. Gewinde prüfen. Information Neues Bauteil sorgfältig einschrauben. Anzugs- Voraussetzung für die nachfolgende Montage momente beachten! der Magnetventile zur Leistungsregelung (CRII) Vor Inbetriebnahme Dichtheitsprüfung durchfüh- und Anlaufentlastung (SU) ist, dass die entspre- ren! chenden CRII und SU-Zylinderköpfe bereits am... -
Page 30: Erweiterungsbausatz "Druckmessumformer" Montieren
CN6 anschließen. Falls keine weiteren Erweiterungsbausätze montiert 4.2 Erweiterungsbausatz "Druckmessumformer" werden: montieren • Weitere elektrische Anschlüsse am CM-RC-01 vor- HINWEIS nehmen (siehe Kapitel Weitere elektrische Anschlüs- Die beiden Druckmessumformer dürfen nicht se am CM-RC-01, Seite 27). vertauscht werden. Sie unterscheiden sich •... -
Page 31: Erweiterungsbausatz "Kältemitteleinspritzung" Montieren
• Anschluss der Kabel beachten! Falls keine weiteren Erweiterungsbausätze montiert 4.3 Erweiterungsbausatz "Kältemitteleinspritzung" werden: montieren • Weitere elektrische Anschlüsse am CM-RC-01 vor- Information nehmen (siehe Kapitel Weitere elektrische Anschlüs- Zur Montage der Einspritzdüse an die Einspritz- se am CM-RC-01, Seite 27). - Page 32 HINWEIS Nach Montage aller Bauteile der Kältemitteleinsprit- Schwere Verletzungen möglich. Neues Bauteil zung: kann sich schlagartig lösen. Gewinde prüfen. HINWEIS Neues Bauteil sorgfältig einschrauben. Anzugs- Nach Montagearbeiten am Verdichter kann Käl- momente beachten! temittel oder Öl entweichen. Vor Inbetriebnahme Dichtheitsprüfung durchfüh- Vor Inbetriebnahme Dichtheitsprüfung durchfüh- ren! ren!
- Page 33 6-Zylinderverdichter 6JE-22Y .. 6FE-50(Y): Die 6-Zylinderverdichter haben zwei Einspritzdü- sen: Information Vor einer endgültigen Montage der Be- festigungselemente, zuerst eine Lötver- bindung zwischen Flüssigkeitsleitung und Einspritzventil herstellen. • Vor dem Einbau, Einspritzdüsen auf Verunrei- nigungen prüfen. • Danach die Verschlussstopfen (1/8 NPTF) entfernen und die Einspritzdüsen einschrau- ben (Anzugsmoment: 10-13 Nm).
-
Page 34: Erweiterungsbausatz "Zusatzventilator" Montieren
CN6 anschließen. Falls keine weiteren Erweiterungsbausätze montiert 4.4 Erweiterungsbausatz "Zusatzventilator" montieren werden: HINWEIS • Weitere elektrische Anschlüsse am CM-RC-01 vor- Der montierte Zusatzventilator verdeckt die nehmen (siehe Kapitel Weitere elektrische Anschlüs- Transportösen des Verdichters! se am CM-RC-01, Seite 27). Mit montiertem Zusatzventilator kann der Ver- •... - Page 35 4-Zylinderverdichter 4JE-13Y .. 4FE-35(Y): • Relevante Schrauben am Zylinderkopf lösen und durch die beiliegenden Gewindebolzen ersetzen. • Anschließend die Befestigungsbleche auf die Gewindebolzen aufstecken und mit Feder- scheiben und Muttern befestigen (Anzugsmo- ment 80 Nm). • Ventilatorfüße mit vormontiertem Ventilator mit den beiliegenden Distanzscheiben, Schrauben und Muttern (siehe kleines Bild) befestigen.
-
Page 36: Kommunikation Über Die Best Software
• Bei Kommunikation über den USB-Anschluss: – BEST Schnittstellenkonverter an Verdichtermodul (CN14) und mobilem Endgerät einstecken. Abb. 1: CM-RC-01 mit der BEST SOFTWARE verbinden – Verdichter über den Analoganschluss (CN13) re- geln. Leistungsregelung ist nicht gleichzeitig über • FIRMWARE UPDATE auswählen (1) und D URCHSU den Modbus-Anschluss möglich. -
Page 37: Konfiguration Mit Der Best Software
• Bluetooth Passwort eingeben. Werkseinstellung ab • Einsatzgrenzüberwachung. Firmwareversion 2.6.58.00: "8670", vorige Versio- • Nieder- und Hochdruckschalter. nen: "2". Anschließend diese Benutzeinstellung zum Gerät über- Das Menü K mit Fenster H ONFIGURATION AUPTEINSTELLUN tragen. erscheint. Das Verdichtermodul ist jetzt mit dem mobilen Endgerät verbunden. - Page 38 Notes...
- Page 39 Notes...
- Page 40 80522301 // 11.2017 Subject to change Änderungen vorbehalten BITZER Kühlmaschinenbau GmbH Eschenbrünnlestraße 15 // 71065 Sindelfingen // Germany Tel +49 (0)70 31 932-0 // Fax +49 (0)70 31 932-147 bitzer@bitzer.de // www.bitzer.de Änderungen vorbehalten // Subject to change // Änderungen vorbehalten80522301 // 11.2017...
Need help?
Do you have a question about the CM-RC-01 and is the answer not in the manual?
Questions and answers