Table of Contents
Advertisement
Quick Links
Advertisement
Table of Contents

Related Manuals for ADI AR-147


Summary of Contents for ADI AR-147
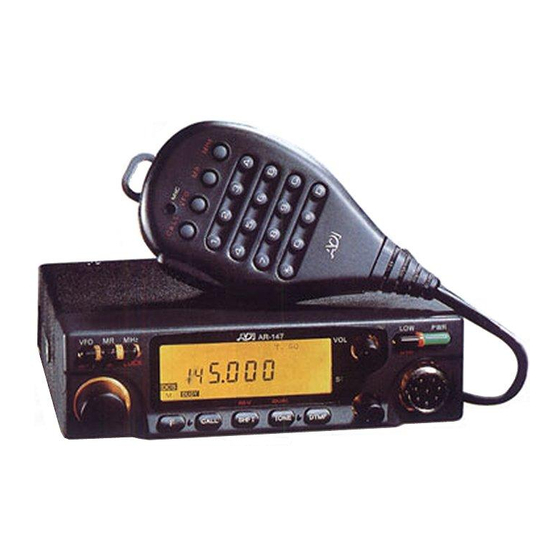
- Page 1 AR-147 AR-247 AR-447 TMA-281A COMMANDO 246 BM MOBILE TRANSCEIVER USER'S MANUAL...
- Page 2 Do not place the transceiver where the heat sink (rear panel) might come in contact with plastic or vinyl surfaces. This Instruction Manual covers the following models. AR-147 144MHz FM TRANSCEIVER AR-247 222/230/250MHz FM TRANSCEIVER...
-
Page 3: Table Of Contents
Memory Entry................18 BEEP................... 38 Memory Channel Recall............. 19 LOCK...................38 Memory Shift................19 CHANNEL DISPLAY..............39 Memory Channel Clear............... 19 AM RECEPTION(AR-147 option only)........39 SCAN 6. KEY FUNCTION LIST..............40 Scan Operation................20 Hold/Resume Programming............20 7. MAINTENANCE................42 Band Scan...................20 GENERAL INFORMATION............42 Programmable Band Scan............ -
Page 4: Before Operation
BEFORE OPERATION The power requirement is 13.8 VDC. TO PREVENT ELECTRIC SHOCK, FIRE AND OTHER INJURY. Never attempt connection to a 24 VDC source. PLEASE NOTE THE FOLLOWING: To avoid risk of electric shock , under no circumstances should the unit be opened. - Page 5 Grasp the plug and ensure that your fingers do not touch the live pins. If an abnormal odor or smoke is detected, immediately turn the power off and pull out the power plug. Connect the ADI service station or our dealer.
-
Page 6: Specifications
2. SPECIFICATIONS AR-147 AR-247 AR-447 TM281A COMMANDO 246BM 144 to148(USA) 222 to 225(USA) 430 to 440 144 to148(THA) 245 to 246(THA) Frequency range (MHz) 144 to146 230 to 250 250 to 270 F3E(FM) Mode 50Ω Antenna impedance -20˚C to +60˚C (-4˚F to +140˚F) Operating temperature 13.8V DC ±15%(11.7~15.8V) -
Page 7: Accessories
ACCESSORIES INSTALLATION INSTRUCTION Unpack your new transceiver carefully, and examine it for visible 4.1 INSTRUCTION damage If the equipment has been damaged in shipment, notify the MOUNTING BRACKET transportation company immediately. Save the boxes and packing When installing the transceiver in a vehicle consider the ease of material for future shipping. - Page 8 4-2 CONNECTOR 4-2-1 Mobile Installations Cautions: 1. Before installing the power cable, be sure to remove the negative lead from the battery for safety. 2. After installation and wiring, be sure to double check for correct installation before reconnecting the negative lead to thebattery terminal.
- Page 9 4-2-2 Fixed Station Match the impedance of the coaxial cable and that of the antenna so that the SWR is less than 1.5 to 10. The protection circuit in the A regulated DC power supply (13.8 VDC capable of supplying at less transceiver will activate if the SWR is particularity poor (greater than 11 Amperes) is required.
-
Page 10: Operation
5 OPERATION 5-1-1 CONTROL FUNCTIONS POWER switch Press to turn the transceiver on or off. This function is used to select the intensity of the front panel Press the VFO/M V or MR/M key and switching the power on will display illumination. - Page 11 mode. The Tuning control can then be used to select the desired memory channel. Press the key for longer than 1 second will initiate memory channel scanning. Pressing the key within 10 second of pressing the F key will store the display data into memory.
- Page 12 and scan step size. Use the tuning control to select the desired tuning step and then press any front panel key except the PWR switch to return to the normal frequency display. TONE/DUAL key TONE (CTCSS/DCS) function Pressing this key by itself causes the radio to select the desired subaudible tone signaling mode.
- Page 13 DTMF key On during transmit. Pressing this key alone to select the PAG, CSQ function if the On whenever the function has been depressed. Also DTMF board is installed. Otherwise, a BU-sound will be shows the last memory channel number that has been generated.
- Page 14 5-1-3 Rear Panel 5-1-4 Microphone ANTENNA connector Attach an antenna with a low SWR and impedance of 50 ohms. UP/DOWN switches 13.8 VDC power input connector These switches can be used to increase or decrease the VFO Connect the supplied DC power cable to this connector. frequency, the Memory channel number, and the subaudible Pay close attention to the polarity.
-
Page 15: Receiver Operation
In addition to the frequency you may see one or more control indicators illuminate on the display. AR-447 AR-247 AR-147 16-Tone DTMF keypad These buttons are used to activate the DTMF encoder. Commando 246BM TM281A... -
Page 16: Frequency Selection
VFO Mode Operation Frequency Selection Note 1. Press the VFO/M V key to select the VFO mode. The frequencies shown above are the default frequencies after a 2. Rotate the tuning control or press the microphone UP/DN microprocessor reset. If the display shows incomplete data or switches to select the desired frequency. -
Page 17: Transmitter Operation
3. Check the frequency to see if it is occupied before you transmit. 4. Rotate the tuning control or press the UP/DN switches on the 4. Press the PTT switch. The TX indicator will light, and the RF microphone until the desired tuning step size appears in the meter will deflect to the right. -
Page 18: Memory
2. Press and Hold the VFO/M V key then turn the PWR switch on. 5-4-2 Initial State 3. Release the VFO/M V key . Initial state of the transceiver from the factory is shown in the chart below. AR-147 AR-247 AR-447 TM281A COMMANDO 246BM VFO/Memory 144.000... -
Page 19: Specific Memory Channels
5-4-4 Specific Memory Channels 3. Press the F key. The F indicator and a memory channel indicator This transceiver provides 81 Memory Channels(CALL channel will light.(For example CH8) included). In addition to serving as a normal Memory Channel, some of the Memory Channels serve a dual purpose to specify other parameters. -
Page 20: Memory Channel Recall
CALL Channel Note CALL channel entry operates only when PAG/C.SQ feature 1. Select the desired operating frequency in VFO mode or the disabled. desired memory channel in memory channel mode, and be sure 5-4-6 Memory Channel Recall that PAG/C.SQ not activated. 1. -
Page 21: Scan
5-5-2 Hold/Resume Programming Note Memory channel 1 cannot be cleared. The transceiver will stop on a busy channel. Two type of scan hold/resume have been provided in this transceiver. Time operated scan(pause scan) Scan will resume approximately 3 seconds after stop even if the station is still present. -
Page 22: Programmable Band Scan
4. You can reverse the direction by rotating the tuning control 7. You can reverse the direction by rotating the tuning control counterclockwise, or by pressing the microphone UP/DN switch. The counterclockwise, or by pressing the microphone UP/DN switch. scan step size depends upon the current step programming. 8.Scan will stop whenever a signal is received (that activates the BUSY 5. -
Page 23: Memory Channel Lockout
5-6 DUAL-WATCH OPERATION 4. Scan will stop whenever a signal is received (that activates the BUSY indicator) for a limited time. This function allows you to watch two different frequencies. The 5. Press any front panel key except LOW key to stop scanning. transceiver is capable of following types of Dual-watch operation. - Page 24 5-6-1 Dual-watch on the dial-frequency and the memory frequency under CH1. 1. Press the VFO/M V key to select the VFO mode. 2. Press the F key momentarily. The F indicator should light in the display. 3. Press the TONE/DUAL key within 10 seconds of pressing the F key. A "DUAL"...
-
Page 25: Repeater Operation Transmitter Offset
The receive frequency may be either above or below that of the transmit select the desired offset frequency. frequency. The initial offset frequency is shown as below: 4. Press the VFO/M V key to select the VFO mode. COMMANDO AR-147 AR-247 AR-447 TM281A 5-7-2 Automatic Repeater Offset... -
Page 26: Reverse Function
Repeater Access Tone Selection Note 1. Press the F key for longer than 1 second when the transceiver not in The offset frequency and automatic repeater band could be programmable by factory or dealer/service center. CTCSS/DCS mode, then press the TONE/DUAL key within 10 seconds. -
Page 27: Dcs Code Selection
2. Rotate the tuning control or press microphone UP/DN switches to CTCSS TONE FREQUENCY(Hz) select the desired DCS code. 67.0 103.5 159.8 199.5 3. Press any front panel key to the normal display. 69.3 107.2 162.2 203.5 71.9 110.9 165.5 206.5 DCS CODE TABLE(The bracketed code is inverse code) 74.4... -
Page 28: Ctcss/Dcs Feature Selection
CTCSS Tone/DCS Code Scan DCS Code Polarity Selection When useing CTCSS/DCS encoding and decoding function, you can Because DCS code is a 23-bits continuous string of logic 1 and 0, when have the transceiver scan through the tones or codes to determine the DCS signal through the Tx or Rx path, the polarity of the DCS signal which one is present on a received signal.During CTCSS TONE/DCS changes probably on other transceivers. - Page 29 Selecting and Storing a code with the DTMF KEY PAD (MIC 147 D) 1. Press the DTMF key twice to light the C,SQ indicator. 2. Press the F key, then press the DTMF key while the F indicator is on in 10 seconds. The C.SQ code setting mode will be entered and the first digit of the code will flash.
- Page 30 5-9-4 Using PAG/C.SQ with a repeater The PAG/C.SQ signal is transmitted after a short delay if the PTT switch is pressed. This is to avoid any malfunction due to the PAG/C.SQ signal being interrupted by repeaters with long response time. Transmit Delay during C.SQ or PAG output A delay is built in when the C.SQ or PAG code is sent out.
-
Page 31: Paging
5-10 PAGING The paging function is available when the optional DTMF unit (DTF147) is installed. The paging function is useful to call all station a group, a specific station, or wait for a call from another station by using DTMF (Dual Tone Multi Frequency) signaling. - Page 32 5-10-1 Paging Code Memories 3. Set the desired memory (0 to 3 or A) with the tuning control (or key 0 to 3 or A on the microphone with DTMF keypad). There are five paging code memories. 4. Press the DTMF key. The first digit will flash. (This operation is not necessary if DTMF microphone is used) Stores your individual ID code in memory.
- Page 33 5-10-3 Paging Transmission (Calling) Your individual ID code is preset in memory A.(Your individual ID code is always stored in memory A.) 1. Turn to the predetermined frequency. 2. Press the DTMF key to light the PAG indicator. 3. Press the F key, then press the DTMF key while the F indicator is on. 4.
- Page 34 1. To call all station in the group, select the memory number in which the group code is stored. In this example, the number is stored in number 2. Press the PTT key once or press a key other than DTMF to display the frequency again.
- Page 35 3. When called with your station ID code, the memory number If the local station code can not be decoded, " Err " appears on the automatically changes to 0. The ID code of the number 3 is displayed. display. Iocal station code Flashing Flashing...
-
Page 36: Dtmf Code Decoding Function
5-10-5 Code Lockout 5-11-1 Setting the CODE decoding mode 1. Press the DTMF key to return to normal mode.(turn off the PAG, If an individual code is stored in P1, P2 or P3, reception is enabled when C.SQ) the codes match, even if one local station communicates with another. 2. -
Page 37: Dtmf Autodialer Operation
5. Or you can press the MHz/LOCK or the microphone MHz key to DTMF Autodial Memory Setting clear the decoded of DTMF codes. When the DTMF Autodialer operation turn on, the display will show as follows.(Autodial Memory 1, empty) 6. Press VFO/M V or MR/M key to return to the normal frequency mode. -
Page 38: Dtmf Redialer Operation
5-13 DTMF REDIALER OPERATION 1. To turn the APO function off and on, press the F key for longer than 1 second, then MHz/LOCK key within 10 seconds. The APO indicator The DTMF Redialer Operation is available when the optional DTMF unit lights. -
Page 39: Beep
5-17 LOCK 2. Select the desired value with the tuning control or the UP/DN key on the microphone. There are two types of lock functions. 3. If, after 10 seconds, no key has been pressed, the displayed level is Microphone key lock set and the original frequency is redisplayed. -
Page 40: Channel Display
4. The LCD will display " PASS " to indicate entering into the CH mode 5-19 AM RECEPTION(AR-147 option only) successfully. When the AM RECEPTION option is installed in the AR-147, it is able to receive AM signals within the frequency range of 118.000 to 135.995 MHz (Air Band). -
Page 41: Key Function List
6 KEY FUNCTION LIST MHz FREQUENCY TUNING (15)MHz (16)MHz + MIC DIGITAL KEY 0-9 ENTER FREQUENCY FROM KEYPAD (1)VFO + PWR/ON VFO RESET (17)F + MHz PANEL KEYLOCK ON/OFF SYSTEM RESET (2)MR + PWR/ON APO ON/OFF (18)F-1Sec + MHz CHANNEL DISPLAY MODE ON/OFF (3)MHz+PTT+MIC CALL+PWR/ON (4)MHZ + PWR/ON MEMORY CHANNEL CLEAR IF THE... - Page 42 DTMF AUTODIALER ON/OFF (33)F + DTMF - 1Sec (27)F + TONE DUAL WATCH (28)F-1Sec + TONE (A) CTCSS CODE SETTING IN DTMF AUTODIAL MEMORY SETTING CTCSS MODE (50 CODES) (EACH MEMORY COULD CONTAIN 16 (B) DCS CODE SETTING IN DCS DTMF CODES MAXIMUM, WITH 9 MODE (106 CODES) INDIVIDUAL MEMORIES)
-
Page 43: Maintenance
7 MAINTENANCE 7-1 GENERAL INFORMATION Your transceiver have been factory aligned and tested to specification before shipment. Under normal circumstances the transceiver will operate in accordance with these operating instructions. All adjustable trimmer and coils in your transceiver have been adjusted at the factory and should only be readjusted by a qualified technician with proper test equipment. -
Page 44: In Case Of Difficulty
7-3 IN CASE OF DIFFICULTY The problems described in this table are failures caused, in general, by improper operation or connection of the transceiver, not by defective components. Check according to the following table. Symptom Probable Corrective action Indicators do not light and no receiver noise is 1. - Page 45 Installing accessories 3. Remove the backing from the small cushion provided with the DTF147 and attach it to the back of the DTF147. 4. Plug the three connectors into the sockets in the units. CAUTION 5. Attach the cable from DTF147 as shown in Fig.2 Before installation, be sure to disconnect the DC power supply, or battery, or damage may occur the equipment.
- Page 46 ONE YEAR LIMITED WARRANTY ADI Communications Corp. warrants this product against defects in material and workmanship. In the unlikely event of any failure due to defect in material or workmanship, occuring within one year of purchase, this product will be repaired or replaced at our discretion at no charge.
- Page 47 ADI Communications Corporation NX255A038E...
Need help?
Do you have a question about the AR-147 and is the answer not in the manual?
Questions and answers