Table of Contents
Advertisement
Advertisement
Table of Contents

Related Manuals for Montabert V1200


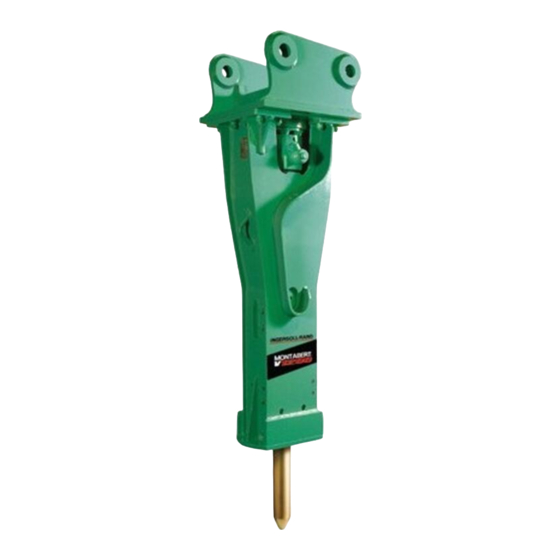
Summary of Contents for Montabert V1200
- Page 1 N° 11495 11 / 2013 revision 09...
-
Page 3: Table Of Contents
Montage ......Montabert 1200 at a glance : Montabert 1200 im Überblick : Seal package (86622677) . -
Page 5: Vorwort
1 FOREWORD 1 VORWORT The contents of this manual are considered Der Inhalt dieser Betriebsanleitung ist Eigentum to be proprietary and confidential to the der Firma des Hersteller und darf nicht ohne manufacturer and should not be reproduced schriftliche Genehmigung durch den Hersteller without the prior written permission of the vervielfältigt werden manufacturer . - Page 7 2012 86734274...
-
Page 8: Demontage
2 DISMANTLING 2 DEMONTAGE - Loosen and remove the fixing cap - Lösen und entfernen Sie die Befest- bolts. igungsschrauben der Anbauplatte. - Remove the fixing cap and the upper - Entfernen Sie die Anbauplatte und die suspension. obere Stoßdämpferplatte. - Remove the breaker from its housing, - Montieren Sie die Adaptionsvorrich- place it on the assembling support... - Page 9 - Remove the distributor. - Entfernen Sie den Steuerschieber. Fig. F Abb. F - Plug the back head to prevent par- - Verstopfen Sie das Kopfteil, um das ticles entering in. Eindringen von Fremdkörpern zu ver- Fig. G hindern. Abb. G - Mark each side rod, nut, and their - Markieren Sie die Montageposition mounting position.
- Page 10 - Use a plastic sledge hammer to - Treiben Sie das Schiebergehäuse mit- extract the distribution box. tels Kunststoffhammer heraus. Fig. L Abb. L - Using a syringe, drain oil contained in - Entfernen Sie im Hammer verbliebe- the breaker. nes Öl mittels einer Spritze.
- Page 11 - Remove the thrust piston with a M10 - Entfernen Sie den Tauchkolben mittels screw. Schraube M10. Fig. R Abb. R - Mount the piston lifting tool - Montieren Sie die Kolbenhebevorrich- (page 46). tung (Seite 46). Remove the piston from the cylinder. Entfernen Sie den Kolben aus dem Fig.
-
Page 12: Prüfen Der Teile
3 PARTS INSPECTION 3 PRÜFEN DER TEILE Back head Kopfteil - Check all helicoïl (A) - Prüfen Sie alle Gewindeeinsätze (A). - Check O’ring seat (B). Polish if nec- - Prüfen Sie die Sitze der Dichtungen essary. (B). Falls nötig, polieren Sie diese. - Check snap ring (C) is well posi- - Prüfen Sie den korrekten Sitz des tioned in its groove. - Page 13 - Check one of the distributor spoke is - Prüfen Sie die Speichen des Steuer- not cracked. schiebers auf Risse. - Check the distribution box inner di- - Prüfen Sie die Innenflächen des ameters (I). Replace if scratched. Schiebergehäuses (I). Wenn es tiefe Riefen aufweist, ersetzen Sie das Gehäuse.
- Page 14 - Check striking area (P). If cracked or - Prüfen Sie die Schlagfläche (P). deformed, replace the piston and Wenn diese Risse oder Verformun- check the tool bushings wear. gen aufweist, ersetzen Sie den Kol- When mounting the breaker on the ben und prüfen Sie die Meißelfüh- excavator, check operation pressure rungshülsen.
- Page 15 - Check cylinder seat (V) is not dam- - Prüfen Sie die Auflagefläche des aged. Zylinders (V) auf Beschädigun- If necessary, remove only the high gen.Falls nötig, entfernen Sie erhöhte spot with fine hand stone or sand pa- Stellen mittels Schleifstein oder fein- per.
- Page 16 Suspension Stoßdämpfung mini 55 mm - Check wear on rubber parts. Replace - Prüfen Sie den Verschleiß der Gum- the suspension when wear limit is miteile. Wenn das Verschleißmaß reached. erreicht ist, ersetzen Sie die Stoß- dämpfung. - Check the disk for cracks. Replace if - Prüfen Sie die Dechscheibe auf necessary.
- Page 17 MONTABERT V 1200 inspection report MONTABERT V 1200 inspektionsbericht breaker sn / Seriennummer : Circle parts to be replaced Markieren Sie die zu ersetzenden Teile...
-
Page 18: Reparatur
4 REPAIRING 4 REPARATUR Energy chamber Energiespeicher - Using the special socket (item 180, - Senken Sie den Stickstoffdruck im page 43) drain the nitrogen off by Energiespeicher durch Lösen der unscrewing the inflating screw (A). Füllschraube (A) mittels Schlüssel (Teil 180, Seite 43). - Page 19 - WARNUNG : Verwenden Sie aus- ERT inflation tool (item 160 or 170, schließlich die Füllvorrichtung von page 43). MONTABERT (Teil 160 oder 170, Seite 43) zum Füllen des Energies- peichers.. - Check the inflation screw is not - Prüfen Sie, dass die Füllschraube des tighten.
- Page 20 - Un- tighten key (1) to open the infla- - Entfernen Sie den Schlüssel (1), um tion screw and fill up the energy cham- die Füllschraube zu öffnen. ber. - After the pressure is stabilized, close - Schließen Sie die Füllschraube nach the inflation screw.
- Page 21 Front guide Vorderzylinder 4.2.1 Front bushing replacement 4.2.1 Ersetzen der unteren Hülse Extraction Entfernen - Drill the 2 plastic plugs to remove the - Bohren Sie die beiden Kunststoffstop- bushing retaining pin (use a 5/8” dia fen aus, um den Haltekeil der Hülse zu steel rod to drive the pin out).
- Page 22 - Screw the nut to bring the cylinder in - Ziehen Sie die Mutter an, bis sich position against the spacer. Zylinder und Zwischenstück berühren. - Connect the pump hose to the cylin- - Verbinden Sie den Pumpschlauch mit der. dem Zylinder.
- Page 23 Mounting Montage - Slide the threaded rod equipped with - Führen Sie die Schraube mit dem the flange inside the front guide. Abziehflansch in den Vorderzylinder Mount the 2 half- retainers. ein. Montieren Sie die beiden Keilhälften. - Mount the new front bushing by hand. - Montieren Sie die untere Meißelhülse.
- Page 24 4.2.2 Upper bushing replacement 4.2.2 Ersetzen der oberen Hülse - The upper bushing replacement can - Die obere Hülse kann nur bei only be done when the breaker is demontiertem Hammer ersetzt wer- stripped. den. Extraction Entfernen 86378882 86378924 - Slide the extracting flange through the - Schieben Sie den Abziehflansch durch bushing and swing it into position.
- Page 25 Mounting Montage - Slide the threaded rod equipped with - Führen Sie die Schraube mit dem the extracting flange. Abziehflansch in den Vorderzylinder Mount the 2 half- retainers. ein.Montieren Sie die beiden Keilhälften. - Mount the new bushing by hand. - Montieren Sie die Meißelhülse.
- Page 26 Shank thrust Anschlagring 4.3.1 Shank thrust replacement 4.3.1 Ersetzen des Anschlags - The shank thrust replacement can - Der Anschlagring kann nur mit only be done when the breaker is demontiertem Hammer ersetzt wer- stripped. den. Extraction Entfernen - Slide the threaded rod equipped with - Führen Sie die Schraube mit dem the extracting flange inside the cylin- Abziehflansch in den Zylinder ein.
- Page 27 Housing Hauptgehäuse 4.4.1 Welded beam repairs 4.4.1 Ausbessern der Schweißnähte - If necessary : - Falls nötig : Widen the crack by grinding Vergrößern Sie den Riss durch (deepen progressively so that to Schleifen. Schleifen Sie zunehmend obtain a slope on each face of the tiefer, so dass Sie auf beiden Seiten ground area).
- Page 28 4.4.2 Front protection 4.4.2 Vorderschutzblech - If necessary re- weld the shield in - Falls nötig, nehmen Sie eine Aufschwei- accordance with the following dimen- ßung des Schildes entsprechend den sions. unten abgebildeten Maßen vor. 296 mm 50 mm 50 mm 127 mm 127 mm 82 mm...
- Page 29 4.4.3 Mounting of wearing 4.4.3 Montage der plates Verschleißplatten - Put some Loctite 270 on the last screw - Sichern Sie die Enden der Schrauben- threads. gewinde mit Loctite 270. - Mount the lock washers (the notched - Montieren Sie die Zahnscheiben so, face of the washers must face both dass die gezahnten Flächen einander together).
-
Page 30: Montage
5 ASSEMBLING 5 MONTAGE - All parts must be clean and oiled with - Alle Teile müssen vor der Montage hydraulic oil at the time they are gereinigt und mit Hydrauliköl mounted. gefettet werden. - Place the front guide on the assembling - Platzieren Sie den Vorderzylinder auf support placed on the floor. - Page 31 - If the breaker is not to be pressurized, - Montieren Sie den Stopfen, wenn der mount the plug. Hammer nicht unter Druck stehen soll. Fig. E Abb. E - Mount the cylinder. - Montieren Sie den Zylinder. Fig. F Abb.
- Page 32 - Prior to assembling, carefully clean the - Reinigen Sie die Auflagefläche (A) des thrust piston guide seat (A) and Zylinderkopfes, sowie die corresponding surface of the spacer. entsprechende Fläche des Fig. L Zwischenstücks gründlich vor der Montage. Abb. L - Mount the thrust piston guide : - Montieren Sie den Zylinderkopf.
- Page 33 - Mount the upper liner / overpressure - Montieren Sie die aus oberer Führung assembly. und Ventil bestehende Baugruppe. Mount the positioning pin on the Montieren Sie den Passstift am cylinder. Zylinder. Fig. S Abb. S - Assemble the complete valves - Montieren Sie die Ventilbaugruppen : - springs, - die Federn...
- Page 34 - Grease side rods seat with “EM 10” - Schmieren Sie die Auflageflächen der grease. Schrauben mit ”EM 10”. Fig. Y Abb. Y - Grease side rod threads with “EM 10” - Schmieren Sie die Schraubengewinde grease. mit ”EM 10”. Fig.
- Page 35 - Using a pneumatic or hydraulic wrench - Ziehen Sie die Zuganker mittels tighten the side rods for 5/6 of an Pneumatik - oder Hydraulikschlüssel additional turn. Fig. AD um eine zusätzliche 5/6 Proceed in 2 steps : Schraubendrehung an. - Tighten in a criss- cross pattern the Abb.
- Page 36 - Grease all the parts covered by the - Schmieren Sie alle später vom energy chamber. Energiespeicher bedeckten Teile. Fig. AJ Abb. AJ - Mount the energy chamber. - Montieren Sie den Energiespeicher. Fig. AK Abb. AK - Grease the bolt threads with “EM 22” - Schmieren Sie die Schraubengewinde grease or equivalent (grade NLGI 2, mit ”EM 22”...
- Page 37 - Remove the adhesive tape wrapped - Entfernen Sie das Klebeband vom around the front guide. Vorderzylinder. - Grease the disk upper face. - Schmieren Sie den oberen Teil der Dechscheibe - Mount the breaker in its housing. - Setzen Sie den Hammer in dessen Gehäuse ein.
- Page 39 2012 86734274...
-
Page 41: Dichtungssatz (86622677)
MONTABERT V 1200 at a glance MONTABERT V 1200 im Überblick SEAL PACKAGE / DICHTUNGSSATZ : 86622677 34 Nm 650 Nm 25 ft.lb 480 ft.lb 86447182 x 9 650 Nm 86617826 x 4 3,25 Mpa 480 ft.lb 32,5 bar 86447356... - Page 42 Tooling Werkzeugausstattung...
-
Page 43: Werkzeugausstattung
Tooling Werkzeugausstattung Item Part name Bezeichnung Page 86720893 Hydraulic tester Hydraulikprüfvorrichtung 86424090 HP/LP pressure checking device Hydraulikdruckprüfvorrichtung 86424108 Energy chamber nitrogen pressure Prüfvorrichtung für Energiespei- check tool cherfülldruck 86656519 HP hand pump HD- Handpumpe 86266251 Helicoïl thread extracting tool Gewindeeinsatzabzieher 86380813 Tap for helicoïl thread housing Gewindebohrer für Gewindeeinsatz-... -
Page 44: Montagehalterung
Assembling support Montagehalterung All dimensions are millimeters. 1” UNF - 12 Alle Abmessungen sind in Millimeter. - 0,2 Ø 85 30° 2 same plates 2 gleiche Platten 270 ± 0,2 2 x Ø 13 Ø 70 4 tubes 100 x 100 thick 8 4 Rohre 100 x 100 dick 8 Same pit for all models of breaker. -
Page 45: Adaptionsvorrichtung
Adaptation kit Adaptionsvorrichtung All dimensions are millimeters. Alle Abmessungen sind in Millimeter. Ø 120 30° Ø 20 (hole for handling) (Bohrung für Hebevorrichtung) +0,25 Ø 85,2... -
Page 46: Hebezusatzausrüstung
Lifting accessory Hebezusatzausrüstung Handling : Strike piston assembling support Hebevorrichtung : Schlagkolben Montagehalterung Lifting hook Hebehaken welding Schweißbereich 20° Ø 30 20° useful hilfreich Ø 23 - 0,2 Ø 1”- UNF- 12f... -
Page 47: Long Term Storage
Long term storage Langzeitlagerung - Wash the breaker. - Reinigen Sie den Hammer. - Remove the tool. - Entfernen Sie den Meißel. - Clean and dry the inside of the front - Reinigen und trocknen Sie die guide. Innenflächen des Vorderzylinders. - Loosen the LP swivel plug and - Lösen und entfernen Sie den Stopfen remove the plug, the spring, the pin... - Page 48 Long term storage Langzeitlagerung - Grease the inside of the front guide. - Schmieren Sie die Innenflächen des Vorderzylinders. - Mount the tool retainer and the - Montieren Sie die Haltekeile und die corresponding plastic plug. Haltekeilstopfen. - Plug the front guide, using the plastic - Verschließen Sie den Vorderzylinder plug provided with the breaker (refer mit dem zum Hammer gehörigen...
-
Page 49: Hammerluftspülung
Breaker pressurization (Montabert V 1200) Hammerluftspülung (Montabert V 1200) - The breaker front guide pressurization - Die Luftspülung des Vorderzylinders ist is compulsory : unbedingt notwendig : S for underwater operation, as soon S bei Unterwassereinsatz, sobald as the front guide is immersed,... - Page 52 203 Route de Grenoble CS 80097 69805 SAINT PRIEST France...
Need help?
Do you have a question about the V1200 and is the answer not in the manual?
Questions and answers