
Related Manuals for CARRE PRECICAM

Summary of Contents for CARRE PRECICAM
- Page 1 PRECICAM NOTICE INSTRUCTION INSTRUCTION D’UTILISATION A LIRE ATTENTIVEMENT AVANT READ IT ATTENTIVELY BE- READ IT ATTENTIVELY BE- D’UTILISER LA MACHINE FORE USING THE MACHINE FORE USING THE MACHINE Réf. 38010101 A MAJ 12.2011...
- Page 2 Type machine/ Type of machine:PRECICAM Année de construction / Built in : 2012 Numéro de série / Serial Number : Catalogues pièces/ Spare parts book : Masse / Weight : ……….KG Accessoires / Accessories :...
- Page 3 4.2 Link between PRECICAM SERVICE and ECONET and ECONET 4.1 Liaison sur le tracteur 4.3 Control terminal 4.3 Control terminal 4.2 Liaison entre PRECICAM et 4.3.1 Presentation of the 4.3.1 Presentation of the ECONET control terminal control terminal 4.3 Terminal de commande 4.3.2 Powering up the control...
- Page 4 1. INTRODUCTION - INTRODUCTION - INTRODUCTION Avant d’utiliser l’interface Before using the PRECICAM Before using the PRECICAM guidage type PRECICAM, guidance interface, guidance interface, nous recommandons lire recommend that you read this recommend that you read this attentivement le présent manuel et...
- Page 5 20 cm de chaque tractor drift of 15cm on each side. tractor drift of 15cm on each side. côté. PRECICAM has a pair of wheels PRECICAM has a pair of wheels PRECICAM comporte une paire which stabilise the camera and which stabilise the camera and de roues qui stabilise la caméra...
- Page 6 être retirés). Le rang suivi par la caméra doit être à PRECICAM is used for single or PRECICAM is used for single or l’extérieur des roues du tracteur. multiple rows and only when the multiple rows and only when the...
- Page 7 Rangées simples - Single rows - Single rows IMPORTANT: Spécifications concernant les rangées: IMPORTANT: Specifications concerning the rows: IMPORTANT: Specifications concerning the rows: Couleur- Colour - Colour: Vert-green-green Interrang min. - Min inter-row - Min. inter-row (r): 15 cm Interrang max - Max. inter-row - Max inter-row (r): 200 cm Diamètre plante min.
- Page 8 Rangées multiples - Multiple rows - Multiple rows IMPORTANT: Spécifications concernant les rangées: IMPORTANT: Specifications concerning the rows: IMPORTANT: Specifications concerning the rows: Couleur- Colour - Colour: Vert-green-green Interrang min. - Min inter-row - Min. inter-row (r): 15 cm Interrang max - Max. inter-row - Max inter-row (r): 75 cm Diamètre plante min.
- Page 9 3. CONSIGNES DE SÉCURITÉ - SAFETY INSTRUCTIONS - SAFETY INSTRUCTIONS 3.1 Symboles de sécurité - Safety symbols - Safety symbols Veillez à ce que les avertisse- Make sure that the warnings and Make sure that the warnings and ments et pictogrammes restent pictograms remain clean and pictograms remain clean and propres et visibles en perma-...
- Page 10 Ne pas monter sur le marche pieds Eloigner toute personne pendant déplacement zone dangereuse, Il y a risque machine d’écrasement. Do not go up on the step during the People should be kept away from the moving of the machine. danger zone.
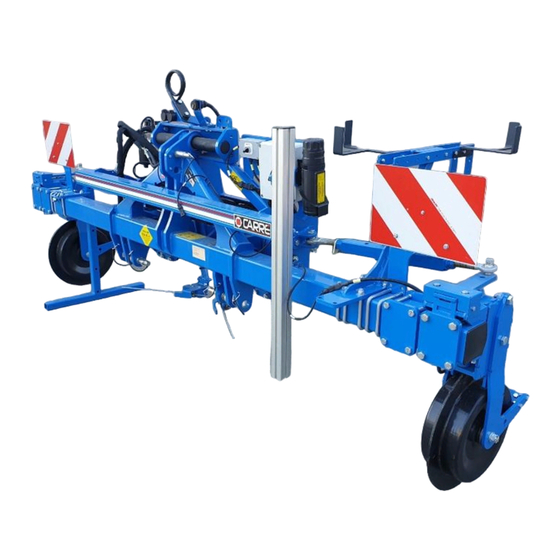
- Page 11 EVITER BLESSURES GRAVES. 3.2 Utilisation conforme à l’usage prévu - Usage as intended - Usage as intended PRECICAM est un ensemble de PRECICAM is an independent PRECICAM is an independent guidage autonome sous forme guidance system in the form of guidance system in the form of d’interface qui s’attelle entre le...
- Page 12 L’utilisation, l’entretien only to people who are familiar only to people who are familiar et la remise en état de PRECICAM with and who are informed of the with and who are informed of the ne devront être confiés qu’à...
- Page 13 PRECICAM is compliant with the PRECICAM is compliant with the PRECICAM est conforme aux regulations set forth in the rules of regulations set forth in the rules of réglementations prescrites par le the road.
- Page 14 Pendant l’opération d’attelage During the hitching of the During the hitching of the de PRECICAM sur le tracteur : PRECICAM to the tractor: PRECICAM to the tractor: - Veiller à ce qu’elle repose sur - Ensure that it is resting on stable - Ensure that it is resting on stable un sol stable.
- Page 15 - Carry out maintenance or repair - Carry out maintenance or repair d’entretien ou de réparation que work only if PRECICAM is resting work only if PRECICAM is resting si PRECICAM repose à plat sur flat on stable ground and where...
- Page 16 PRECICAM by chains. PRECICAM by chains. 4.2 Liaison entre PRECICAM et ECONET - Connection between PRECICAM and ECONET - Connection between PRECICAM and ECONET PRECICAM est équipé de crochet PRECICAM has a category No.
- Page 17 Le 3° point entre PRECICAM The 3-point coupling between The 3-point coupling between et la bineuse peut se faire par 2 PRECICAM hoeing PRECICAM hoeing systèmes de bielette. machine can be performed using machine can be performed using 2 rod systems.
- Page 18 Touche Marche/Arrêt. Sert à mettre l’unité sous Start/Stop key. Used to power the unit on tension et hors tension. and off. Molette avec fonction de bouton Thumb wheel with button function La rotation de la molette permet de Rotating the thumb wheel enables the sélectionner les zones de saisie configurable input fields to be selected.
- Page 19 •Vous pouvez appuyer sur la •You can press the wheel (button •You can press the wheel (button molette (fonction de bouton) pour function) to: function) to: -->select the current input field to -->select the current input field to -->sélectionner la zone de saisie carry out an adjustment (to adjust carry out an adjustment (to adjust courante...
- Page 20 4.3.2 Mise sous tension du terminal - Powering up the terminal - Powering up the terminal Remarque importante! Lors du Important note! When starting the Important note! When starting the démarrage du moteur du tracteur, tractor engine, the control terminal tractor engine, the control terminal le terminal de commande doit être must be turned off.
- Page 21 Le terminal de commande établit control terminal then control terminal then alors la liaison avec la caméra. Ce establishes link with establishes link with processus peut durer quelques camera. This may take several camera. This may take several secondes ! Une fois la liaison seconds! Once the connection seconds! Once the connection établie, le menu Travail s’ouvre...
- Page 22 Ce faisant, tous les menus et In doing this, all the menus and In doing this, all the menus and toutes les applications ISOBUS all the ISOBUS applications are all the ISOBUS applications are s’affichent, pour sélection. displayed for selection. displayed for selection.
- Page 23 Ce faisant, tous les menus et In doing this, all the menus and In doing this, all the menus and toutes les applications ISOBUS all the ISOBUS applications are all the ISOBUS applications are s’affichent, pour sélection. displayed for selection. displayed for selection.
- Page 24 Pour ouvrir un onglet, appuyez To open a tab, press one of the To open a tab, press one of the (le cas échéant plusieurs fois) software keys (several times if software keys (several times if sur une des touches logicielles necessary) shown in the following necessary) shown in the following présentées...
- Page 25 Activer ou désactiver la commande automatique pour Activate or deactivate the automatic control for the l’outil. Veillez à ce que la commande automatique soit tool. Ensure the automatic control is only activated in activée uniquement dans les cas suivants : the following cases: •...
- Page 26 Qualité du signal de la caméra avec valeur seuil. Quality of the camera signal in relation to the threshold Si la qualité du signal passe en dessous de la valeur value. seuil réglée, par exemple en cas de zones de défaut If the signal quality goes beneath the set threshold dans une rangée simple, l’outil est maintenu dans sa value, e.g.
- Page 27 Marche/arrêt des projecteurs xénon (en option, pour Start/Stop for xenon projectors (as an option for driving la conduite dans l’obscurité). Pour en savoir plus, voir in the dark). For more information, see the chapter le chapitre Procédure d’allumage et d’extinction des Procedure for turning the xenon projectors on and off.
- Page 28 Pour désactiver la commande automatique - To deactivate the automatic control - To deactivate the automatic control: Appuyez sur la touche Press the software key Press the software key logicielle d’activation for activation or deactivation of for activation or deactivation of désactivation guidage automatic...
- Page 29 Procédure de commutation entre deux déports - Procedure for switching between two offsets - Procedure for switching between two offsets (Dual Offset Lorsque l’utilisateur manœuvre en When the user manoeuvres in When the user manoeuvres in tournière, il est parfois avantageux a turning area, it is sometimes a turning area, it is sometimes de pouvoir commuter entre deux...
- Page 30 projecteurs au niveau de l’onglet in the Automatic Control tab, this in the Automatic Control tab, this Commande automatique, cette option must have been previously option must have been previously option doit au préalable être activated in the General Settings activated in the General Settings activée dans l’onglet Réglages tab;...
- Page 31 zone de défaut. angle angle Une mauvaise qualité du signal • Incorrect application • Incorrect application peut être raisons • Field data outside • Field data outside suivantes : specifications. specifications. • Visibilité insuffisante de la Speed too high / speed Speed too high / speed structure de champ too low...
- Page 32 4.4.4 Onglet «Réglage application» - «Application Settings» Tab - «Application Settings» Tab L’onglet Réglage application The Application Settings tab The Application Settings tab permet sélectionner makes it possible to select the makes it possible to select the applications. applications applications. following applications.
- Page 33 Procédez comme suit pour régler Proceed as follows to adjust the Proceed as follows to adjust the les paramètres appropriés : appropriate settings: appropriate settings: 1. Tournez la molette (dans 1. Turn the thumb wheel 1. Turn the thumb wheel le sens horaire ou antihoraire) (clockwise or anticlockwise) until (clockwise or anticlockwise) until...
- Page 34 Présentation des paramètres de l’application Rangées multiples - Presentation of the Multiple Rows application settings - Presentation of the Multiple Rows application settings Ecartement des rangées multiples Spacing for multiple rows Inter rang dans un groupe de Inter-row in a group of multiple rows. rangées multiples Hauteur de plante Plant heigh...
- Page 35 4.4.5 Onglet «Réglages généraux» - «General Settings» Tab - «General Settings» Tab La hauteur de la caméra Camera height L’angle de la caméra Camera angle Onglet suivant Next tab Marche/arrêt du signal sonore Sound signal Start/Stop Activation de la fonction en option Activation of the optional “Start/Stop Dual-Offset”...
- Page 36 Appuyez ensuite sur la molette. then press the thumb wheel. then press the thumb wheel. Remarque valeur Note: The value selected then Note: The value selected then sélectionnée apparaît alors dans appears in a frame with thicker appears in a frame with thicker un cadre à...
- Page 37 Effets du réglage de la hauteur de la caméra - Effects of adjustment of the camera height- Effects of adjustment of the camera height Choisir plus ou • Plus la caméra détecte de rangées, plus le système peut repérer les moins de rangées herbes et plantes manquantes.
- Page 38 Hauteur de la caméra pour deux rangs avec un angle de 30° - Camera height for two rows with an angle of 30° - Camera height for two rows with an angle of 30° Ecart entre Largeur des Rangées rangées Space plantes Plant Hauteur de la caméra Camera height (cm) Nr of rows...
- Page 39 Hauteur de la caméra pour quatre rangs avec un angle de 30° - Camera height for four rows with an angle of 30° - Camera height for four rows with an angle of 30° Ecart entre Largeur des Nb Rangées rangées Space plantes Plant Hauteur de la caméra Camera height (cm)
- Page 40 (Example below, the ci-dessous, la caméra est réglée camera is adjusted at 2m from the camera is adjusted at 2m from the à 2m de l’entraxe du PRECICAM centre distance of the PRECICAM centre distance of the PRECICAM 0.8+0.8+0.4=2m) 0.8+0.8+0.4=2m)
- Page 41 Procédure de détermination de l’angle de la caméra - Procedure for determining the camera angle - Procedure for determining the camera angle Remarque : L’angle de caméra Note: The camera angle entered Note: The camera angle entered saisi doit concorder avec l’angle must agree with the real camera must agree with the real camera réel de la caméra.
- Page 42 Procédure d’activation et de désactivation de l’option «marche/arrêt des projecteurs xénon» - Procedure for activation and deactivation of the “Stop/Start xenon projectors” option - Procedure for activation and deactivation of the “Stop/Start xenon projectors” option Si cette fonction est activée, If this function is activated, you If this function is activated, you vous pouvez allumer ou éteindre...
- Page 43 Si cette fonction est activée, il If this function is activated, it is If this function is activated, it is est possible d’alterner entre deux possible to alternate between two possible to alternate between two déports au niveau de l’onglet offsets in the Automatic Control offsets in the Automatic Control Commande automatique.
- Page 44 4.4.6 Réglages étendus - Extended Settings - Extended Settings Exécution d’un calibrage - Performance of a calibration - Performance of a calibration Pour configurer le système après To configure the system after To configure the system after montage de la caméra sur un mounting the camera on a tool, mounting the camera on a tool, outil, un calibrage est nécessaire.
- Page 45 rapidement dans le sens horaire to reduce the current value). to reduce the current value). (ou dans le sens antihoraire pour The faster you turn, the The faster you turn, the réduire la valeur actuelle). greater increment used greater increment used Plus vous...
- Page 46 À la fin du trajet At the end of the At the end of the de 100 mètres, appuyez sur la 100 metre run, press the Stop 100 metre run, press the Stop touche logicielle Stop. software key. software key. Remarque : En appuyant sur Note: By pressing the ESC Note: By pressing the ESC...
- Page 47 Calibrage du capteur de position du vérin - Calibration of the cylinder position sensor - Calibration of the cylinder position sensor Assurez-vous que Ensure that Ensure that le menu de calibrage est ouvert calibration menu is open in the calibration menu is open in the au niveau de l’onglet Service Service (extended settings) tab.
- Page 48 l’outil complètement à gauche et on the thumb wheel. on the thumb wheel. appuyer sur la molette. Turn thumb Turn thumb Tournez la molette wheel until the area for the right wheel until the area for the right jusqu’à ce que la zone pour la turn stop is surrounded by a turn stop is surrounded by a butée de braquage à...
- Page 49 Assurez-vous que Ensure that Ensure that le menu de calibrage est ouvert calibration menu is open in the calibration menu is open in the au niveau de l’onglet Service Service (extended settings) tab. Service (extended settings) tab. (réglages étendus). Press the upper right Press the upper right Appuyez software key (in order to open...
- Page 50 4.5 Système Hydraulique, Directionnel - Hydraulic System, Directional - Hydraulic System, Directional (11-228-01-01) • Exigences • Requirements • Requirements valve directionnelle directional valve only directional valve only fonctionne qu’avec le système functions with following functions with following hydraulique suivant monté sur les hydraulic system mounted on hydraulic system mounted on tracteurs agricoles :...
- Page 51 sur l’attelage et du port B (bas) au on the coupling and from port B on the coupling and from port B port de base de ce même vérin. (bottom) to the port on the base of (bottom) to the port on the base of the same cylinder.
- Page 52 • Réglage de Vitesse du • Cylinder speed • Cylinder speed Vérin : adjustment adjustment Réglage de la vitesse du vérin Adjusting cylinder speed Adjusting cylinder speed pendant le travail sur le terrain : during work on the terrain during work on the terrain La vitesse de déplacement du The cylinder movement speed The cylinder movement speed...
- Page 53 Examinez l’indicateur du and equipped with rubber O-rings. and equipped with rubber O-rings. filtre, s’il est rouge changez le filtre. • Safety measures • Safety measures Le système entier est system been system been construit selon normes manufactured and must be used in manufactured and must be used in industrielles.
- Page 54 The 2 coulters damage the crop. The 2 coulters Les 2 coutres de chaque coté on either side of the PRECICAM on either side of the PRECICAM PRECICAM doivent être...
- Page 55 Les tiges de palpeurs sont réglables en orientation et en longueur .Il faut desserrer l’écrou rep. 2. The sensor rods can be adjusted for direction and length. The bolt must be loosened Marker 2. The sensor rods can be adjusted for direction and length. The bolt must be loosened Marker 2. 4.6.3 Les feux xénons - The xenon lights - The xenon lights Les feux xénon placés au dessus de la caméra permettent de travailler en condition nocturne.
-
Page 56: Maintenance
If they are polyamide de translation sur les worn, replace them. worn, replace them. axes. En cas d’usure il faut les * Check that the PRECICAM * Check that the PRECICAM remplacer. hydraulic pipe lines are correctly hydraulic pipe lines are correctly Vérifier... - Page 57 5.2 Entretien par du personnel spécialisé - Maintenance by specialised personnel - Maintenance by specialised personnel Le PRECICAM ne nécessite The PRECICAM does not require The PRECICAM does not require l’utilisation d’outillages the use of any special tools for the use of any special tools for spécifiques pour l’entretien.
- Page 58 6. MISE AU REBUT - DISPOSAL - DISPOSAL A la fin de la durée de vie de la At the end of the service life of At the end of the service life of machine, celle-ci doit être mise the machine it must be disposed the machine it must be disposed au rebut dans le respect de of in an environmentally friendly...
-
Page 59: Déclaration Ce De Conformité
B.P. 6 Z.A. Les Fours 85140 SAINT MARTIN DES NOYERS Déclare que : Le PRECICAM de marque CARRÉ N° de série 38010101 - 2011 Est conforme aux dispositions de la directive «machines» modifiée (Directive 2006/42/CE) et aux législations nationales la transposant. -
Page 60: Ec Declaration Of Conformity
Z.A. Les Fours 85140 SAINT MARTIN DES NOYERS FRANCE Declares that : The CARRE brand PRECICAM Serial number 38010101 - 2010 Is compliant with the provisions of the amanded «machines» directive (Directive 2006/42/CE) and with the transpositions into national law. - Page 61 Z.A. Les Fours 85140 SAINT MARTIN DES NOYERS FRANCE Declares that : The CARRE brand PRECICAM Serial number 38010101 - 2010 Is compliant with the provisions of the amanded «machines» directive (Directive 2006/42/CE) and with the transpositions into national law.
- Page 62 NOTES Page 60...
- Page 63 Page 61...
- Page 64 CARRE SAS – CONSTRUCTIONS MECANIQUES ZA les Fours – BP6 85140 SAINT MARTIN DES NOYERS Tel : +33 (0)2 51 07 82 35 Fax : +33 (0)2 51 07 80 75 e-mail : carre@carre.fr Internet : http://www.carre.fr...
Need help?
Do you have a question about the PRECICAM and is the answer not in the manual?
Questions and answers