
Related Manuals for CERTIFIED 060-0739-0


Summary of Contents for CERTIFIED 060-0739-0
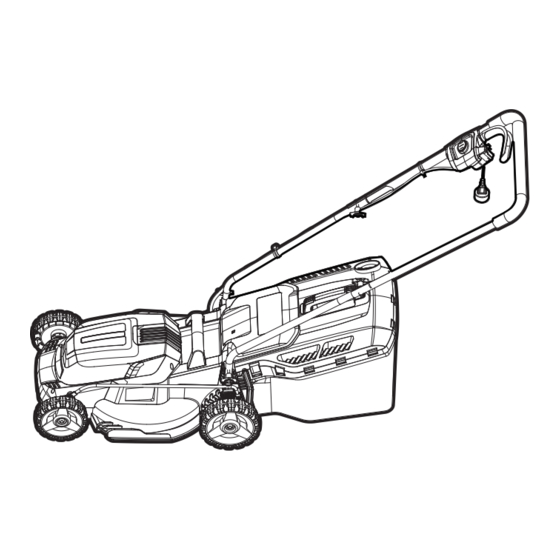
- Page 1 060-0739-0 14” (36 CM) 10 A LAWN MOWER IMPORTANT : SAFETY AND Please read this manual carefully before running this OPERATING rotary tool and save it for reference. MANUAL...
- Page 2 060-0739-0 CANADA: 1-844-428-7277...
- Page 3 Read and understand this instruction manual thoroughly before using the product. It contains important information for your safety as well as operating and maintenance advice. Keep this instruction manual for future use. Should this product be passed on to a third party, this instruction manual must be included. 3026035...
-
Page 4: Table Of Contents
060-0739-0 TABLE OF CONTENTS Product safety Safety Instructions for walk-behind mowers Safe Practices for Walk-Behind Mowers Safe Operation practices for walk-behind mowers SYMBOLS COMPONENT LIST TECHNICAL DATA ACCESSORIES ASSEMBLY Fitting The Handle Grass collection bag assembly Grass collection bag fitting... -
Page 5: Product Safety
A) FOR ALL DOUBLE-INSULATED LAWN 4) Dress properly - Do not wear loose MOWERS clothing or jewellery. They can be caught in moving parts. Use 1) Replacement Parts of rubber gloves and footwear When servicing use only identical is recommended when working replacement parts. - Page 6 060-0739-0 of power and overheating. (NOTE: authorized service facility. Inspect Table 1 shows the correct size to extension cords periodically and use depending on cord length and replace if damaged. Keep handles nameplate ampere rating. If in dry, clean, and free from oil and doubt, use the next heavier gauge.
-
Page 7: Safety Instructions For Walk-Behind Mowers
material against a wall or CORD APPLIANCE CORD obstruction. Material may ricochet back toward the operator. Stop (A) TIE CORD AS the blade when crossing gravel SHOWN surfaces. 9. Do not operate machine without the entire grass catcher, discharge guard, rear guard, or other safety (B) CONNECT PLUG protective devices in place and AND RECEPTACLE... -
Page 8: Safe Operation Practices For Walk-Behind Mowers
060-0739-0 result in severe injury. Operation on all 1. Keep all nuts and bolts tight to slopes requires extra caution. If you ensure the equipment is in a safe feel uneasy on a slope, do not mow it. - Page 9 intended. inspections. f) Shut the motor off and wait until the blade comes to a complete 1.2 Preparation stop before removing the grass a) Thoroughly inspect the area where catcher or before unclogging the the equipment is to be used and chute.
- Page 10 060-0739-0 remove some metal from the heavy or lower end until the blade is balanced. It is balanced when neither end drops. SAVE THESE INSTRUCTIONS...
-
Page 11: Symbols
SYMBOLS Blade Warning KEEP HANDS AND FEET AWAY GARDER MAINS ET PIEDS À DI S TANCE Keep hands and feet clear of mower deck and discharge opening at all times. Danger thrown objects. Keep bystanders/children away. Safety alert. Do not mow up and down on slopes. Read the operator’s manual. -
Page 12: Component List
060-0739-0 Safety switch Handle knob, lower Switch lever 10. Carry handle Upper handle 11. Lower handle Grass bag fill indicator 12. Mulch insert *(See Fig. E) 13. Blade (See Fig. L1) Grass collection bag 14. Blade bolt (See Fig. L1) Handle knob, upper 15. -
Page 13: Technical Data
Rated voltage 120V~60Hz Rated power Deck Width 14”(36CM) Cutting path 13”(33cm) No load speed 3400 RPM Front wheel diameter 5 1/2”(14cm) Rear wheel diameter 6 5/16” (16 cm) Cutting height 1”-3”(2.5-7.5 cm) Cutting height positions Grass collection capacity 0.85 BUSHELS (30 L) Machine weight 20 lb 4 oz(9.2 kg) -
Page 14: Accessories
060-0739-0 Grass collection bag We recommend that you purchase your accessories from the same store that sold you this product. Refer to the accessory packaging for further details. Store personnel can assist you and offer advice. -
Page 15: Assembly
OPERATION INSTRUCTION NOTE: Before using this product, read the instruction book carefully. INTENDED USE This product is intended for domestic lawn mowing. FITTING THE HANDLE (See Fig. A1-B3) Fitting the lower handle 1) Insert the lower handle (11) into the holes on the deck. (See Fig. A1) 2) Attach the lower handle (11) to the deck with the handle knobs. -
Page 16: Grass Collection Bag Assembly
060-0739-0 GRASS COLLECTION BAG ASSEMBLY Connect the grass bag handle to the bag top as shown in Fig. C1-C4. STEP 1: Align the front and back parts of the handle with the front and rear slots on the grass collection bag. (See Fig. C1) STEP 2: Press the front of the handle briefly. -
Page 17: Grass Collection Bag Fitting
Back Part Front Part GRASS COLLECTION BAG FITTING (See Fig. D1-D3) 1) Turn the mower off, wait until blade stops and remove safety switch (1). 2) Open the safety flap. Pick up the grass collection bag by the handle, and position grass collection bag on the upper hooks on the mower (See Fig. -
Page 18: Removing/Emptying Collection Bag
060-0739-0 REMOVING/EMPTYING THE GRASS COLLECTION BAG Hold the grass collection bag, lift the safety flap (7) and hold up. Remove grass collection bag (5). INSTALLING MULCH INSERT (See Fig. E) 1) Unplug tool, and wait for blade to come to a complete stop. - Page 19 1) Unplug mower, and wait for blade to come to a complete stop. 2) Raise the safety flap and hold it up. 3) Grasp the middle of the insert, lift and pull out the mulching insert completely. 4) The safety flap is spring loaded. When you release it, the flap will return to the closed position.
-
Page 20: Operation
060-0739-0 STARTING AND STOPPING STARTING (SEE FIG. G1, G2) To prevent accidental starting, the lawn mower is fitted with a safety switch. Press and hold the safety switch button. Next, depress the switch lever and release the safety switch. -
Page 21: Collection Bag Fill Indicator
COLLECTION BAG FILL INDICATOR (See Fig. I) To remind you to empty when the grass collection bag is full, the mower provides an indicator on the top of bag to show the collection status: Empty status: flap floats (a) Full status: flap falls down (b) MOWING TIPS NOTE: ALWAYS INSPECT AREA WHERE MOWER IS TO BE USED AND REMOVE ALL STONES, STICKS, WIRE, METAL AND OTHER DEBRIS WHICH MIGHT BE THROWN BY... -
Page 22: Maintenance
060-0739-0 4. If a grass collection bag is used during the fast growing season, the grass may tend to clog up at the discharge opening. Release switch lever to turn mower “OFF” . Remove the grass collection bag and shake the grass down to the back end of the bag. -
Page 23: Blade Balancing
sharpening stone. 6. Check balance of blade. See instructions for blade balancing. 7. Replace blade on mower and tighten securely. Refer to instructions below. BLADE BALANCING (SEE FIG. K) Check balance of blade by placing centre hole in blade K-1 over a nail or screwdriver shank K-2, clamped horizontally in a vice K-3. - Page 24 060-0739-0 To aid storage, release the Handle Knobs, and rotate or fold the handles.
-
Page 25: Exploded View
4(6) white black 2(4) white black 46 47 69(2) 11(2) 13(4) 12(2) 27(2) 23(4) 26(2) 24(2) 25(2) 13(10) 36(2) EL01LM.00.00 Electric circuit 37(2) 33(4) switch 13(4) 120V AC MOTOR... -
Page 26: Parts List
060-0739-0 Item Description QTY. Motor Assembly ST4.8x1 mm bolt Small pulley ST4x20 mm bolt Shaft ring 609-2RS bear Plate Out-put shaft Insulator pellet Hoop Spring Brake pad ST4x15 bolt 6002-2RZ bear Big belt wheel Ribbed belt LOGO label... - Page 27 Guard Lower rod Bolt Washer Wrench Tube plug Cable clamp Upper rod Button Mandril Spring Switch box upper cover Micro switch Capacitance Left handle Compressed spring Switch box lower cover Power cord Safety guard Torsional spring Spring steel wire Washer Handle Indicator Grass collection bag cover...
-
Page 28: Warranty
060-0739-0 2-YEAR LIMITED WARRANTY This CERTIFIED product is guaranteed for a period of two (2) years from the date of original retail purchase against defects in workmanship and materials. Subject to the conditions and limitations described below, this product, if returned to...
Need help?
Do you have a question about the 060-0739-0 and is the answer not in the manual?
Questions and answers