
Related Manuals for CERTIFIED 060-0740-4


Summary of Contents for CERTIFIED 060-0740-4
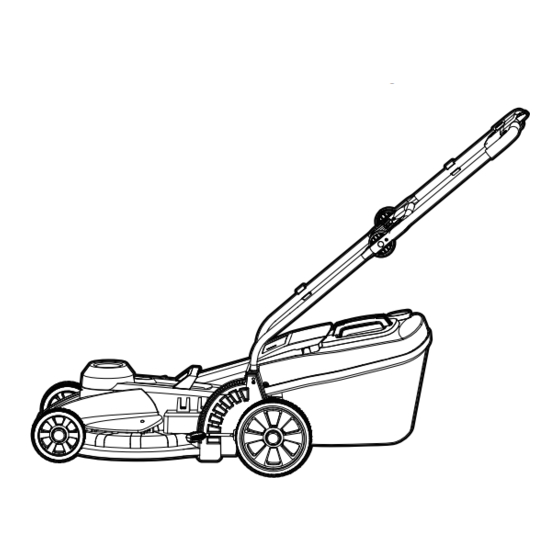
- Page 1 060-0740-4 17” (43 CM) 12A LAWN MOWER IMPORTANT : SAFETY AND Please read this manual carefully before running this OPERATING rotary tool and save it for reference. MANUAL...
- Page 2 060-0740-4 CANADA: 1-844-428-7277...
- Page 3 Read and understand this instruction manual thoroughly before using the product. It contains important information for your safety as well as operating and maintenance advice. Keep this instruction manual for future use. Should this product be passed on to a third party, this instruction manual must be included. 3025736...
-
Page 4: Table Of Contents
060-0740-4 TABLE OF CONTENTS Product safety Safety instructions for walk-behind mowers SYMBOLS COMPONENT LIST TECHNICAL DATA ACCESSORIES ASSEMBLY Fitting The Handle Grass Collection Bag Assembly Grass Collection Bag Fitting Removing/Emptying Grass Collection Bag Handle Adjustment OPERATION Starting And Stopping... -
Page 5: Product Safety
PRODUCT SAFETY 2) Don’t use in rain. 3) Keep children away - All visitors READ ALL INSTRUCTIONS should be kept a safe distance from a) FOR ALL DOUBLE-INSULATED LAWN work area. MOWERS 4) Dress properly - Do not wear loose 1) Replacement Parts clothing or jewellery. - Page 6 060-0740-4 AWG, 14 AWG or 12 AWG extension Follow instructions for lubricating cords should be used. An undersized and changing accessories. Inspect cord will cause a drop in line voltage lawn mower cord periodically and resulting in loss of power and if damaged, have it repaired by an overheating.
-
Page 7: Safety Instructions For Walk-Behind Mowers
Figure 1 unless absolutely necessary. Always look down and behind APPLIANCE CORD CORD before and while moving backward. 8. Never direct discharged material (A) TIE CORD AS toward anyone. Avoid discharging SHOWN material against a wall or obstruction. Material may ricochet back toward the operator. - Page 8 060-0740-4 SLOPE OPERATION SERVICE Slopes are a major factor related to slip GENERAL SERVICE and fall accidents, which can result in 1. Keep all nuts and bolts tight to severe injury. Operation on all slopes ensure the equipment is in a safe requires extra caution.
- Page 9 d) Do not use a mower for any whenever you leave the equipment, job except that for which it is before cleaning the mower housing, intended. and before making any repairs or inspections. f) Shut the motor off and wait until 1.2 Preparation the blade comes to a complete stop a) Thoroughly inspect the area where...
- Page 10 060-0740-4 its centre hole. The mail should also be in a horizontal position. If either end of the blade rotates downward, remove some metal from the heavy or lower end until the blade is balanced. It is balanced when neither end drops.
-
Page 11: Symbols
Some of the following symbols may be used on this product. Please study them and learn their meanings. Proper interpretation of these symbols will allow you to operate the product effectively and safely. Symbol Name Designation/Explanation CPSC Danger Label KEEP HANDS AND FEET AWAY GARDER MAINS ET PIEDS À... -
Page 12: Component List
060-0740-4 Switch lever Lower handle Cable clip Safety flap Grass bag fill indicator 10. Carry handle Grass collection bag 11. Motor cover 12. Mulch insert *(See Fig. F) Safety button 13. Blade bolt * (See Fig. J1) Upper handle 14. -
Page 13: Technical Data
Rated Voltage 120 V~60 Hz Rated Power 12 A No load speed 3500 RPM Cutting width 16“(41 cm) Front wheel diameter 5 1/2” (14 cm) Rear wheel diameter 8 1/4” (21 cm) Cutting height 1 1/2” - 3 1/2” (3.8-8.8 cm) Cutting height positions Grass collection capacity 1.3 BUSHELS (45 L) - Page 14 060-0740-4 Spanner Grass collection bag Cable clips Handle knobs We recommend that you purchase your accessories from the same store that sold you this product. Choose the type according to the work you intend to undertake. Refer to the accessory packaging for further details. Store personnel...
-
Page 15: Accessories
Important! Before you assemble the lawn mower, check the accessories according to the information on the Accessories page. Ensure the accessories are complete. FITTING THE HANDLE (SEE FIG. A1- A5) 1) Remove the screws (X2) on the both side of deck. (Fig. A1) 2) Insert the lower handle (8) into the holes on the deck provided. -
Page 16: Grass Collection Bag Assembly
060-0740-4 6) Attach the cable clips (2) provided, to the upper and lower handle. Insert the cable into the clips ensuring there is enough cable slack. (Fig. A5) GRASS COLLECTION BAG ASSEMBLY Connect the grass collection bag handle to the bag top as shown in Fig. -
Page 17: Grass Collection Bag Fitting
GRASS COLLECTION BAG FITTING (SEE C1, C2, C3) 1) Unplug mower, and wait for blade to come to a complete stop add period. 2) Raise the safety flap (9) and hold it up, ensure that the mulching insert has been removed. 3) Pick up the grass collection bag by the handle, and position grass collection bag on the lower hooks (a) -
Page 18: Handle Adjustment
060-0740-4 HANDLE ADJUSTMENT (SEE FIG. D) The upper handle can be adjusted to 3 different height positions. Release the locking cam lever, set the upper handle to one of the three height positions, and make sure to insert the pin into the hole. -
Page 19: Operation
STARTING AND STOPPING (SEE FIG. E1, E2) STARTING Connect the plug to the main and switch ON. The switch box is provided with a lock-off button to prevent accidental starting. With one hand press and hold the safety button (5), AND WITH the other hand squeeze the switch lever (1) towards the handle, and release the safety LOCK-OFF button. -
Page 20: Adjusting The Cutting Height
060-0740-4 ADJUSTING THE CUTTING HEIGHT (See Fig. The lawn mower can be set to 6 cutting heights between 1 1/2” (3.8 cm) and 3 1/2” (8.8 cm). Your mower features one touch cut height adjustment 2. Move the cutting height adjustment lever outwards then adjust to the preferred position. -
Page 21: Mowing Tips
MOWING TIPS NOTE: Always inspect area where mower is to be used and remove all stones, sticks, wire, metal and other debris which might be thrown by the rotating blade. Mow across the face of slopes, never up-and-down. Exercise extreme caution when changing direction on slopes. - Page 22 060-0740-4 stop. Using an object such as a stick, wipe out any accumulation of grass in the blade area. Be careful of the sharp edges of the blade. Clean often in wet, new grass, and always after every use.
-
Page 23: Maintenance
Check for obvious defects such as a loose, dislodged or a damaged blade, loose fittings and hardware, and worn or damaged components. Check that the covers and guards are all undamaged and are correctly attached to mower. Carry out any necessary maintenance or repairs before operating mower. -
Page 24: To Sharpen Blade In A Vice
060-0740-4 BLADE SHARPENING KEEP BLADE SHARP FOR BEST MOWING PERFORMANCE. A DULL BLADE DOES NOT CUT GRASS CLEANLY OR MULCH PROPERLY. WEAR PROPER EYE PROTECTION WHILE REMOVING, SHARPENING, AND INSTALLING BLADE. ENSURE THE MOWER IS OFF AND THE CORD IS UNPLUGGED. -
Page 25: Storage
L-3. If either end of the blade rotates downward, file that end. Blade is properly balanced when neither end drops. STORAGE: (See Fig. M) Stop the mower and unplug the tool. Clean the exterior of the machine thoroughly using a soft brush and cloth. Do not use water, solvents or polishes. -
Page 26: Exploded View
060-0740-4... -
Page 27: Parts List
Position Position Part Description Qty. Part Description Qty. Self Tapping Screw Indicator Timing Pinion Grass Collection Bag Screw Compression Spring Brake Disc Bracket I Lockwasher Mulching Baffle Self tapping screw Deck and screws 6pcs Big Belt Wheel Rear Roller Shaft Press Plate2 Sleeve Steel ball... - Page 28 060-0740-4 Position Part Description Qty. Spanner Self tapping screw Pushing Rod II Terminal Front Wheel Assembly Rear Wheel Assembly Output Shaft Assembly Blade kit Grass Collection Bag Cover Assembly Motor Set...
-
Page 29: Warranty
2-YEAR LIMITED WARRANTY This CERTIFIED product is guaranteed for a period of two (2) year from the date of original retail purchase against defects in workmanship and materials. Subject to the conditions and limitations described below, this product, if returned to...
Need help?
Do you have a question about the 060-0740-4 and is the answer not in the manual?
Questions and answers
after using the mower for 5 minutes the blade slows and then stops, it seems to be over heating, is there a solution for this?
The blade of the CERTIFIED mower 060-0740-4 may slow down and stop after 5 minutes of use due to the circuit breaker tripping. This can happen if too much grass is removed at once, especially when mowing in rough ground or tall weeds. Clogged grass at the discharge opening or abnormal vibration may also indicate issues requiring maintenance.
This answer is automatically generated
Why will my lawnmower not start when plugged in? It was working yesterday. Handle pulled after round button depressed. Same cord/power source. Verified power to the appliance. Thank you
The CERTIFIED lawnmower model 060-0740-4 may not start when plugged in due to the following reasons:
1. The plug may not be fully inserted into a polarized extension cord or wall outlet. Ensure the polarized plug fits properly.
2. The lock-off safety button may not be pressed before squeezing the switch lever, which is required to start the mower.
3. The extension cord may not have Ground Fault Circuit Interrupter (GFCI) protection, which is recommended for safety.
4. The mower may be unplugged from the power source.
5. The drive system may be engaged, which should be disengaged before starting.
Check each of these steps to ensure proper operation.
This answer is automatically generated